
Hello hello,
Hope everyone is well.
Back in May we went to New York and of course, whilst there I stopped off at Mood. I was there for fabric for my copy of the Valentino Dress but ended up falling in love with a lightweight sage green twill. At first I thought I would make a relaxed shirt dress but lately I’ve really wanted to wear something other than dresses and jeans so I decided to use it for trousers.
My good friend Mary, of The Daily Sew, also wanted to make trousers this year so we decided to keep each other accountable by working on the project together. We met every weekend of July and it was so useful having someone else to help look at the muslin etc.
First of all I decided to try the Chandler Pants by Untitled Thoughts. As always, I made a muslin, to save fabric I just did shorts. These were such an easy and fast make but unfortunately, due to no fault in the pattern, I decided they just weren’t me. I think having a large hip to waist ratio (11″) and a protruding belly makes elastic waist trousers look a little weird, on me anyways!
So then it was back to the drawing board. I know I wanted high waisted and tapered. I was just a little worried about all the fitting; I’ve made the Closet Core Ginger jeans and the Megan Nielsen Dawn jeans in the past and the changes I had to make were ridiculous. Then it hit me, the Dawns were high waisted and I’d already did a lot of work on them so why not change them to make them more “trouser” like so that’s what I set out to do.
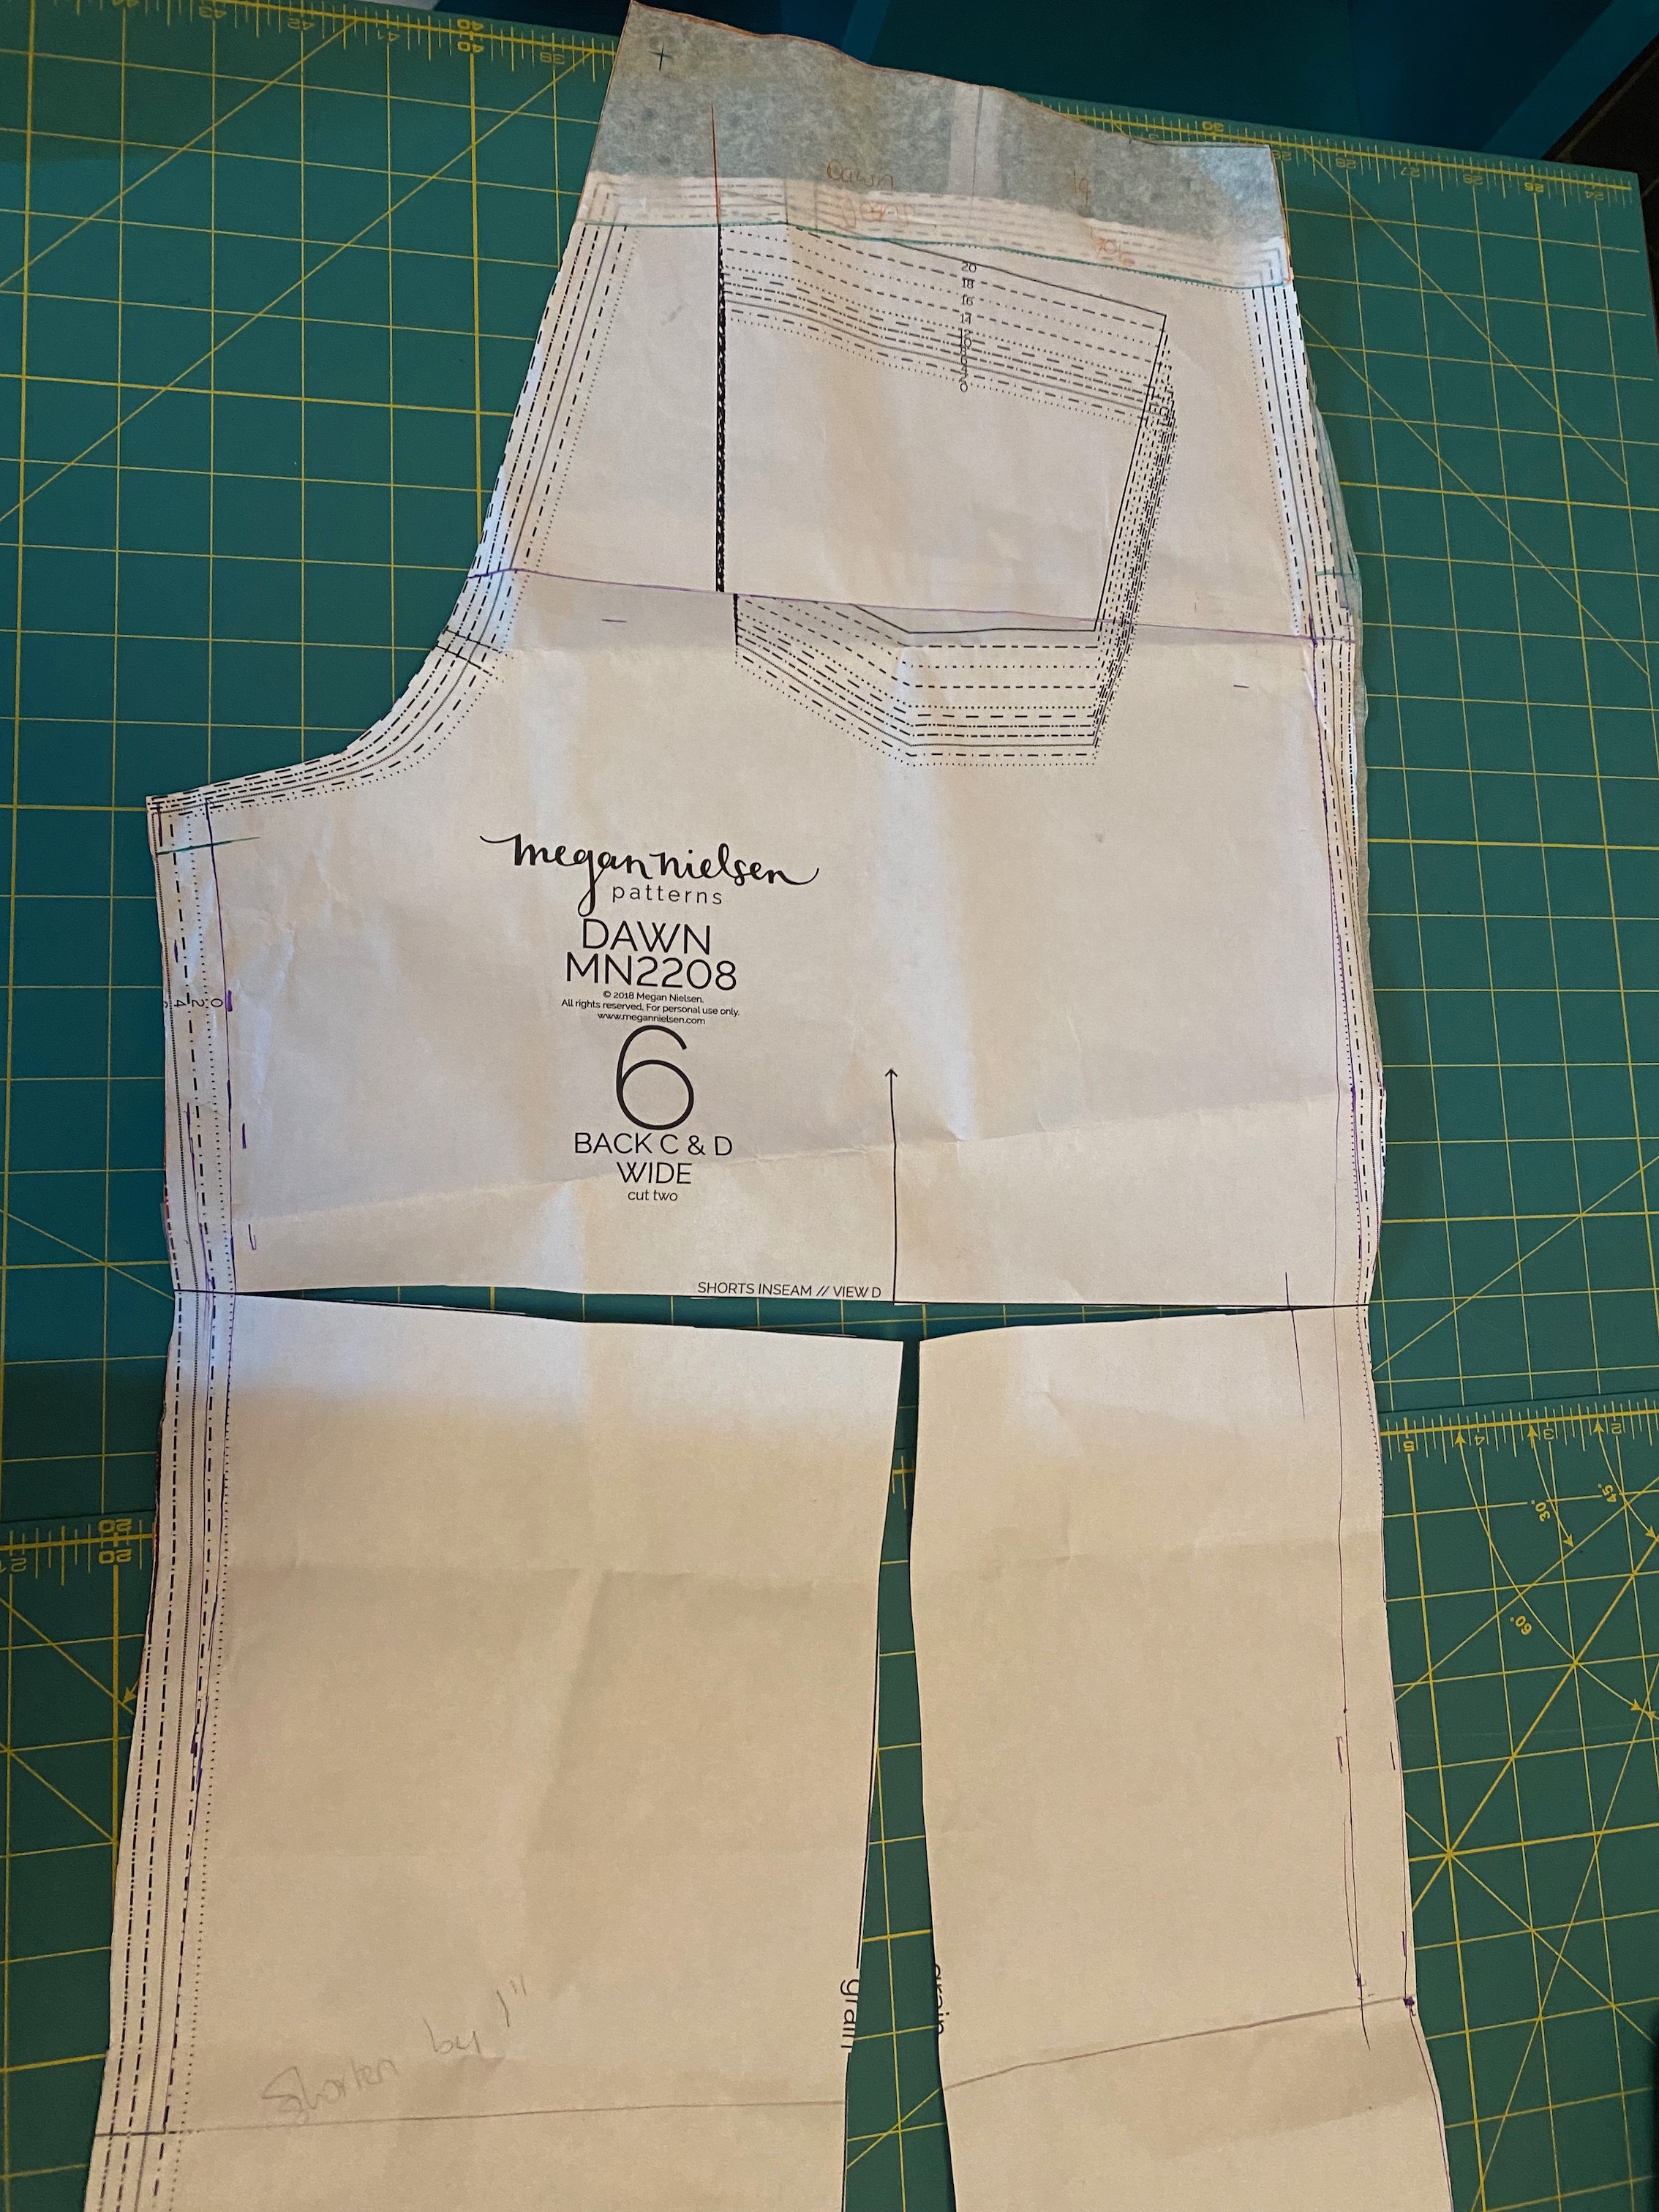
My jeans version weren’t perfect so first of all I analyzed those and decided what changes I wanted to make – there was issues with wrinkles behind my knee and the rise dipped in the front. I also decided the way to make them less jeans more trousers was to make the front pockets slash, and remove the back yoke. I also considered welt pockets in the back but felt like that was one step too many.

So, the changes I made to my flat pattern were:
- raise the front rise by 1.5″ (it dips down lower than the back)
- removed the back yoke
- removed length from back of the leg between knee and bottom
- changed the front pockets to slash and removing coin pocket
- added a little extra room in the hip
- taper the leg (I’d made the wide leg jeans)
With all that – phew! – it was time to make my first muslin.
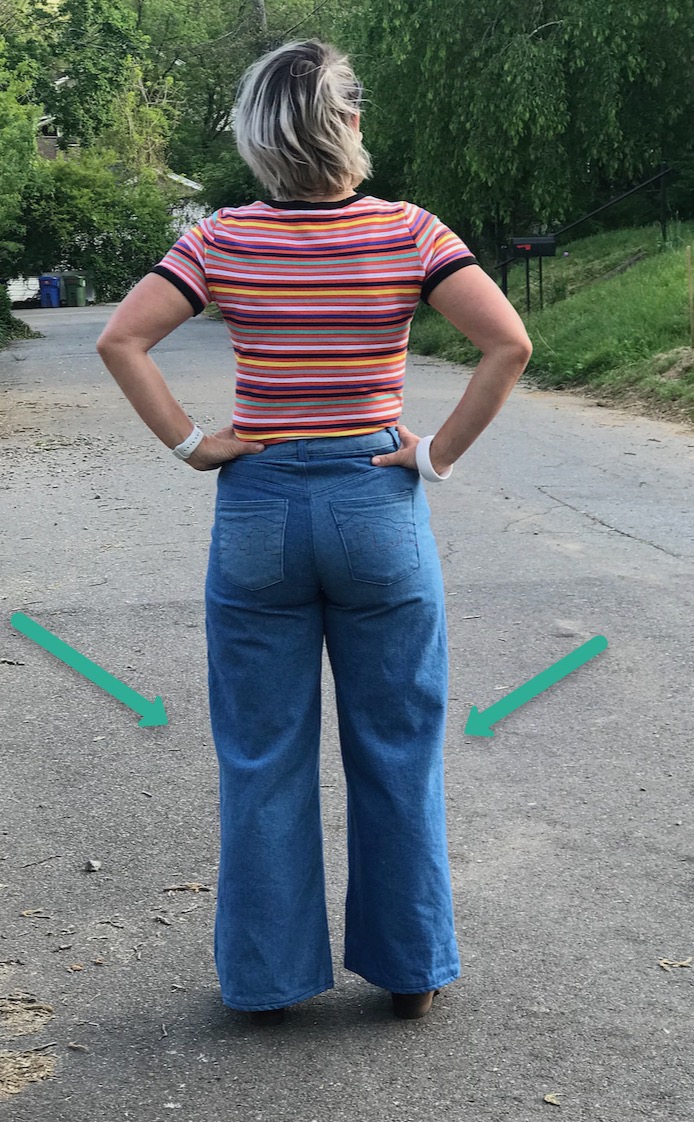
It wasn’t too bad, the rise was much better but there were smile lines in the front crotch, legs still had wrinkles in the back and they were too wide, plus I had a little bit of the dreaded wedgie!
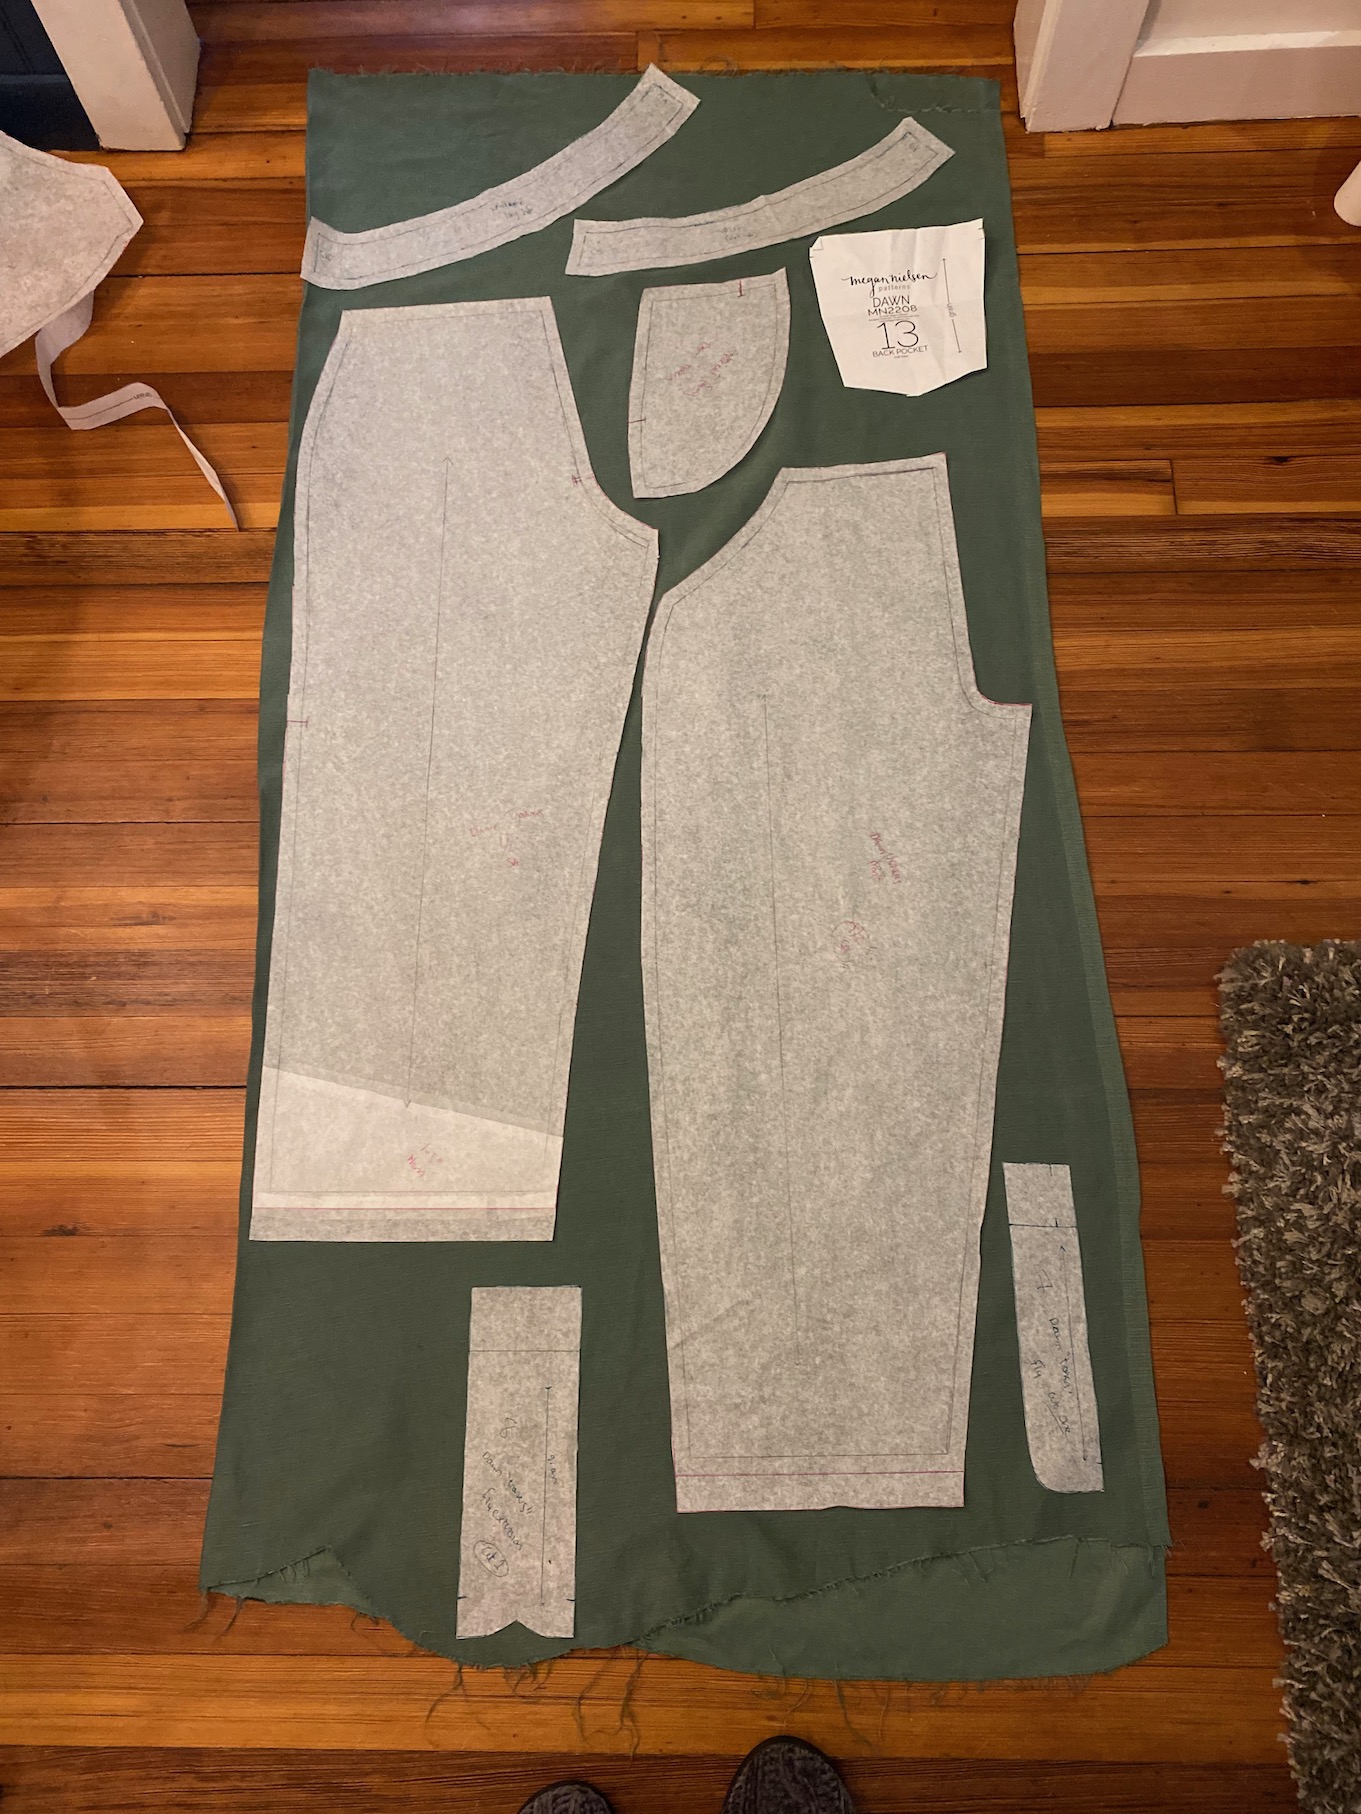
 Below is how I took out length in the back leg to take out the wrinkles:
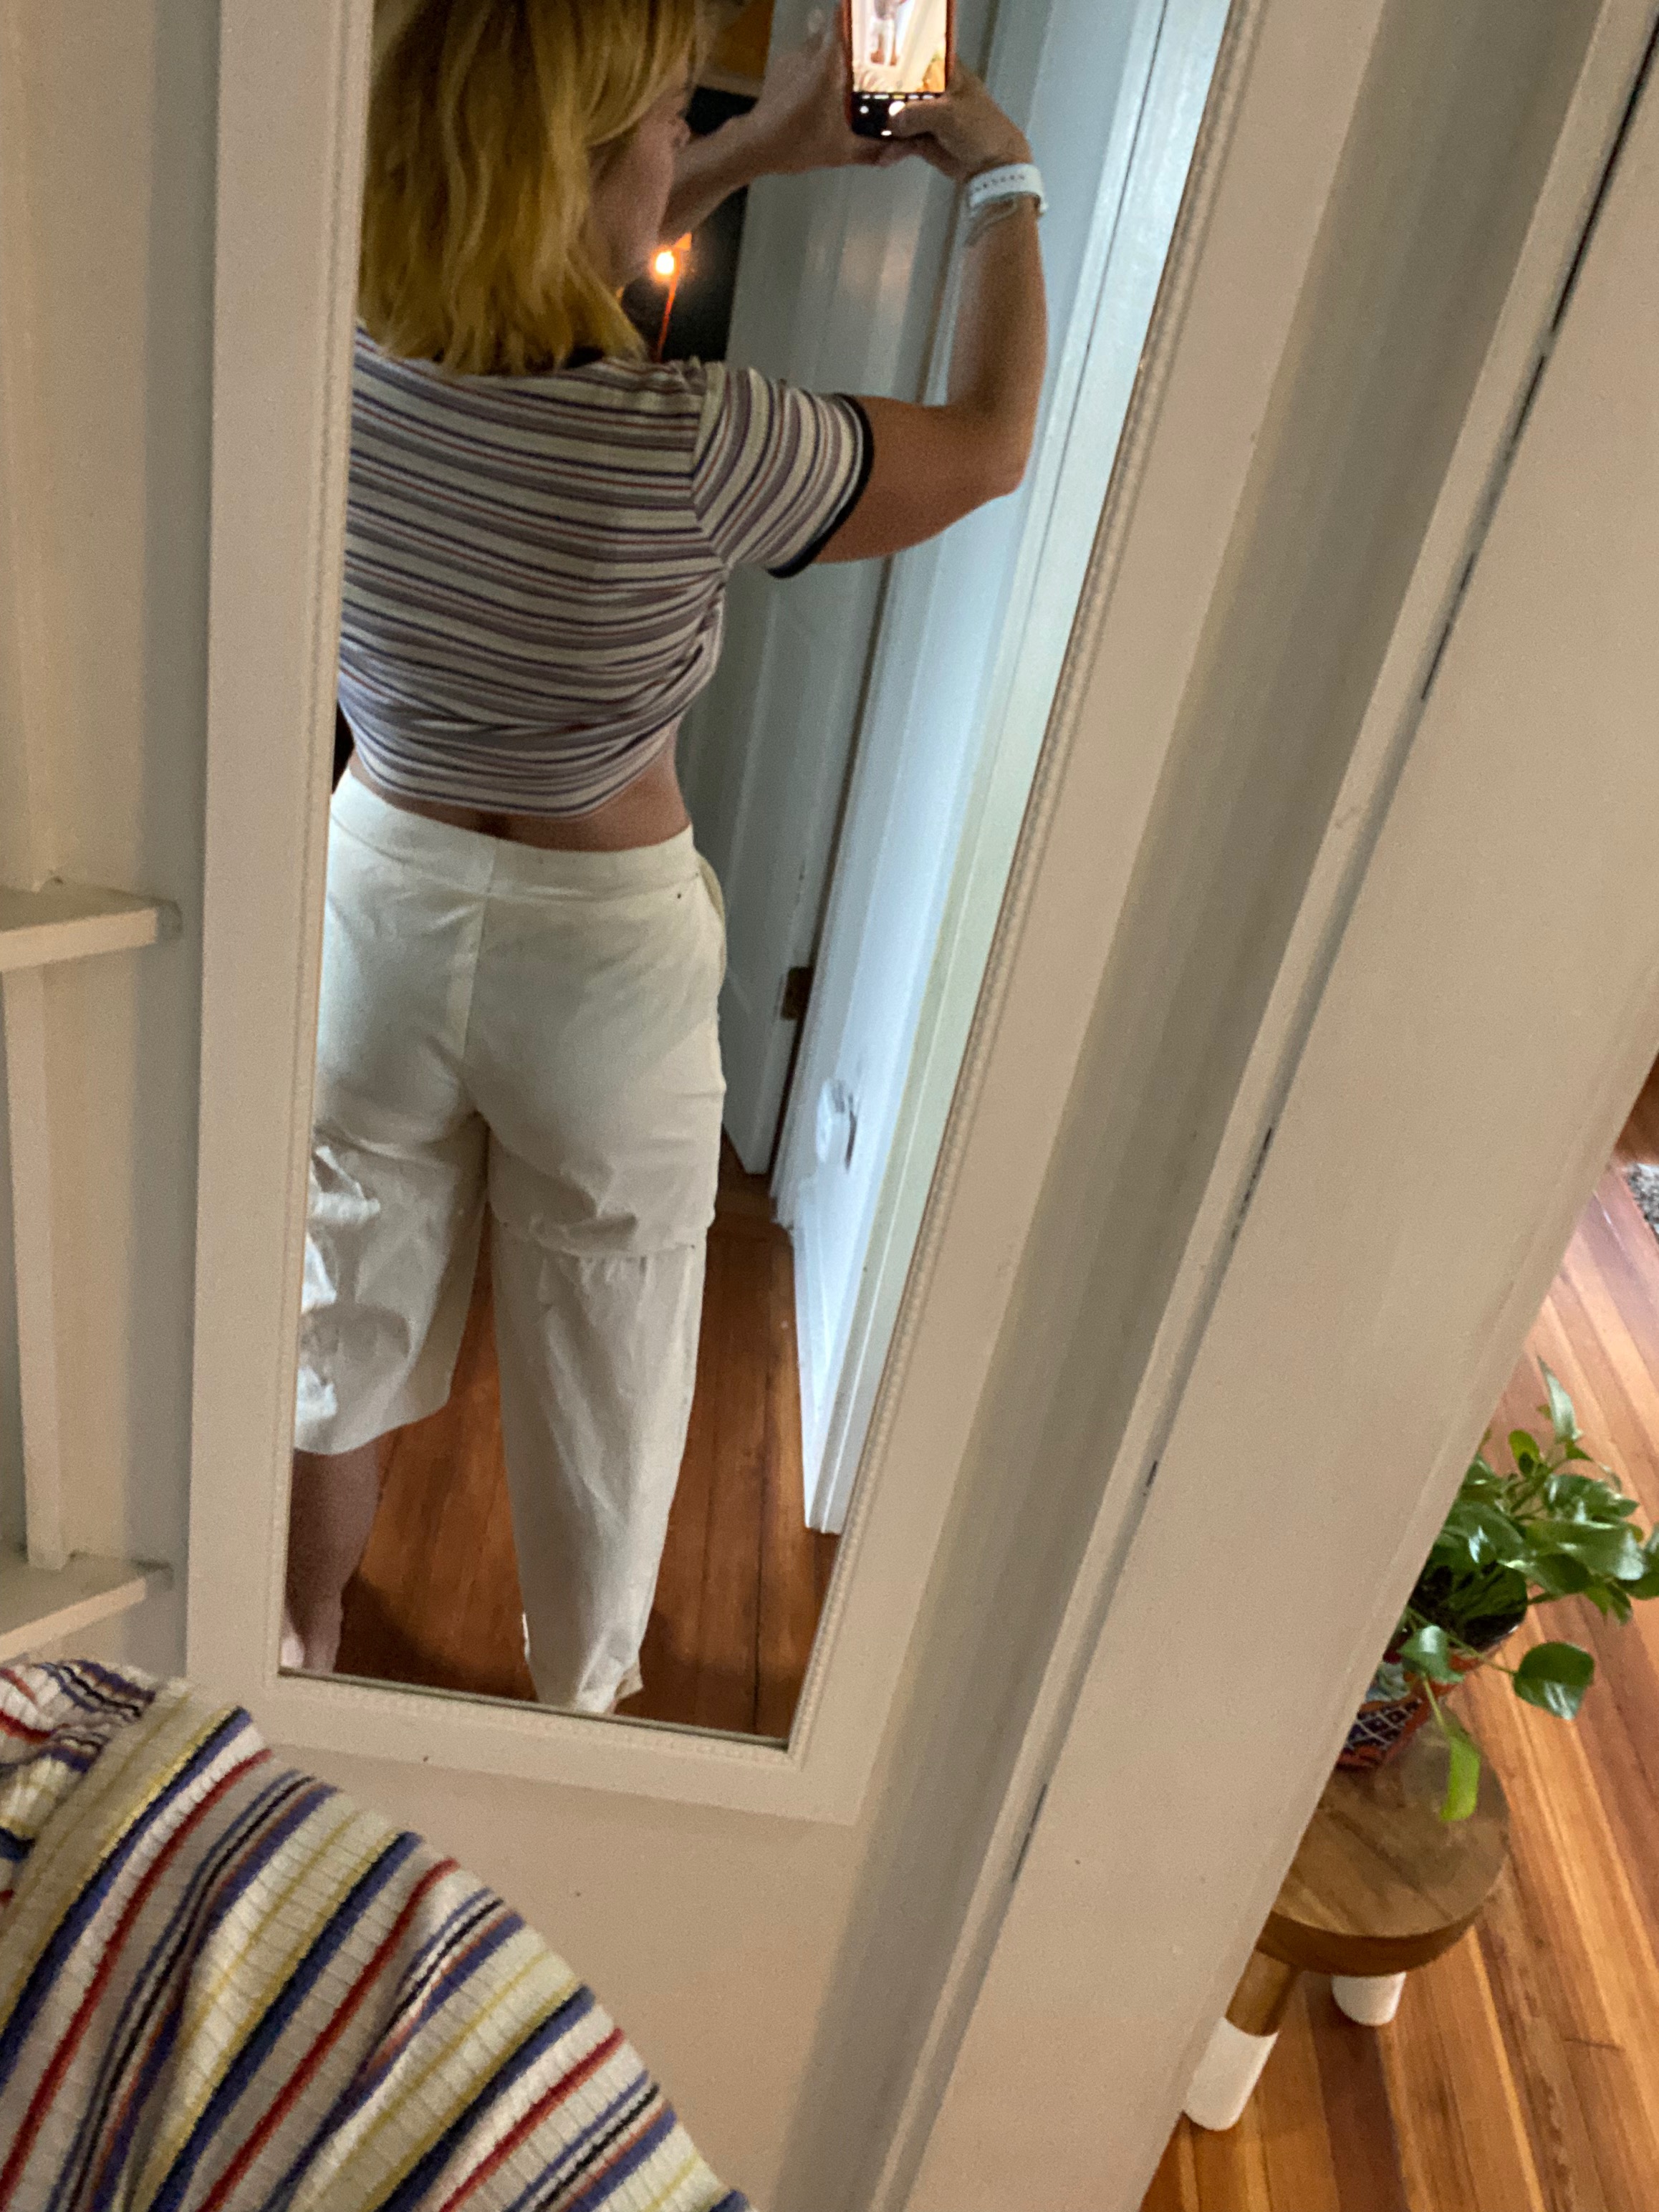
So back to the drawing board.
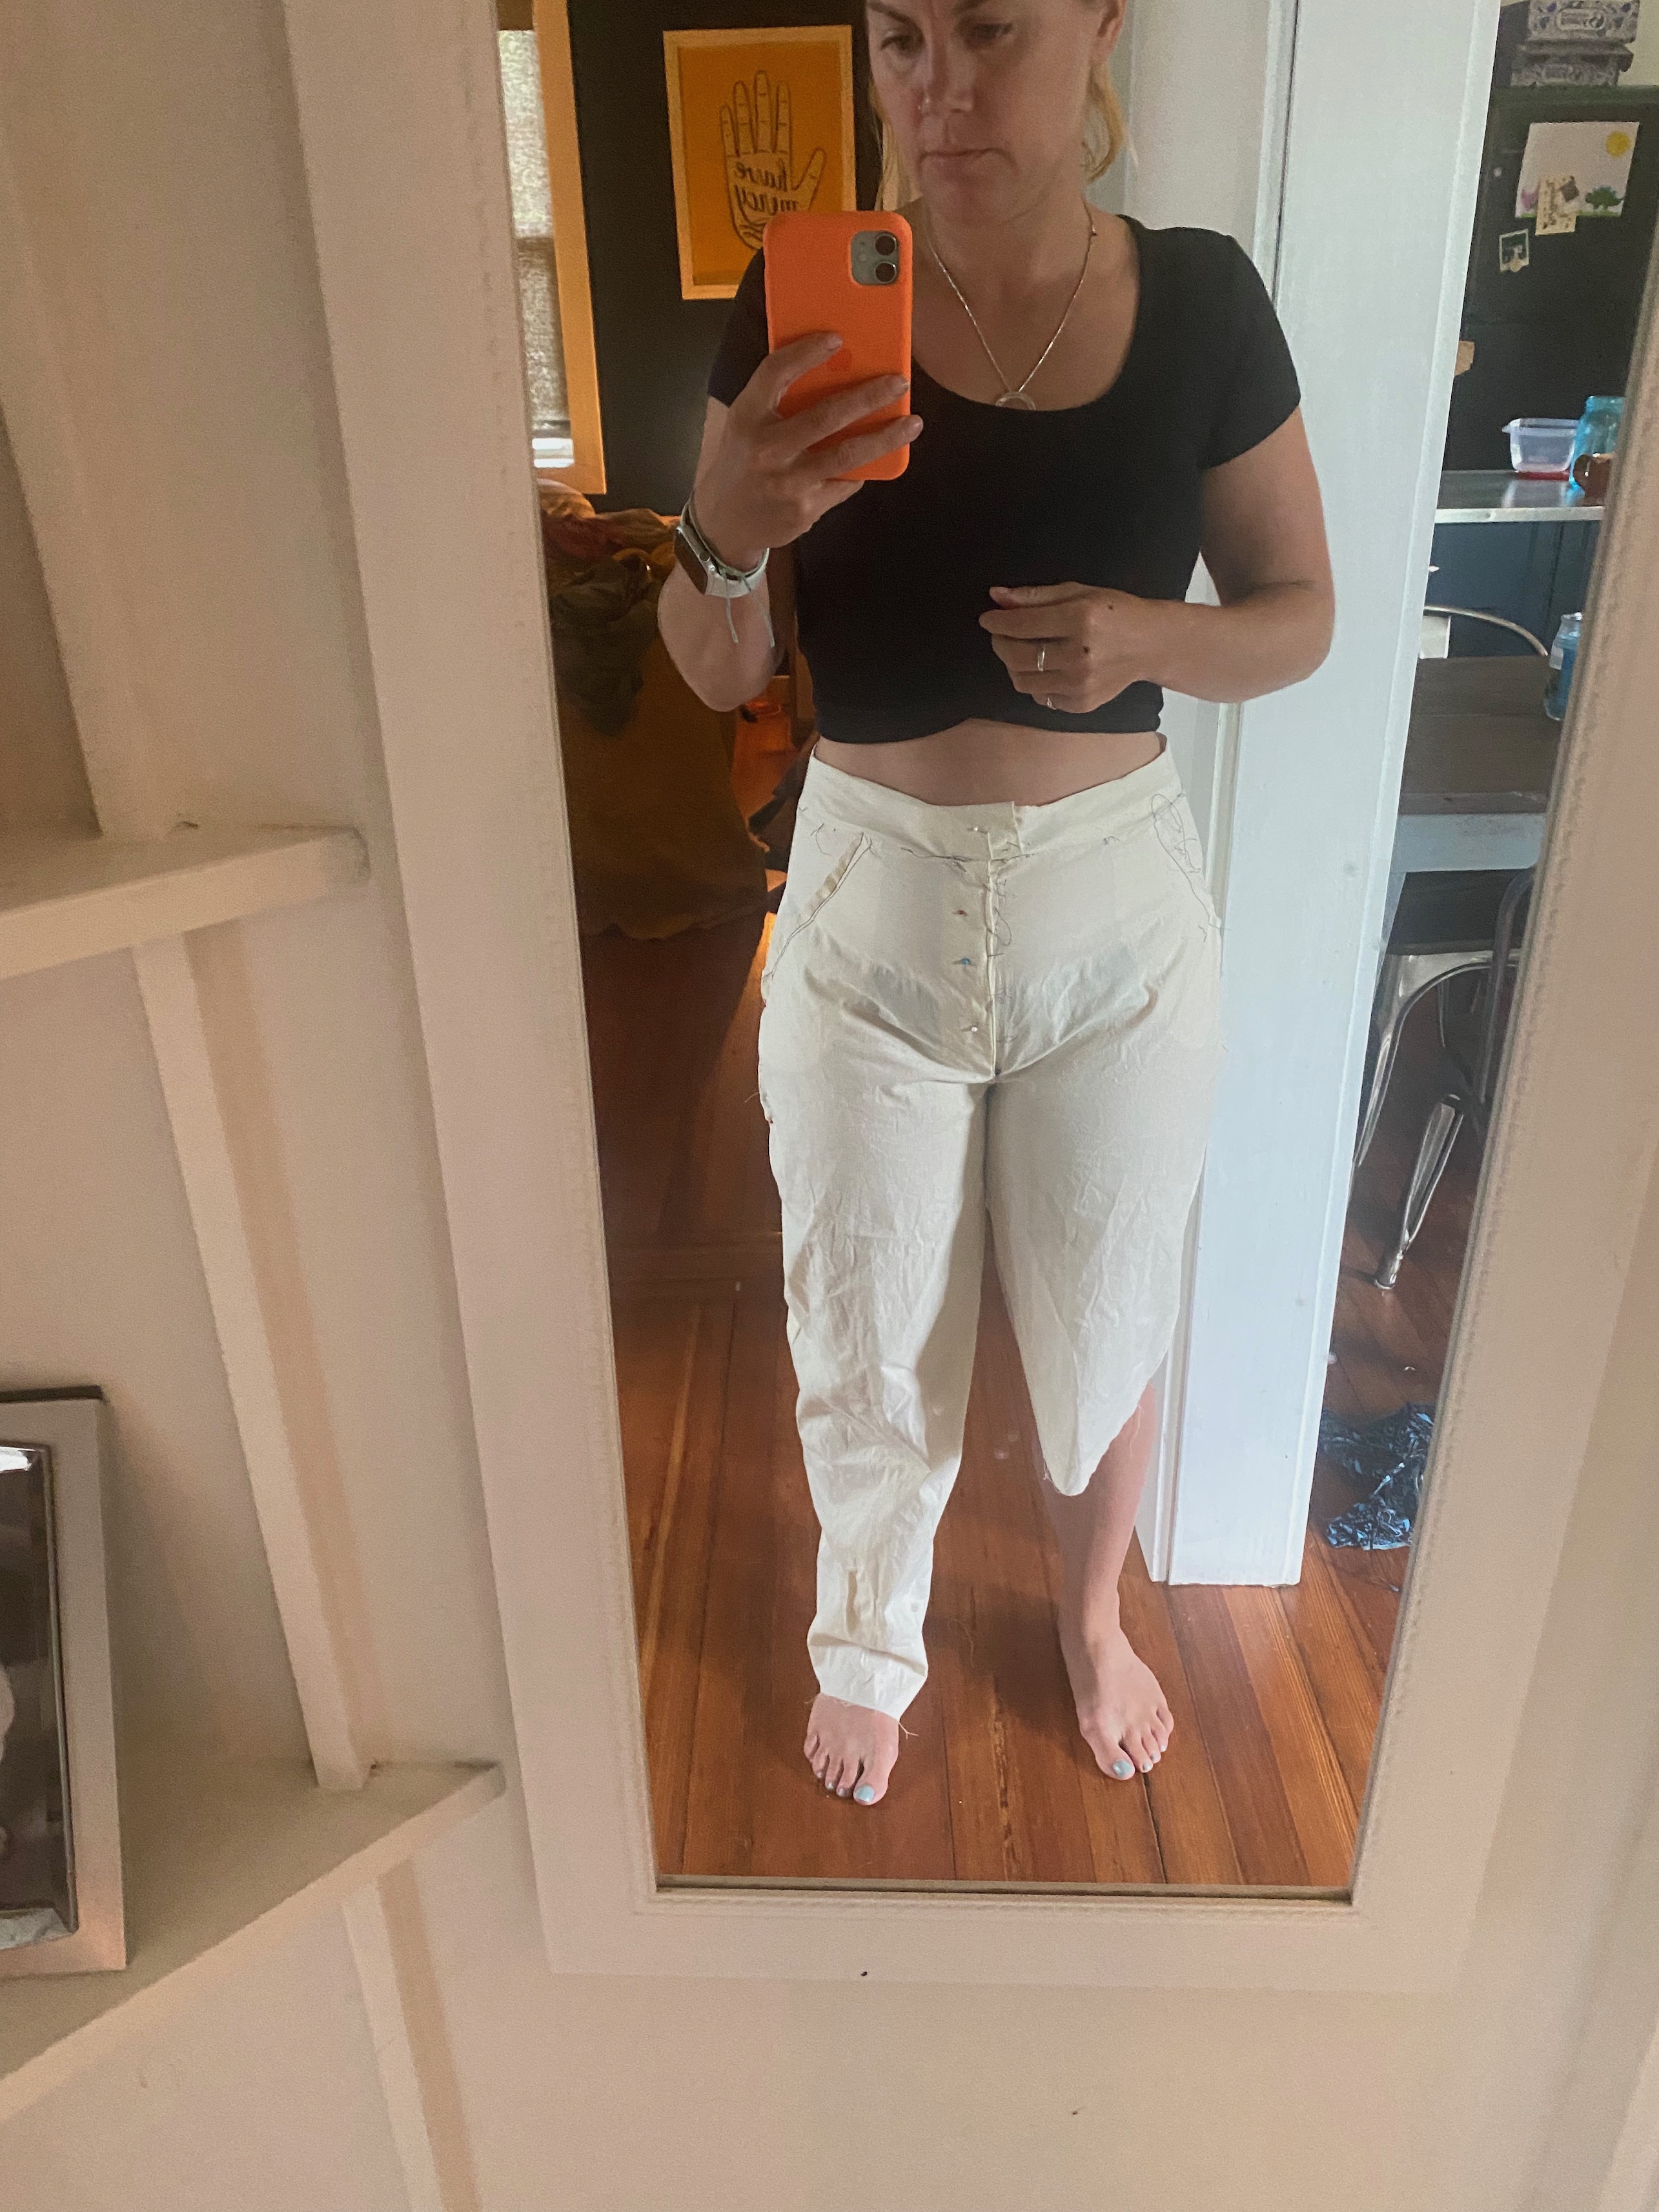
For the next round I decided to do a full abdomen adjustment of just 1/2″ , tapered the legs more and added extra room around my calf.
Muslin 2 was soooo much better! No more smile lines or wedgies!
I played around with the leg a little more; Mary and I thought for a minute there was still a room in the calf issue as the fabric was still wrinkling but then we realized it’s because they were too long so the fabric was pooling, once we folded it up to where I’d actually hem it, it was wrinkle free!
Unfortunately I seem to have forgotten to take pics of number 2!
After tweaking the muslin it was time to transfer all that to the paper pattern. I ended up just cutting my muslin at the stitch line and laying it on the paper pattern to get all the changes. Mary and I had a good laugh and how short my legs are compared to hers – I’m 5ft 2″ and my inseam is 21″
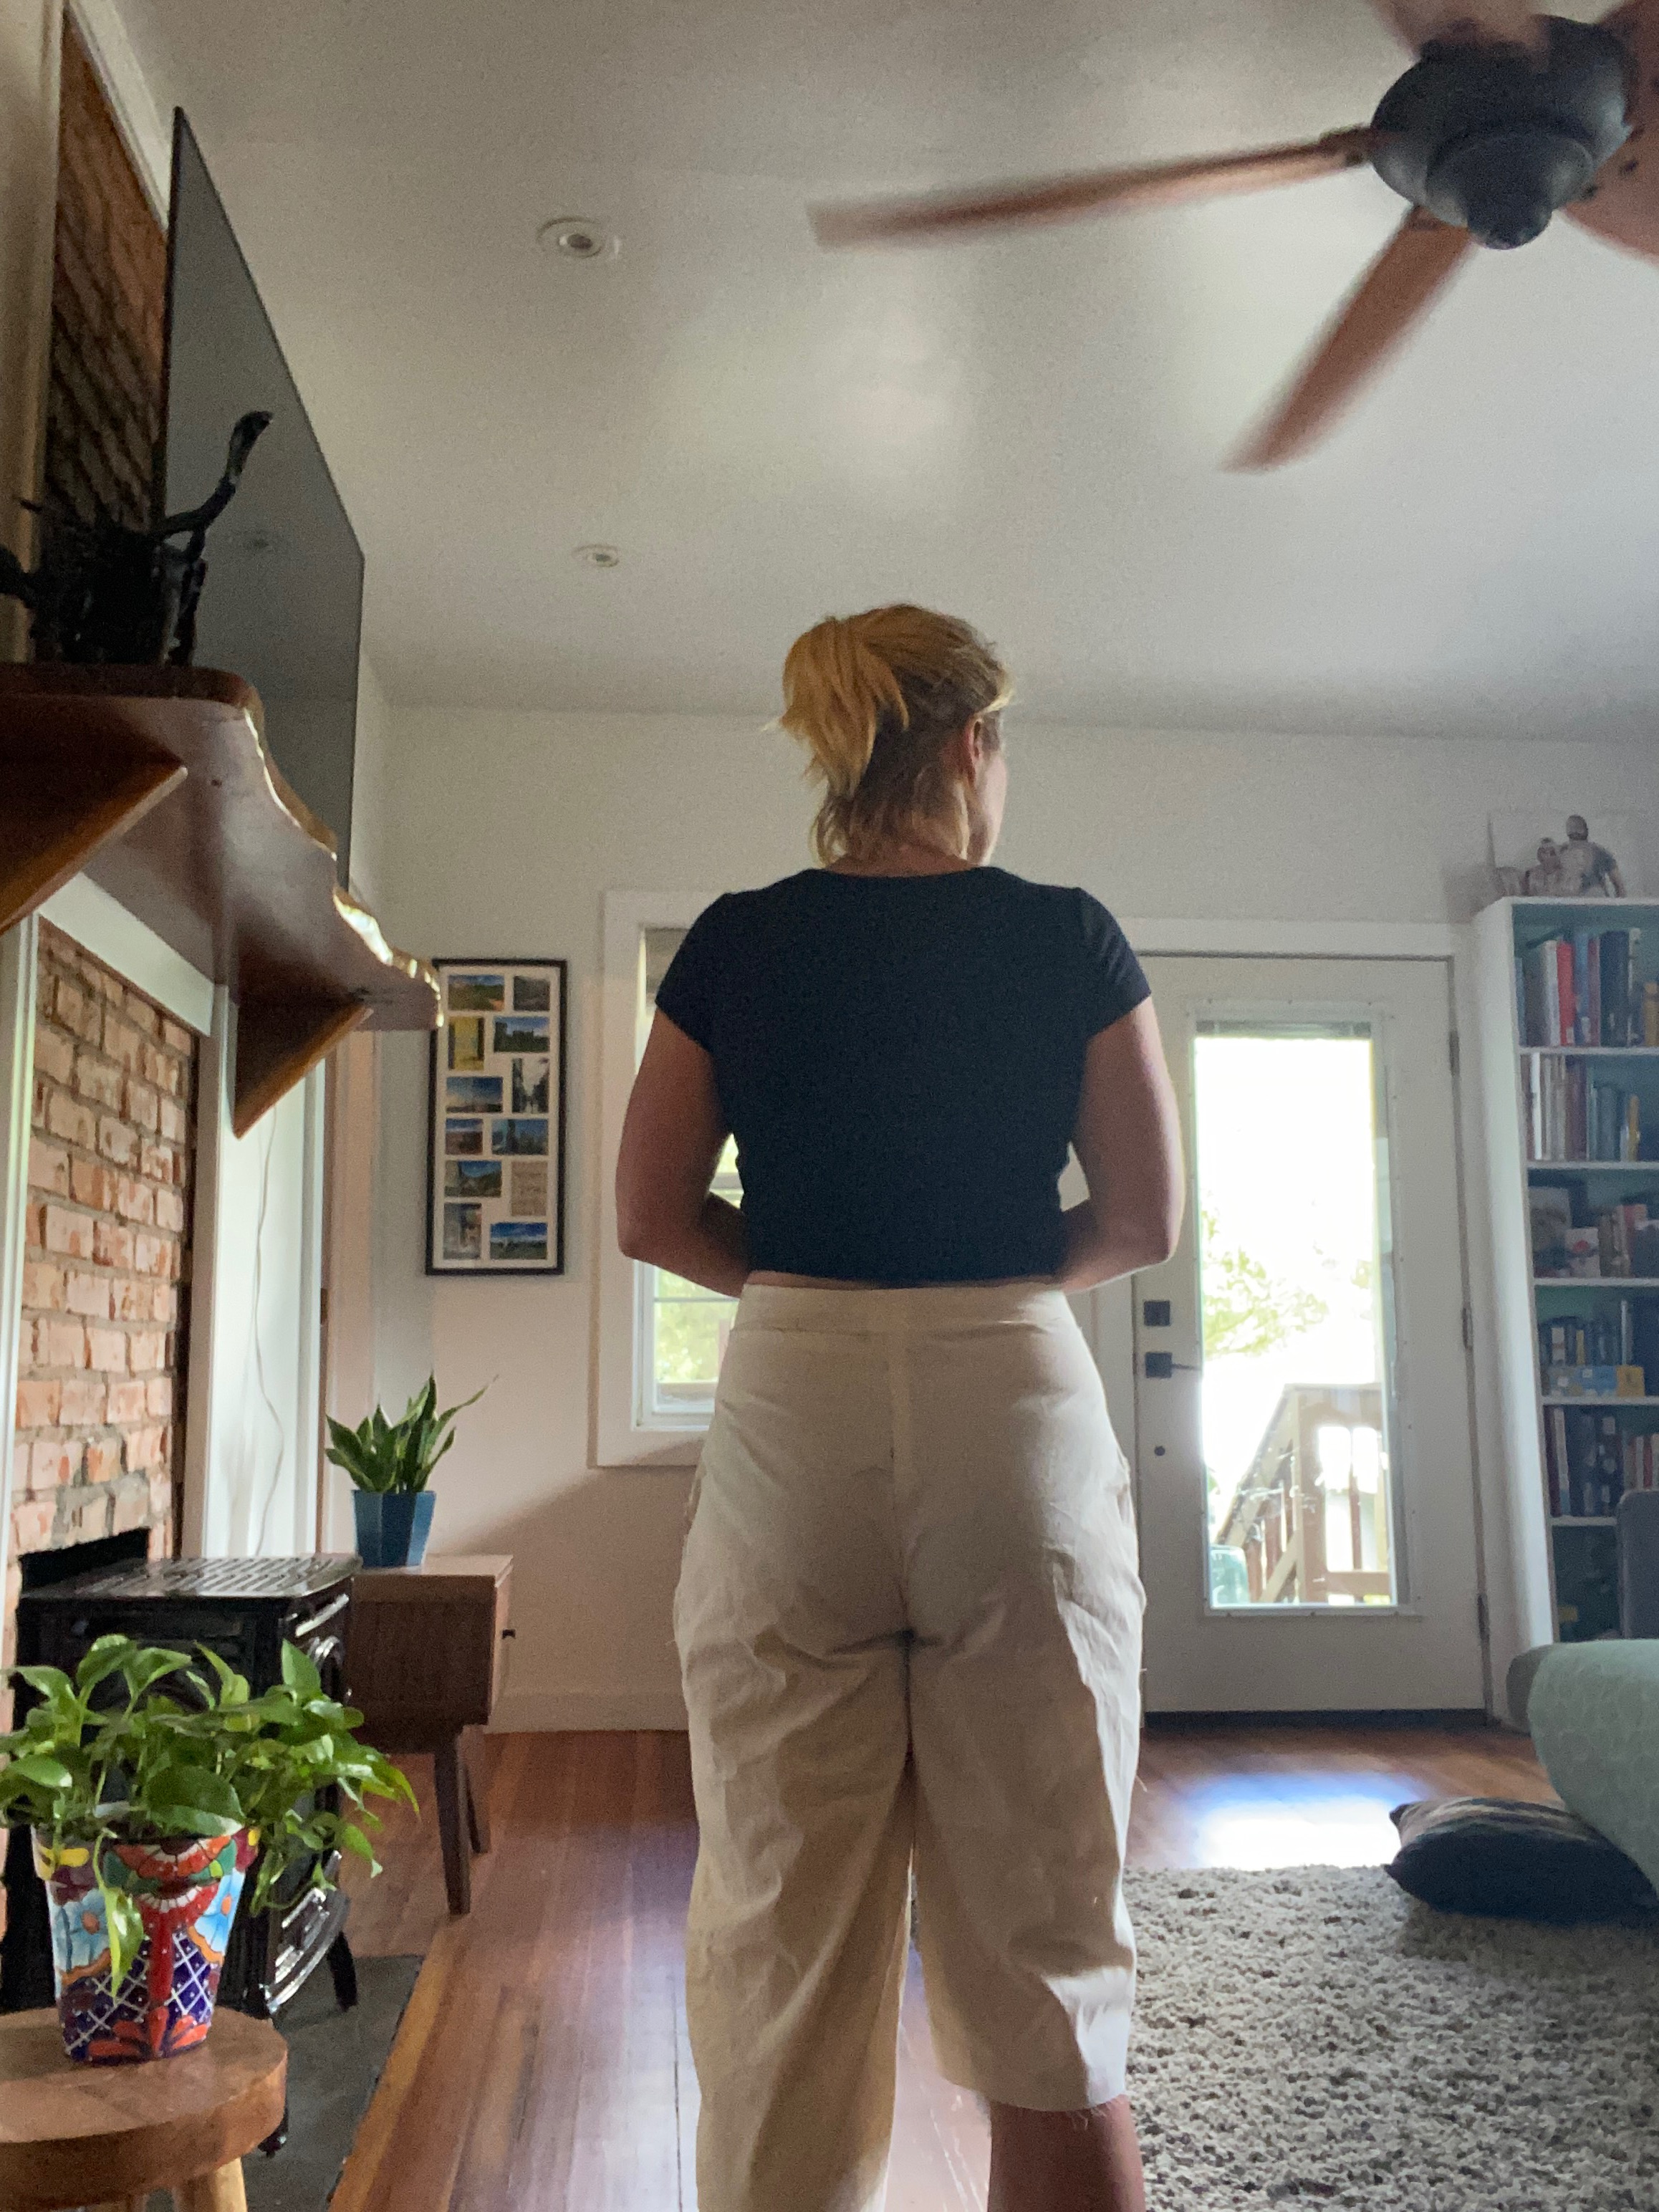
Once the paper pattern was prepped it was time to cut my beautiful Mood fabric. I had a hard time getting it on grain and I was super worried I wasn’t going to have enough as I only bought 1.5 yards – that’s when the lack of height really saves the day – it fit! For my pocket bags and the inner waistband I cut up an old night dress I had in my stash, it was given to me by a family friend. Its a beautifully soft brushed cotton and the green in the leaves matches the twill as if it were made for the job!
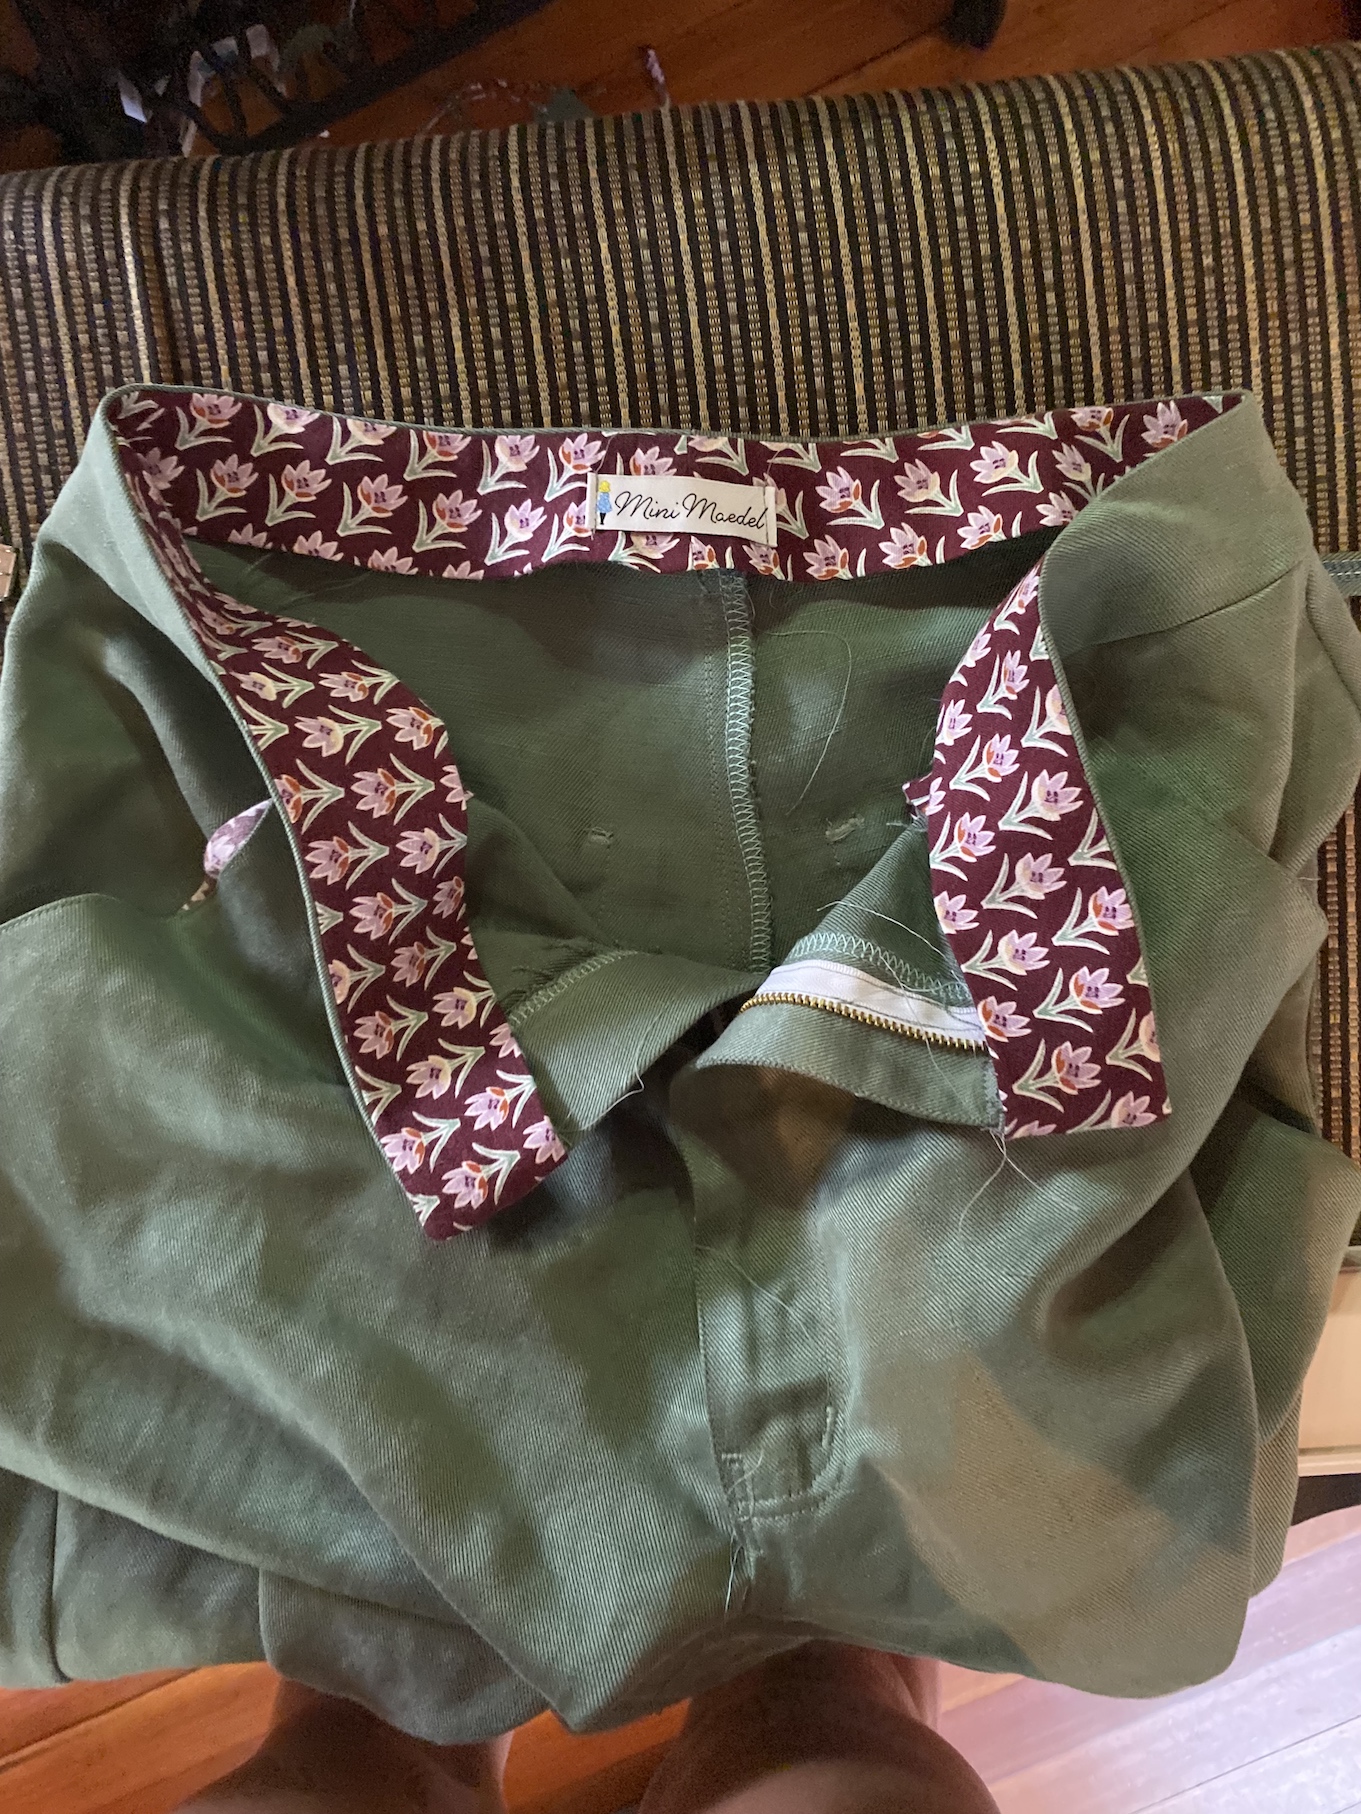
Whilst making the final version the only issue I had was the my pocket facing notches were wrong, it didn’t line up with the pocket piece but it worked out okay. I also had to take a wedge out of the back waistband as they were a little loose.
I ended up using a hook and eye because I wanted them to be plain and I planned to wear them with a belt.
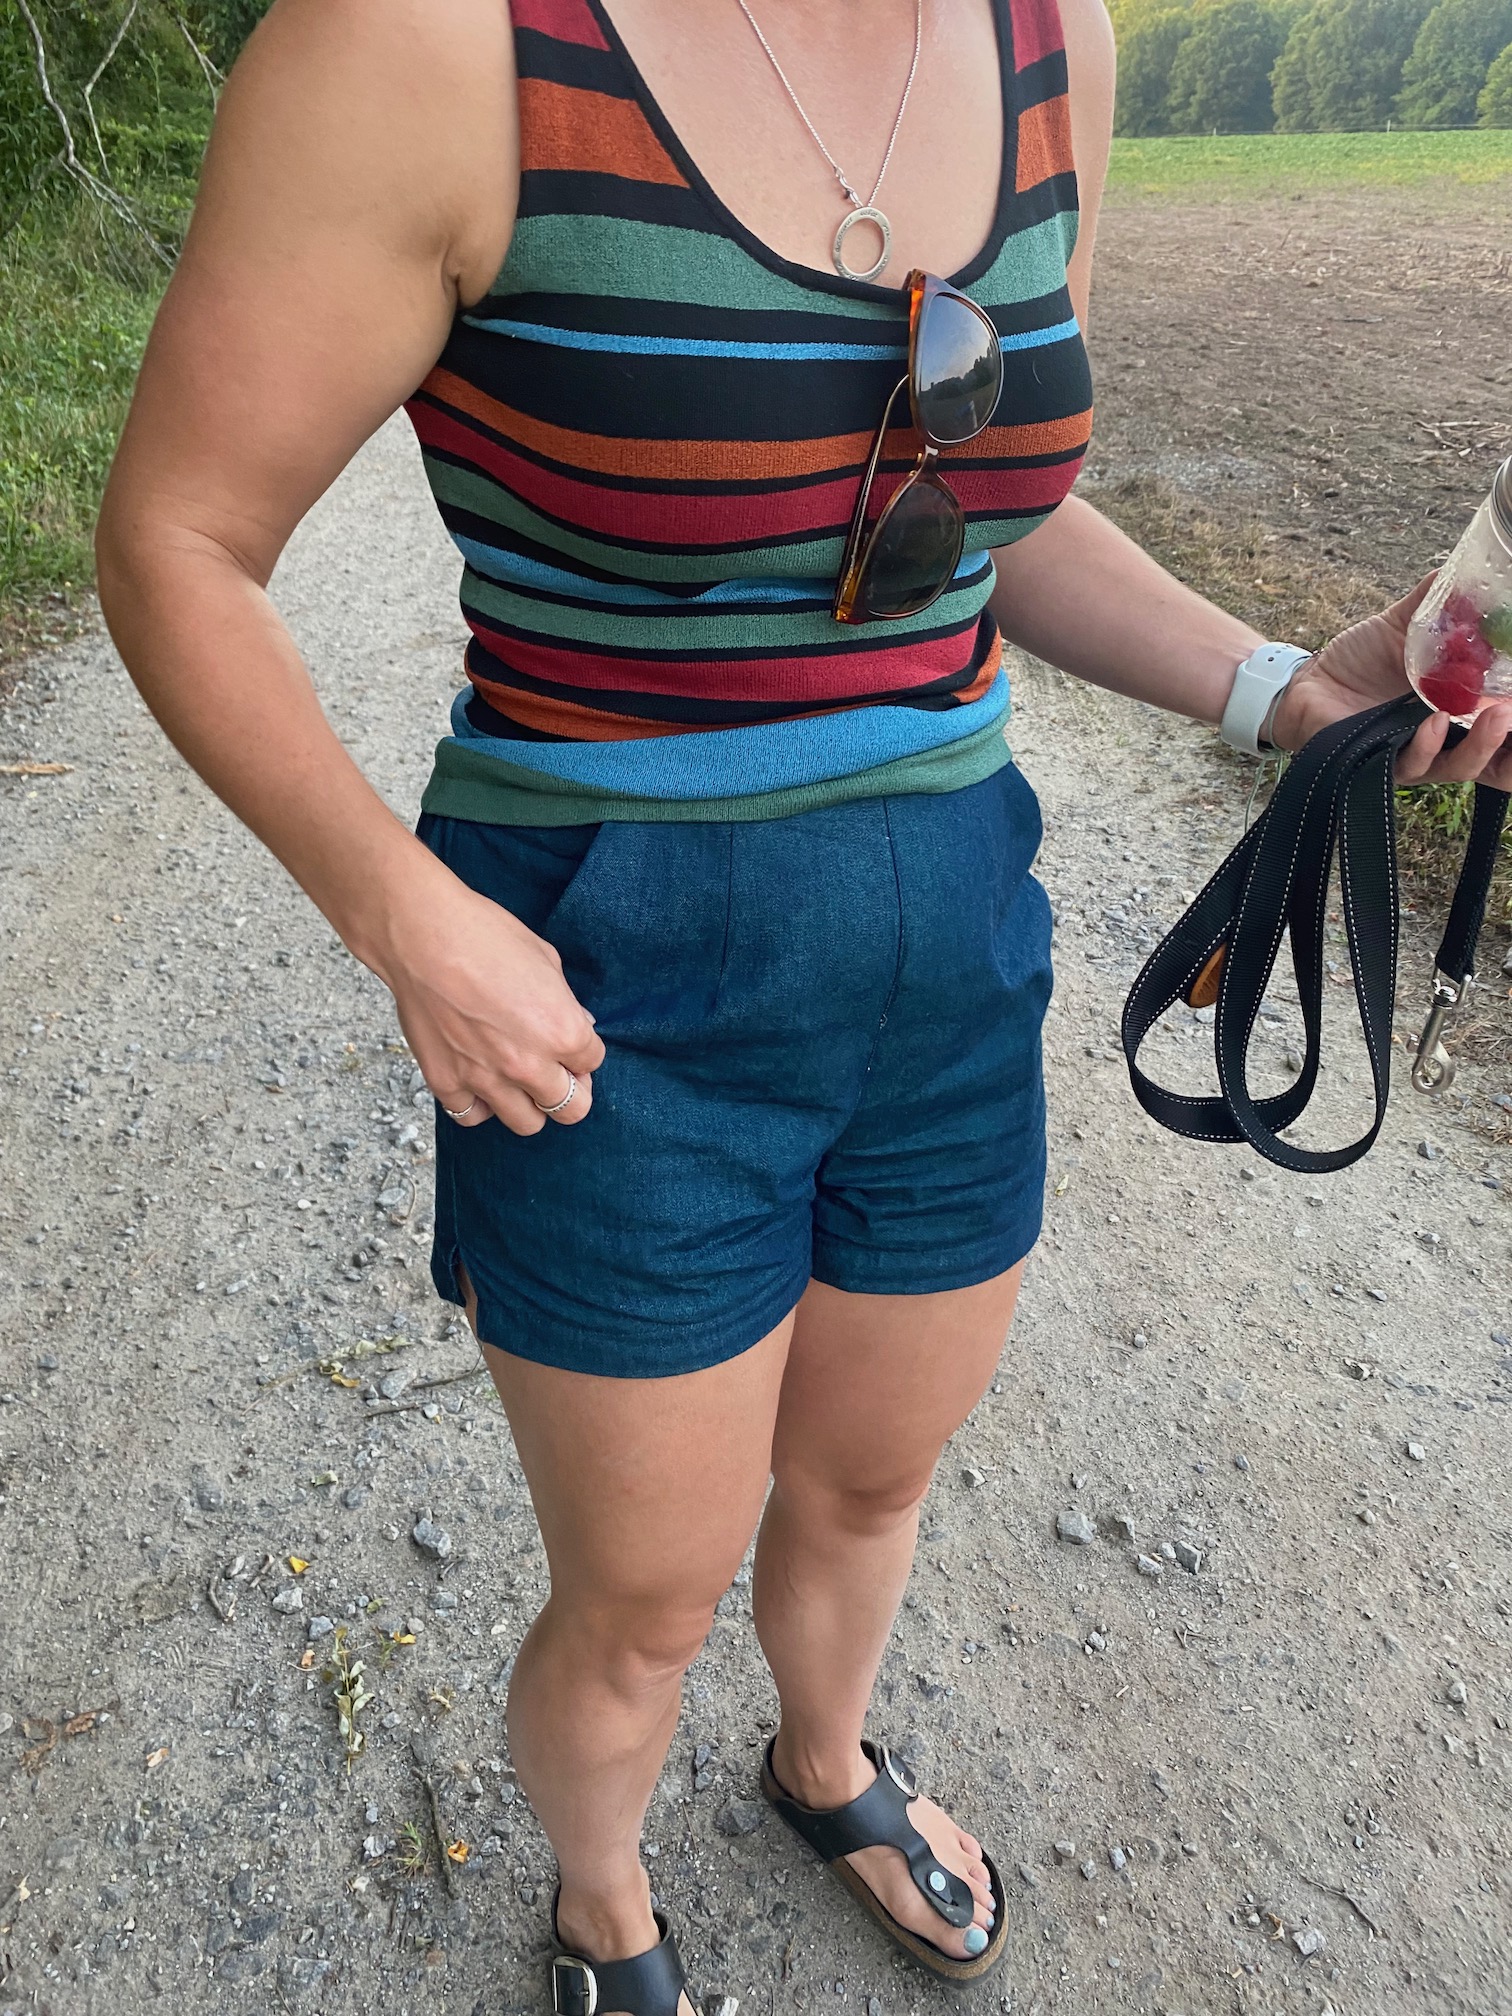
After hemming them I wore them straight out that night! You know it’s a successful make when you wear them hot off the machine. I even made a Sophie Haynes Axis Tank specially to wear with them.

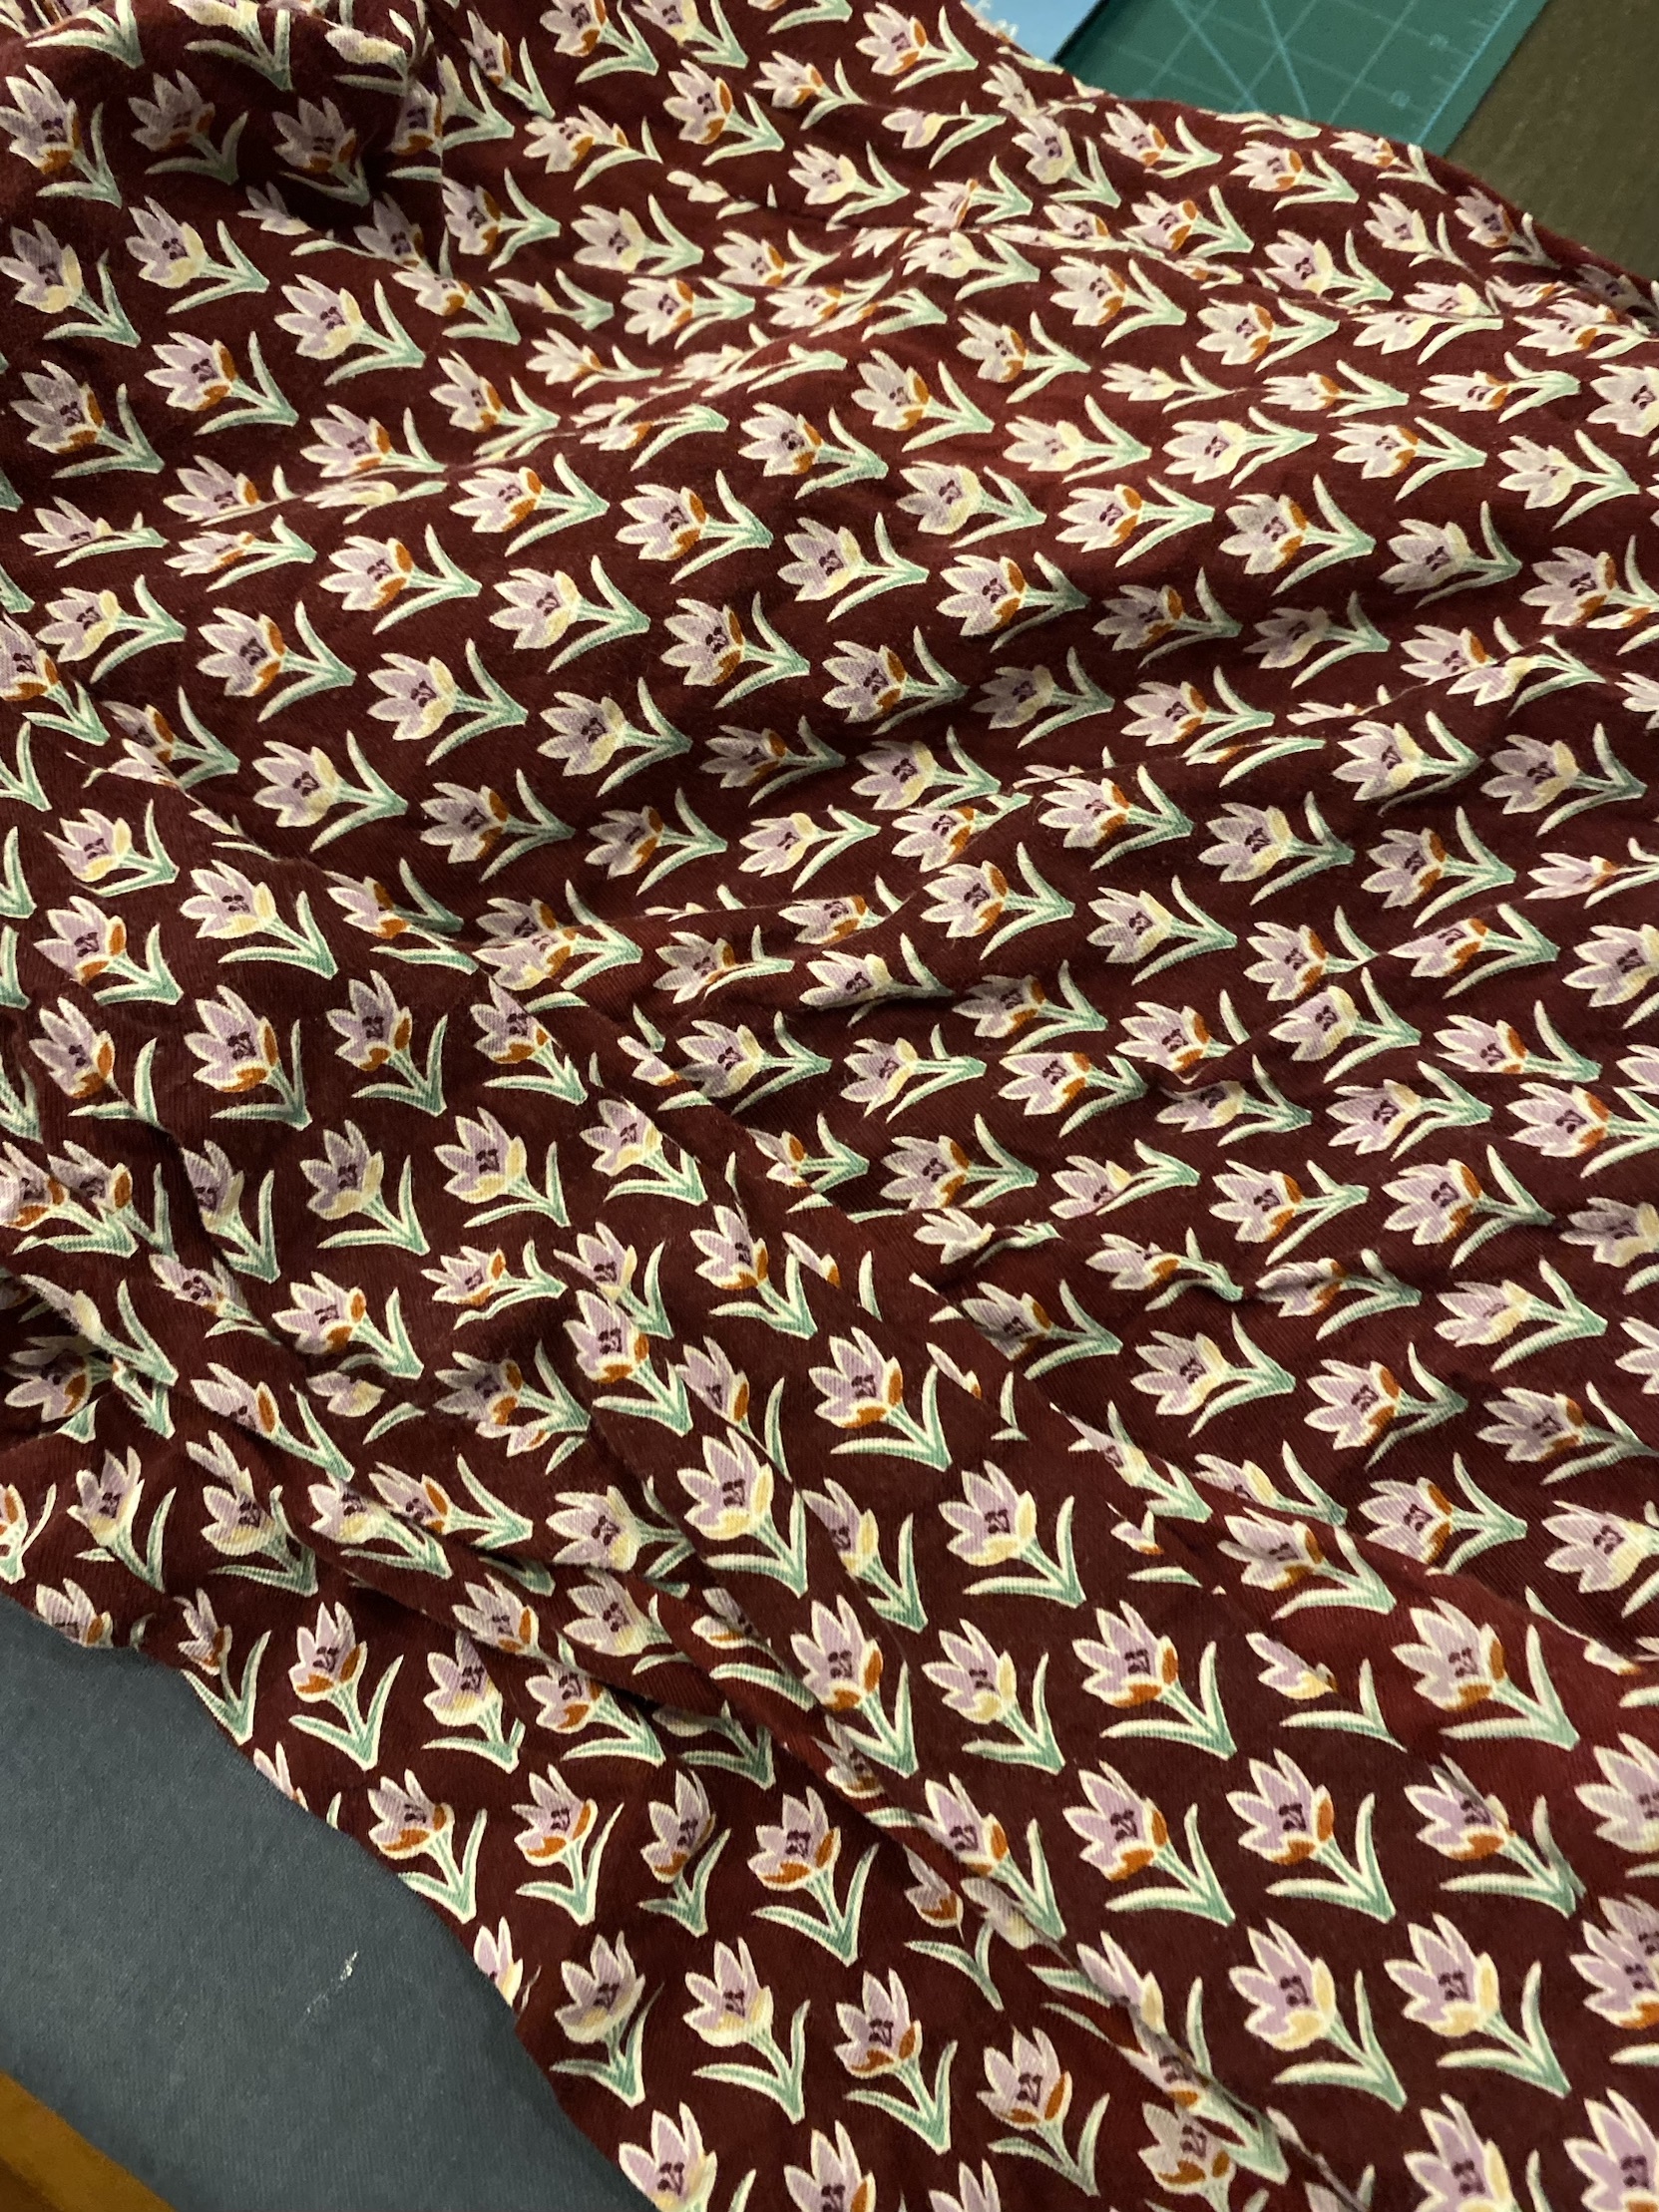
I love them so much! I’m super proud of the work Mary and I put in to getting the fit right of these. Now I’m confident knowing I have a trouser pattern that works for me and want to make another pair in maybe a corduroy. I was so great going through this process with a friend. She was working on a chino pattern at the same time so we could help each other out, and encourage each other to keep going when the muslin stage was getting frustrating.
For next time, the only changes I possibly makes is I think I’d add an extra 1/2″ to the bottom so I could have a nice deep hem.
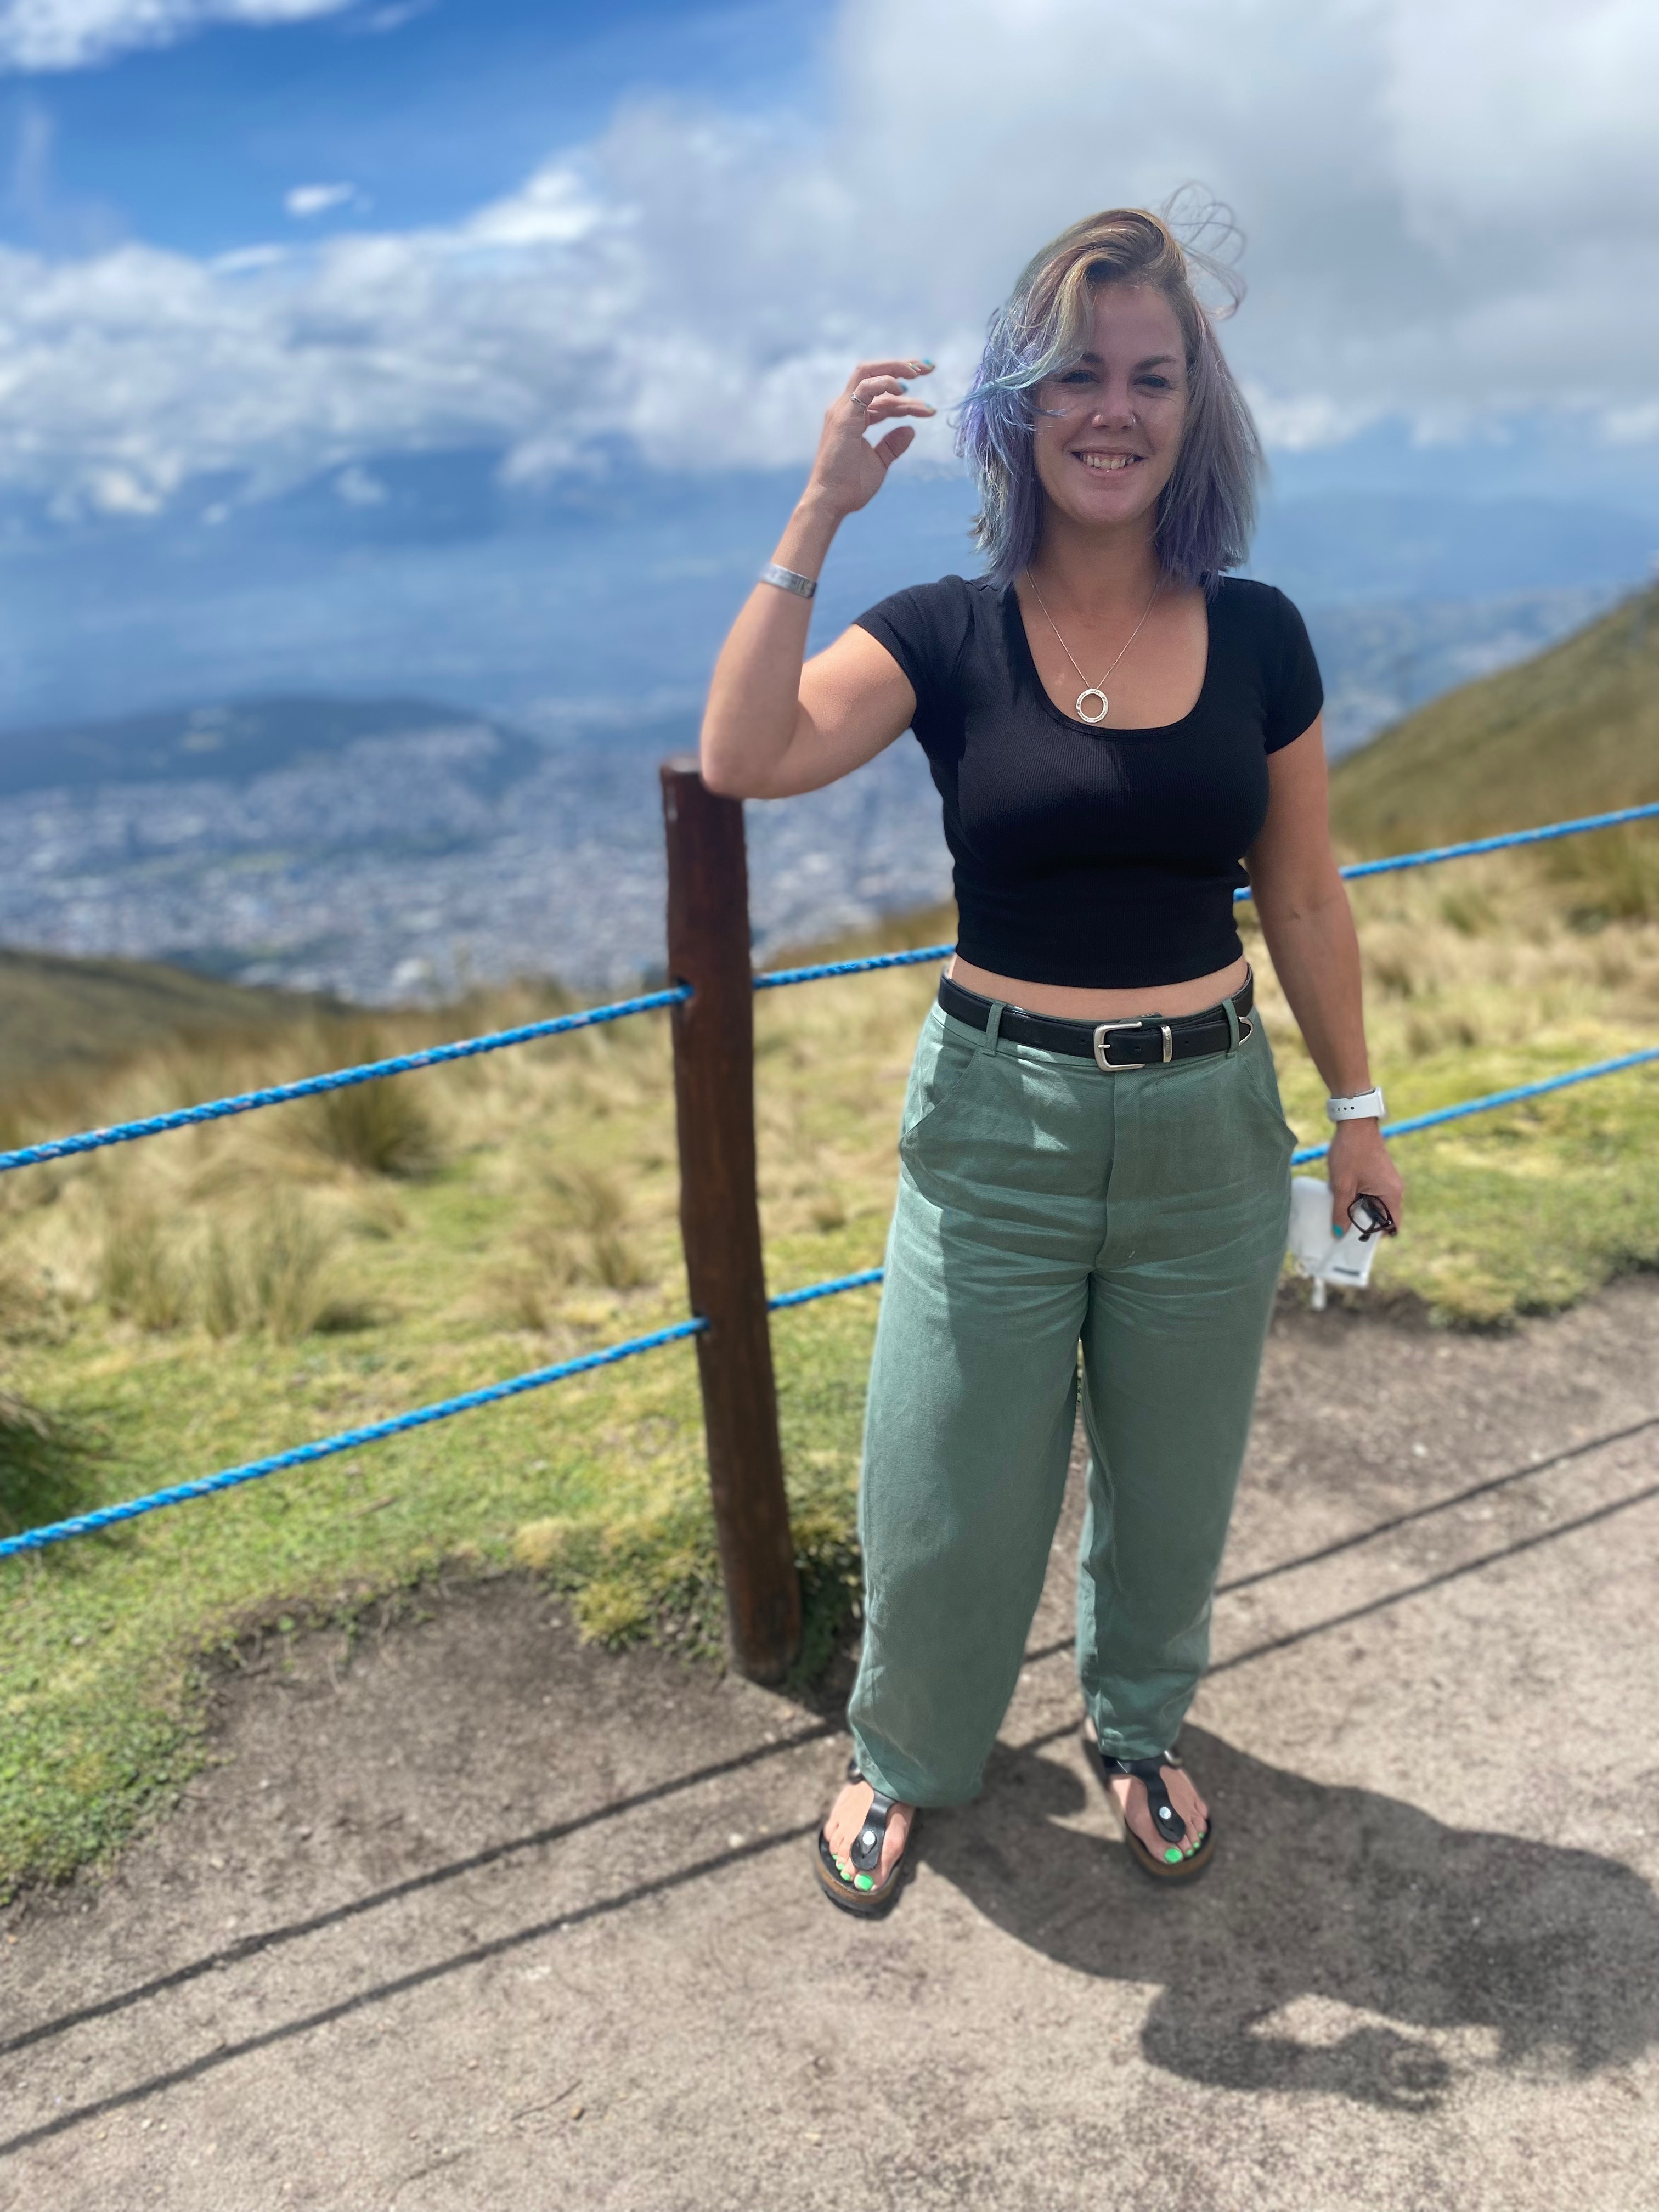
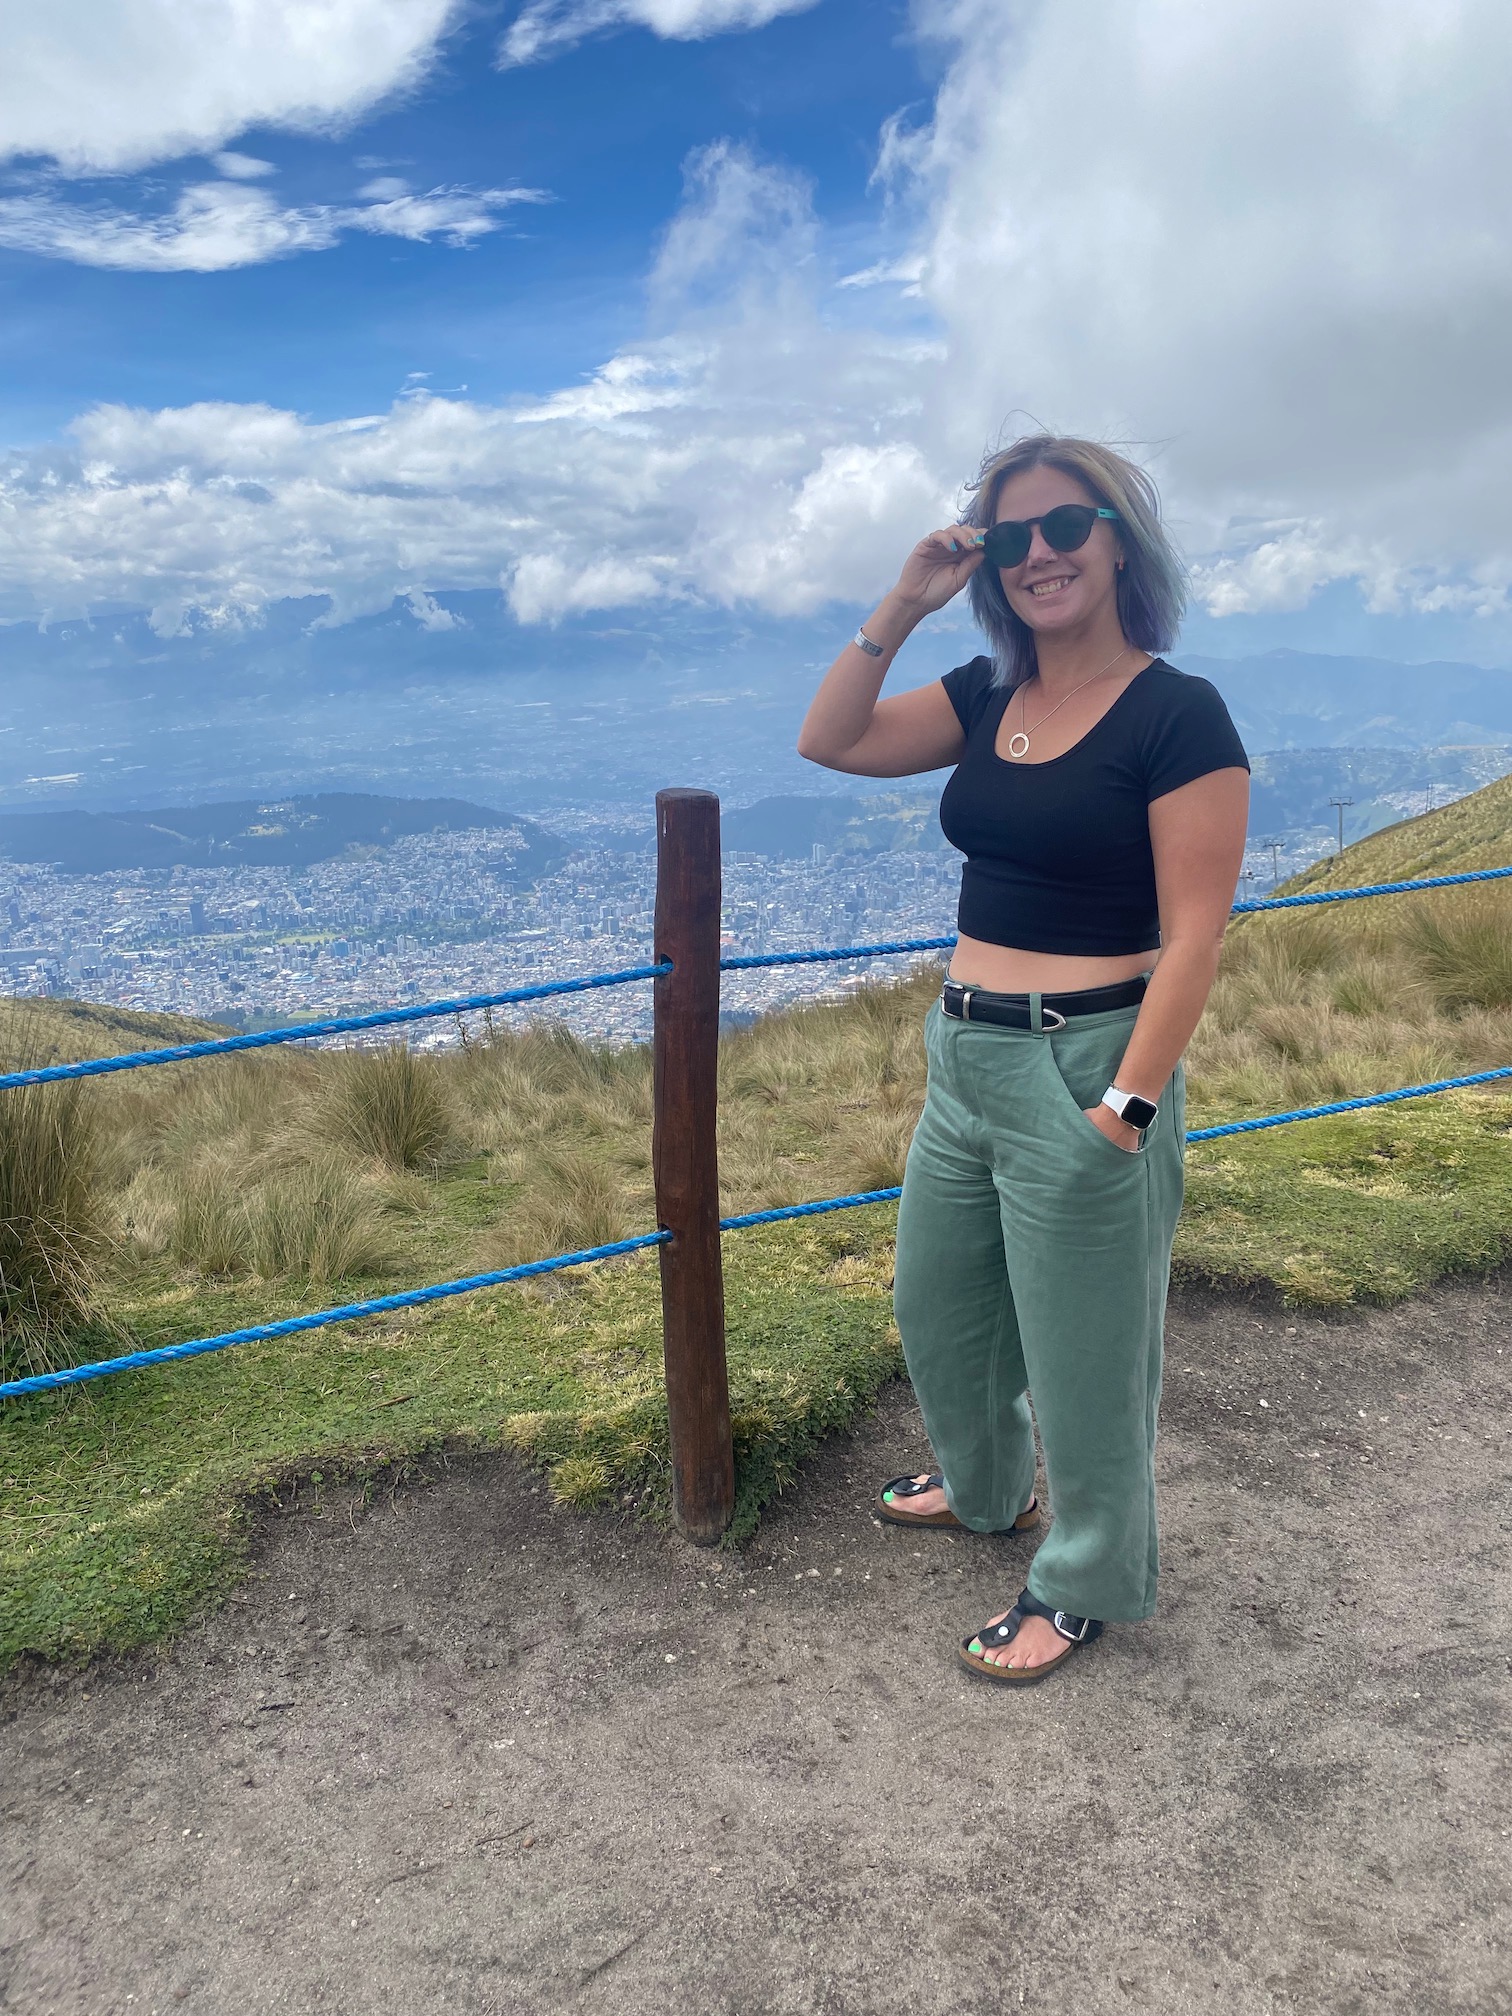
A week or so after I finished them we went on vacation to Ecuador and I got to test them out in the wild! They are possibly the most comfortable thing I own! I love love love wearing them. The fabric definitely creases a lot so not the best for being stuffed in a suitcase or for long car rides but I don’t care!
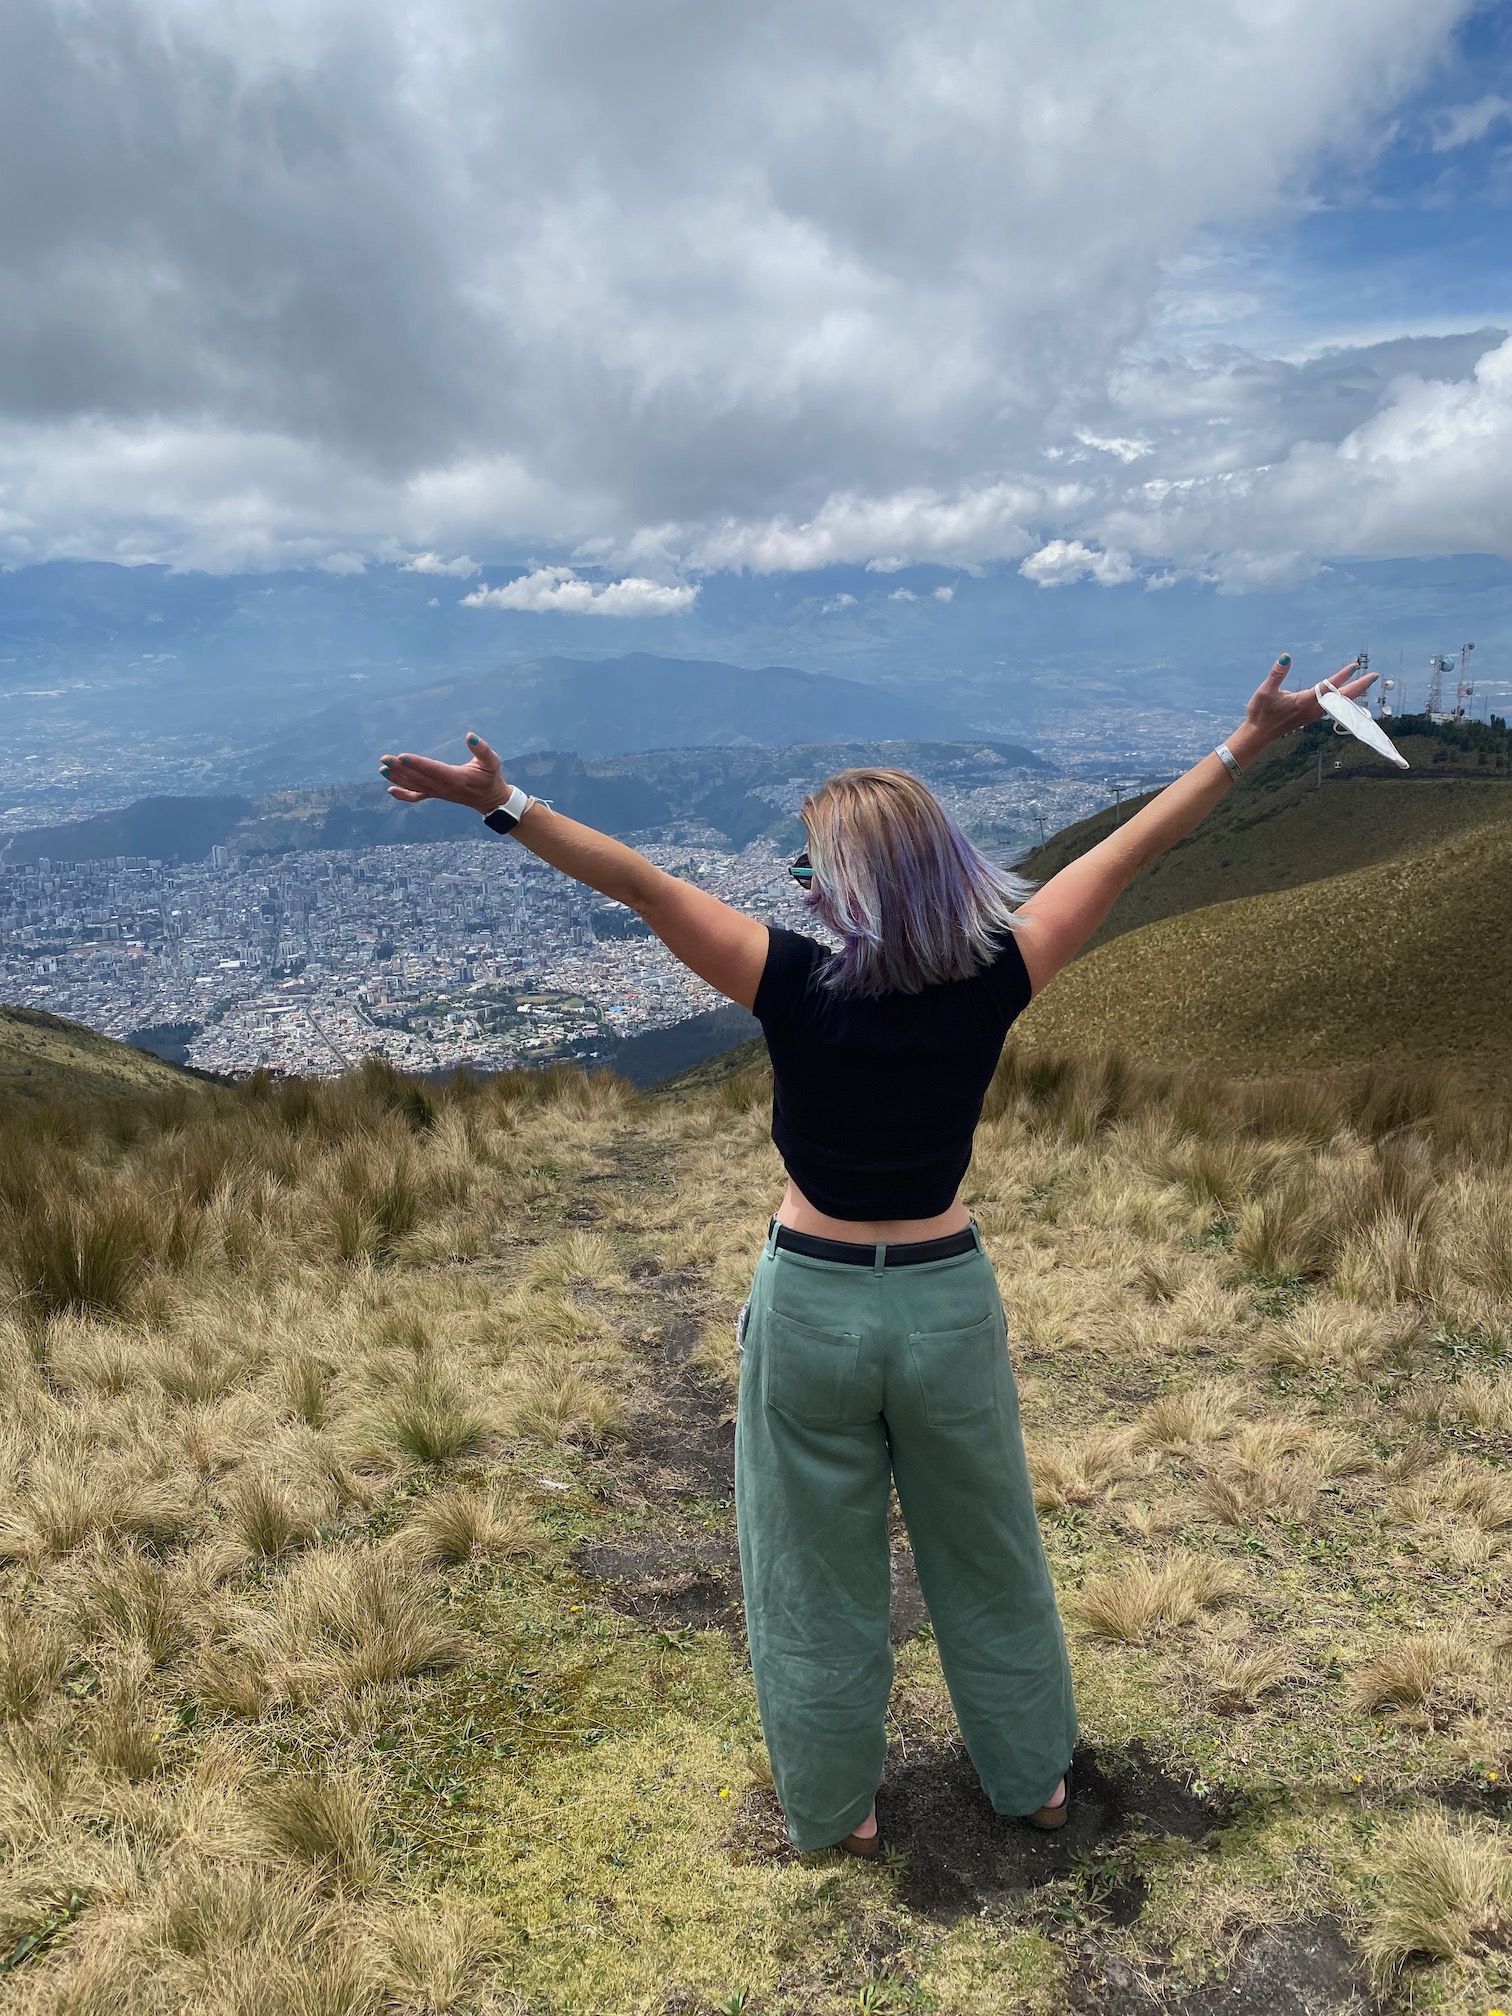
This is before we left the apartment, to prove the weren’t creased when I left 😉 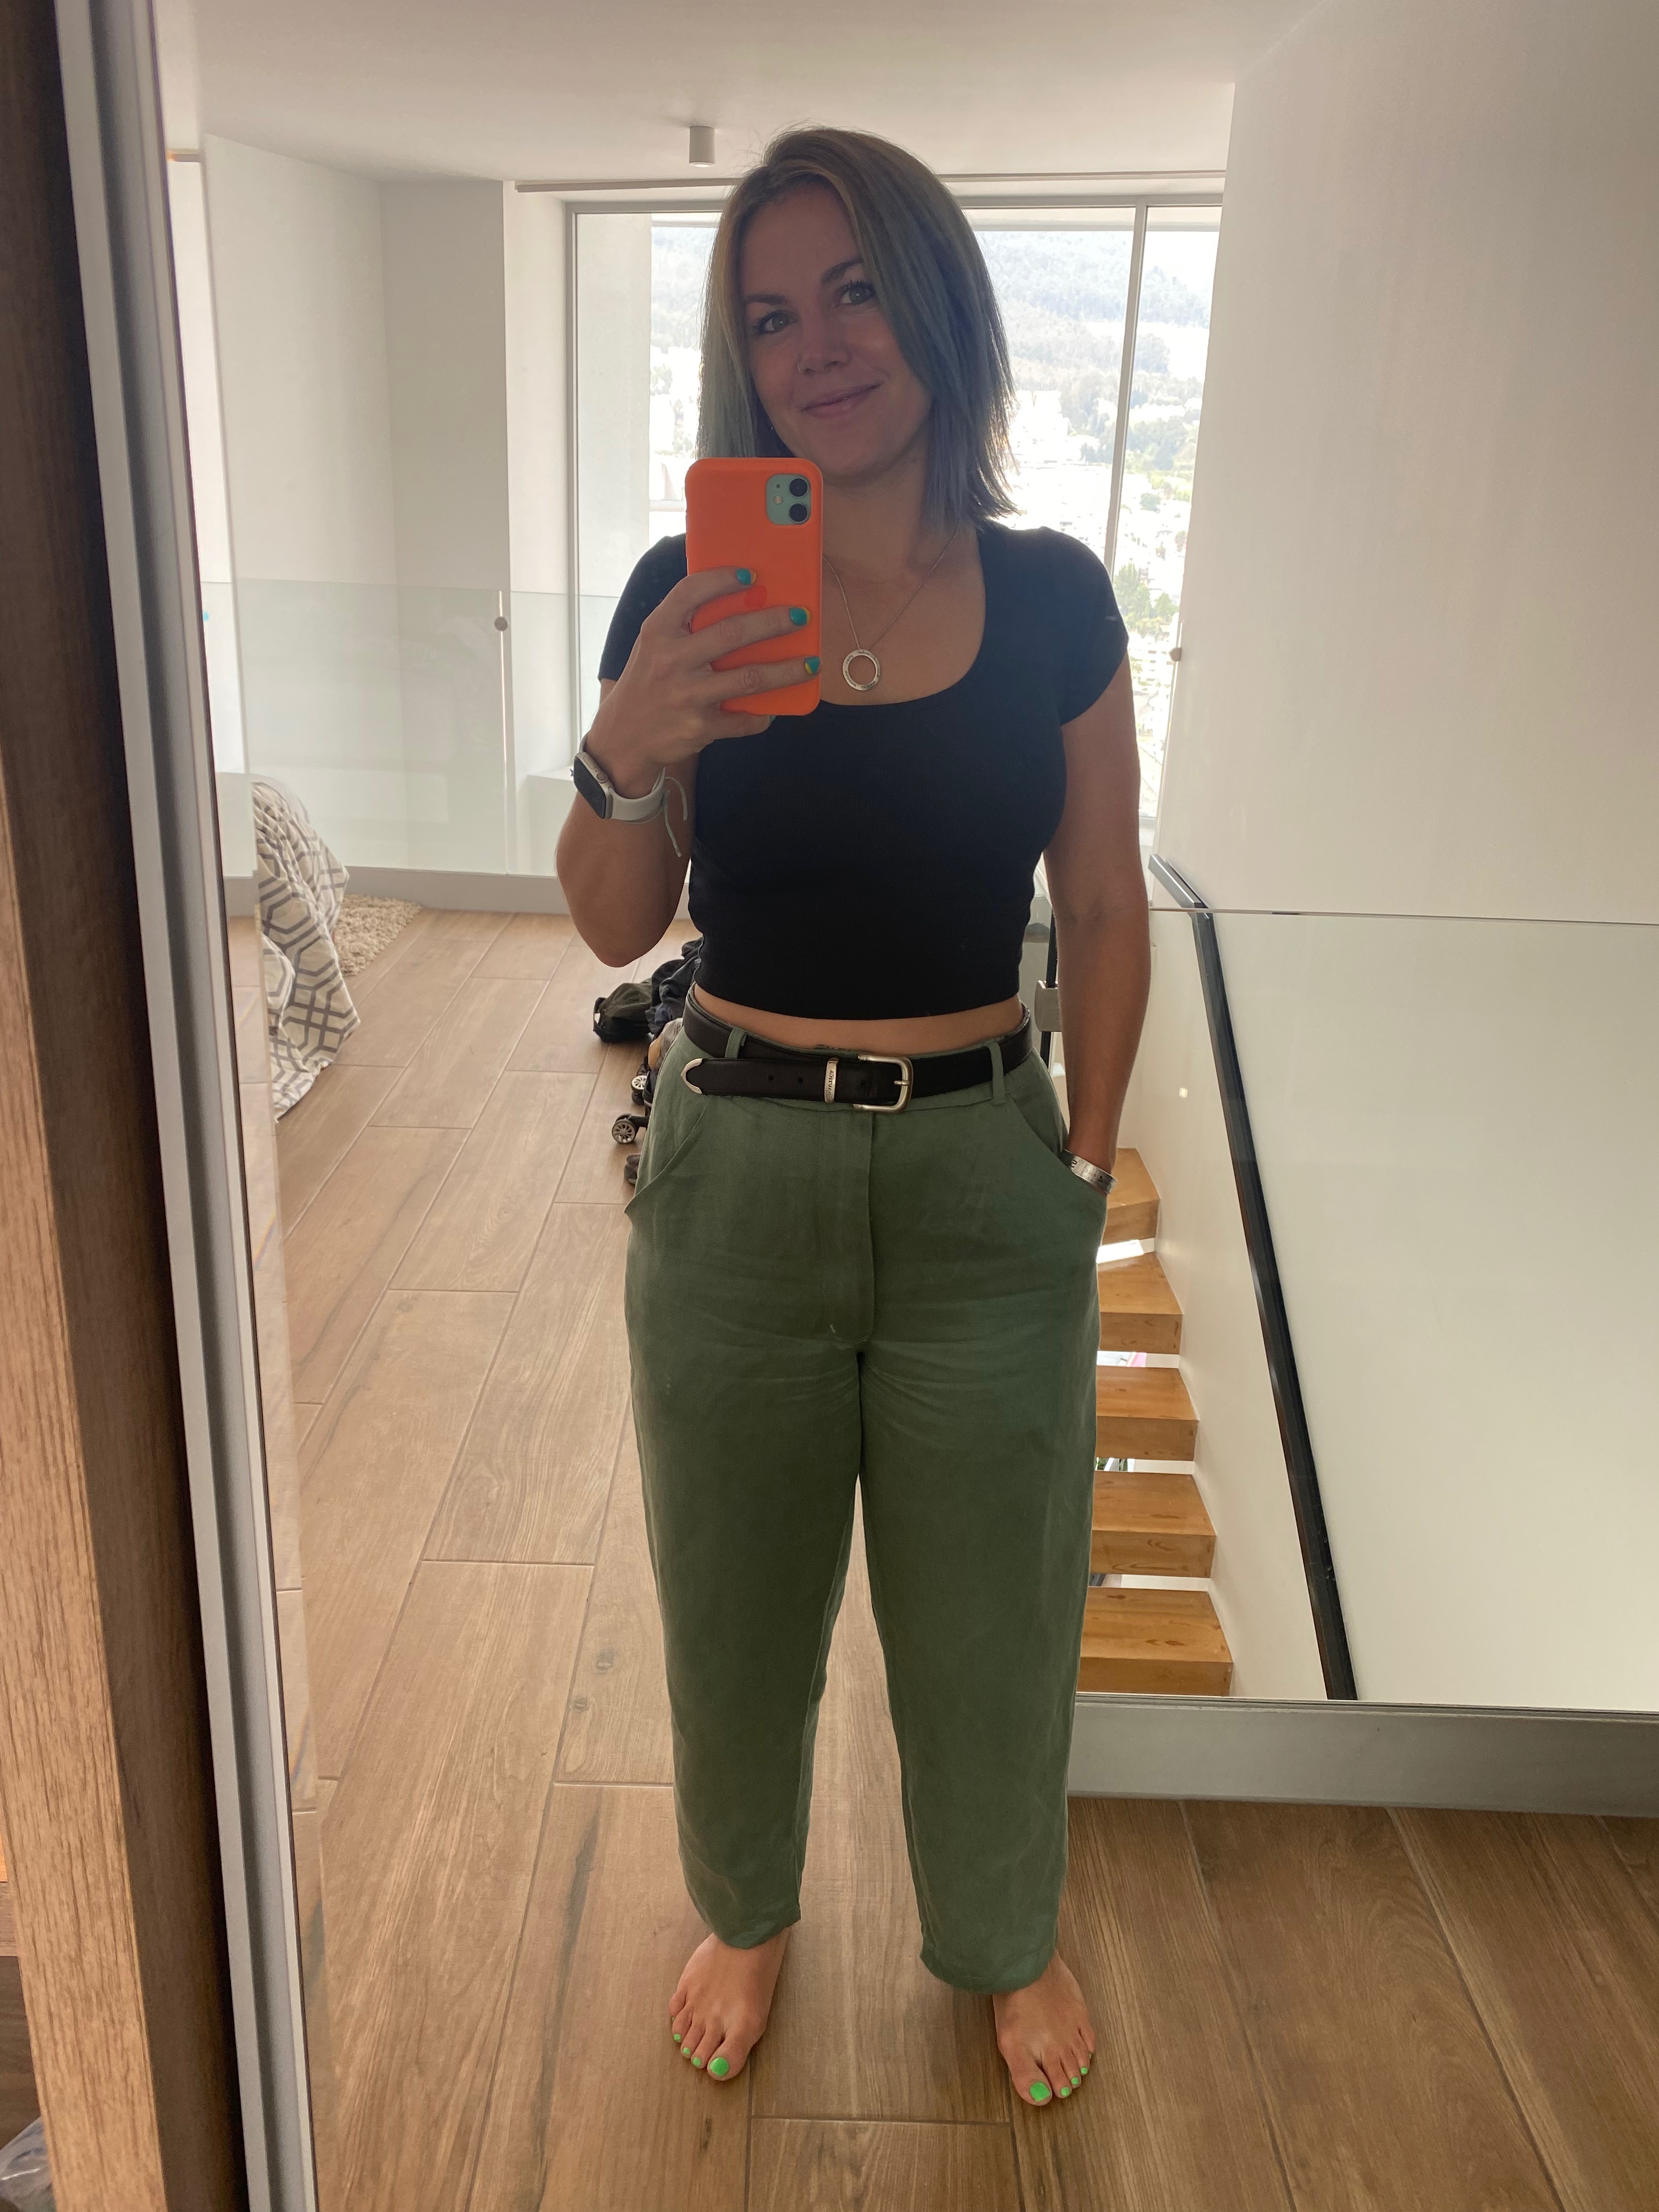

What do you guys think?
I’m off to figure out whats my next project as I finished my list!
![]()