Howdy ho Sewists!
I finally got some pictures of my first successful 2019 Make Nine projects (the story of the failures is for another day) so thought it was time I shared the journey.
This is the tale of making the New Look 6567 and I’ll give you a heads up, it is going to be a long post as it was quite a trip. However, as the title says, I learnt a lot so who knows maybe you will too? I think this will be especially helpful for those petite sewists or anyone who has had trouble with gaping necklines/narrow shoulders out there.
Over the last year I’ve become more aware of trying to sew sustainably and not spend as much money on my sewing. This project seemed perfect then as I got the pattern from a local charity shop for 50c.
I’d had the pattern for about 6 months and then we were invited to a wedding so it seemed a great thing to use it for so I added it to my make nine (that reminds me I need to post about that too!)
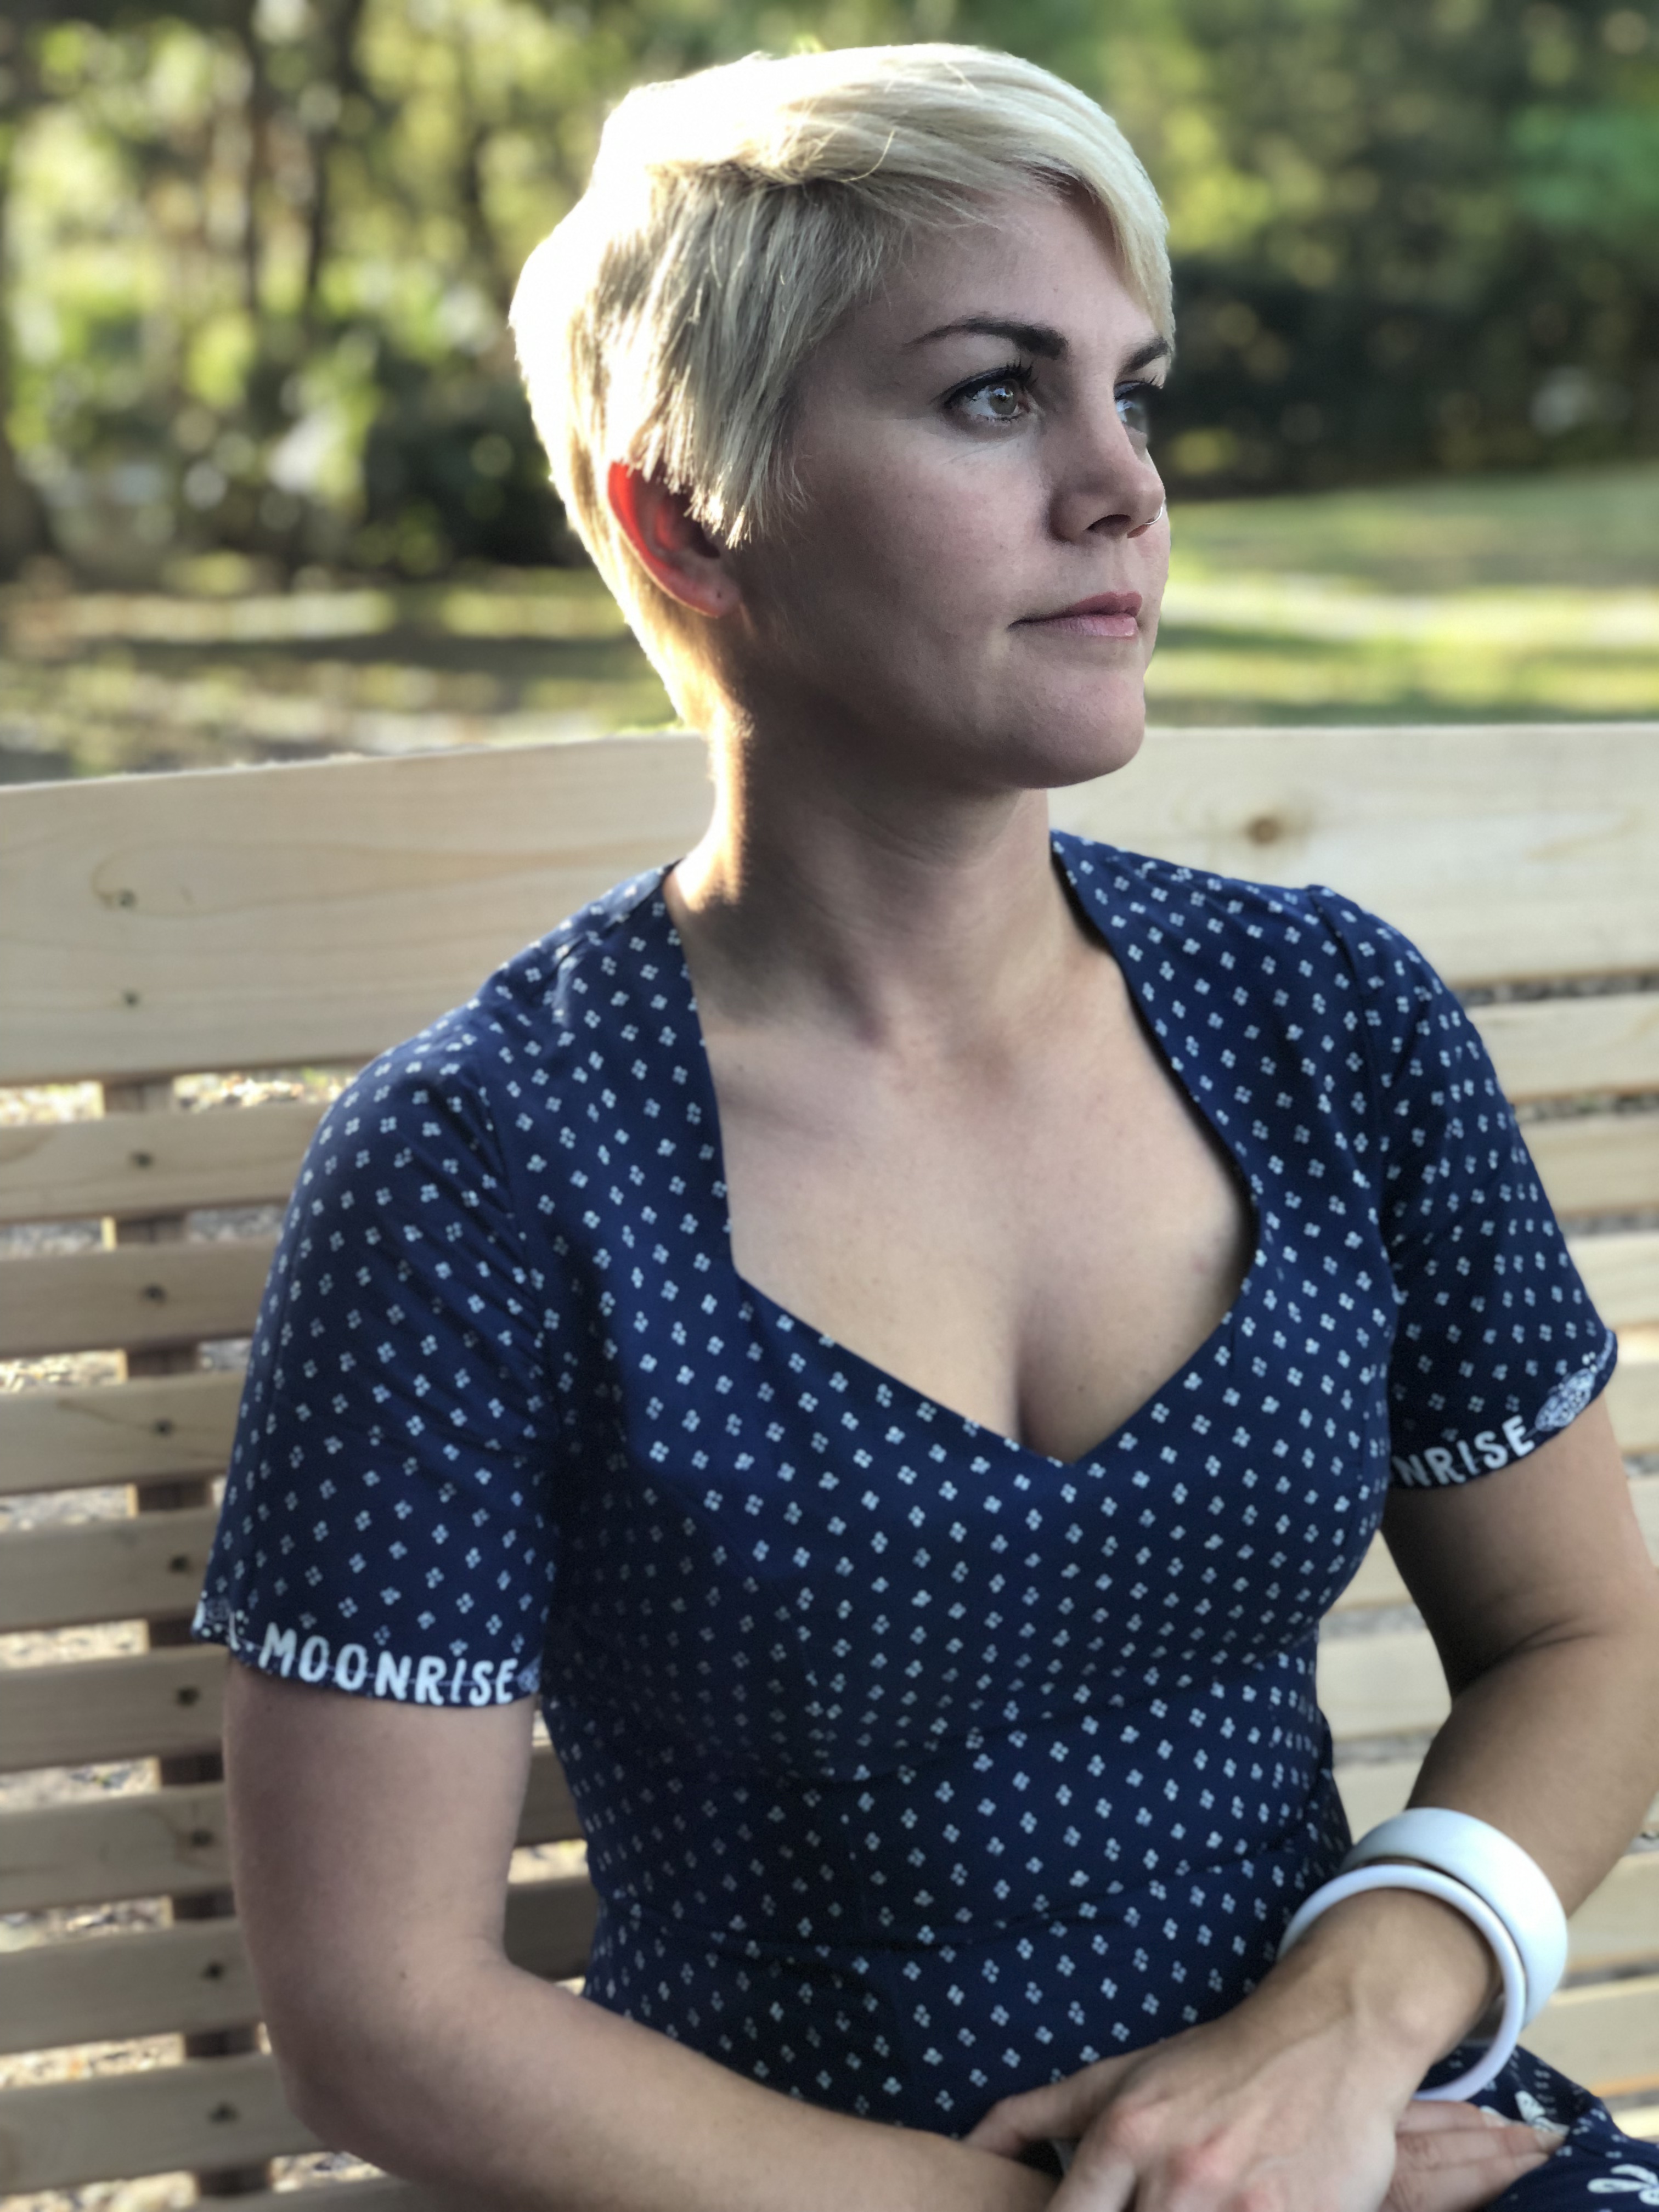
If you’ve read any of my other posts you’ll know I struggle with a lot of fit issues in my sewing. No pattern ever fits me out of the envelope. I’m getting better at diagnosing these but I still know to make a toile. For those of you new here, I’m narrow shouldered but have a fairly large bust, small waist, big hips and thighs, and short above the chest and below the knee – the things sewing teaches us hey!
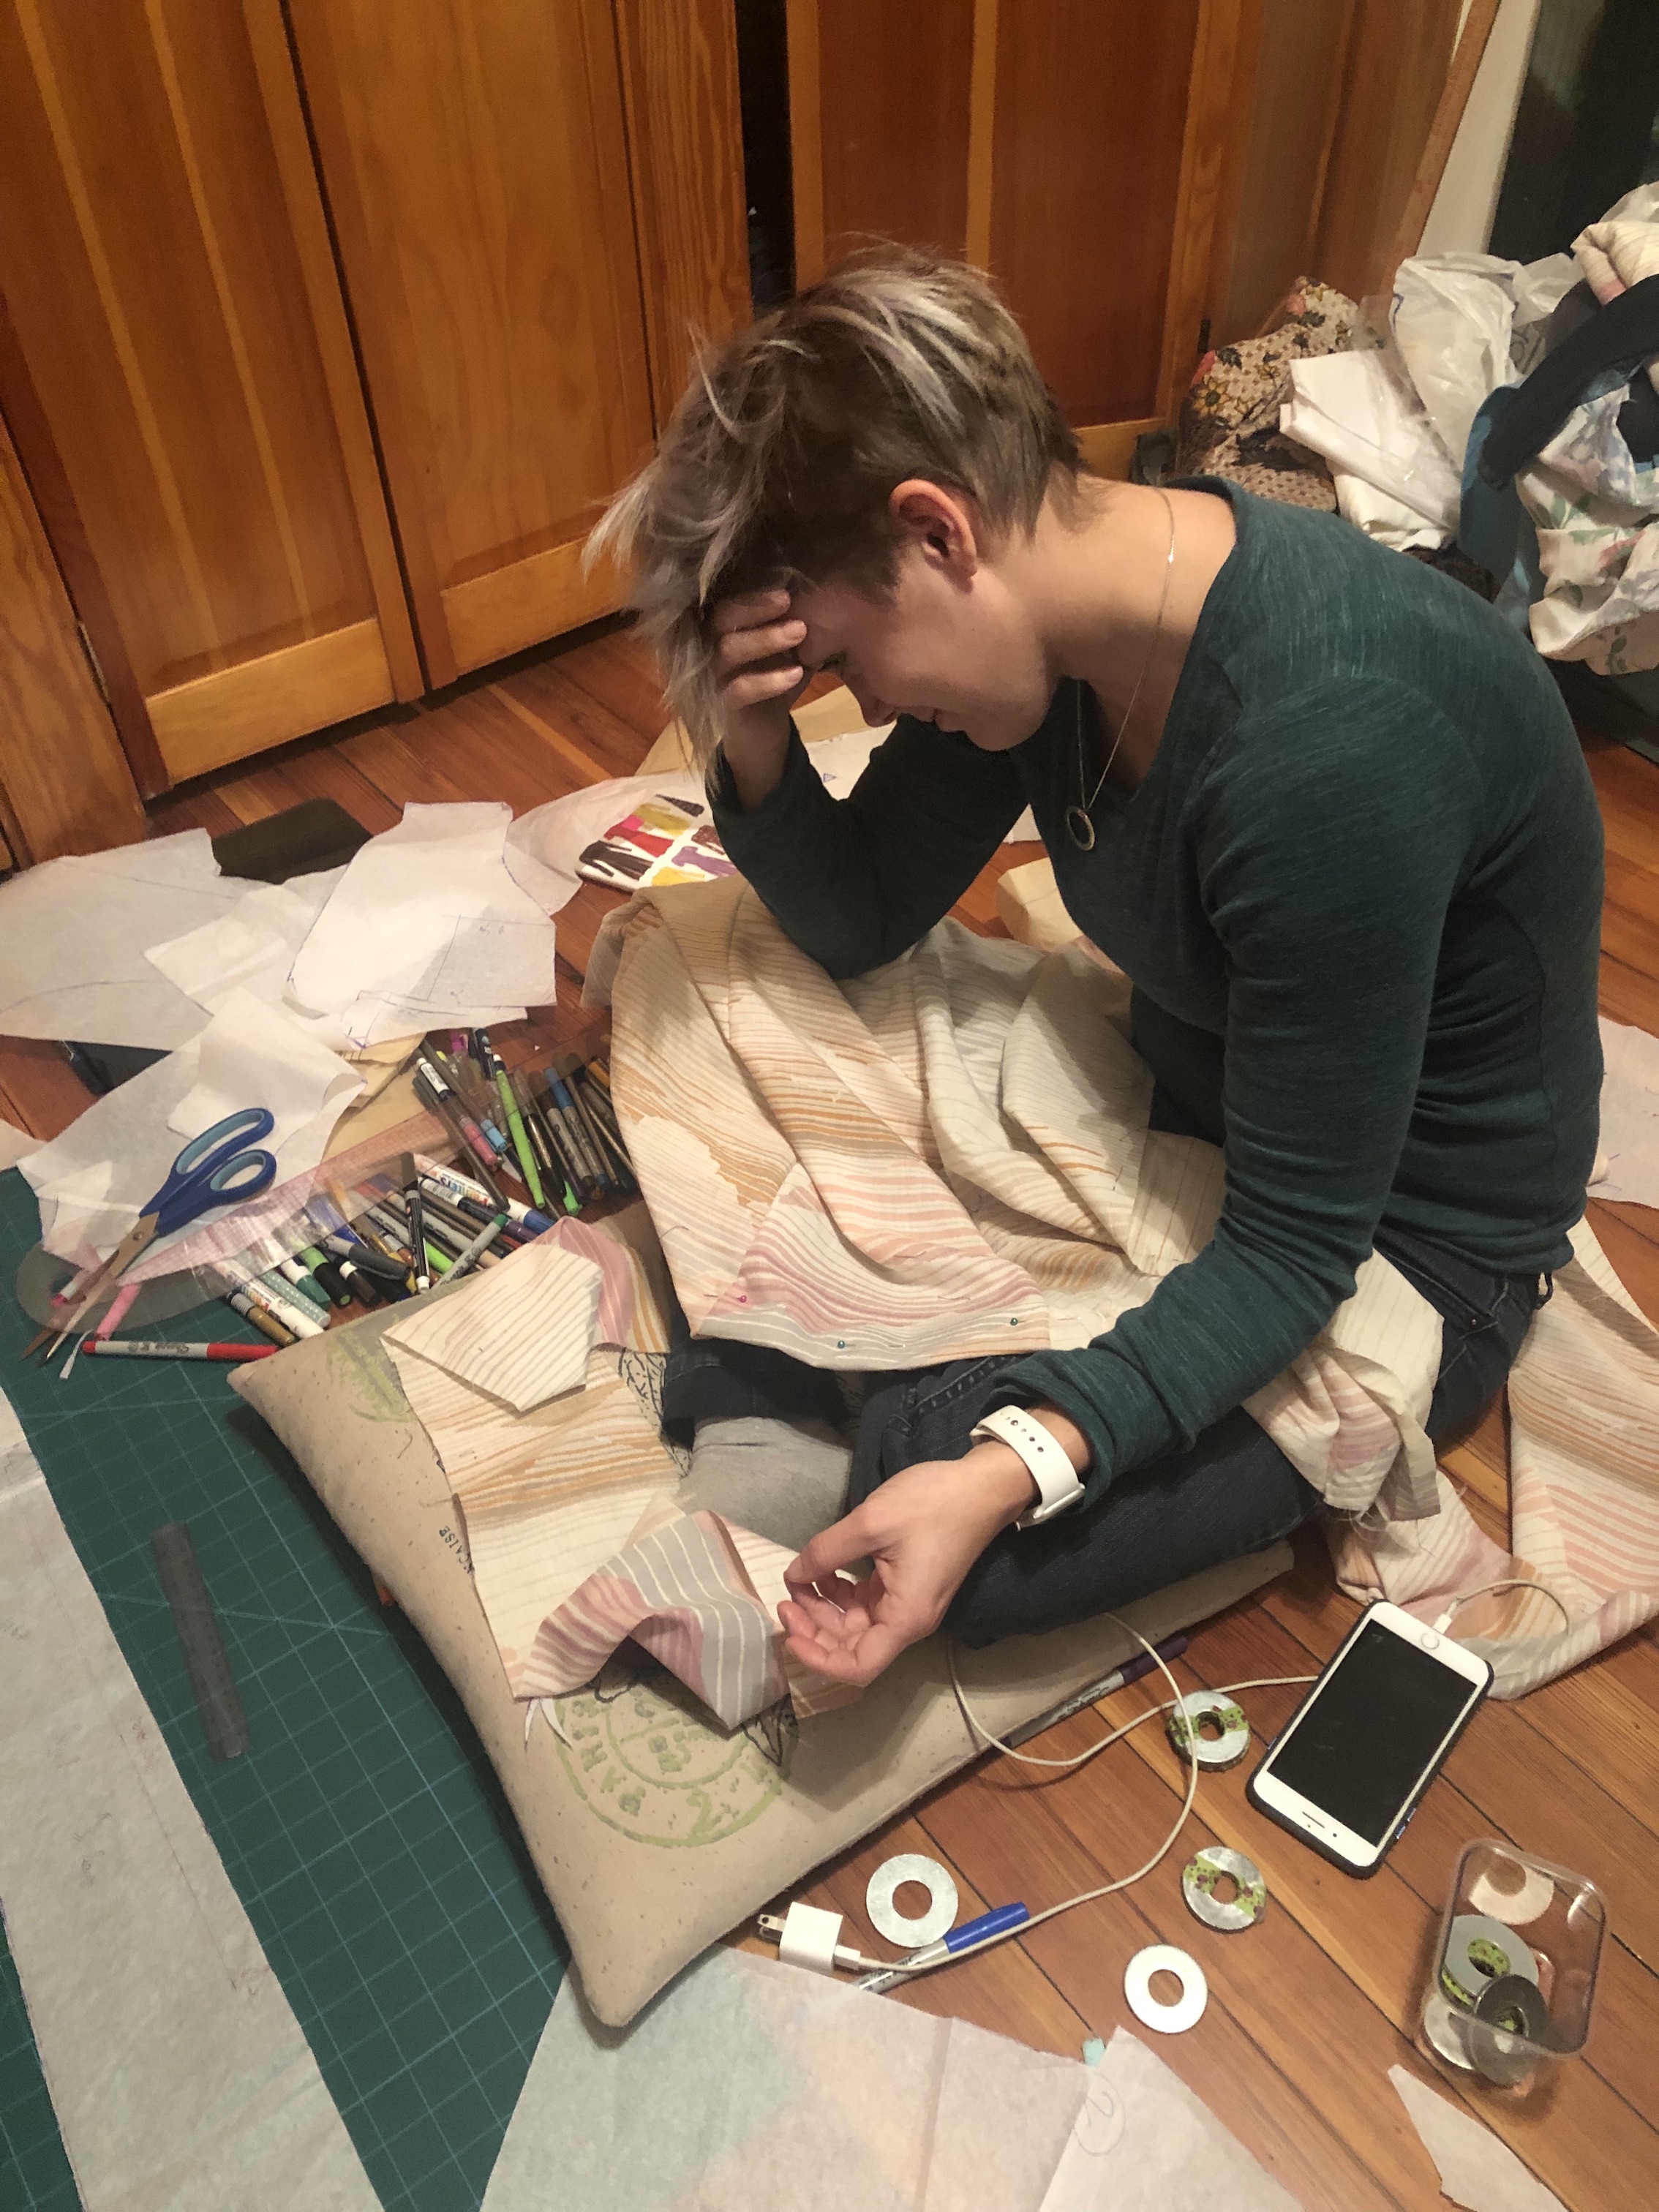
To stick with my sustainable aims I make all my toiles from old bedsheets that I find at charity shops, my favourite has to be Habitat for Humanity. I try to choose ones that aren’t in great shape so I don’t feel like I’m taking them from someone who would be able to use them as bed linen. I find they are great for this as they are huge and as I usually have to make more than one muslin this is ideal.
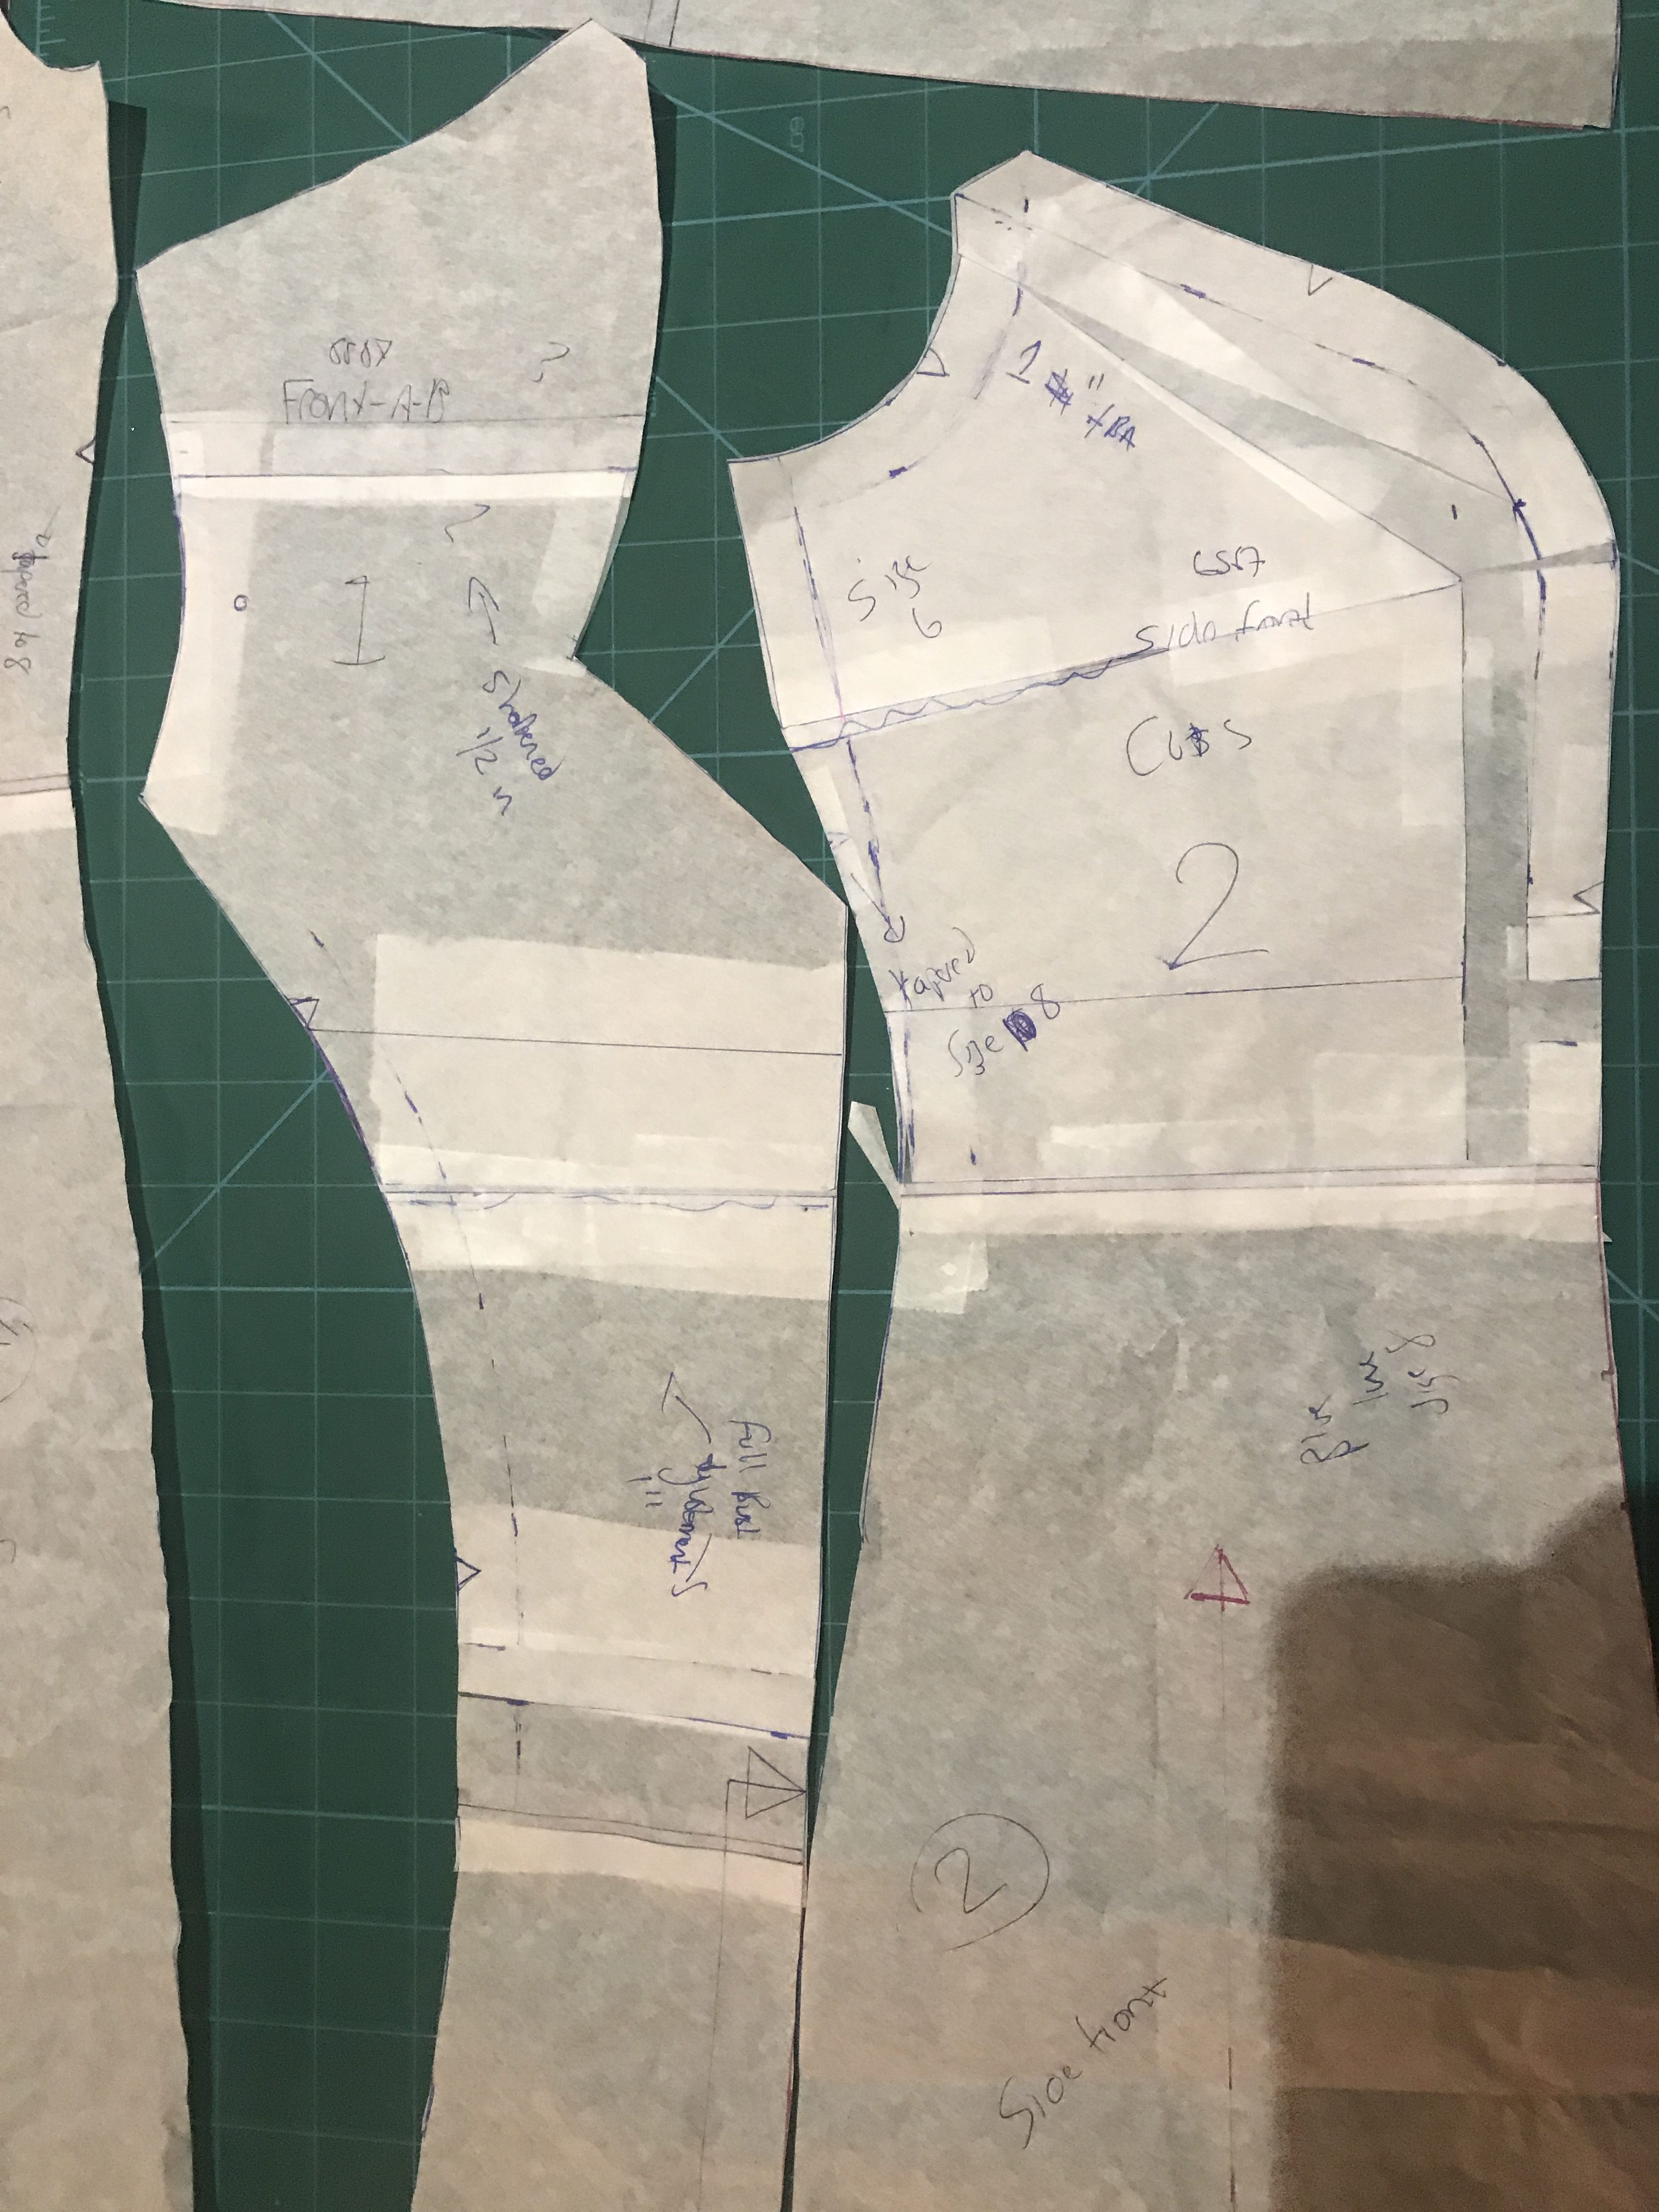
I traced off my pattern, did my usual “petiting’ between chest and shoulder (basically folding out some of the length across the pattern, preferably below the arm scye), with this being a princess seamed dress I wasn’t 100 % sure where to do this so I gave it my best shot. I also narrowed the shoulders.
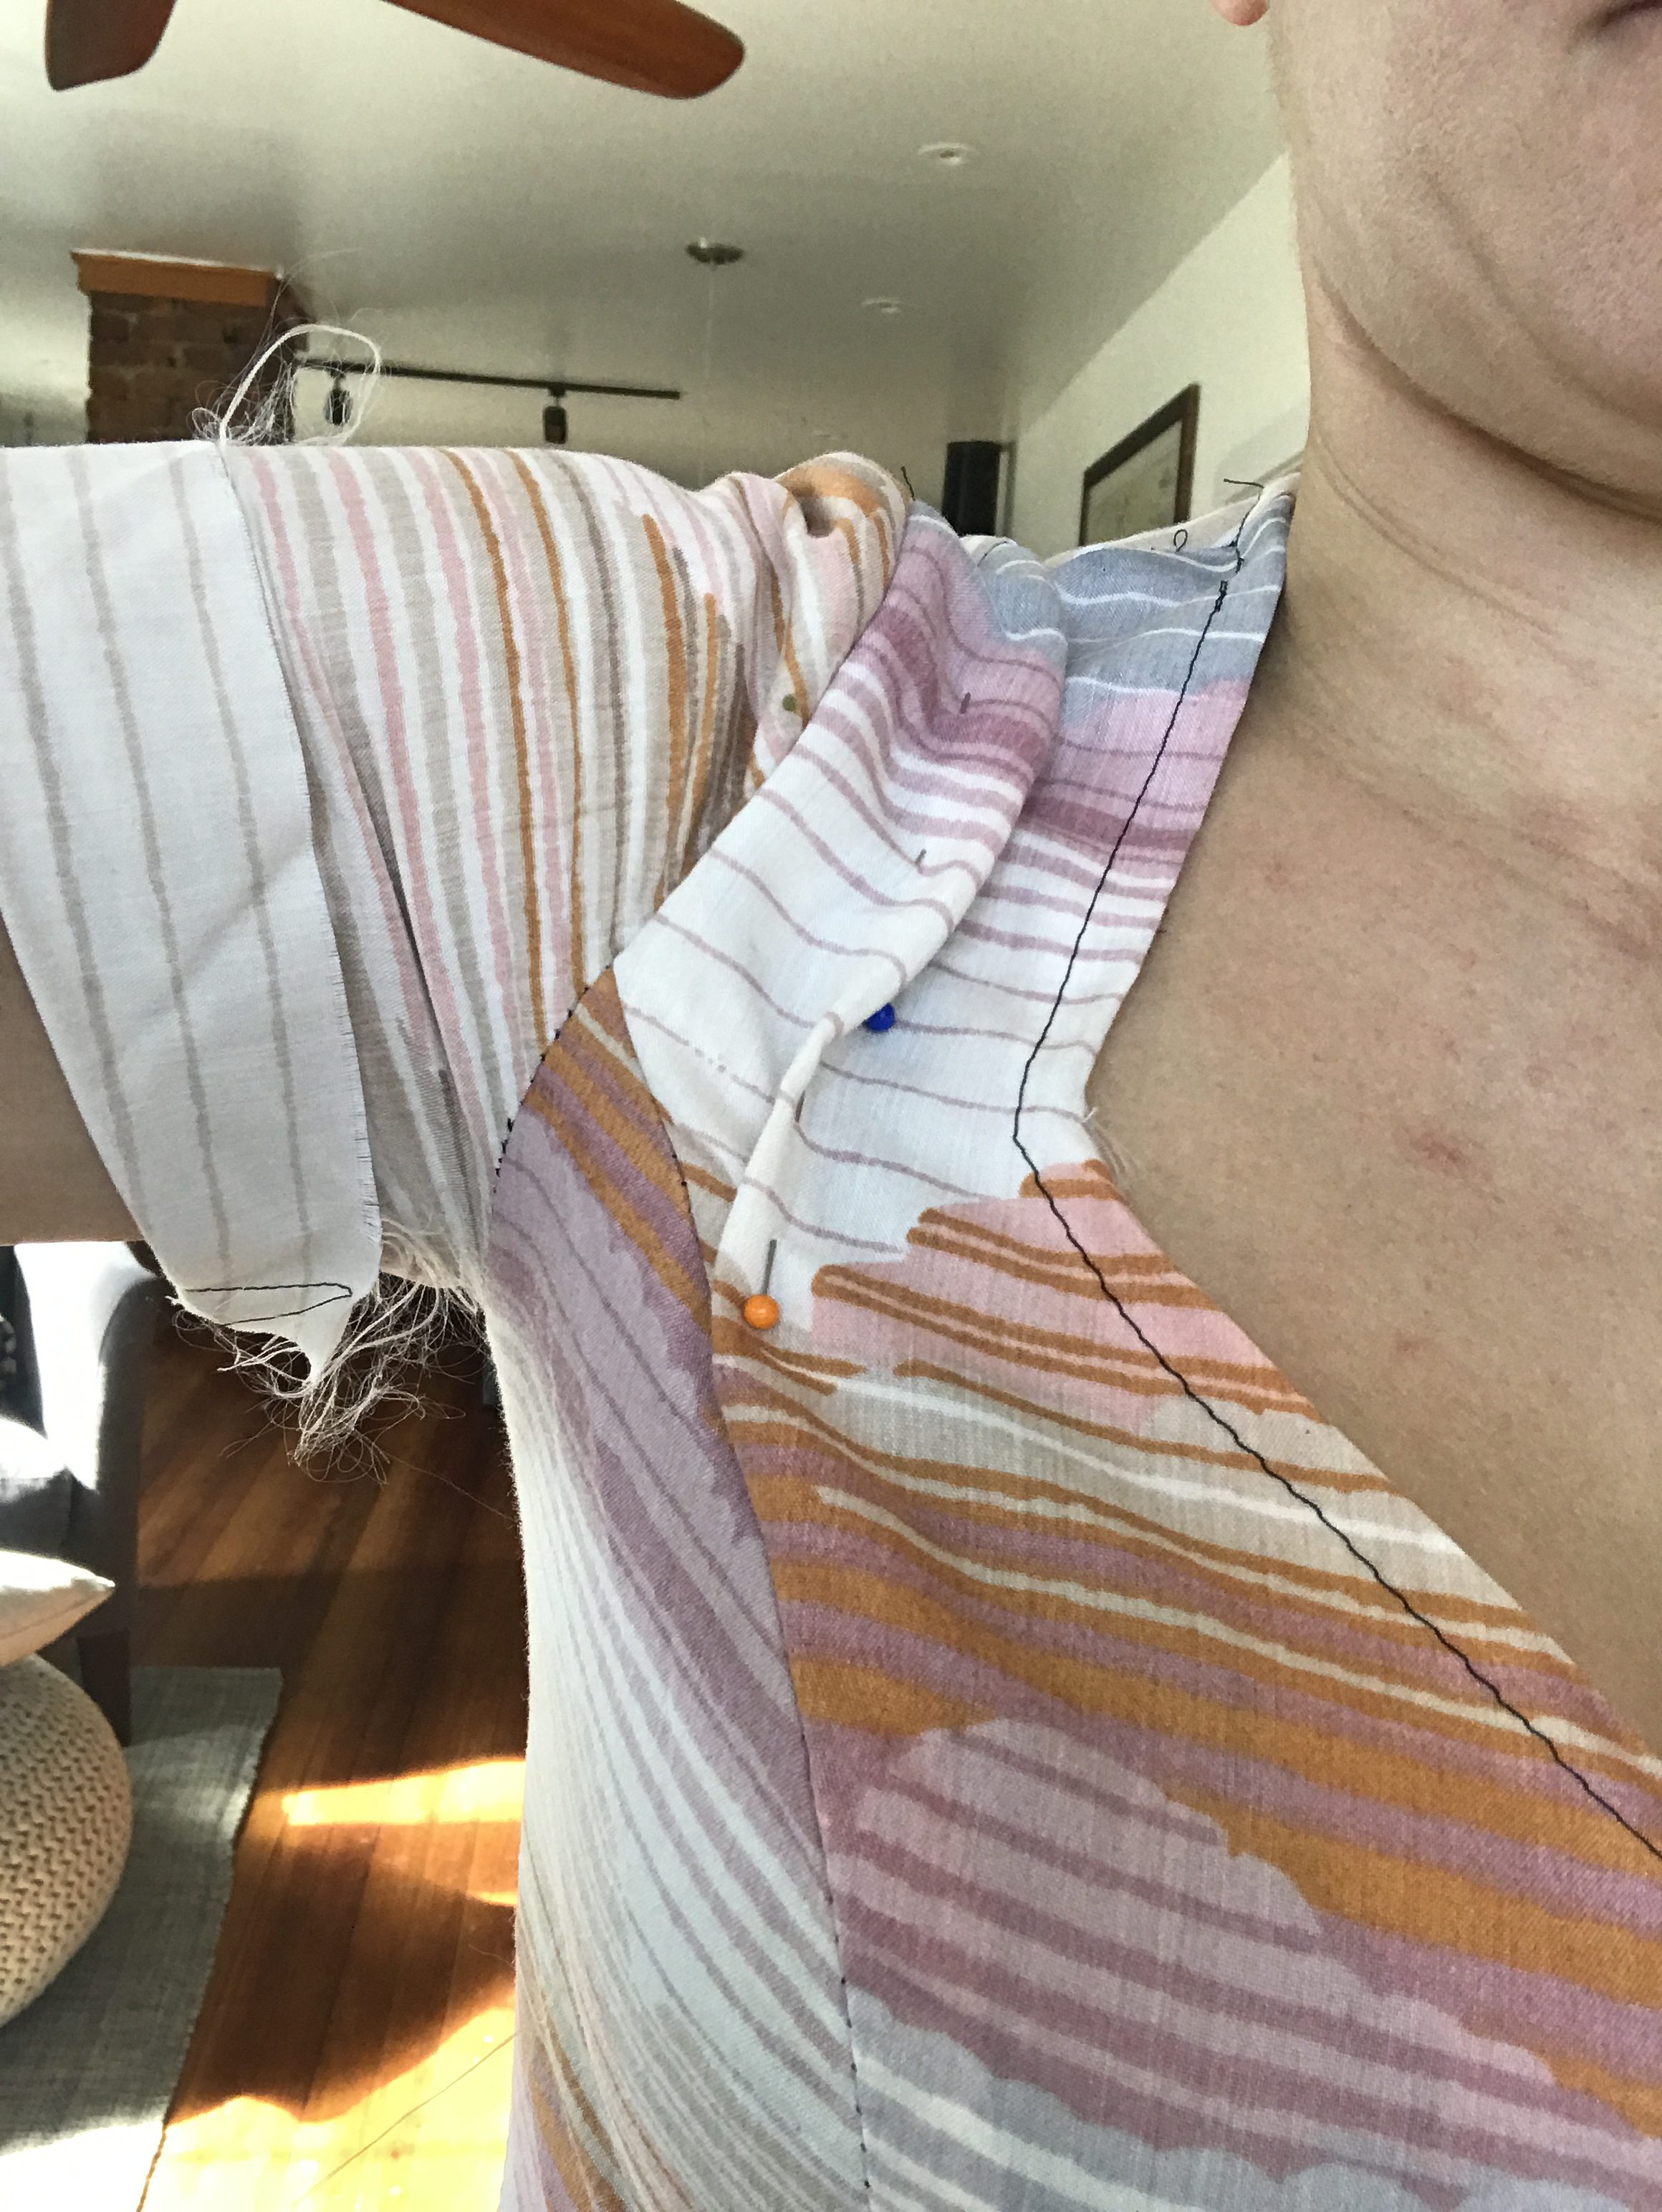
I sewed up the first version and that “easy” stamped on the packet truly wasn’t lying. It was such a nice dress to put together – so fast! I was feeling super positive when I tried it on but decided to be safe and put the zip in. Man, I’m so glad I did as I realised I had a HUGE amount of fabric at the back of the neck – it made the zip stand up and away from my body. I’ve had this issue before but it’s usually only like a cm, this was more like 3.5 on each side! It was such a shame as it looked great from the front!
 Usually I just remove the zip., fold out the excess and reapply the zip but there was just so much fabric it seemed like this couldn’t be good and would totally ruin the grain of the fabric. I wanted to figure out the alteration correctly so I posted to the wonderful patternreview. If you’ve not used this yet you really should. The members are SO knowledgable and so generous with their time.
After a few back and forths the general consensus was that the whole dress was simply too big for me and that I needed to size down. During this time I got in contact with a sewist on Pattern Review called Bunny who is built very much like me and has been sewing for years, she blogs over at La Sewista It turns out it was her blog post I orginally found on “petiting” patterns.
We started E-mailing back and forth and Bunny was such an amazing help to me. Having someone who has had the same issues as you is fantastic as they understand so much better. She took a lot of time out in responding to my ridiculous amount of questions.
She agreed that I should size down but she also said I needed an FBA as I’m a C cup. I showed her where I originally petited my pattern and she explained where to do it instead.
 I was super excited that this would be it, but of course, it was not. Overall the fit was better but unfortunately the neck gape at the back was still substantial.
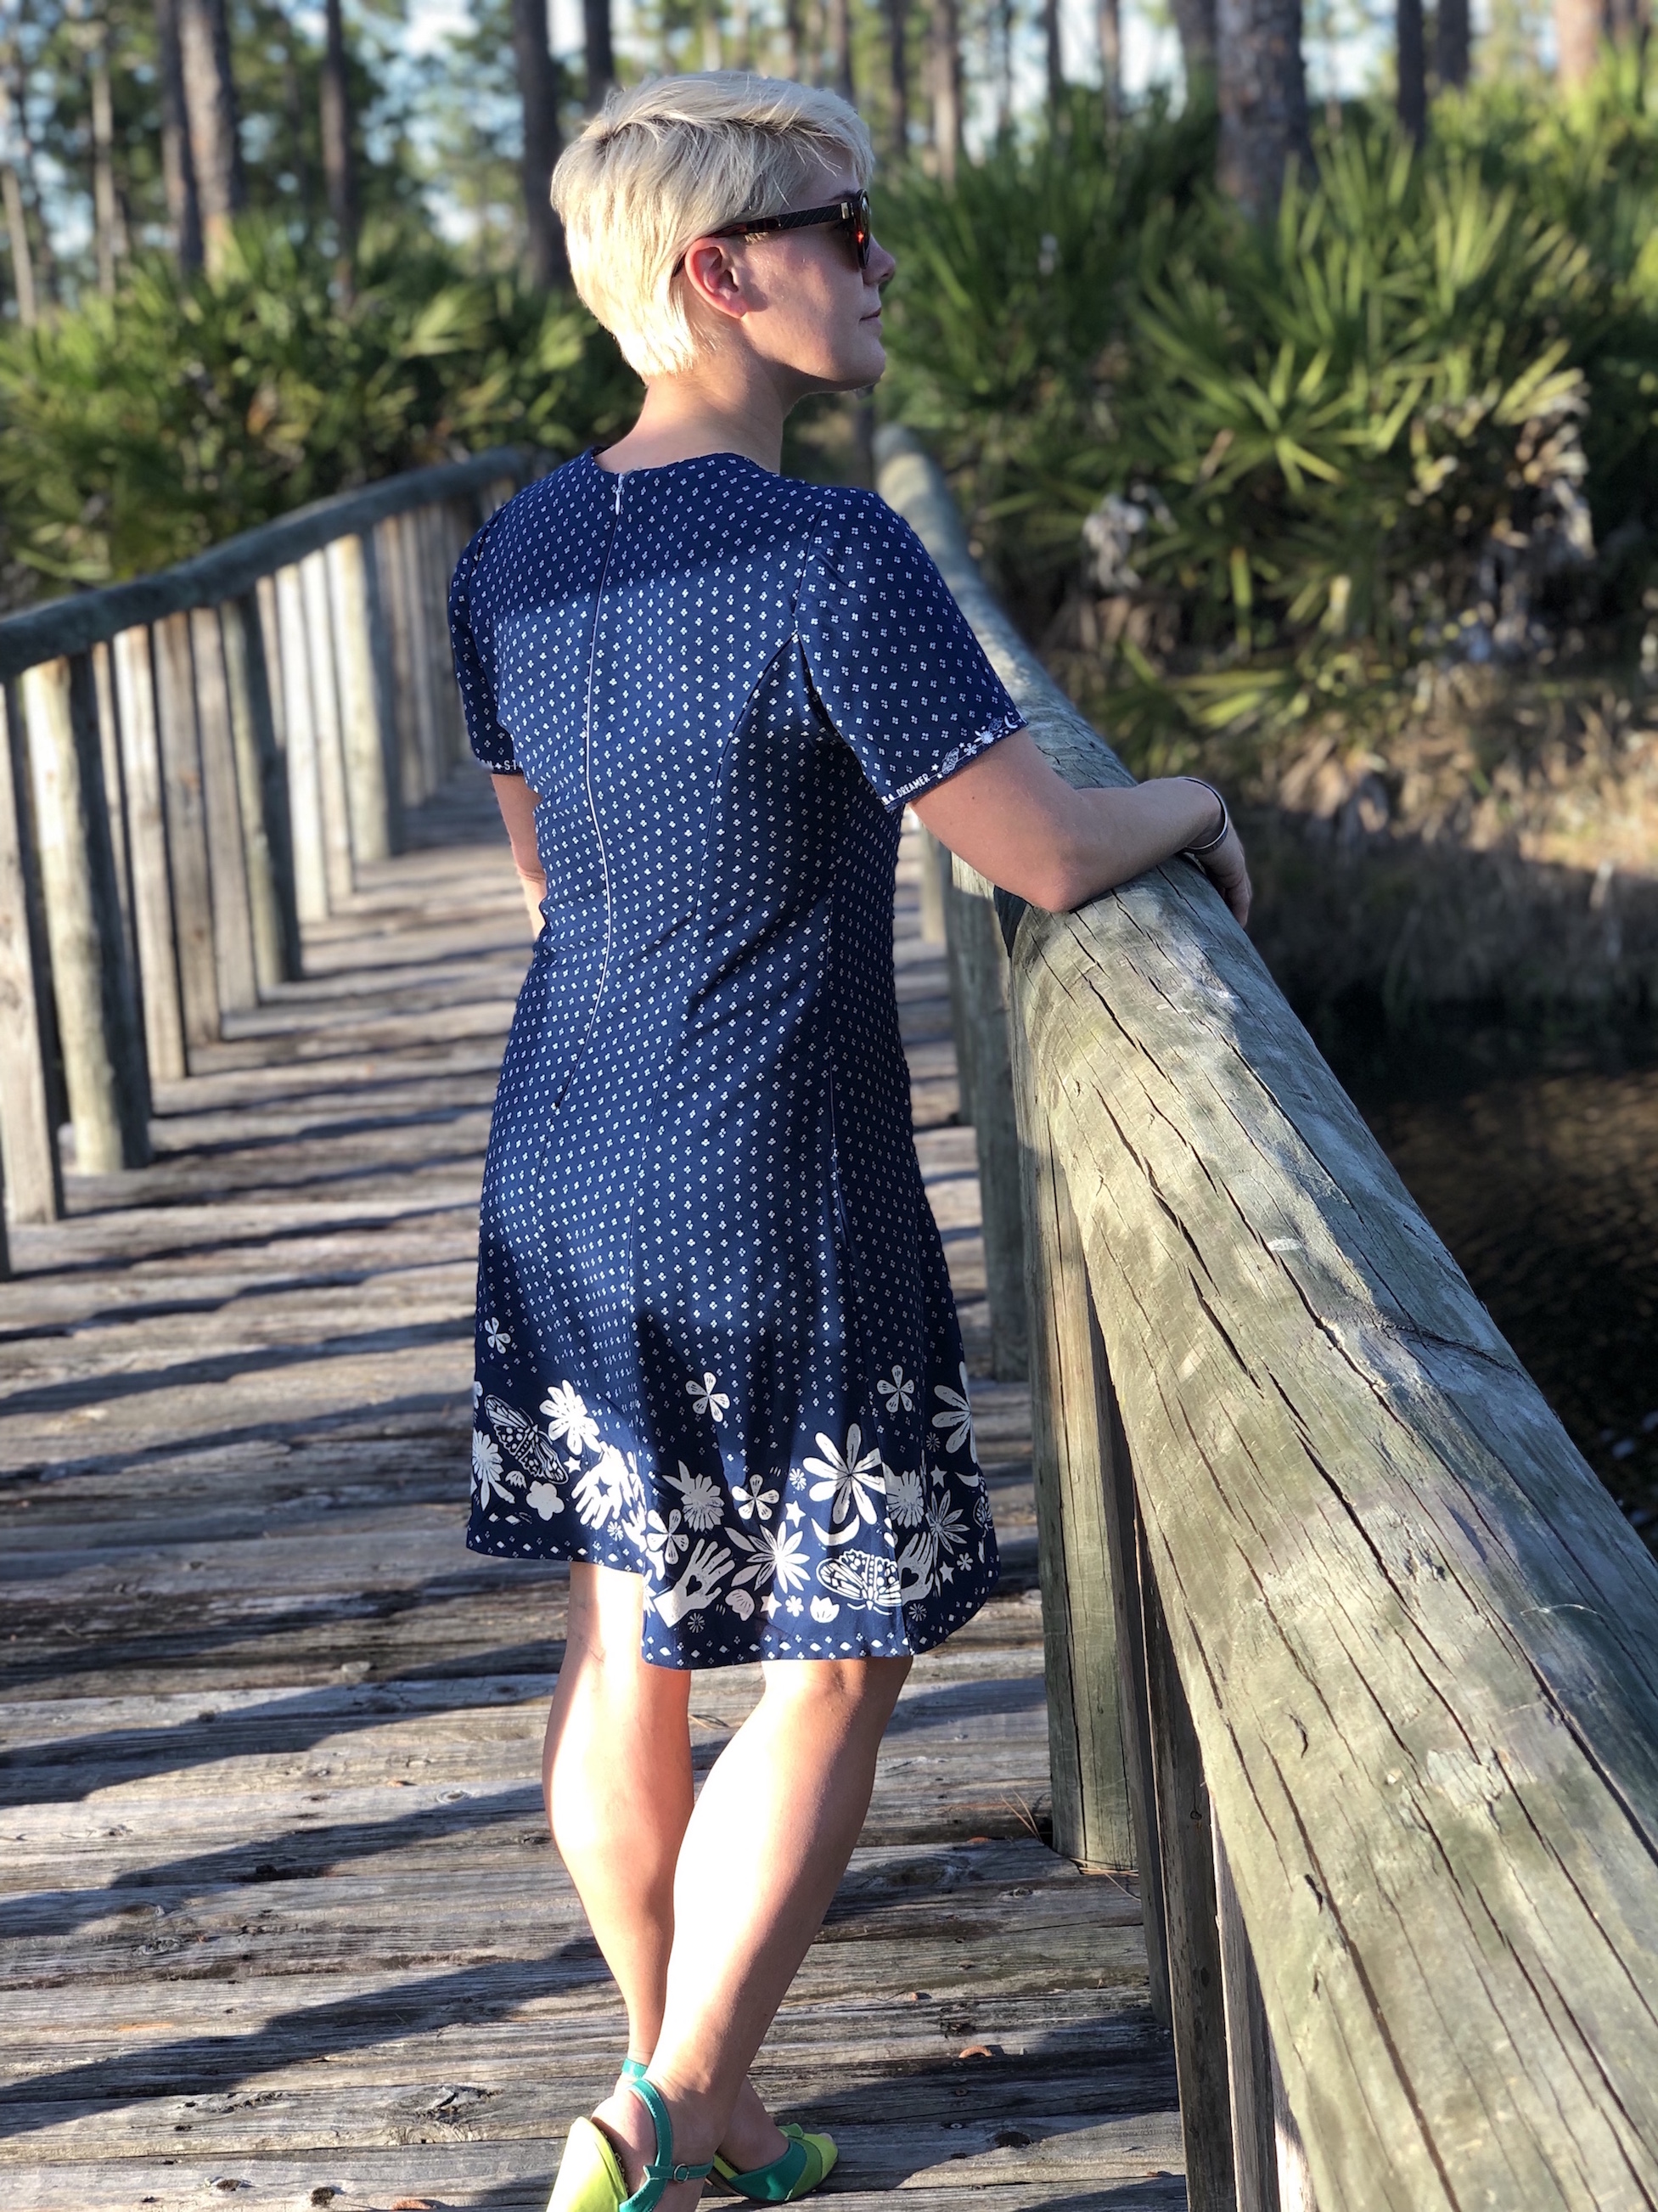
 I ended up pinning out darts at the neckline which helped a lot. The issue then though was that I didn’t want darts in the back of the final version, so how to change the paper pattern to reflect the shape I needed?
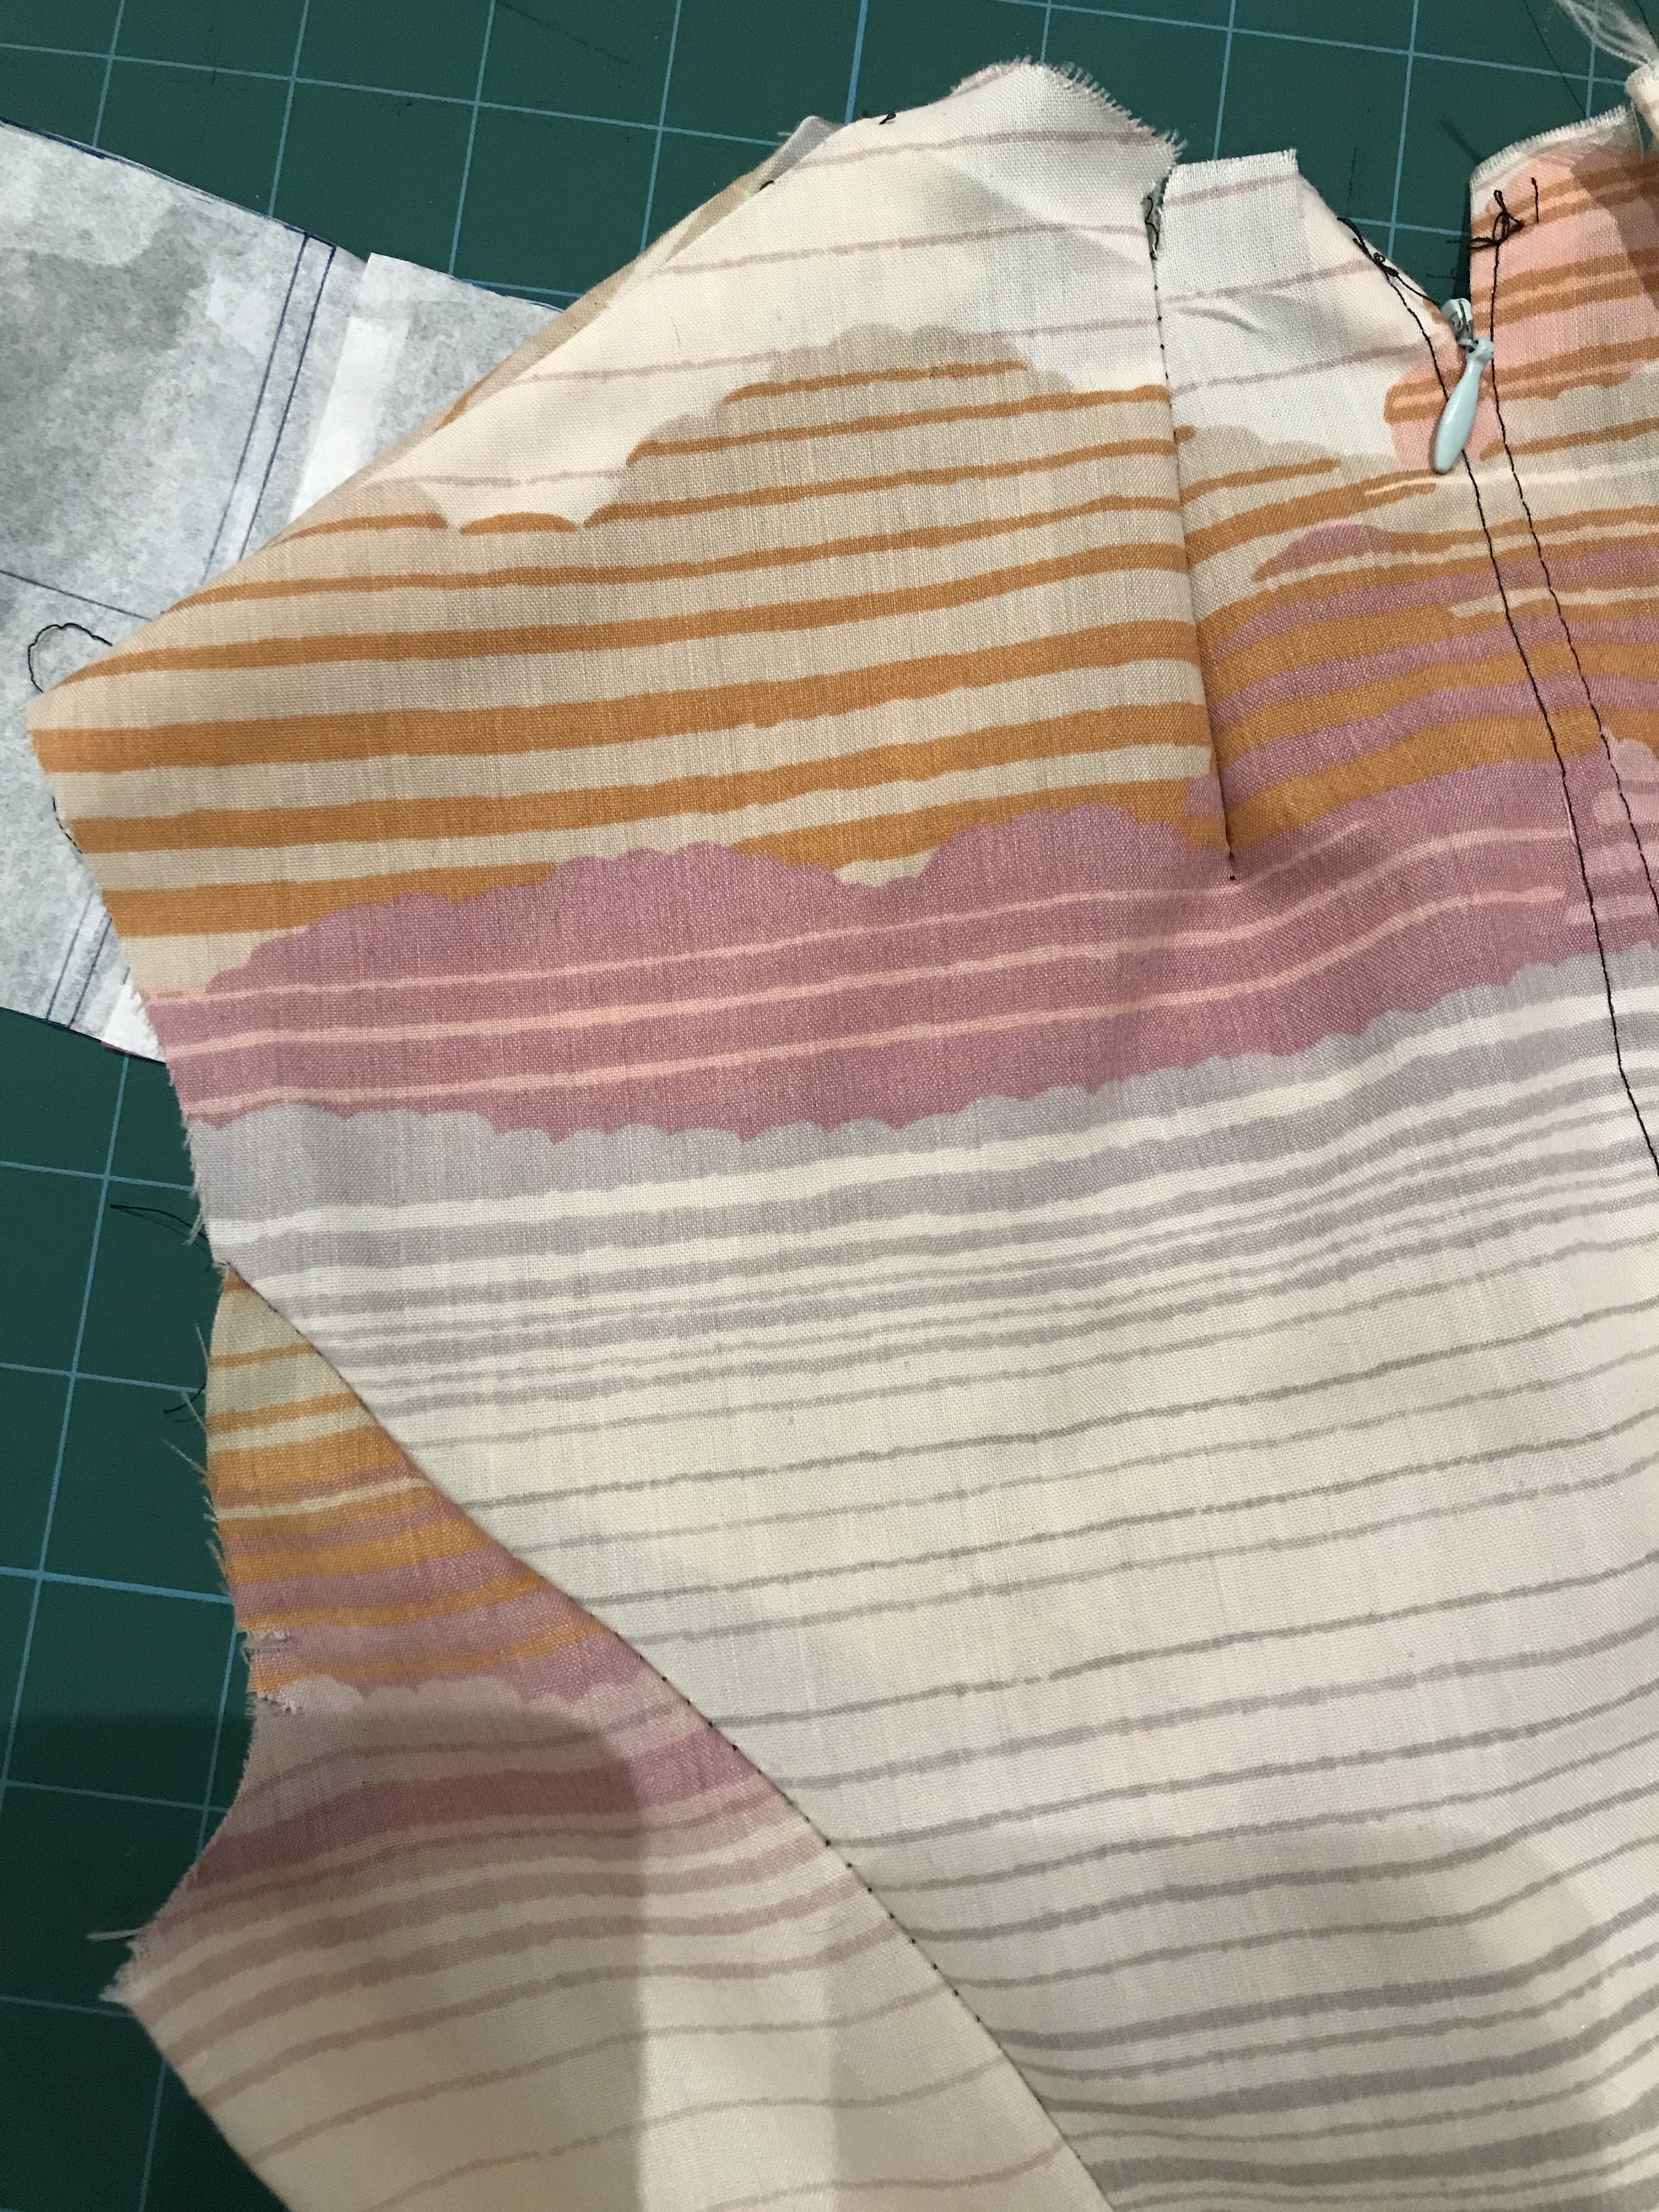 At the same time as trying it figure this issue out, I’d admitted to myself that the sleeves really weren’t right – whenever I tried to move my arms forward the sleeve would dig into my arm – nightmare. Oh and it seemed like there was still an excess of fabric between chest and shoulder.
Again the great sewing community, both on Instagram and Pattern review were forth coming with lots of suggestions. I’ll admit it got a bit overwhelming as there was some contradictory advice – namely some saying the armhole was too low while others said it was too high.
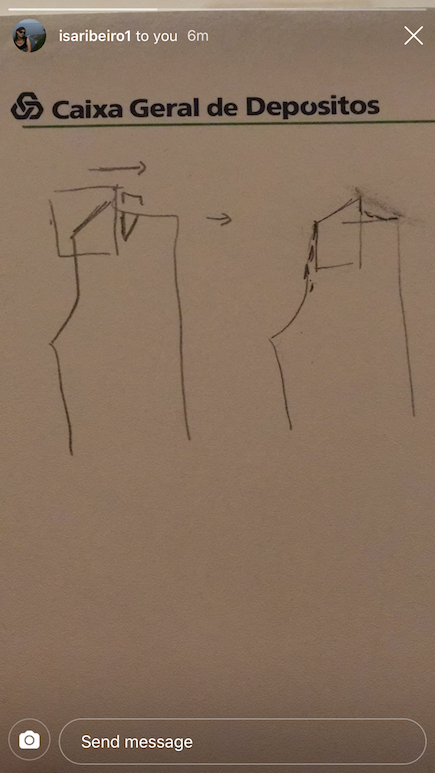
So, while I was mulling all that over I worked on my back piece. I got a few different pieces of advice:
- dart manipulation
- tracing the muslin piece
- cutting and moving the shoulder
I drew all three out and decided to go with cutting an moving the shoulder as recommended by Isa of Isaribeiro1.
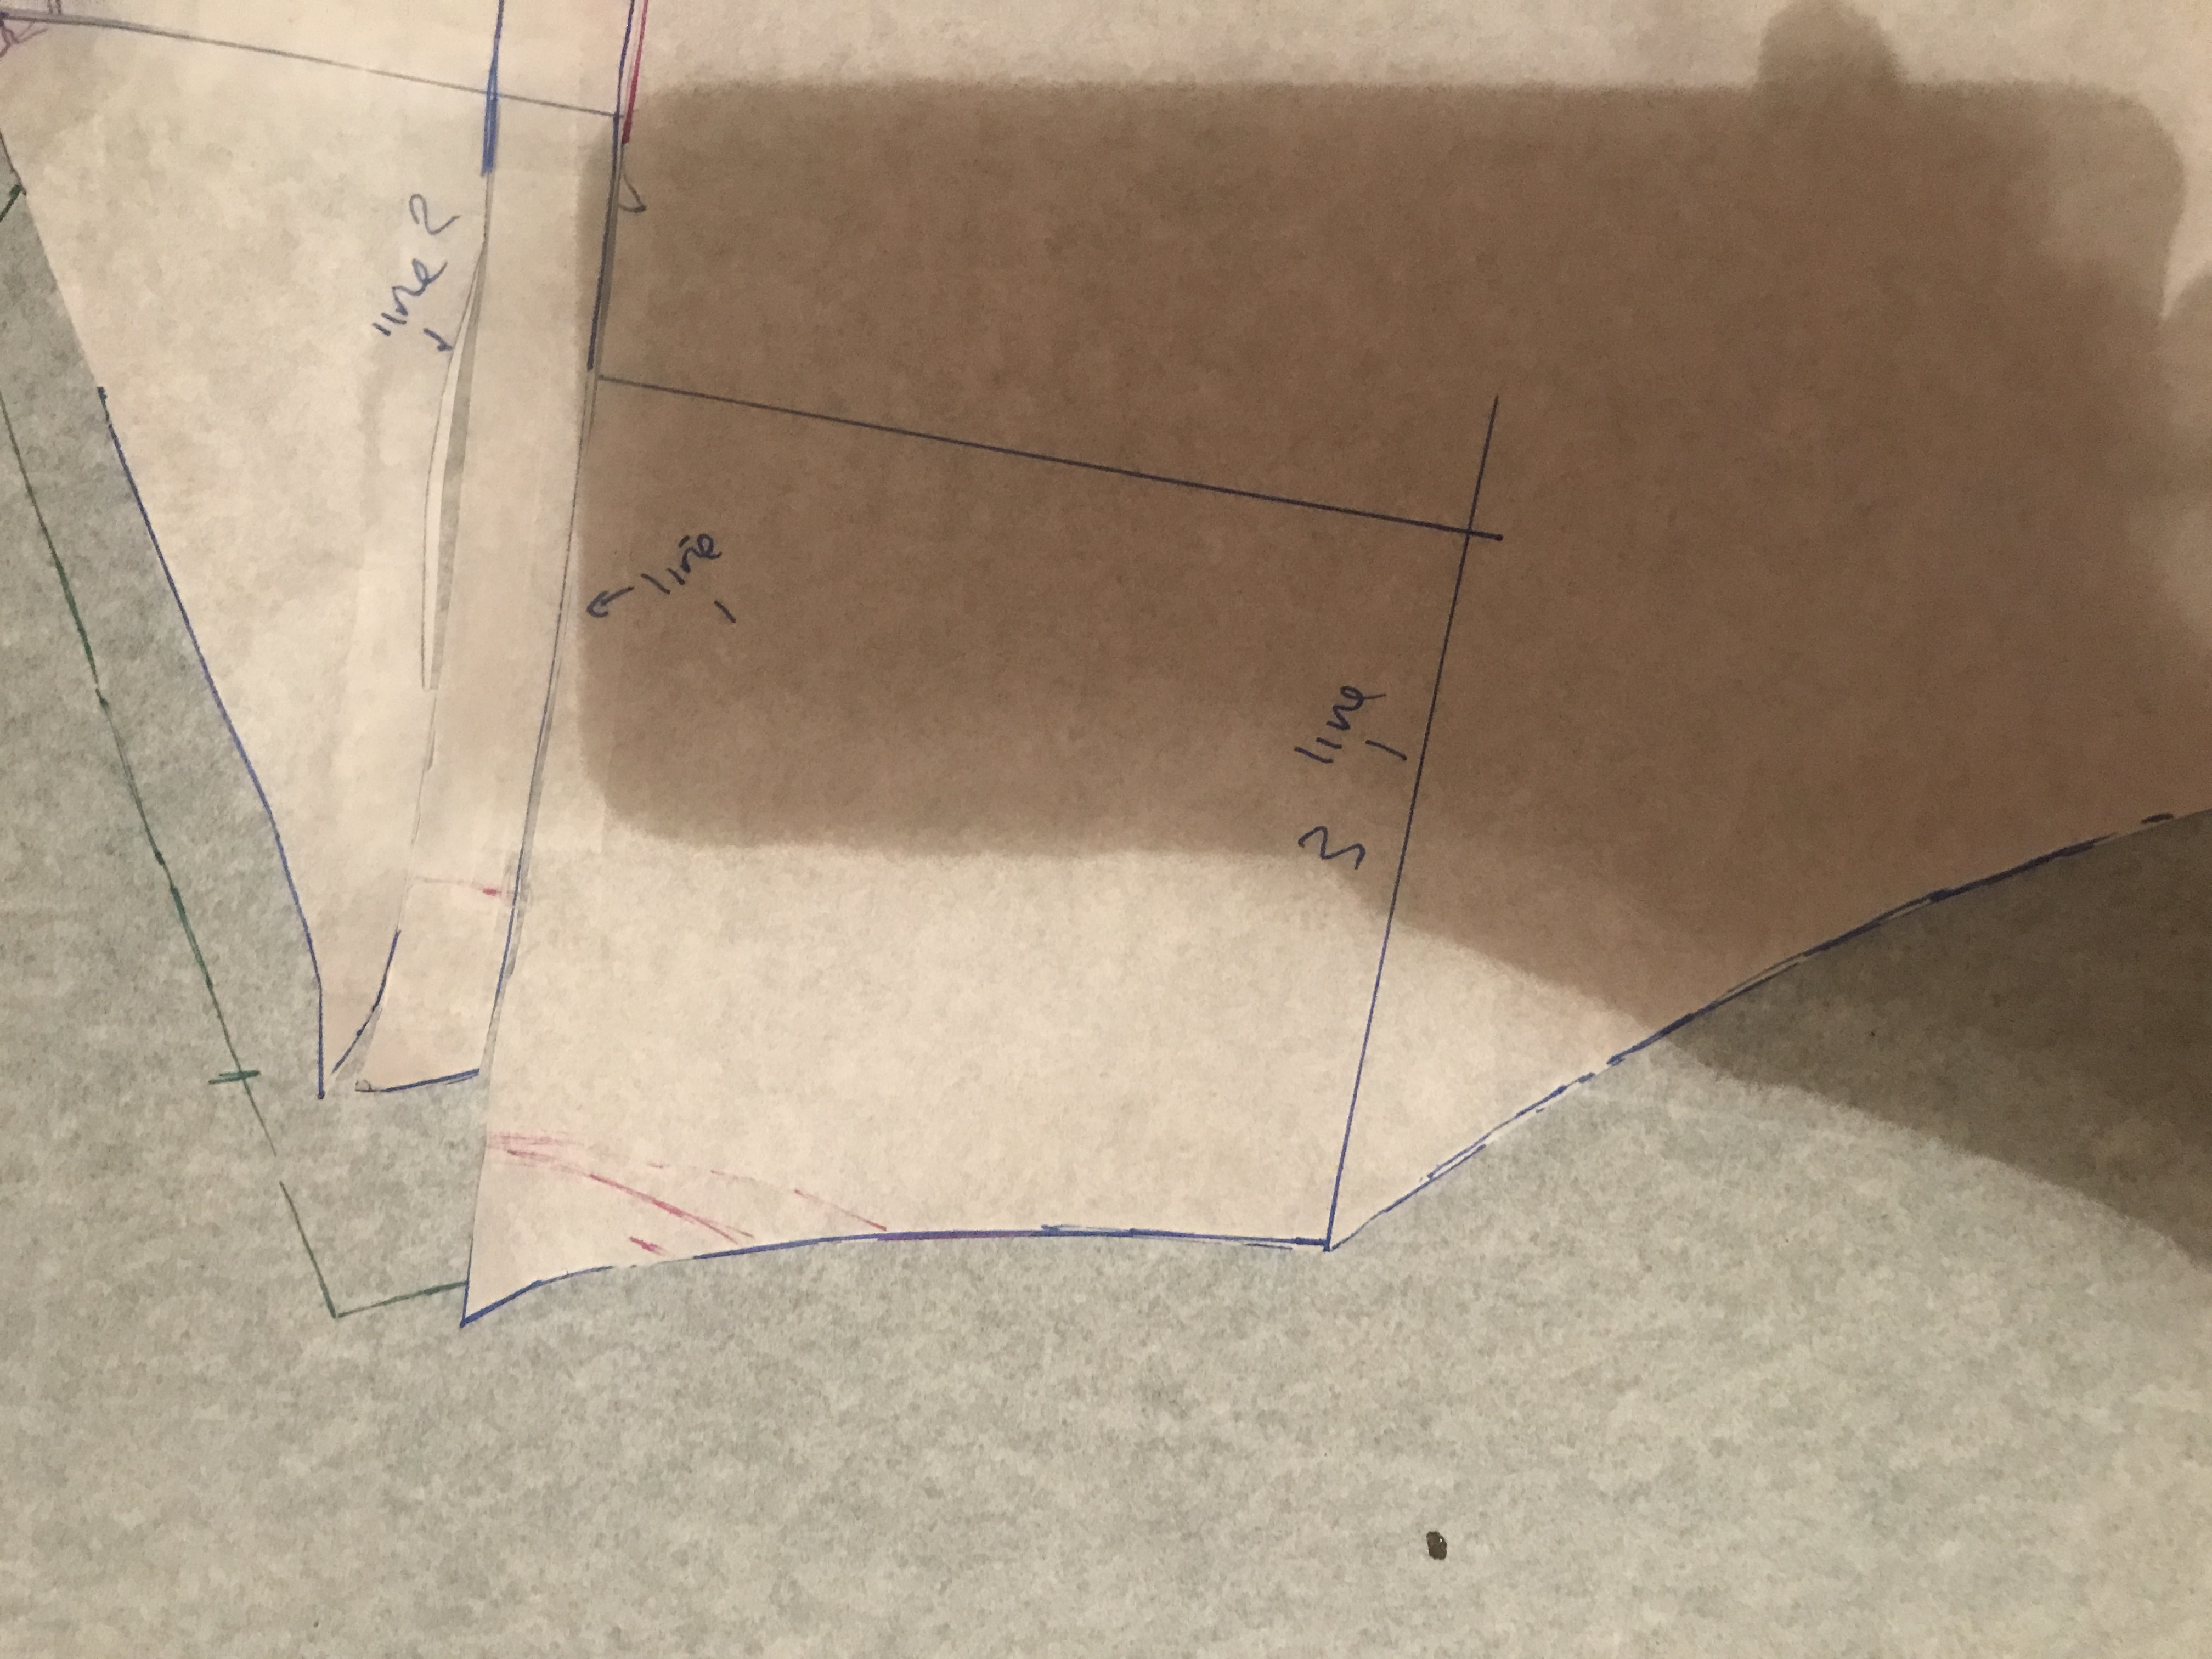

But then I needed to work on the other issues. First of all I narrowed the shoulders even more and also did a forward shoulder adjustment as I realised the shoulder seams were sitting in the wrong place. Then for the arm specifically:
My first try was to go for a large bicep adjustment.
Unfortunately that didn’t work.
I then tried a slight broad back adjustment, again, no luck.
I tried unpicking the underarm to see if that gave me any clues…still non the wiser.
 I’ll be honest, I was reaching the end of my tether
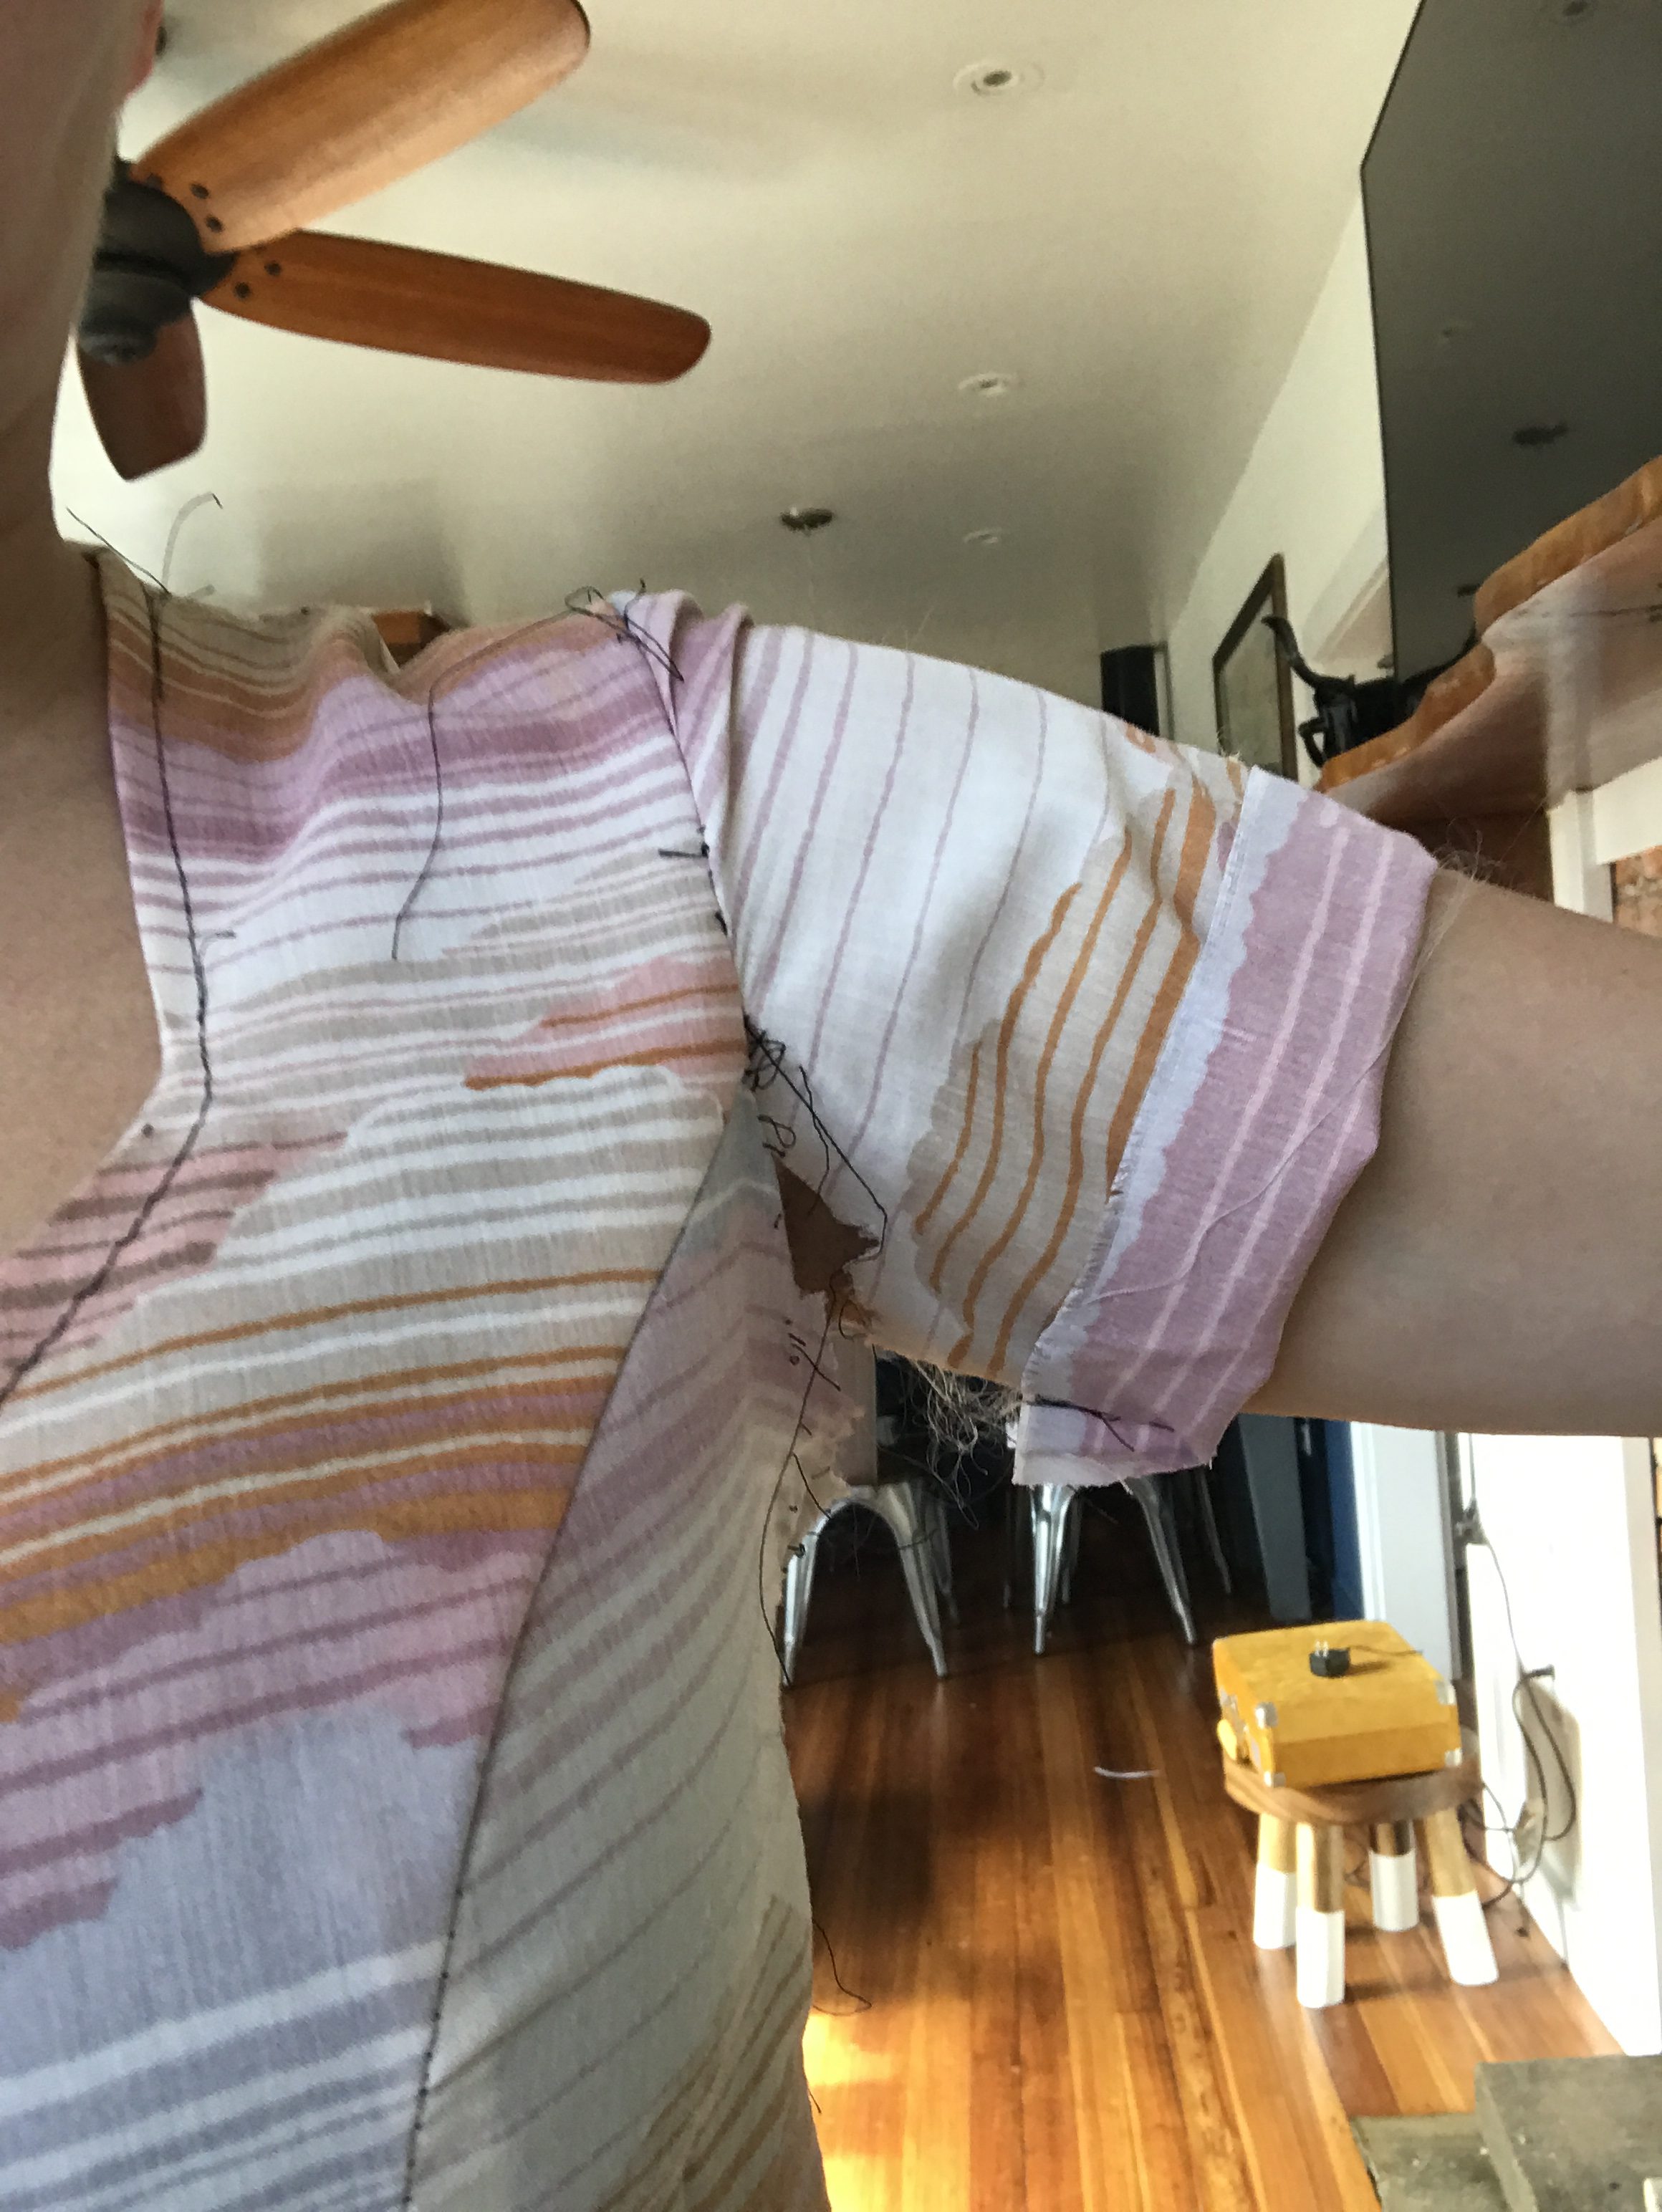
I’d got so sick of cutting out the pattern I started just making the bodice. In the last effort I asked Joe to see if he could see any pulling anywhere.
He realised the issue was under the armpit and more so on the back than the front. So I ended up sewing it with a really small seam allowance. I also undid the armpit side seam, sewing the back side seam with a smaller seam allowance than the front.
Low and behold:
As you can see, I was feeling pretty pleased with myself – ha!
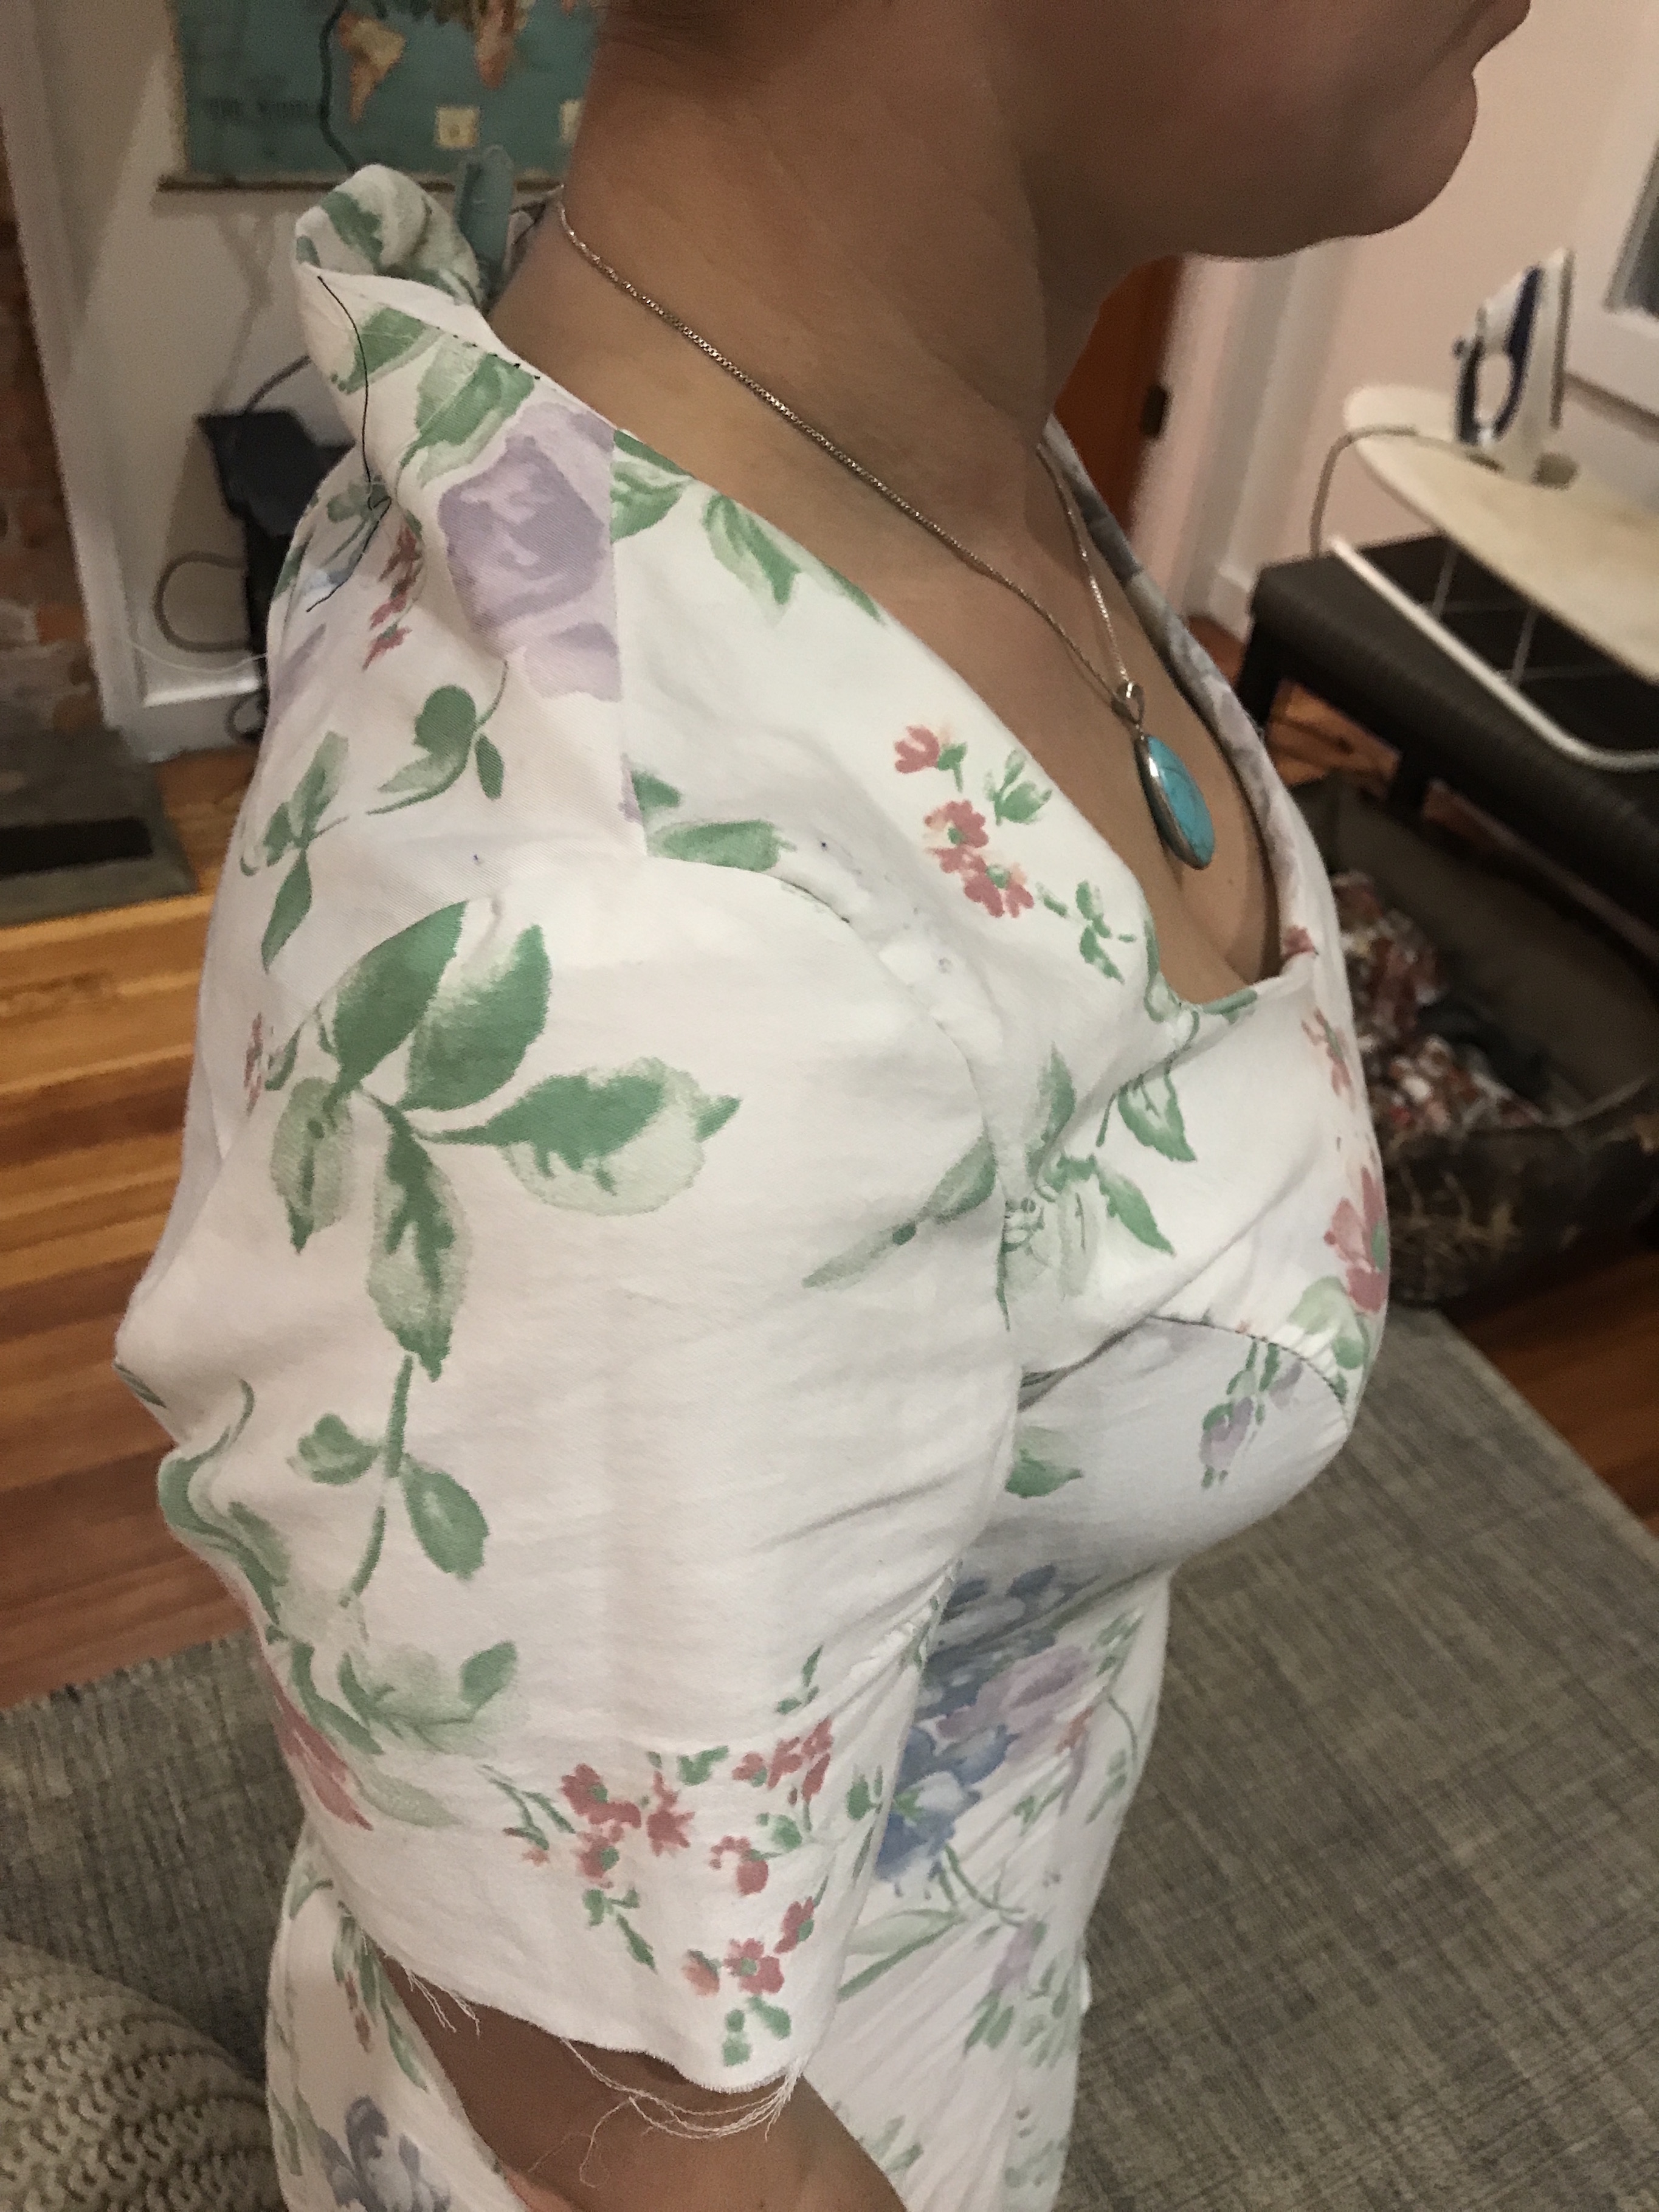
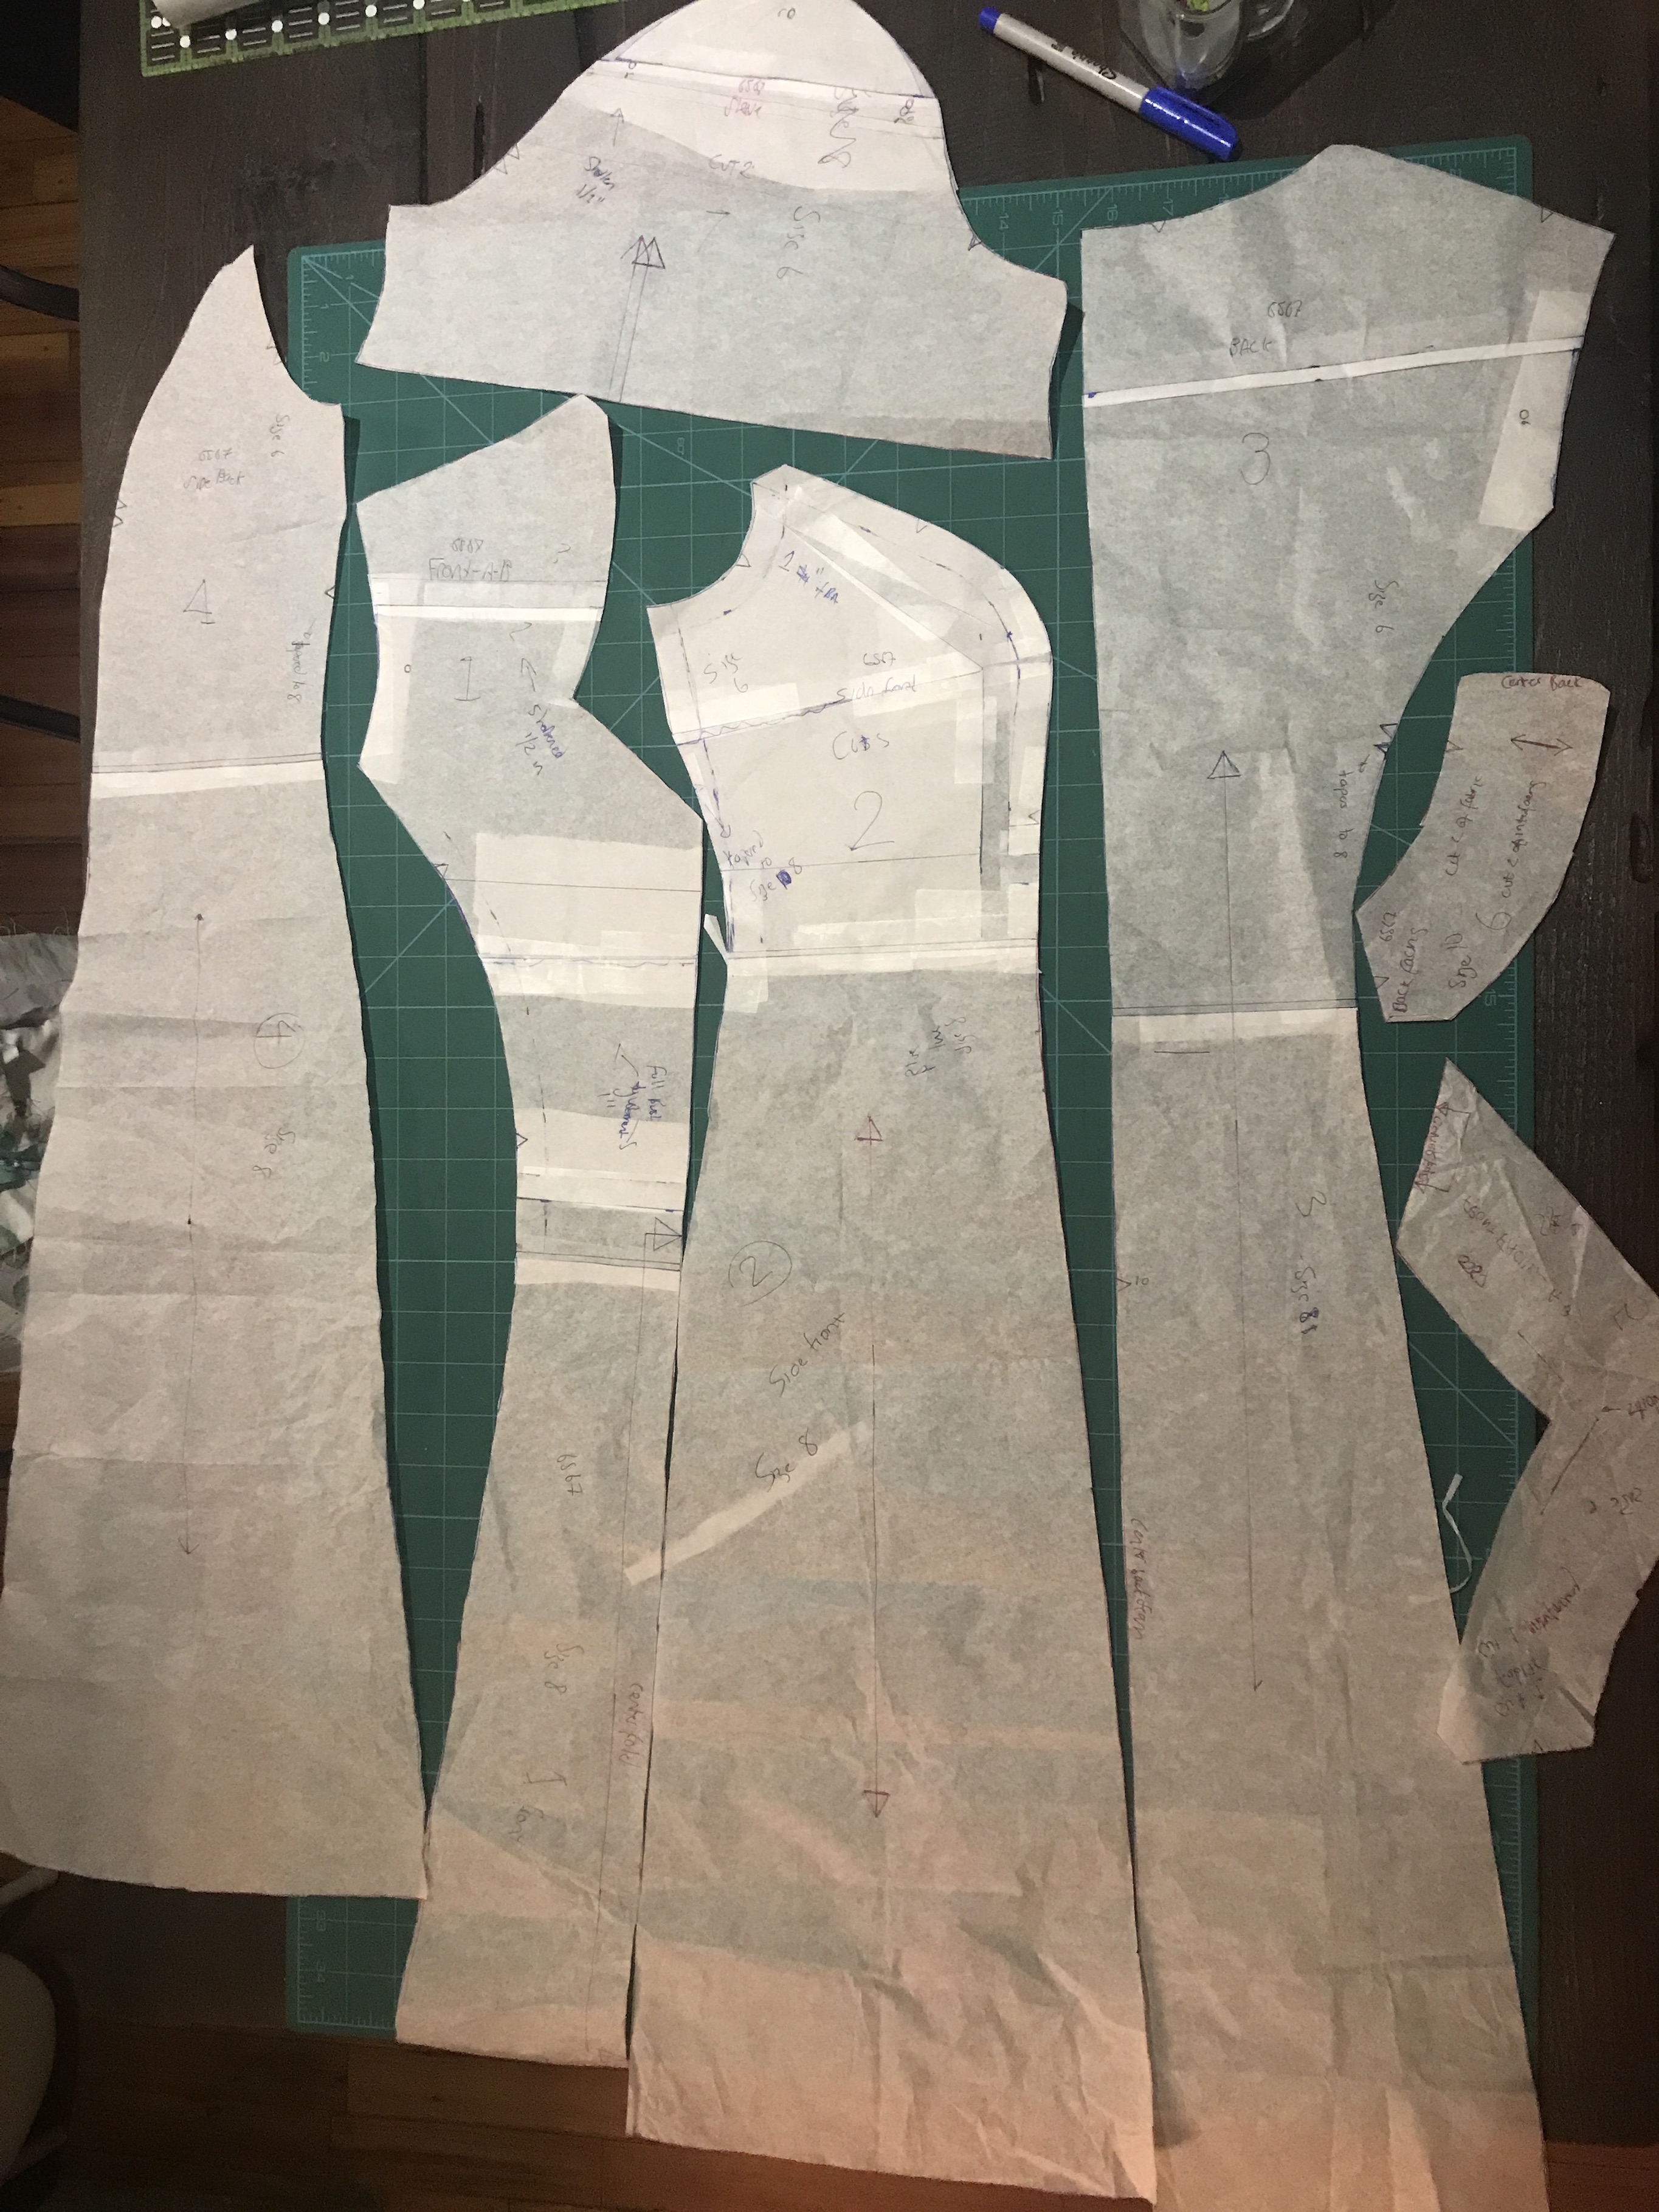
That was late at night on like a Wednesday or something. I took a few days to regroup before sitting down and making the necessary alterations to my patterns. This is what they looked like when I was through, patchwork much???
 Then it was time to cut into my fashion fabric! EEK!
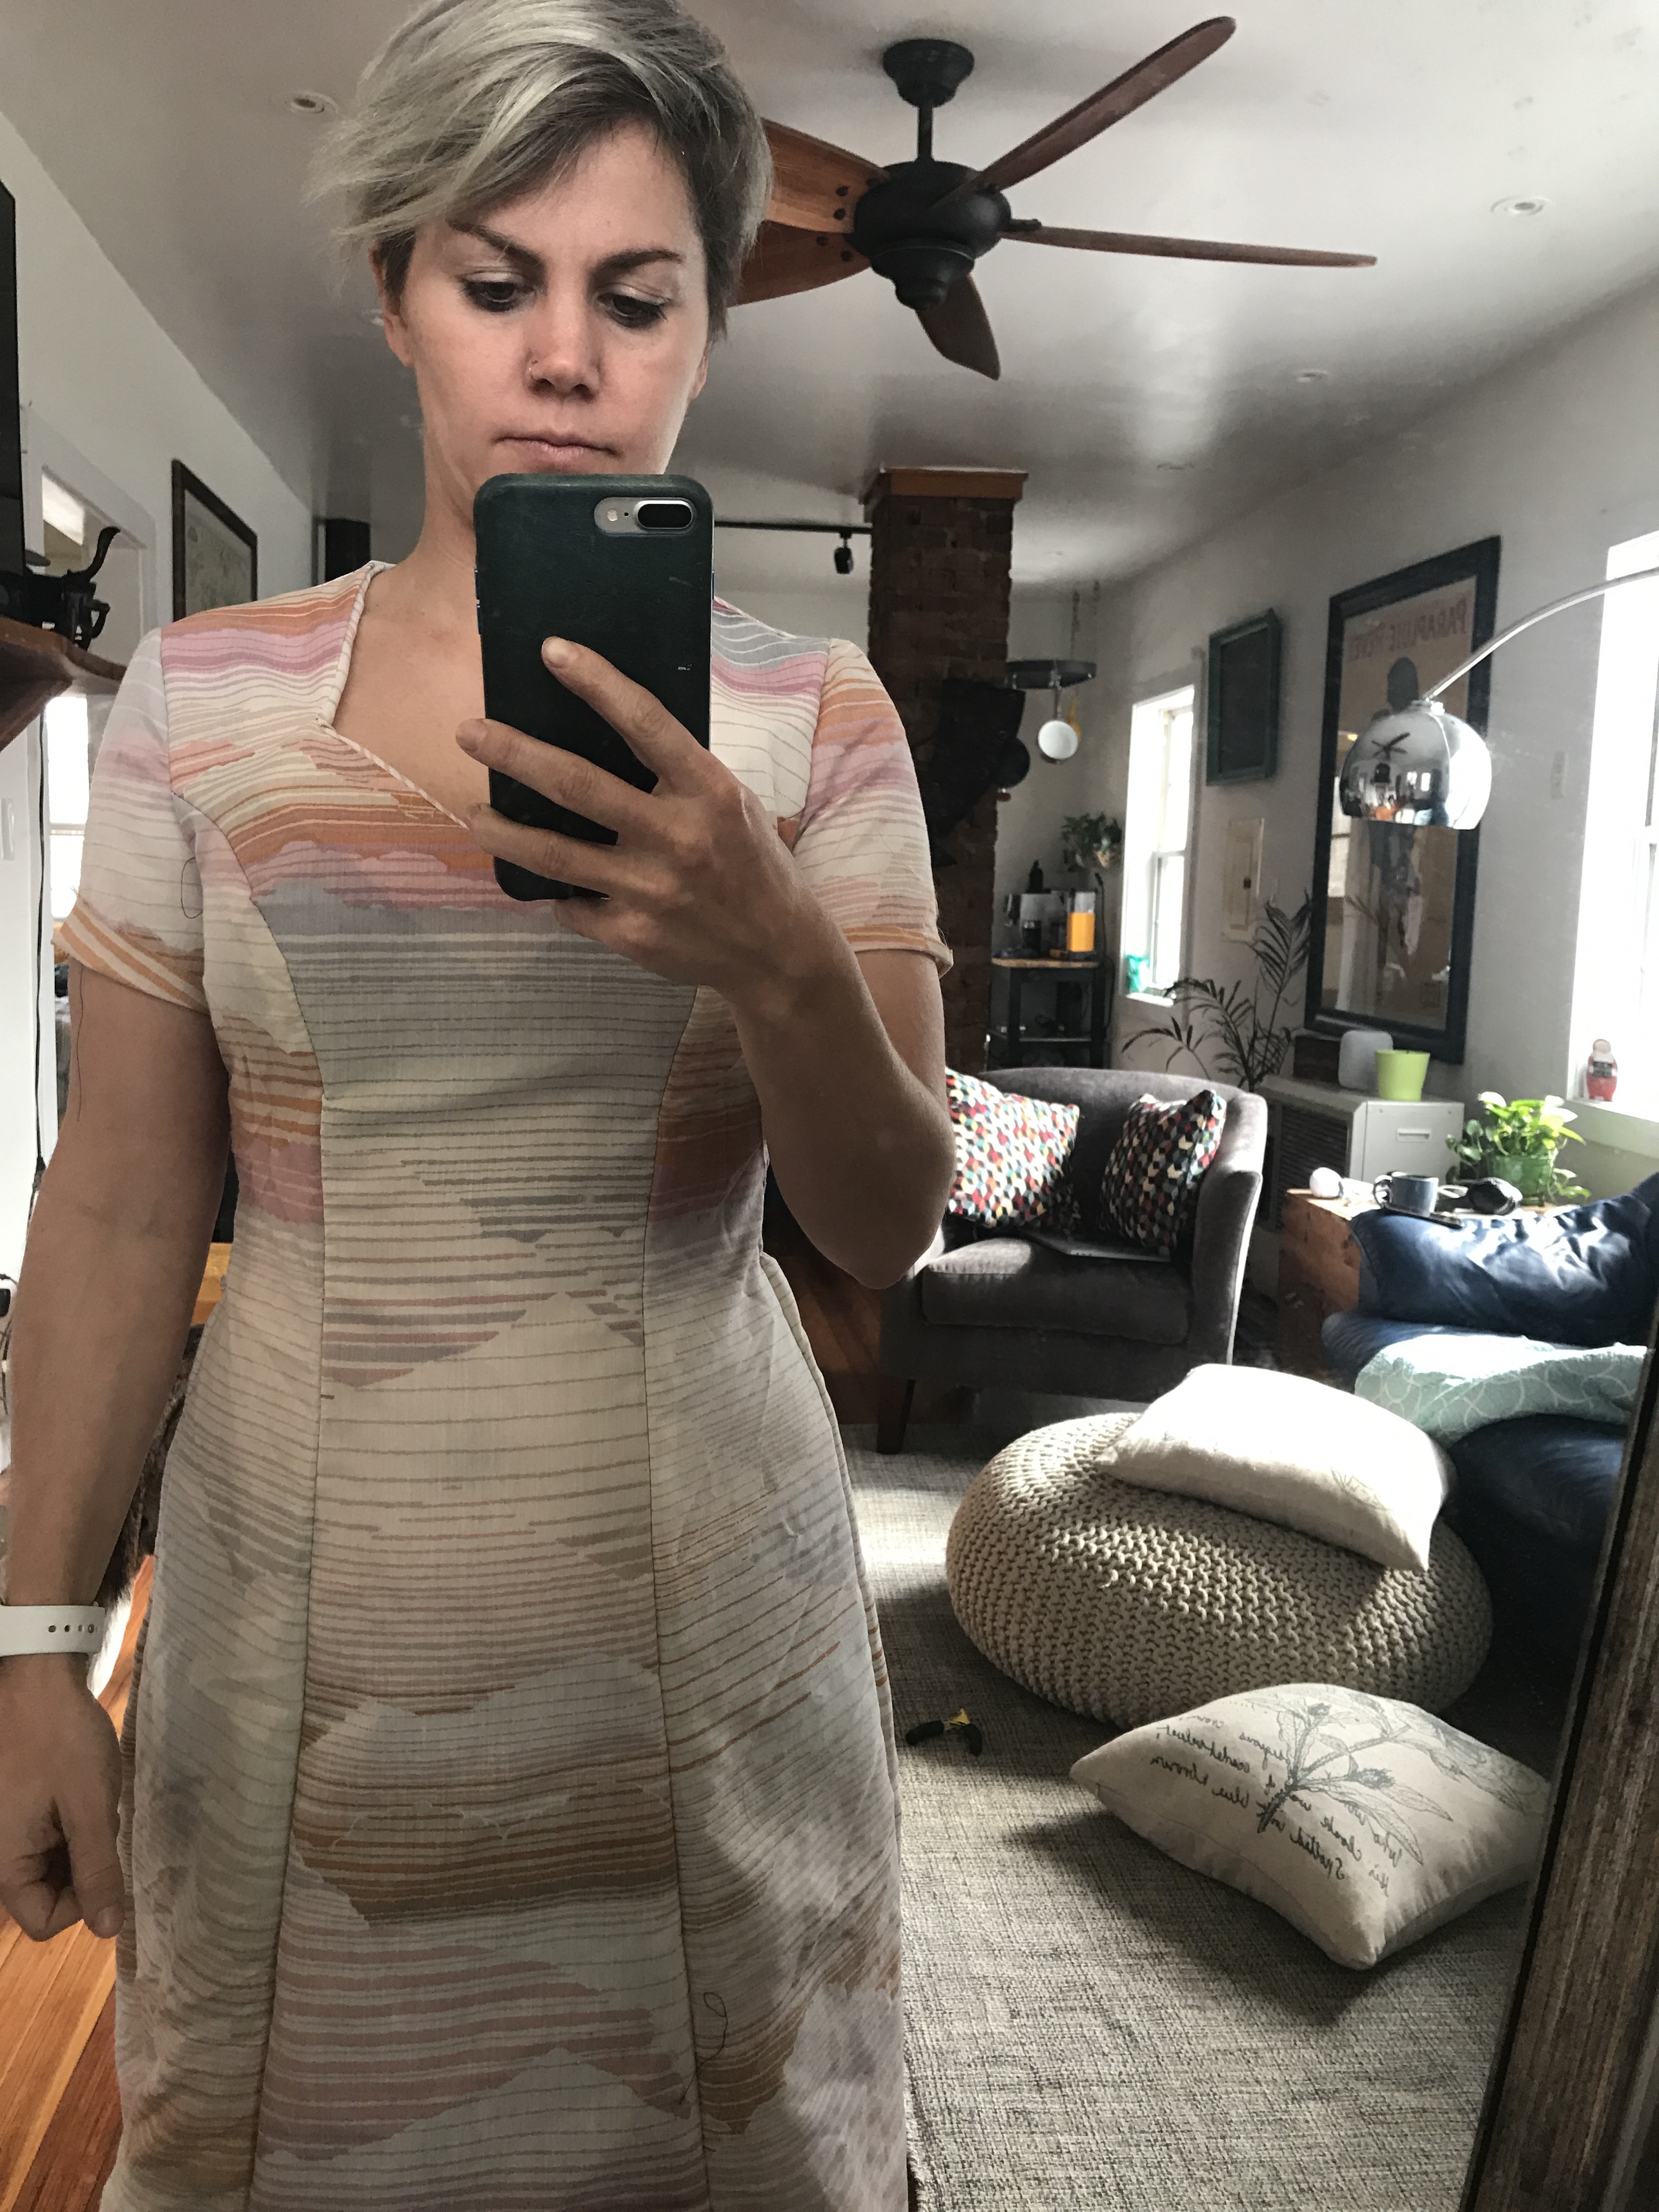
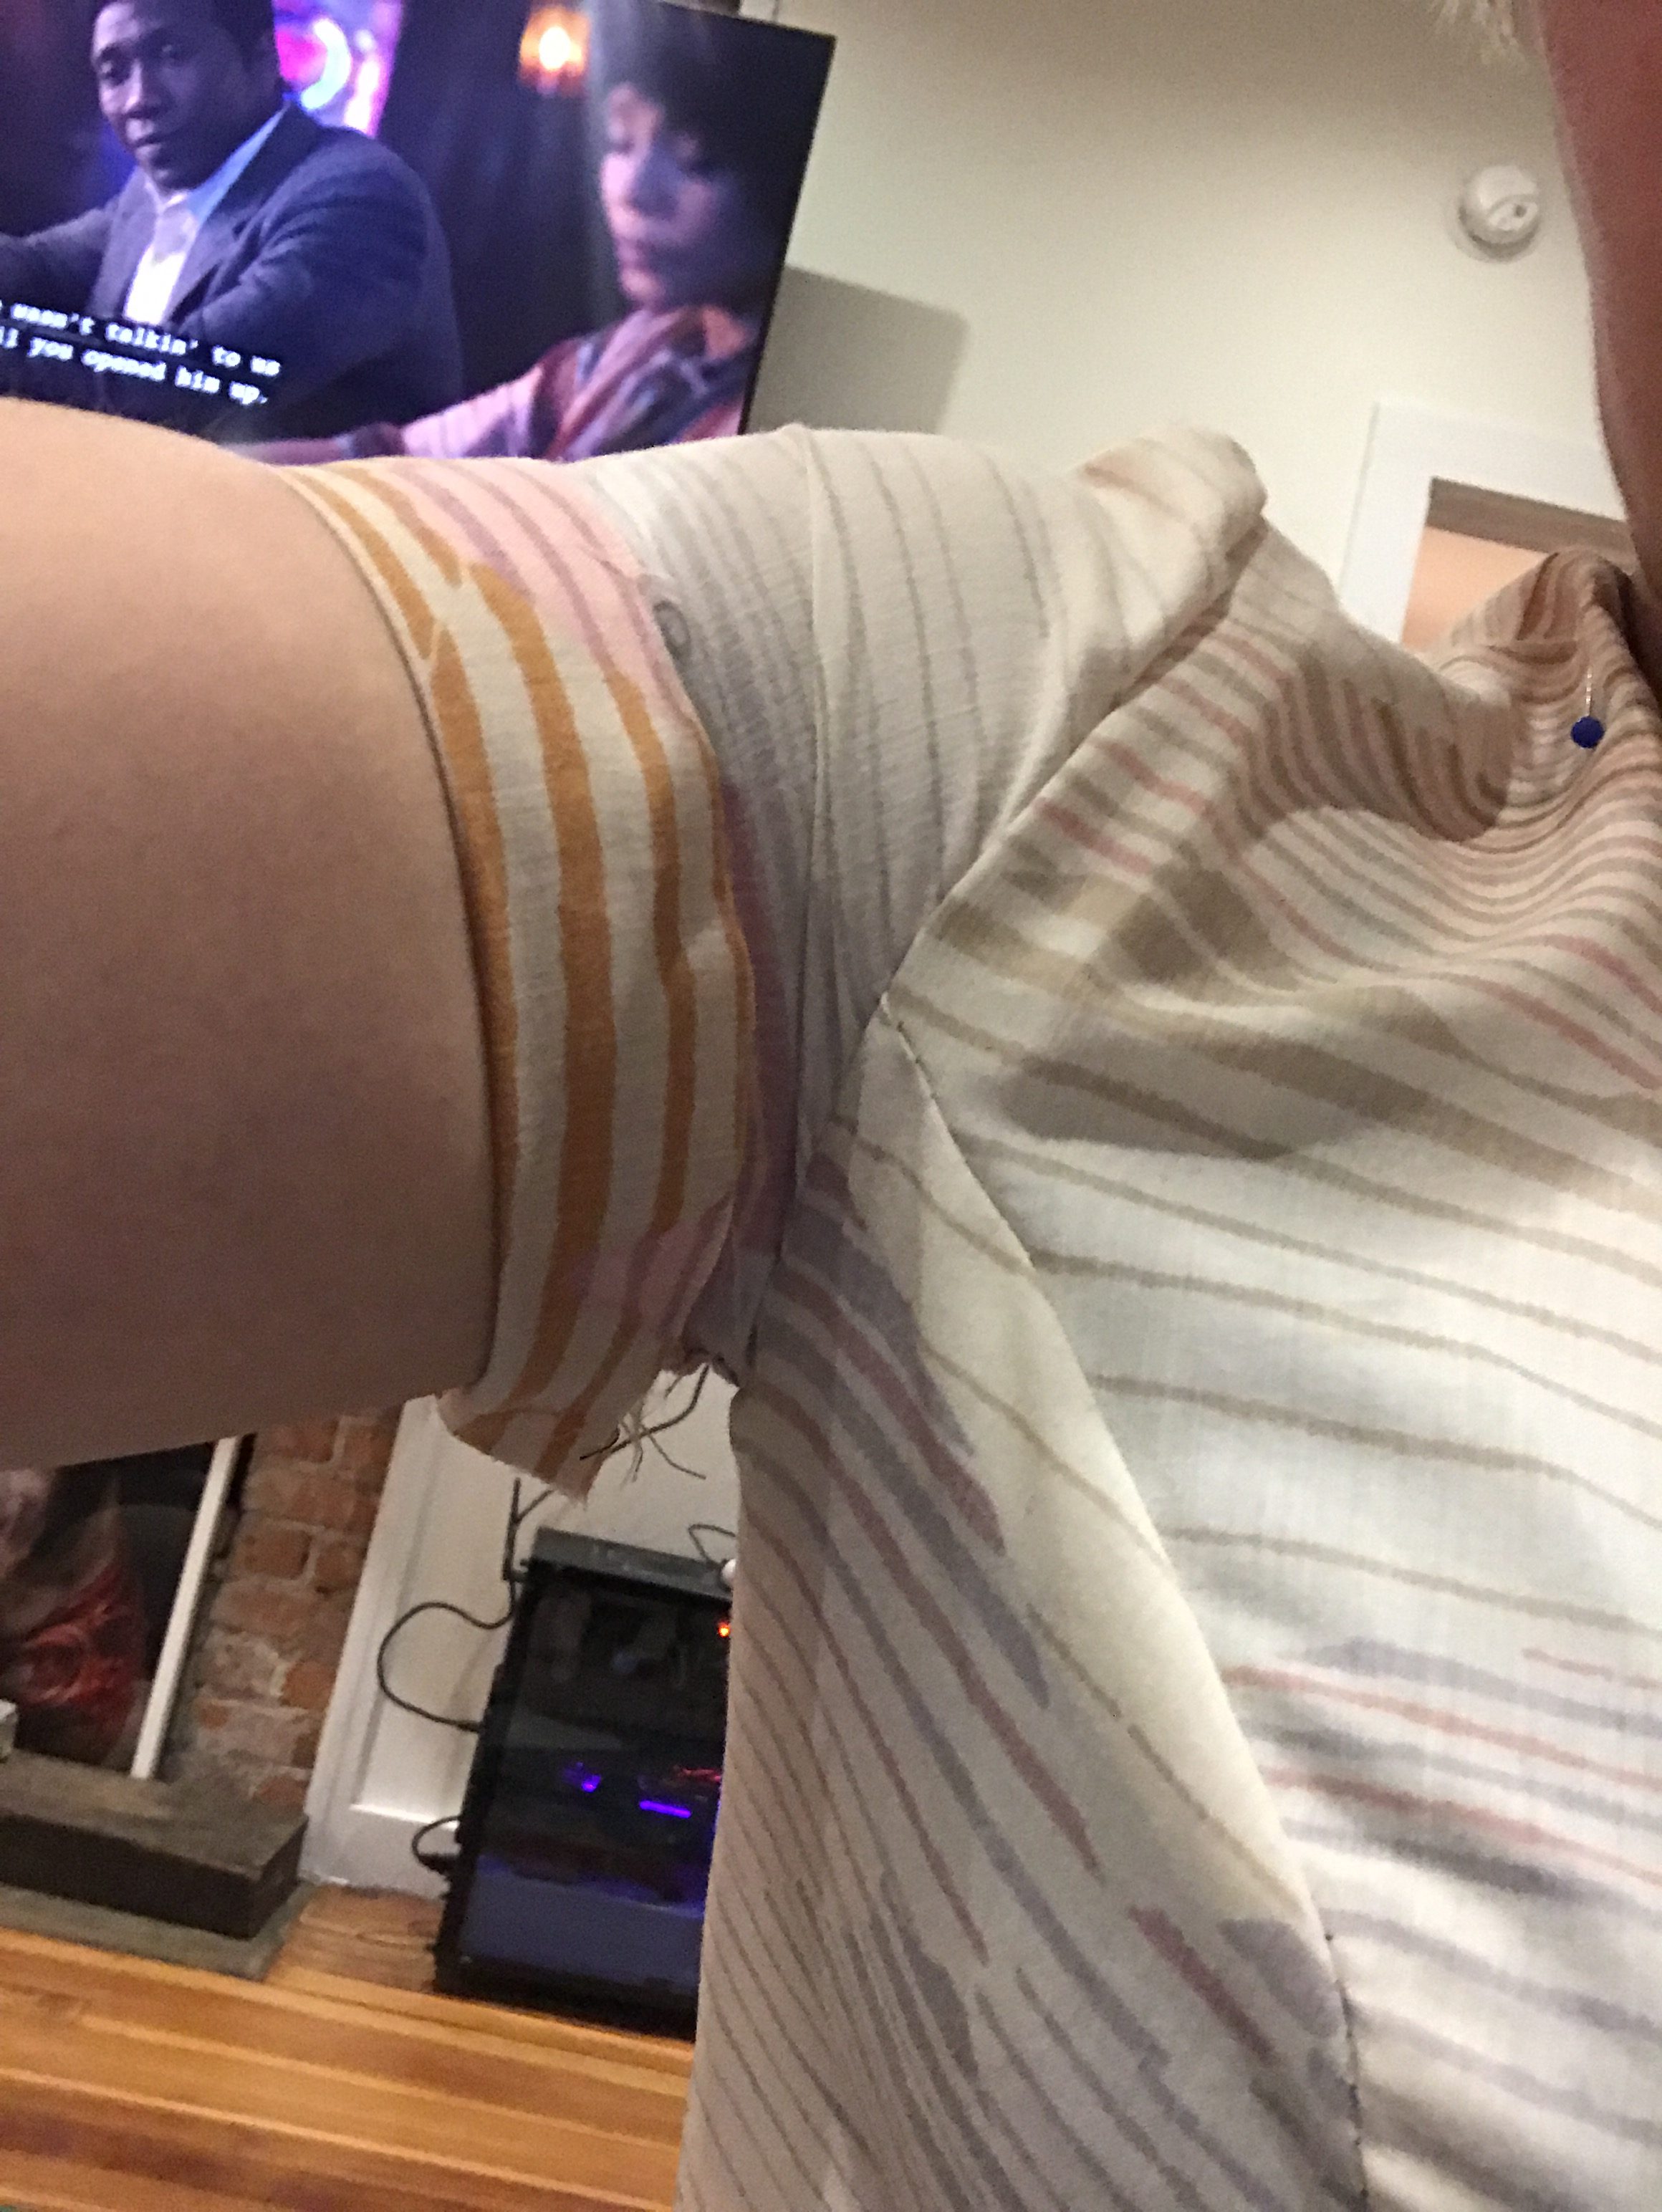
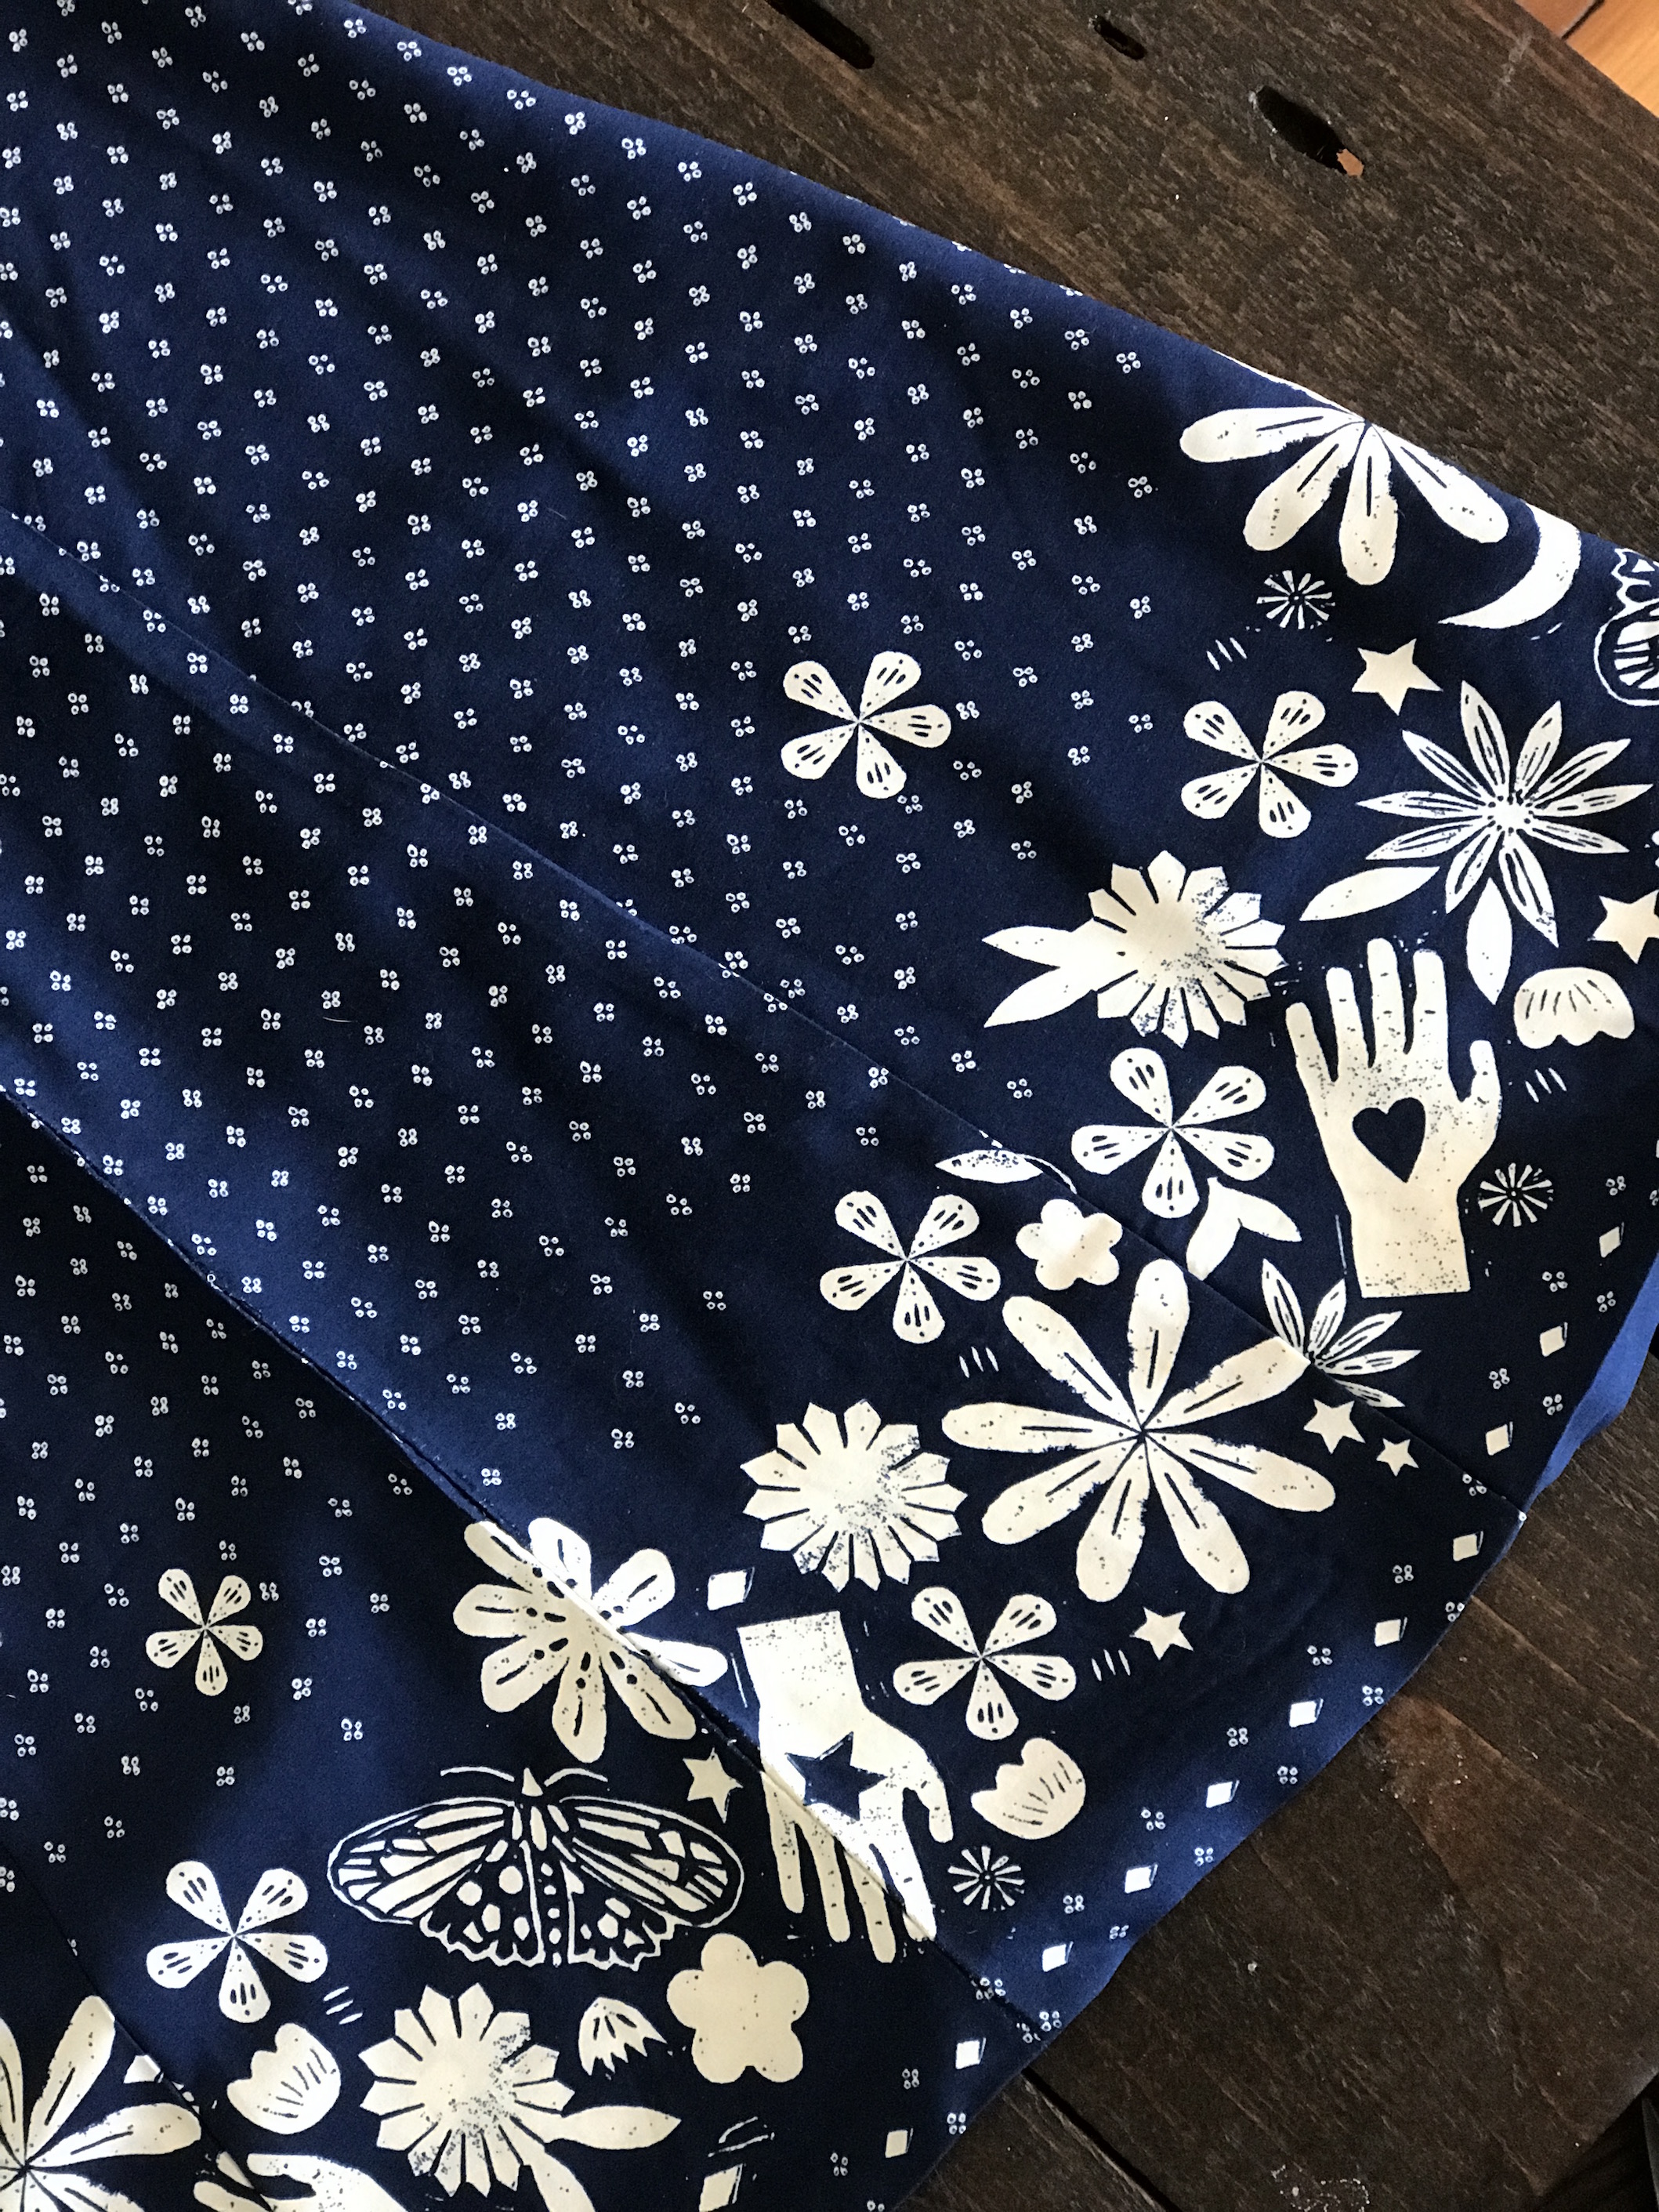
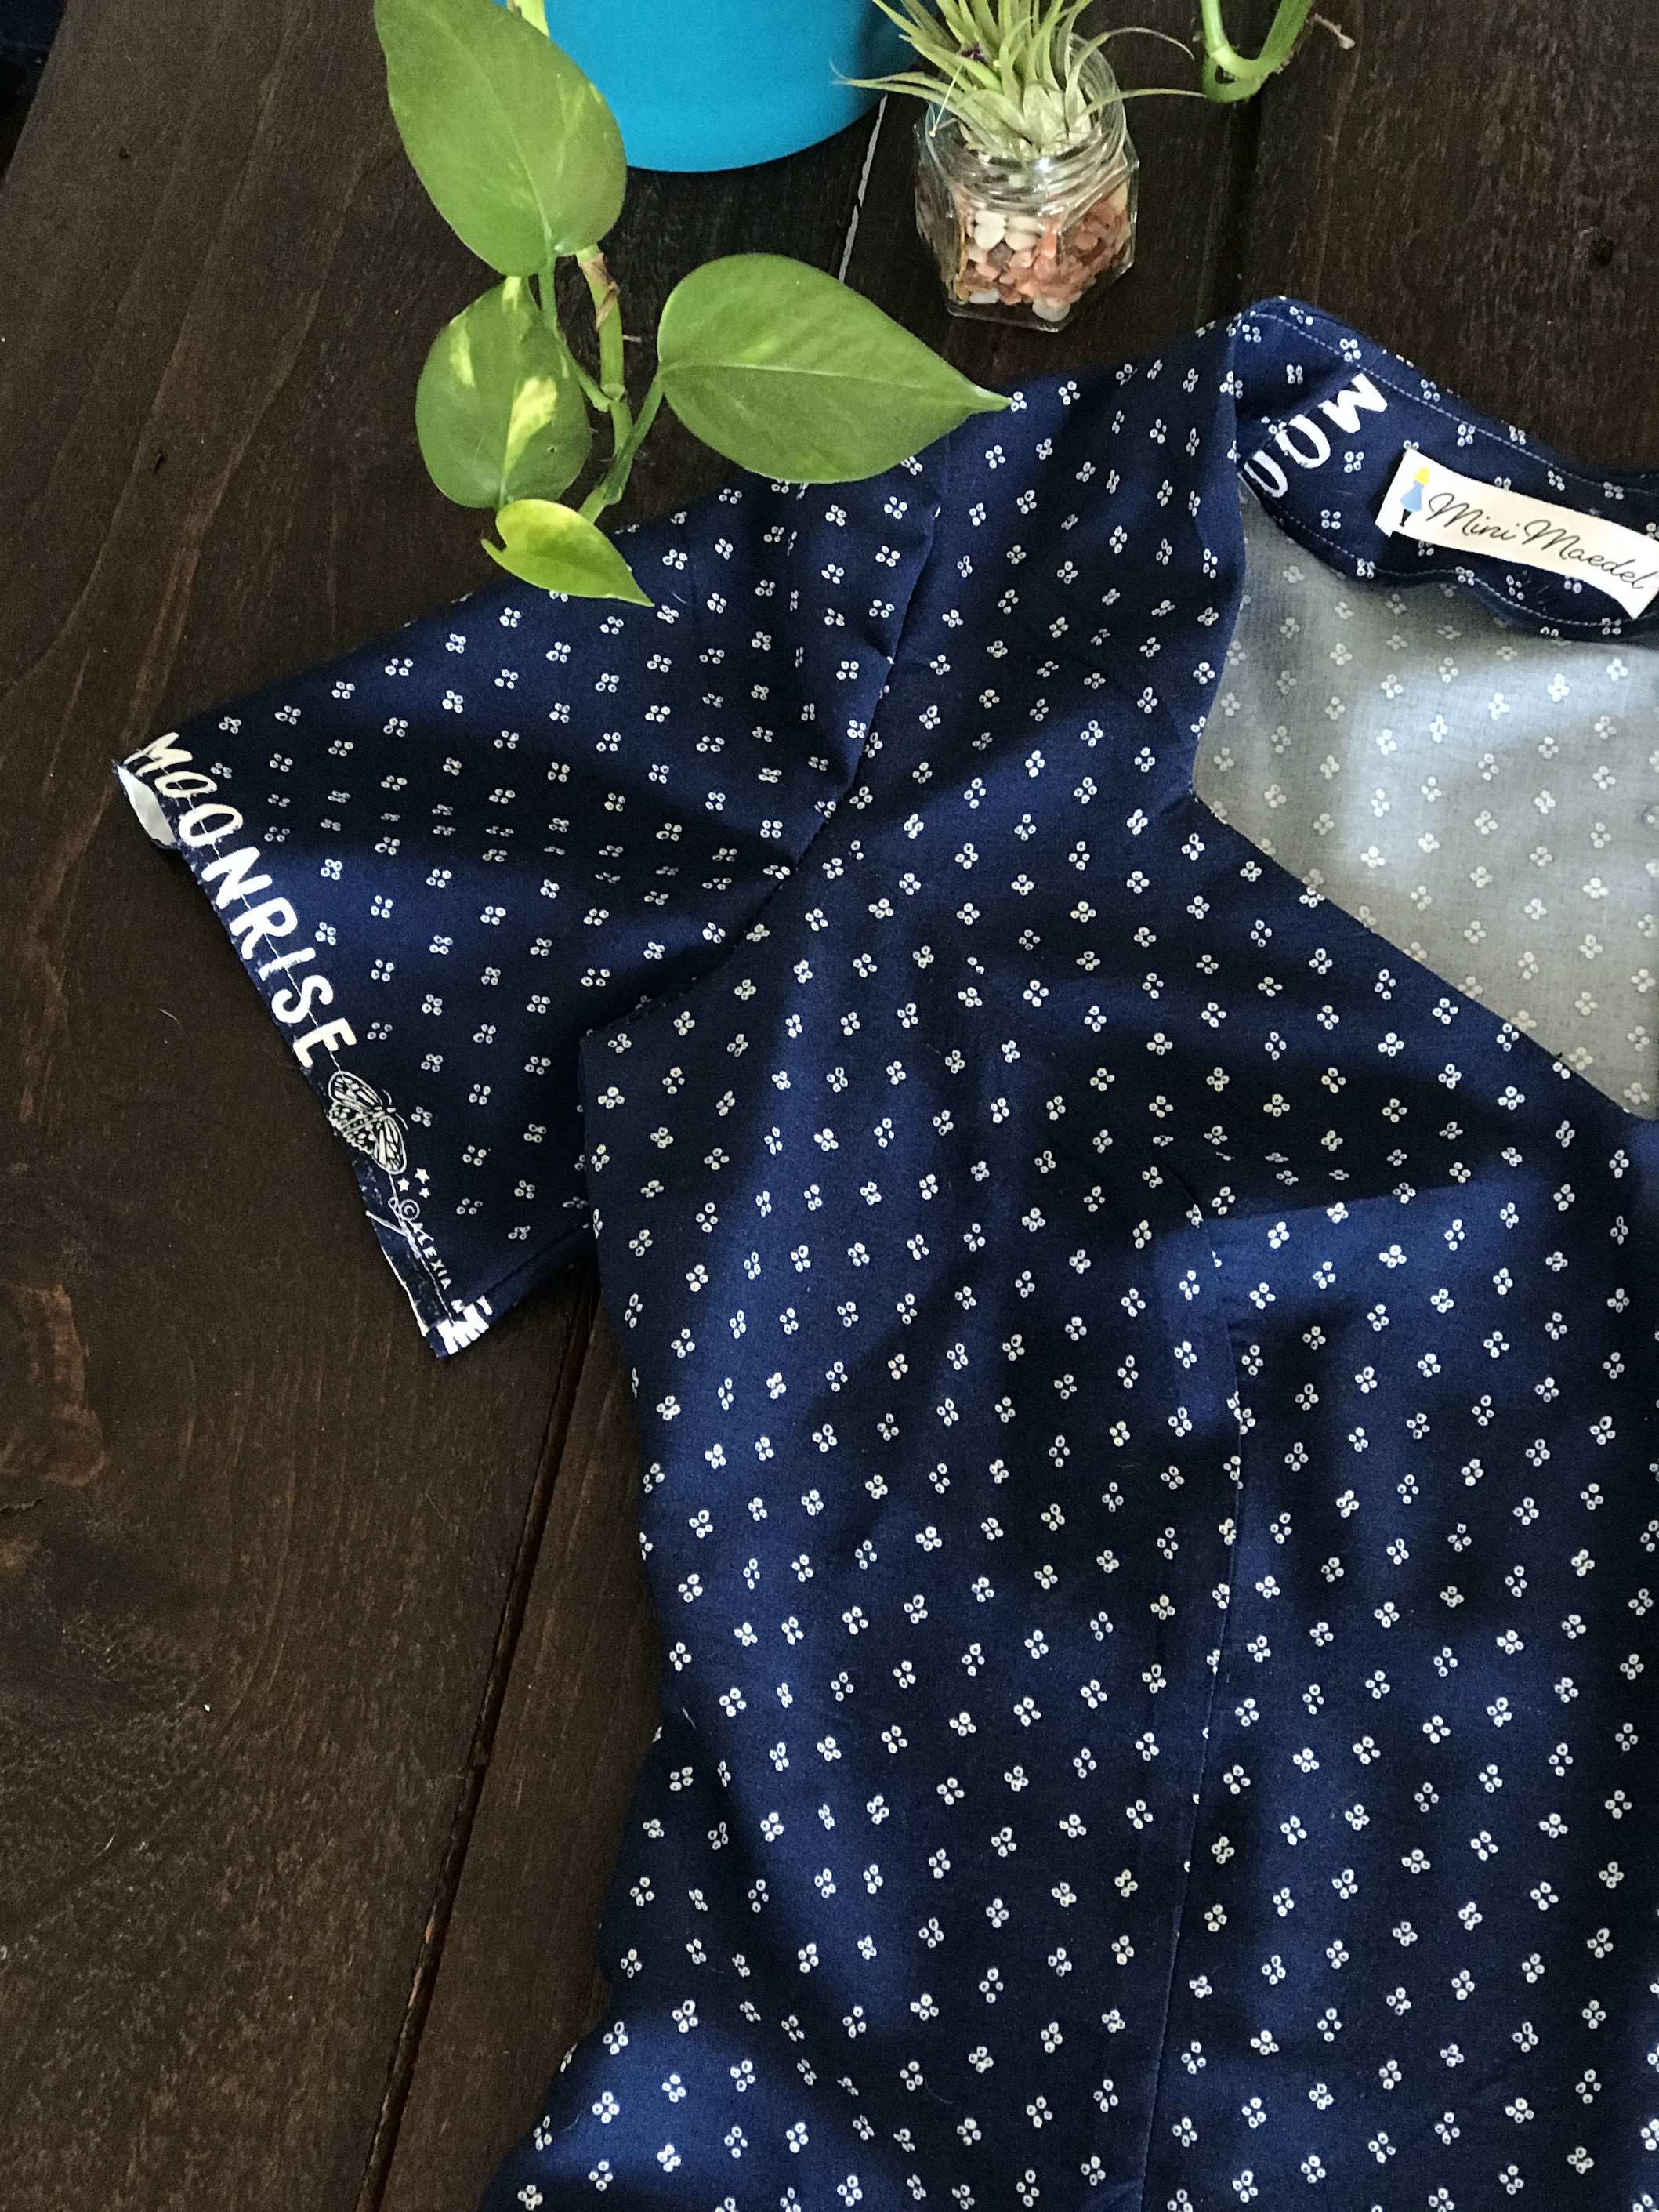
I’d been so excited about this moment I totally forgot about the fact I a)needed to pattern match and b) was working with border print for the first time – talk about making my life extra hard!
The fabric I’d chosen was totally worth it in my eyes though. I’d gone for a Cotton and Steel Rayon called “Bandana”. I’ve worked with their rayon before and I just love it.
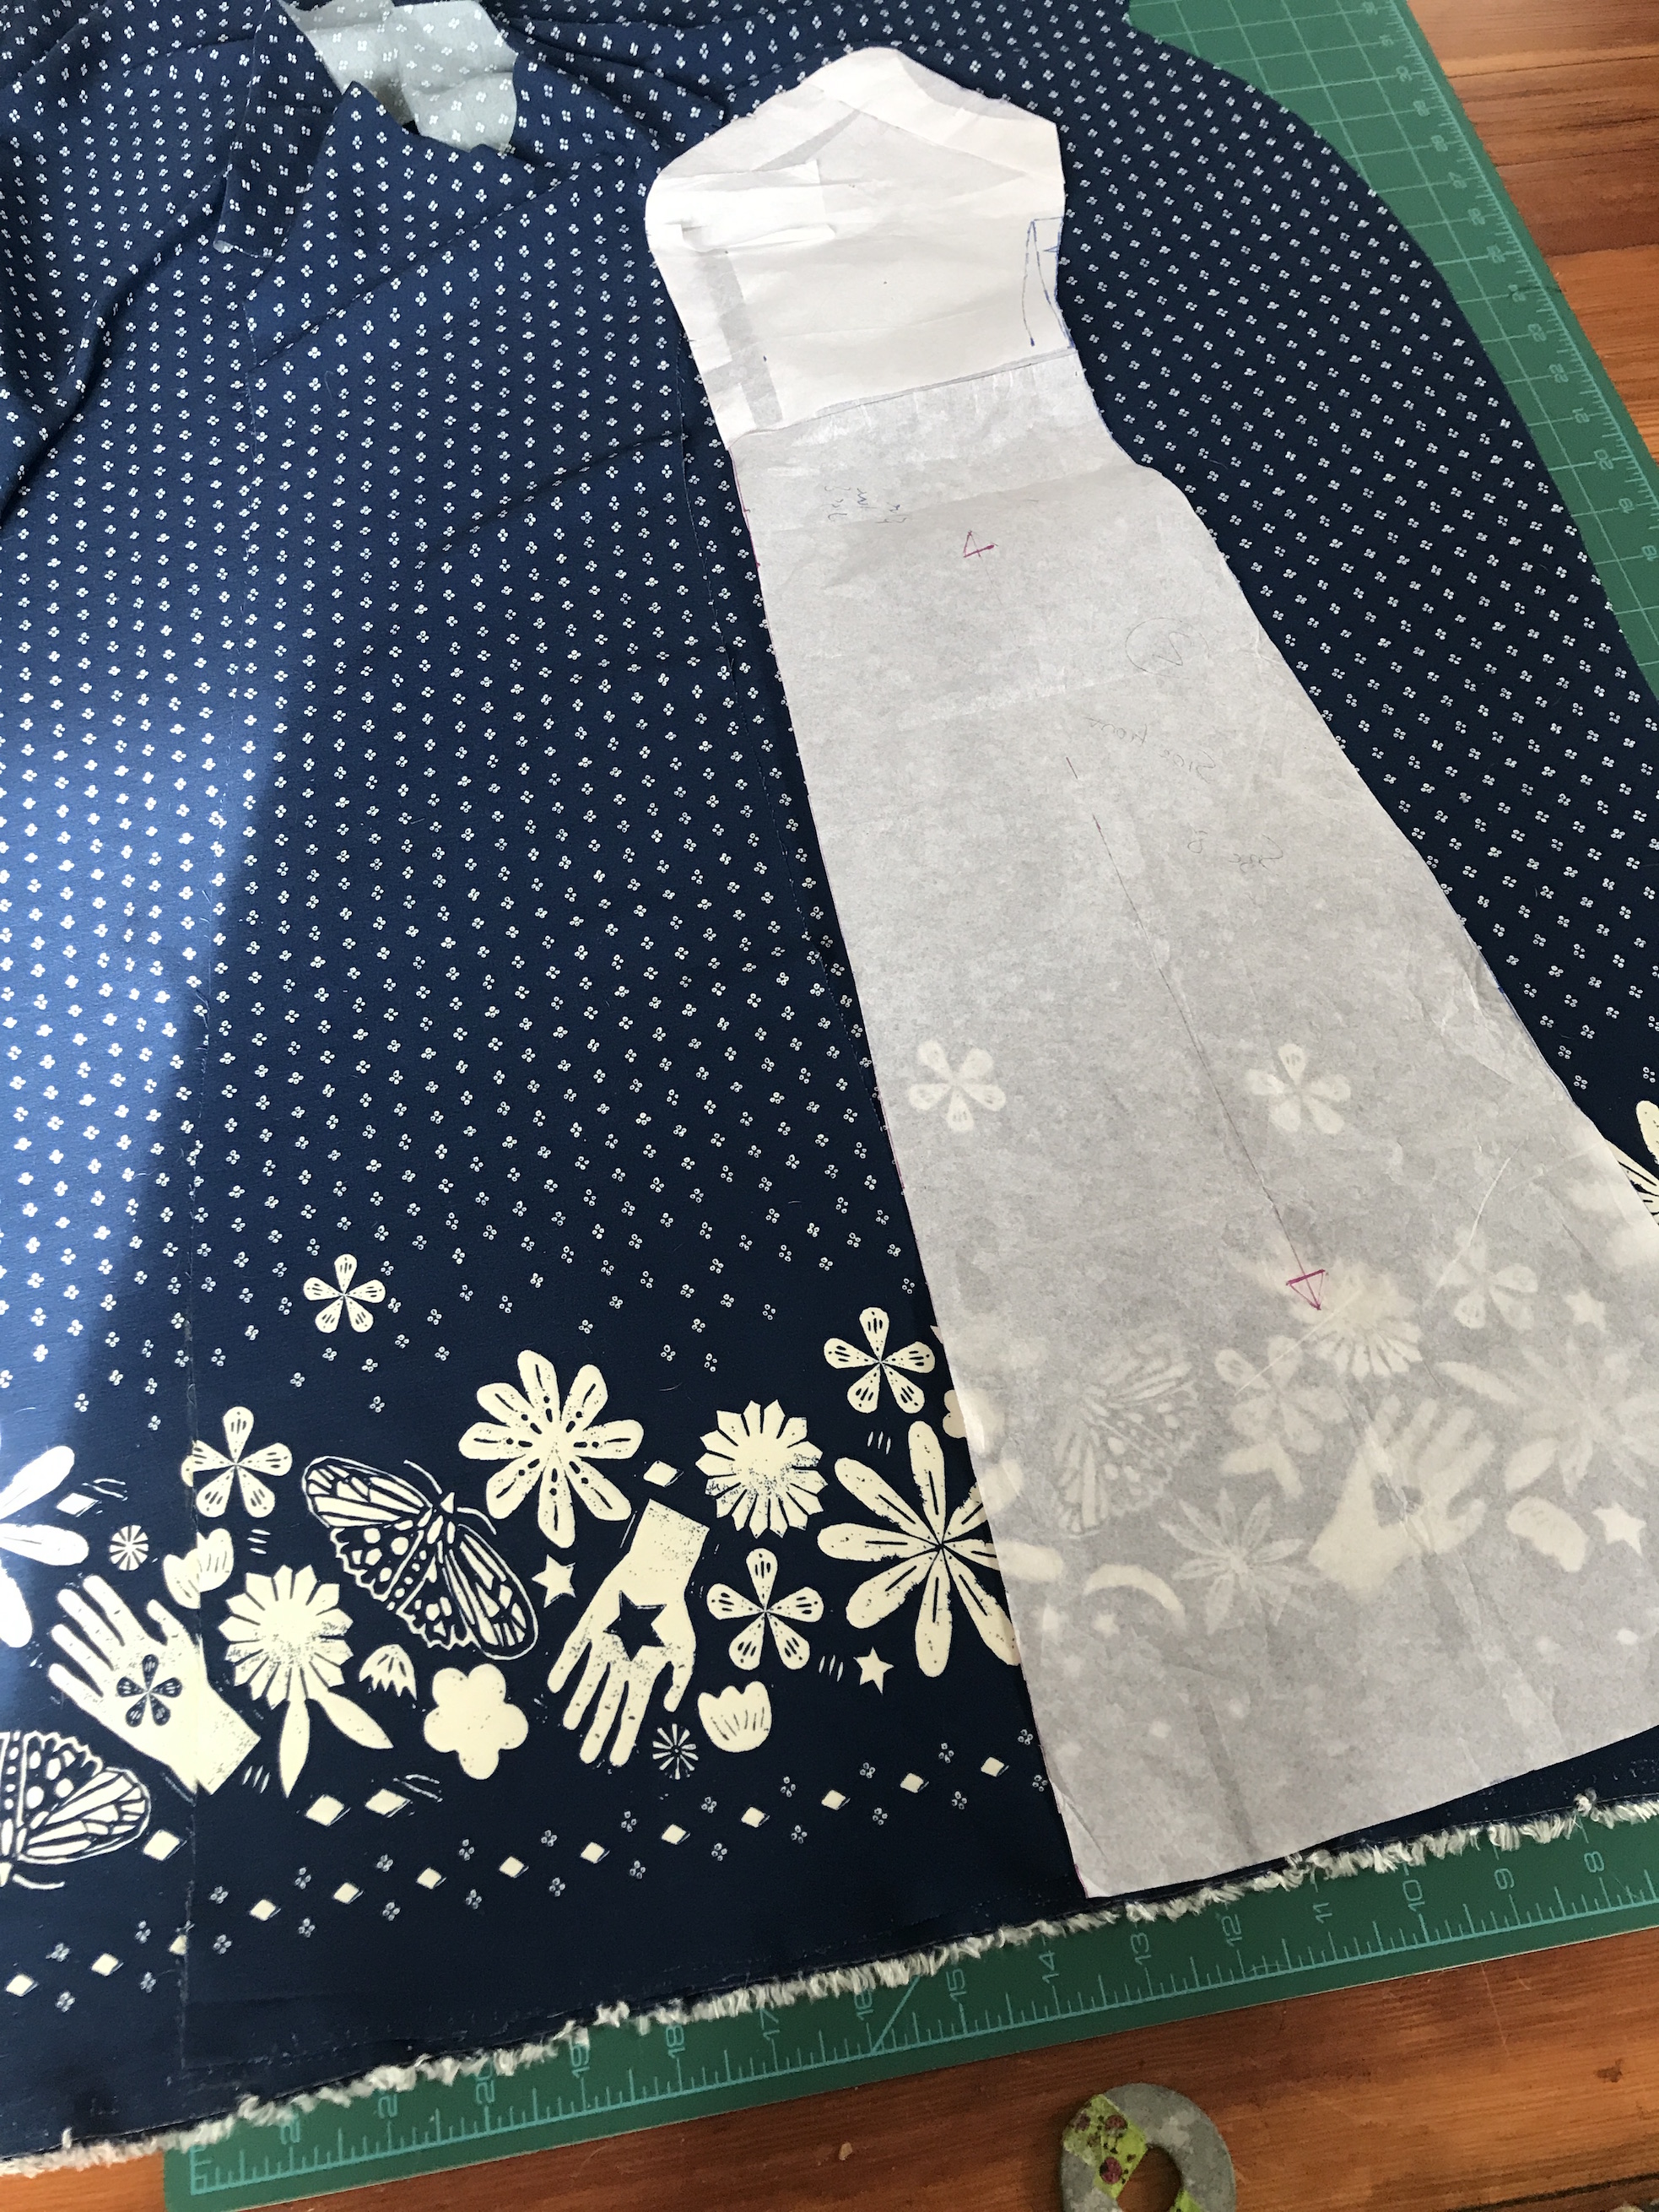
I’m not going to lie, trying to cut this was a bit of a nightmare. It would’ve been fine if it wasn’t princess seams but of course, it was. After over an hour of messing with it, I just decided to match as much as possible and just go for it. It wasn’t perfect but I’m happy with what I did.
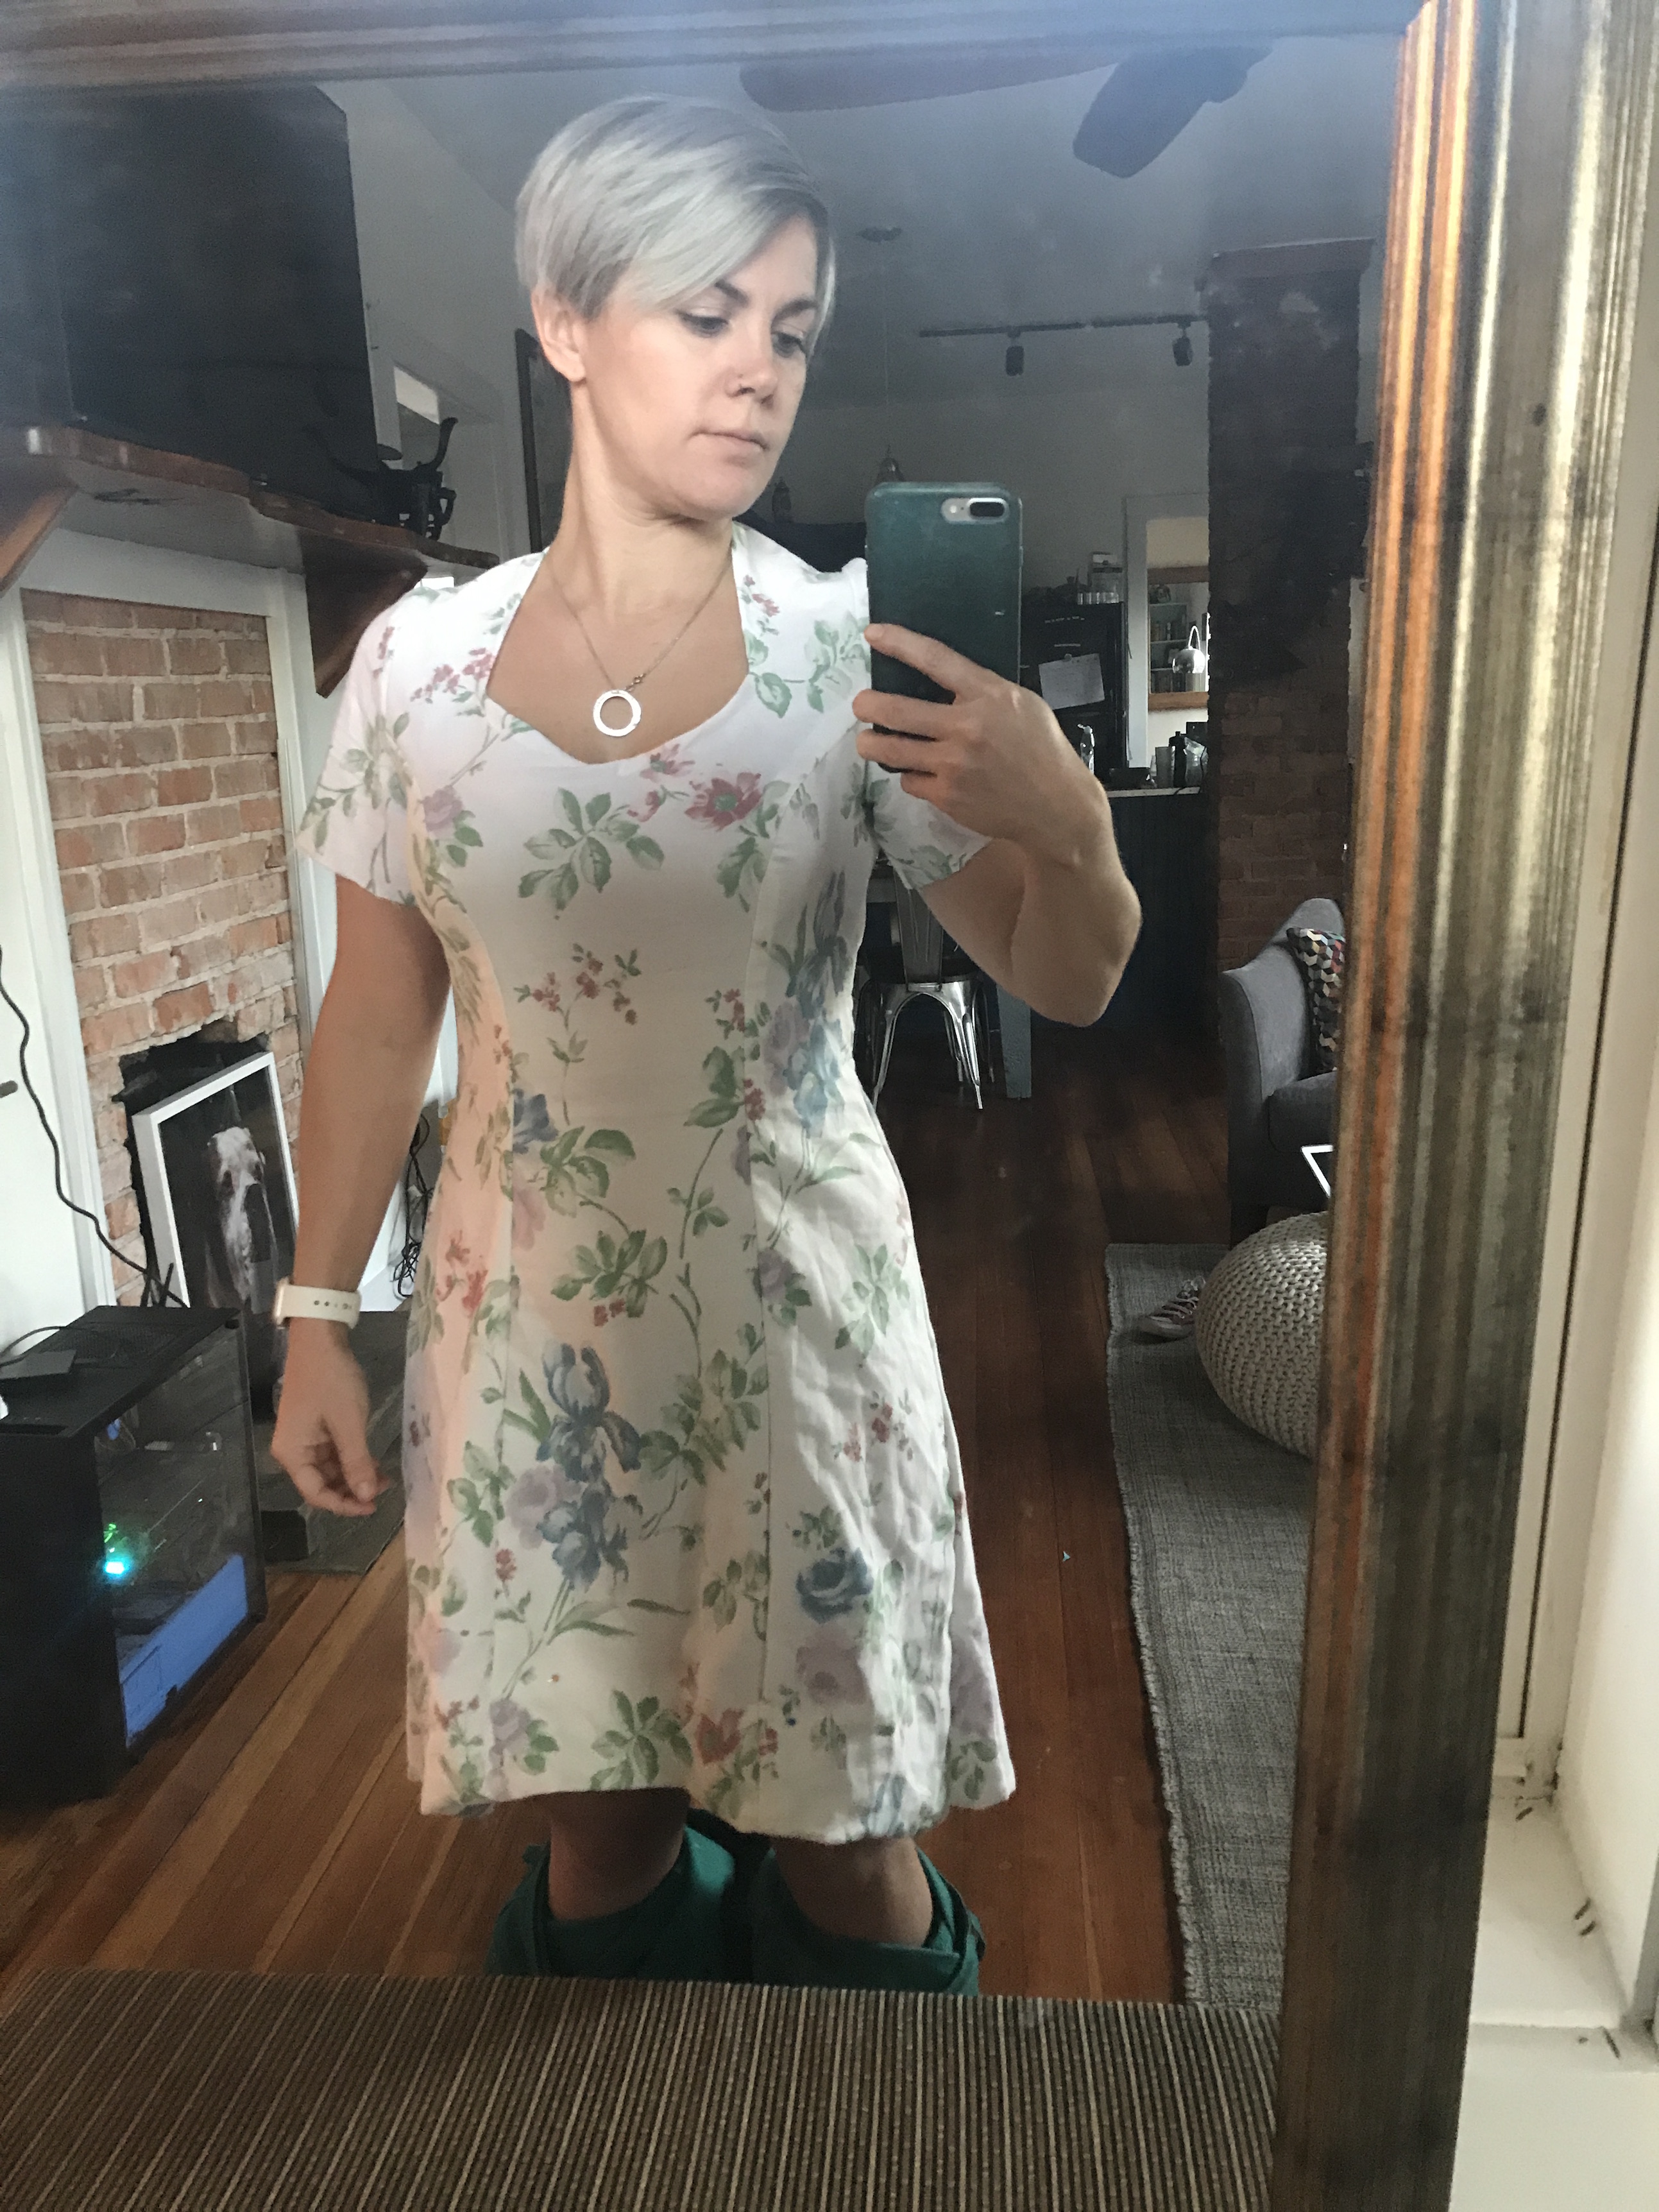
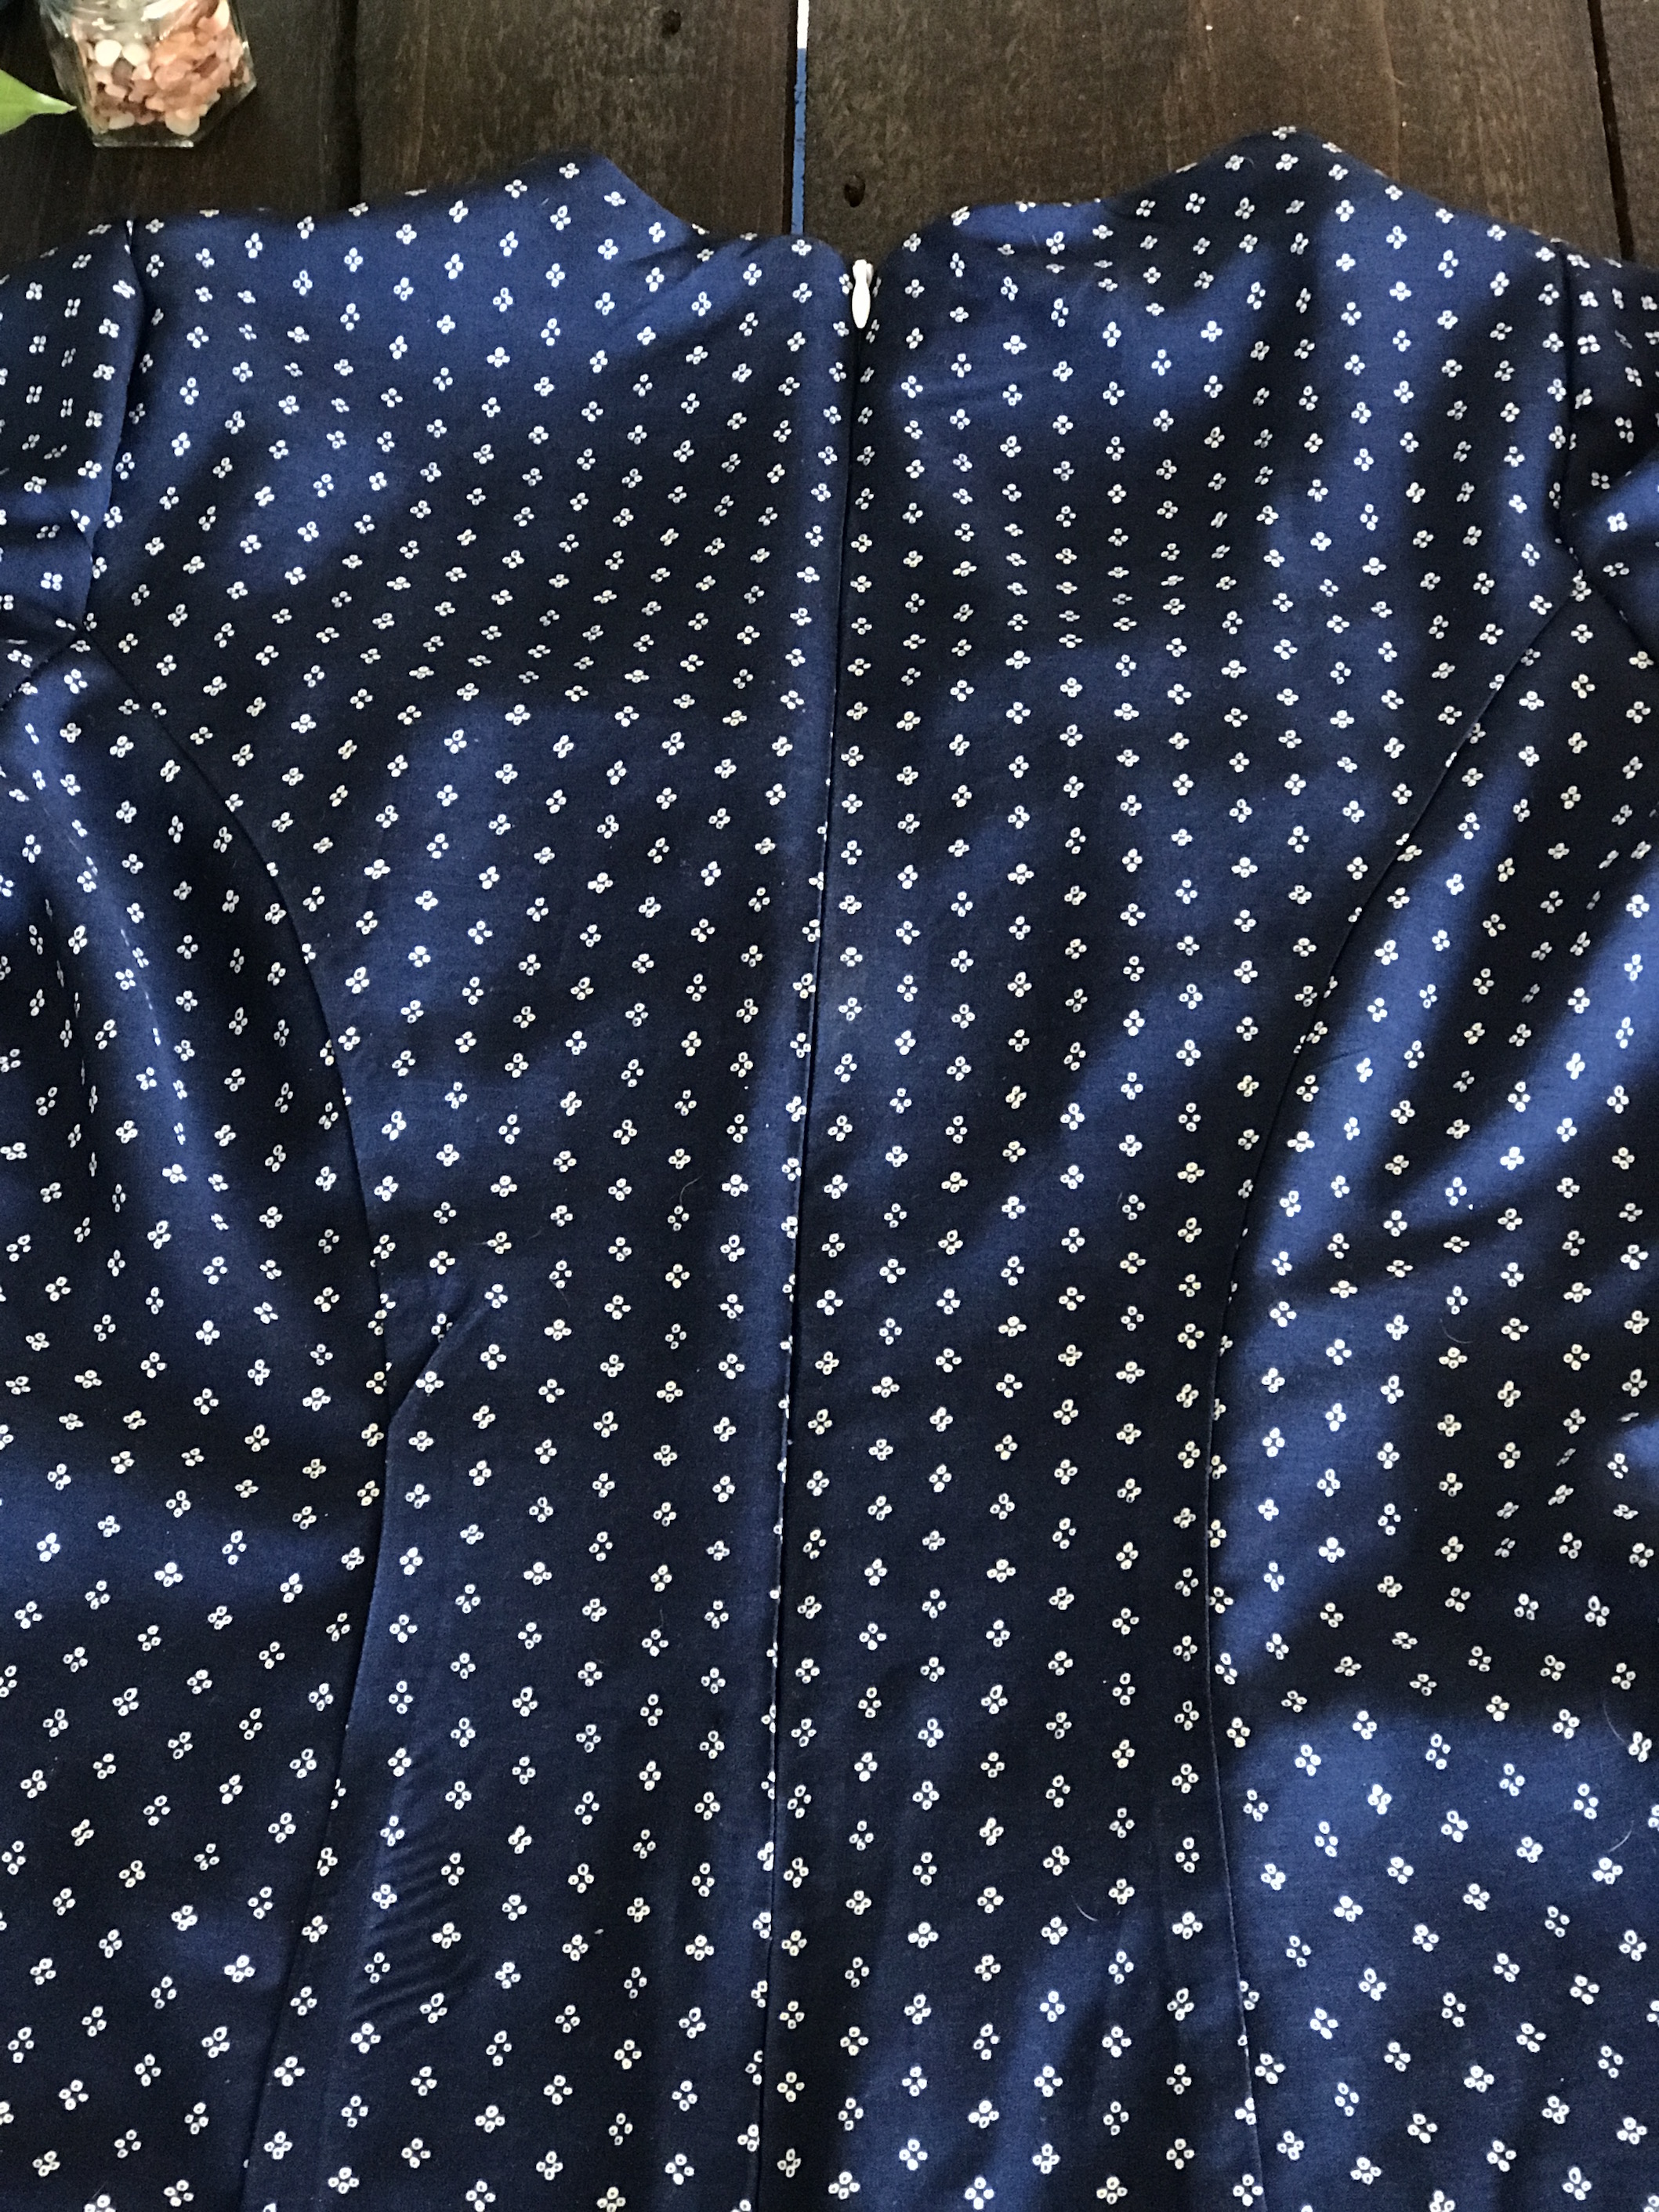
 After cutting out, as the first toile had show me, this was SUCH an easy sew. So so quick to put together. And would you just look at that invisible zip insert?!
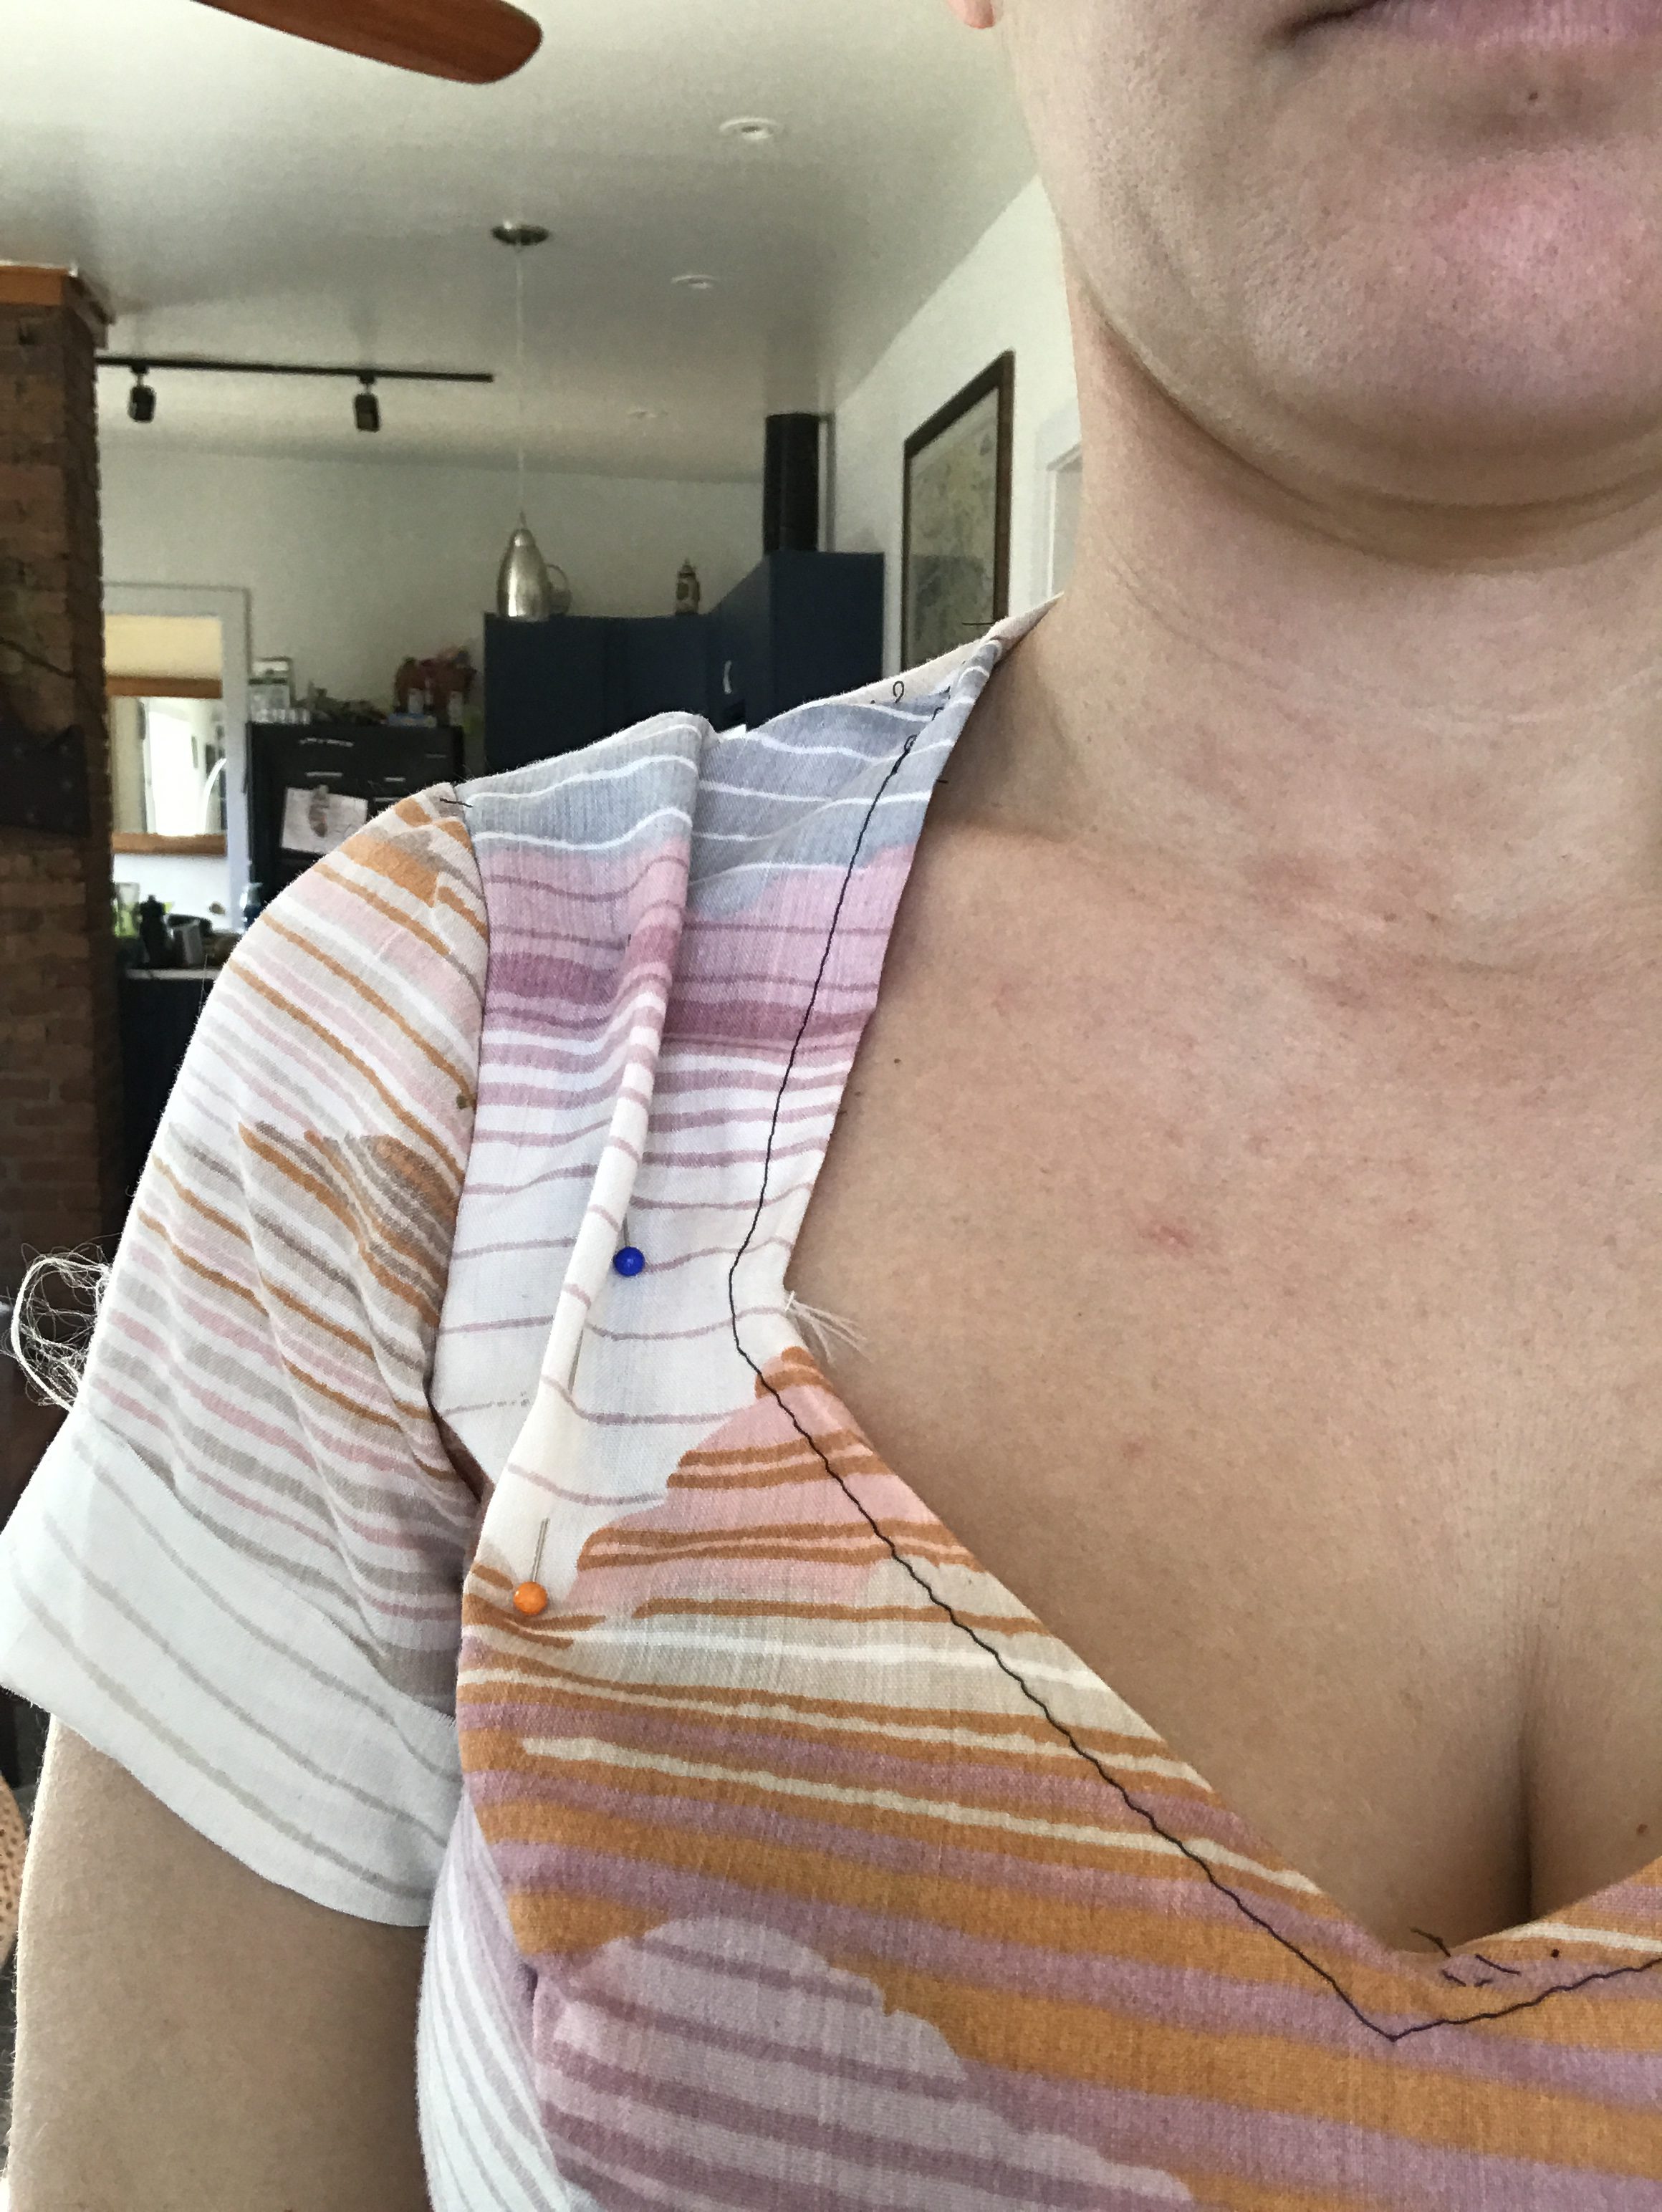
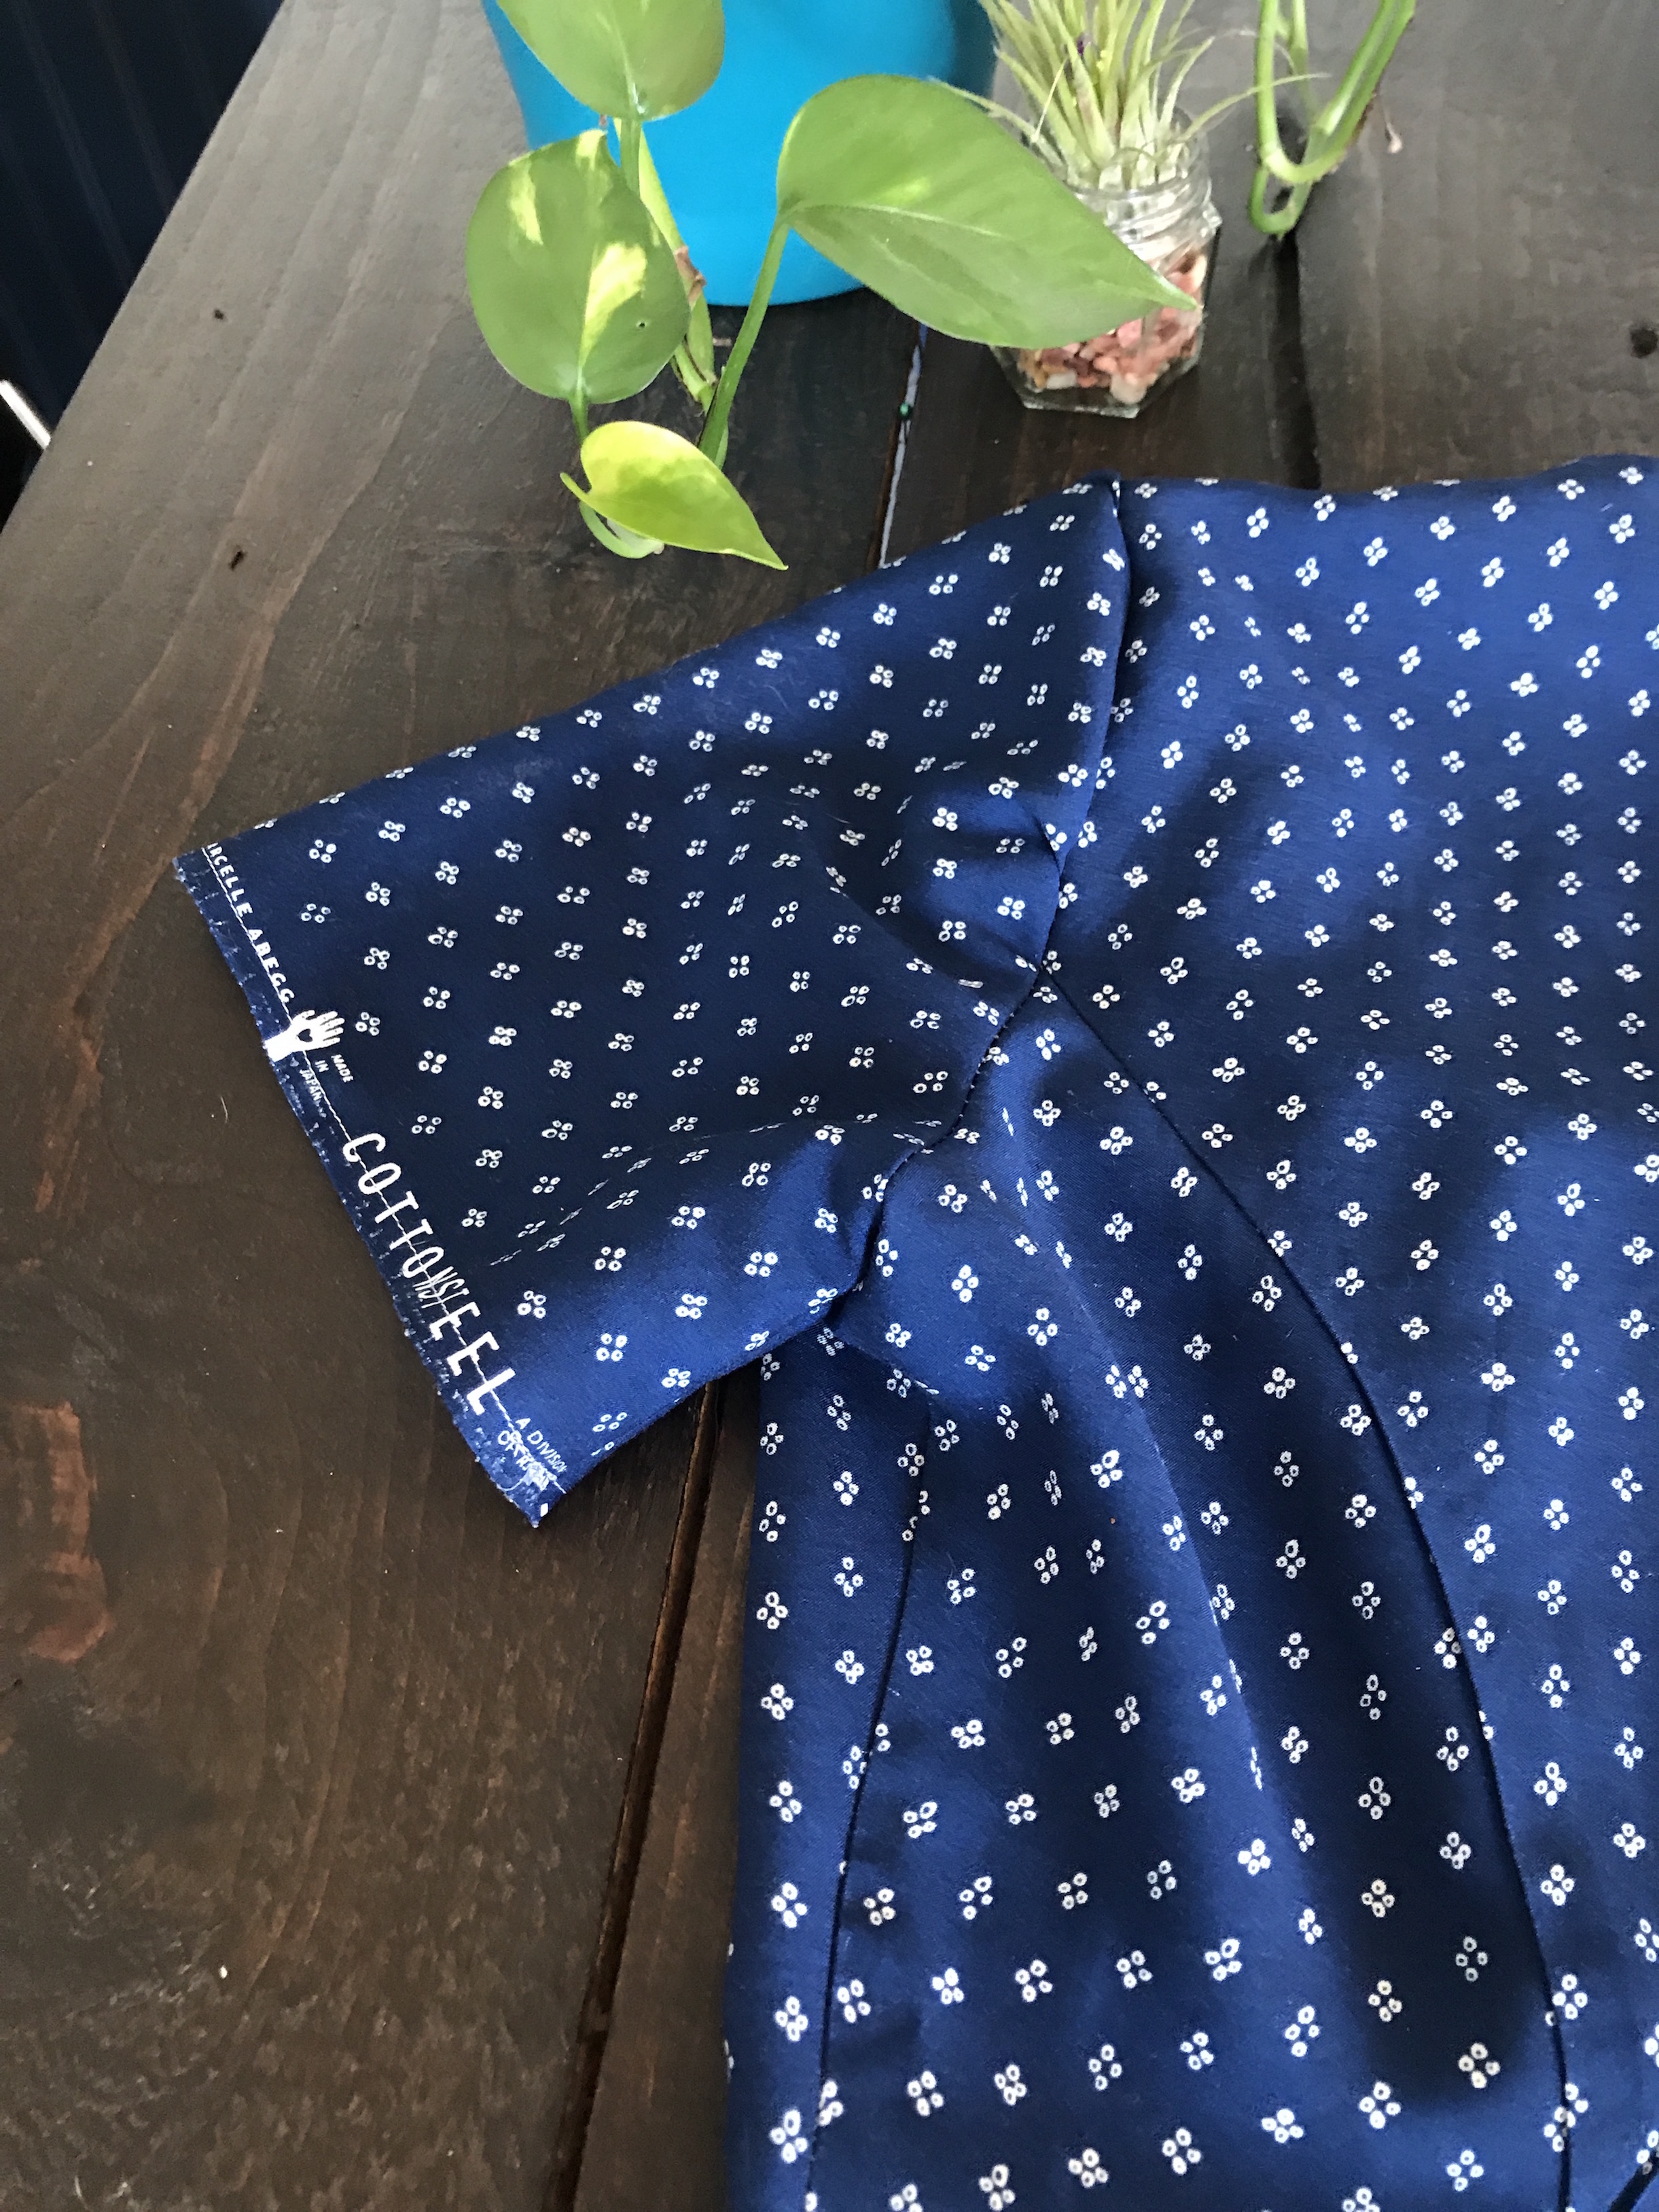
 If you’ve every used any Cotton and Steel fabric you’ll know it usually has the most wonderful selvedge. In my last project using a fabric by them, my beloved Kalle , I decided to incorporate that selvedge in my sleeves and as a last minute decision I decided to do with this dress too and I’m so glad I did. I love how it turned out.
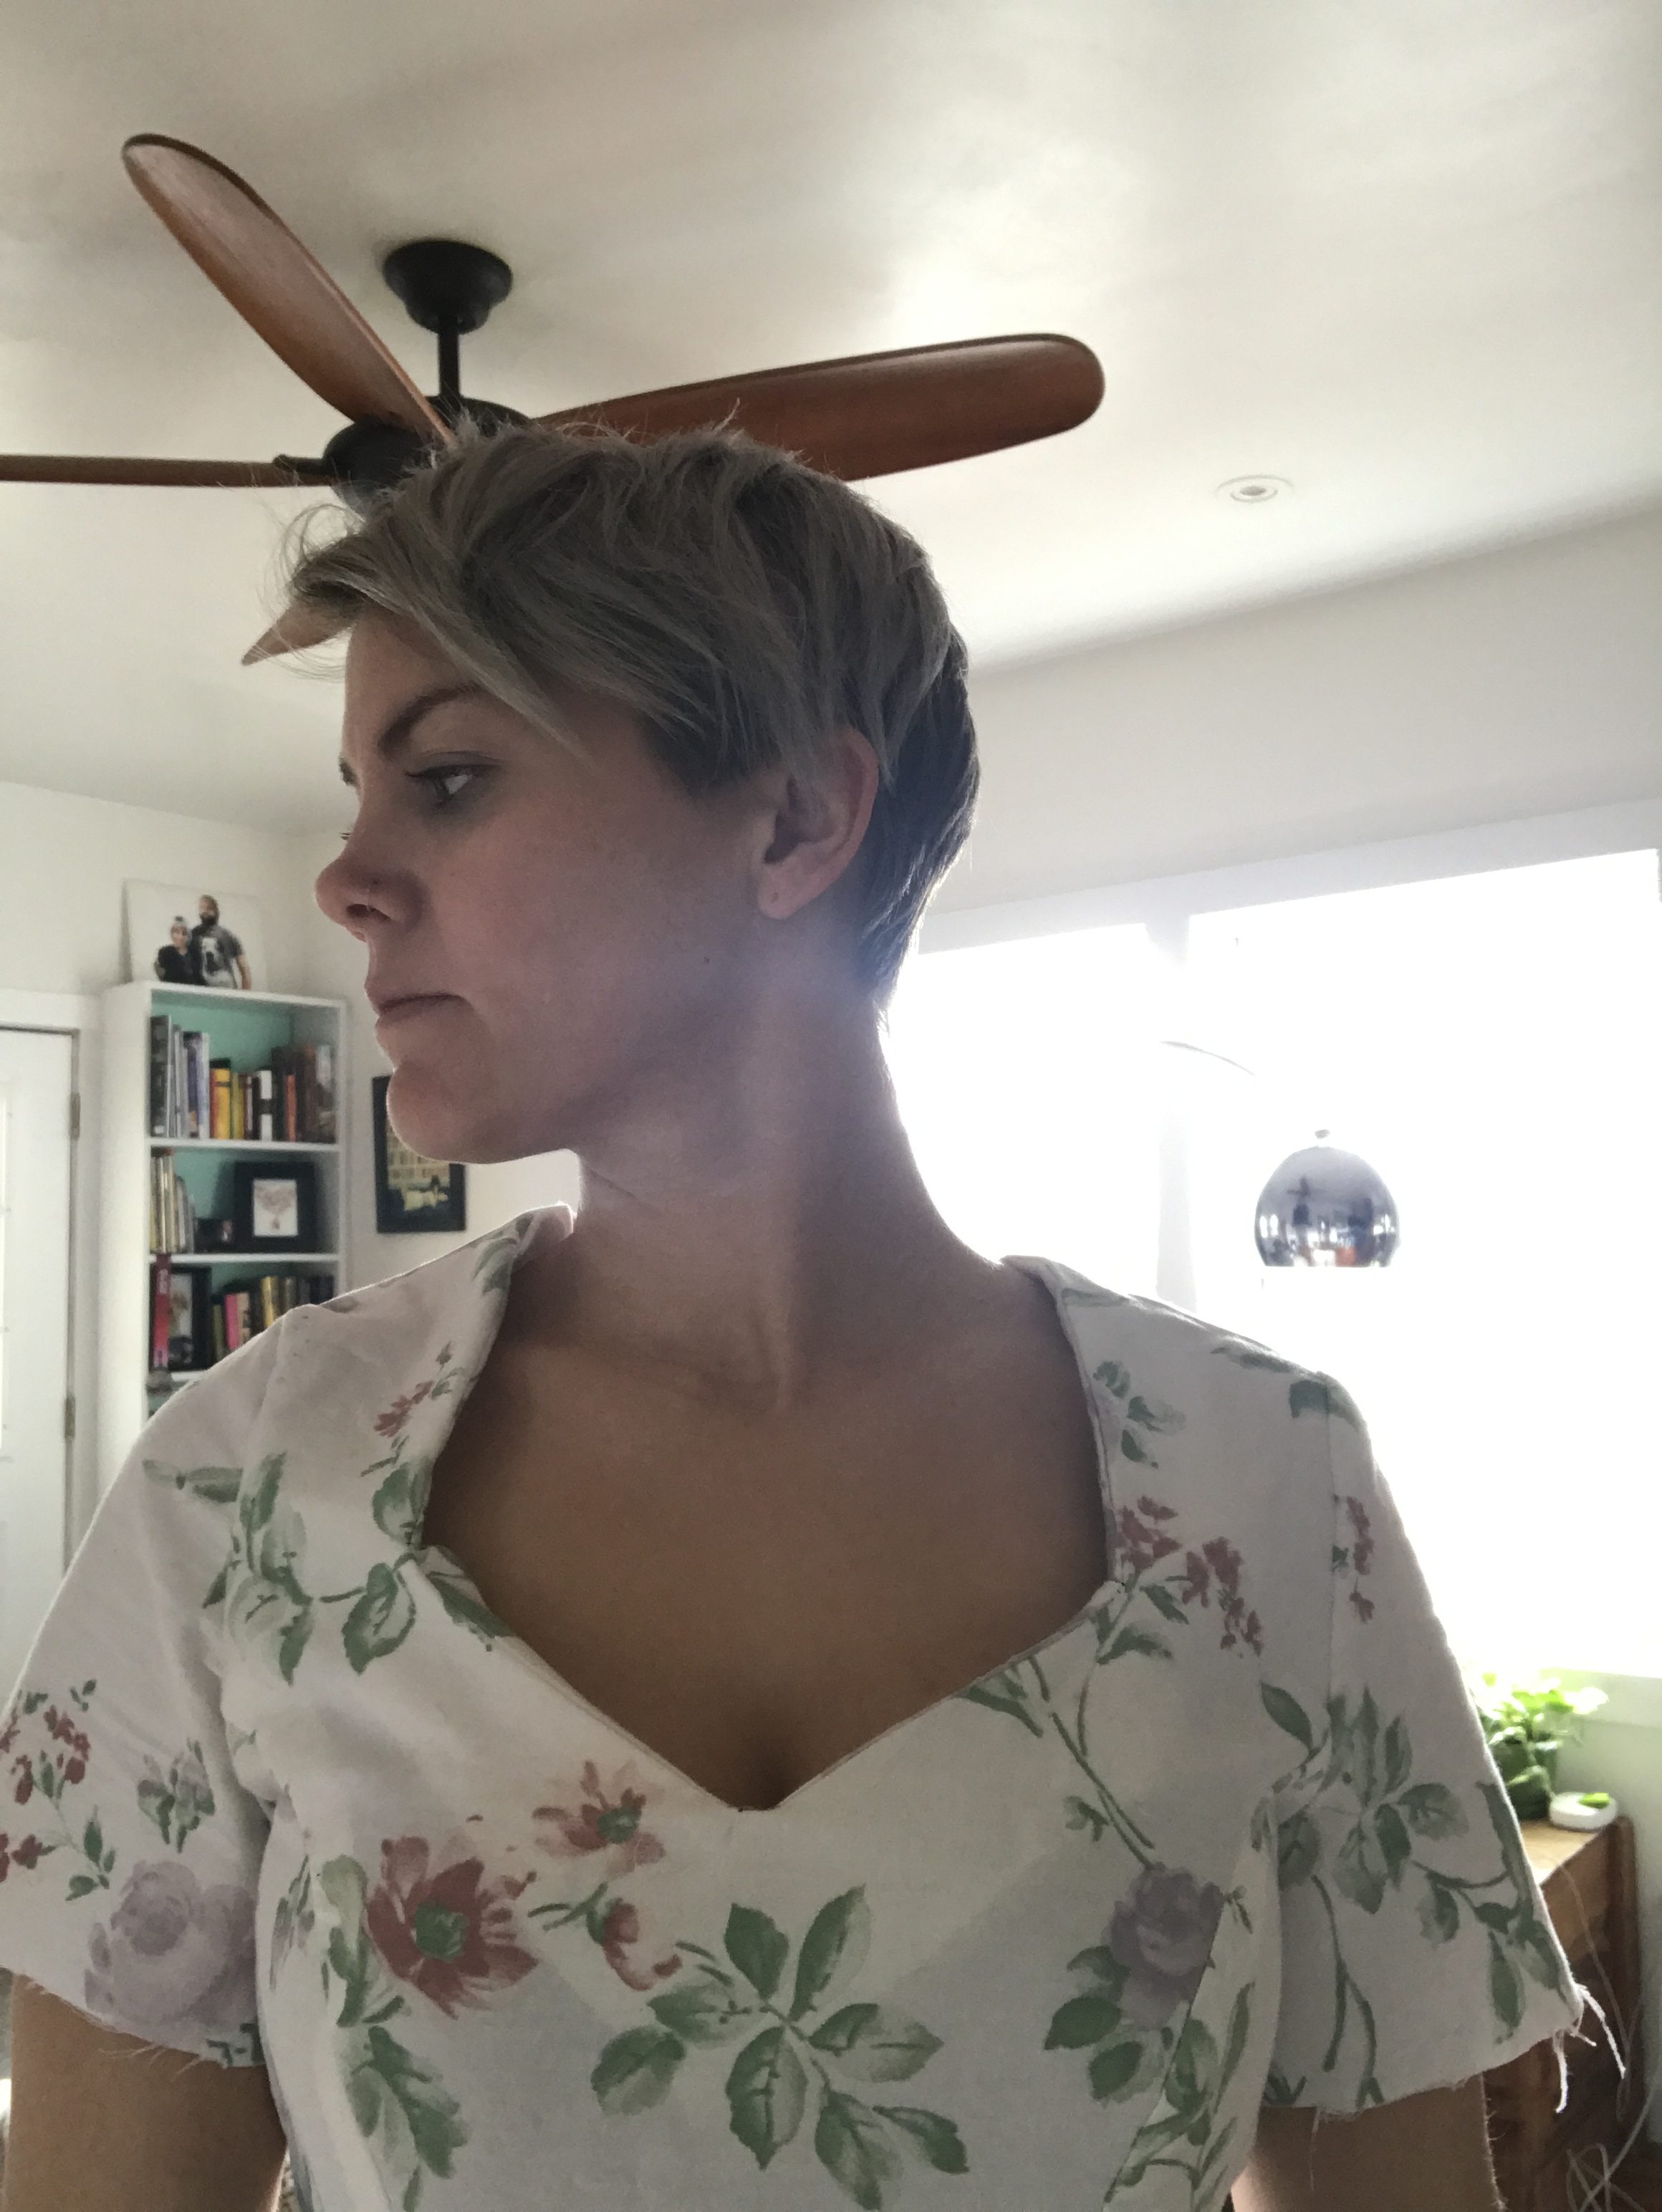
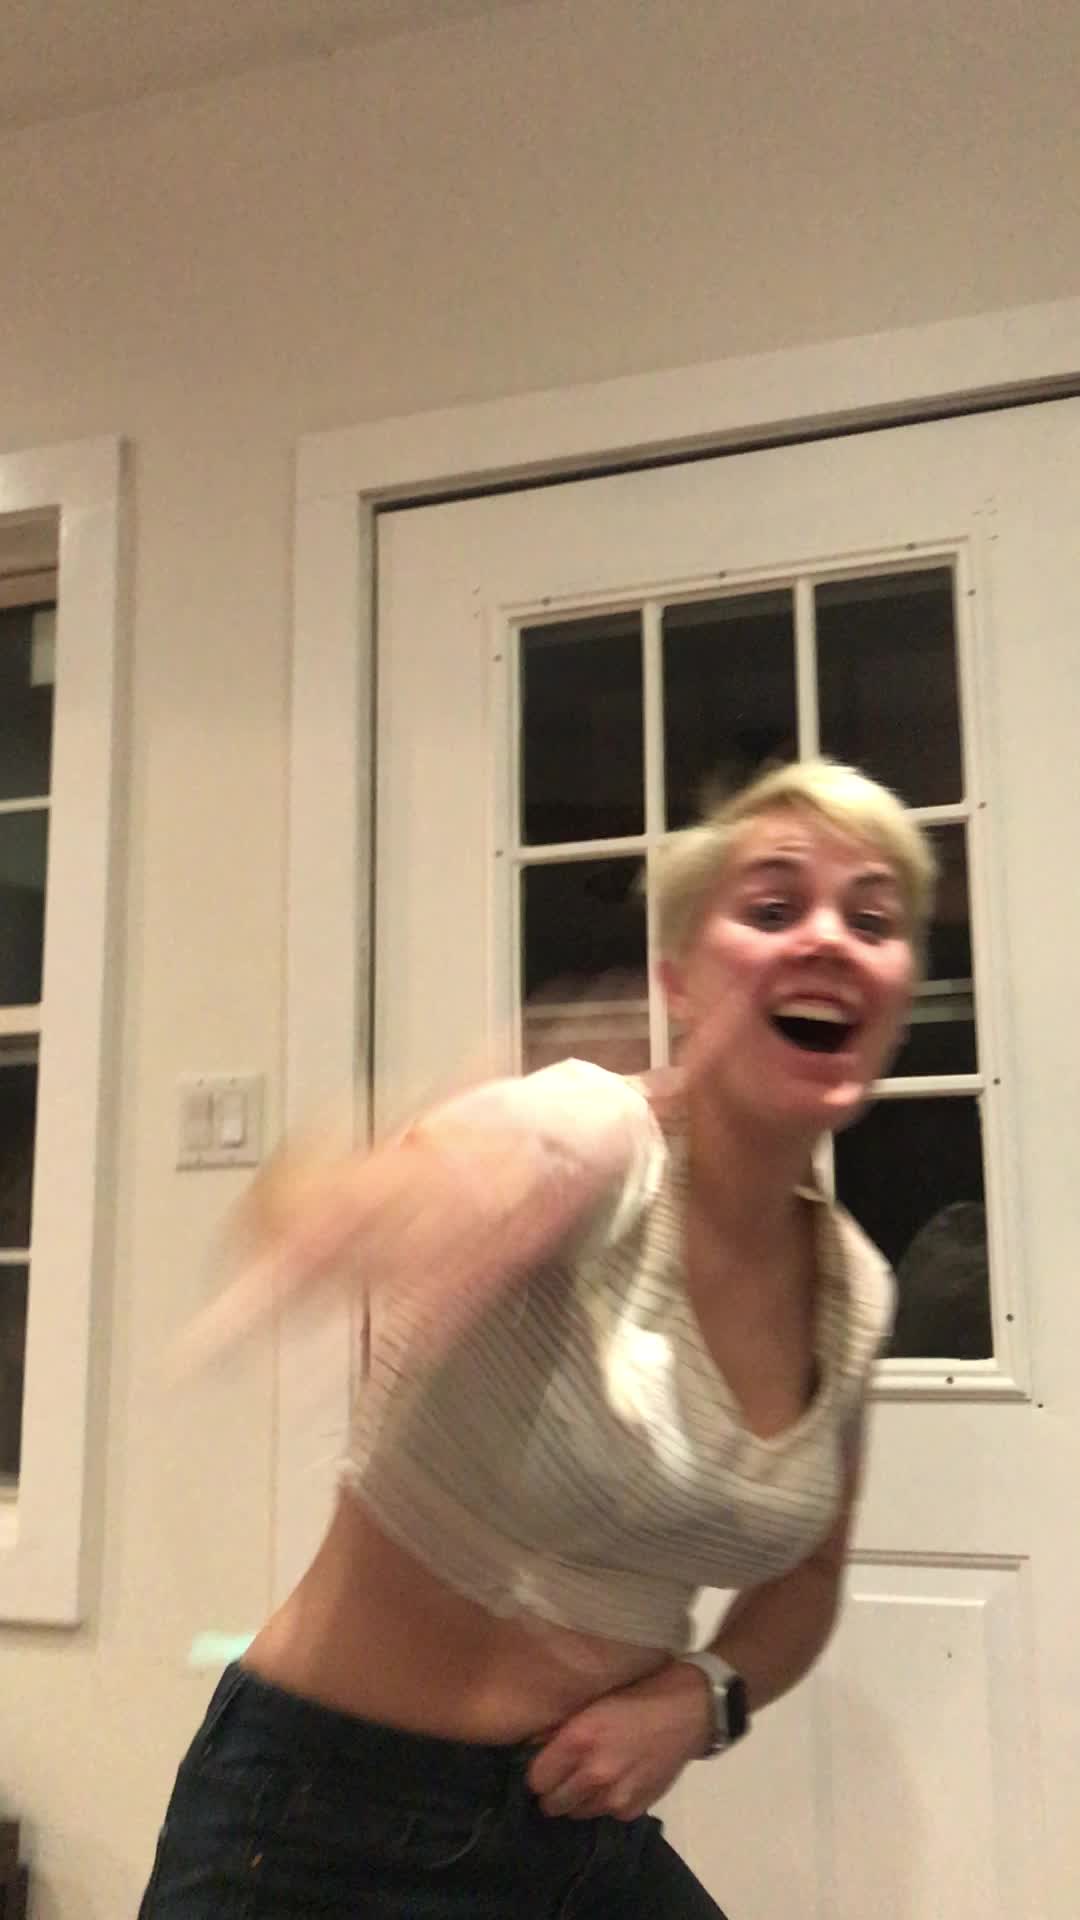
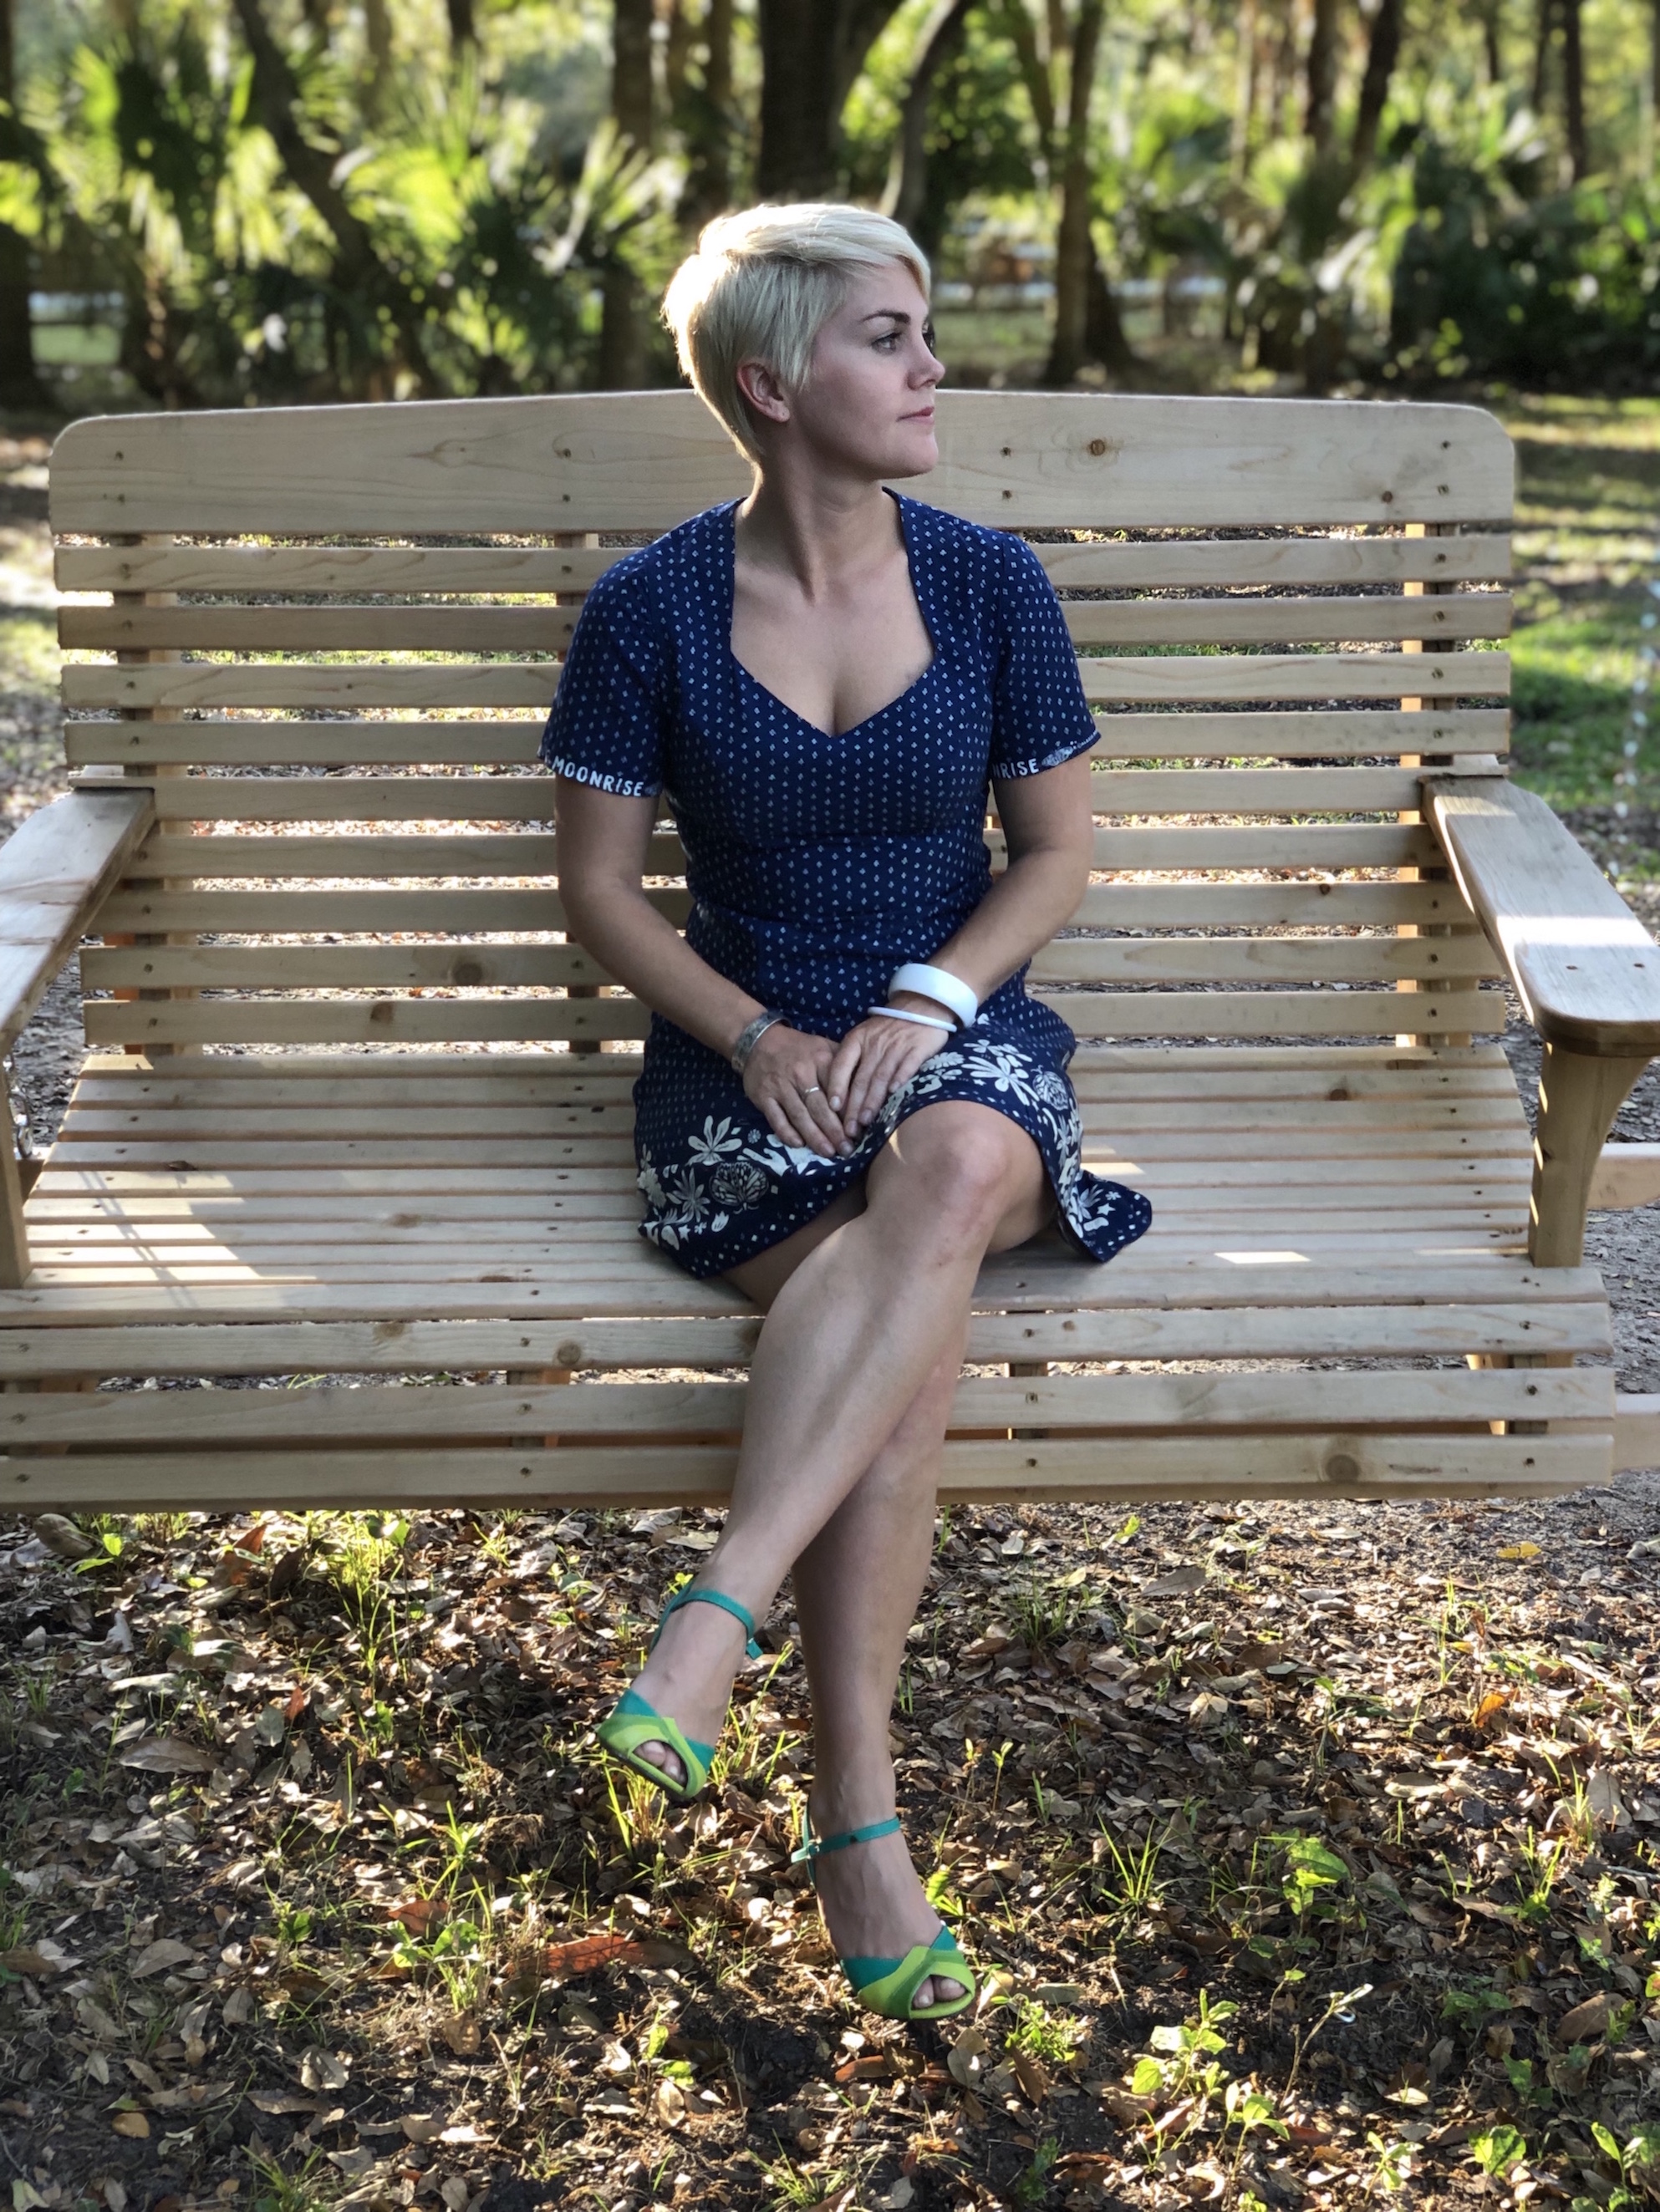
I’ll admit, I didn’t try it on once during the construction, the hem was dictated by the border print so I could even do that before trying it. I also french seamed everything as the rayon is very prone to fraying. Once the facing was attached and the hems were done it was the moment of truth. I’ll be honest, I felt a bit sick. As soon as I reached back to pull the zip up, I KNEW…
Knew that it was going to fit and that I would move my arms! Hooray! I was so so happy when I put it on.
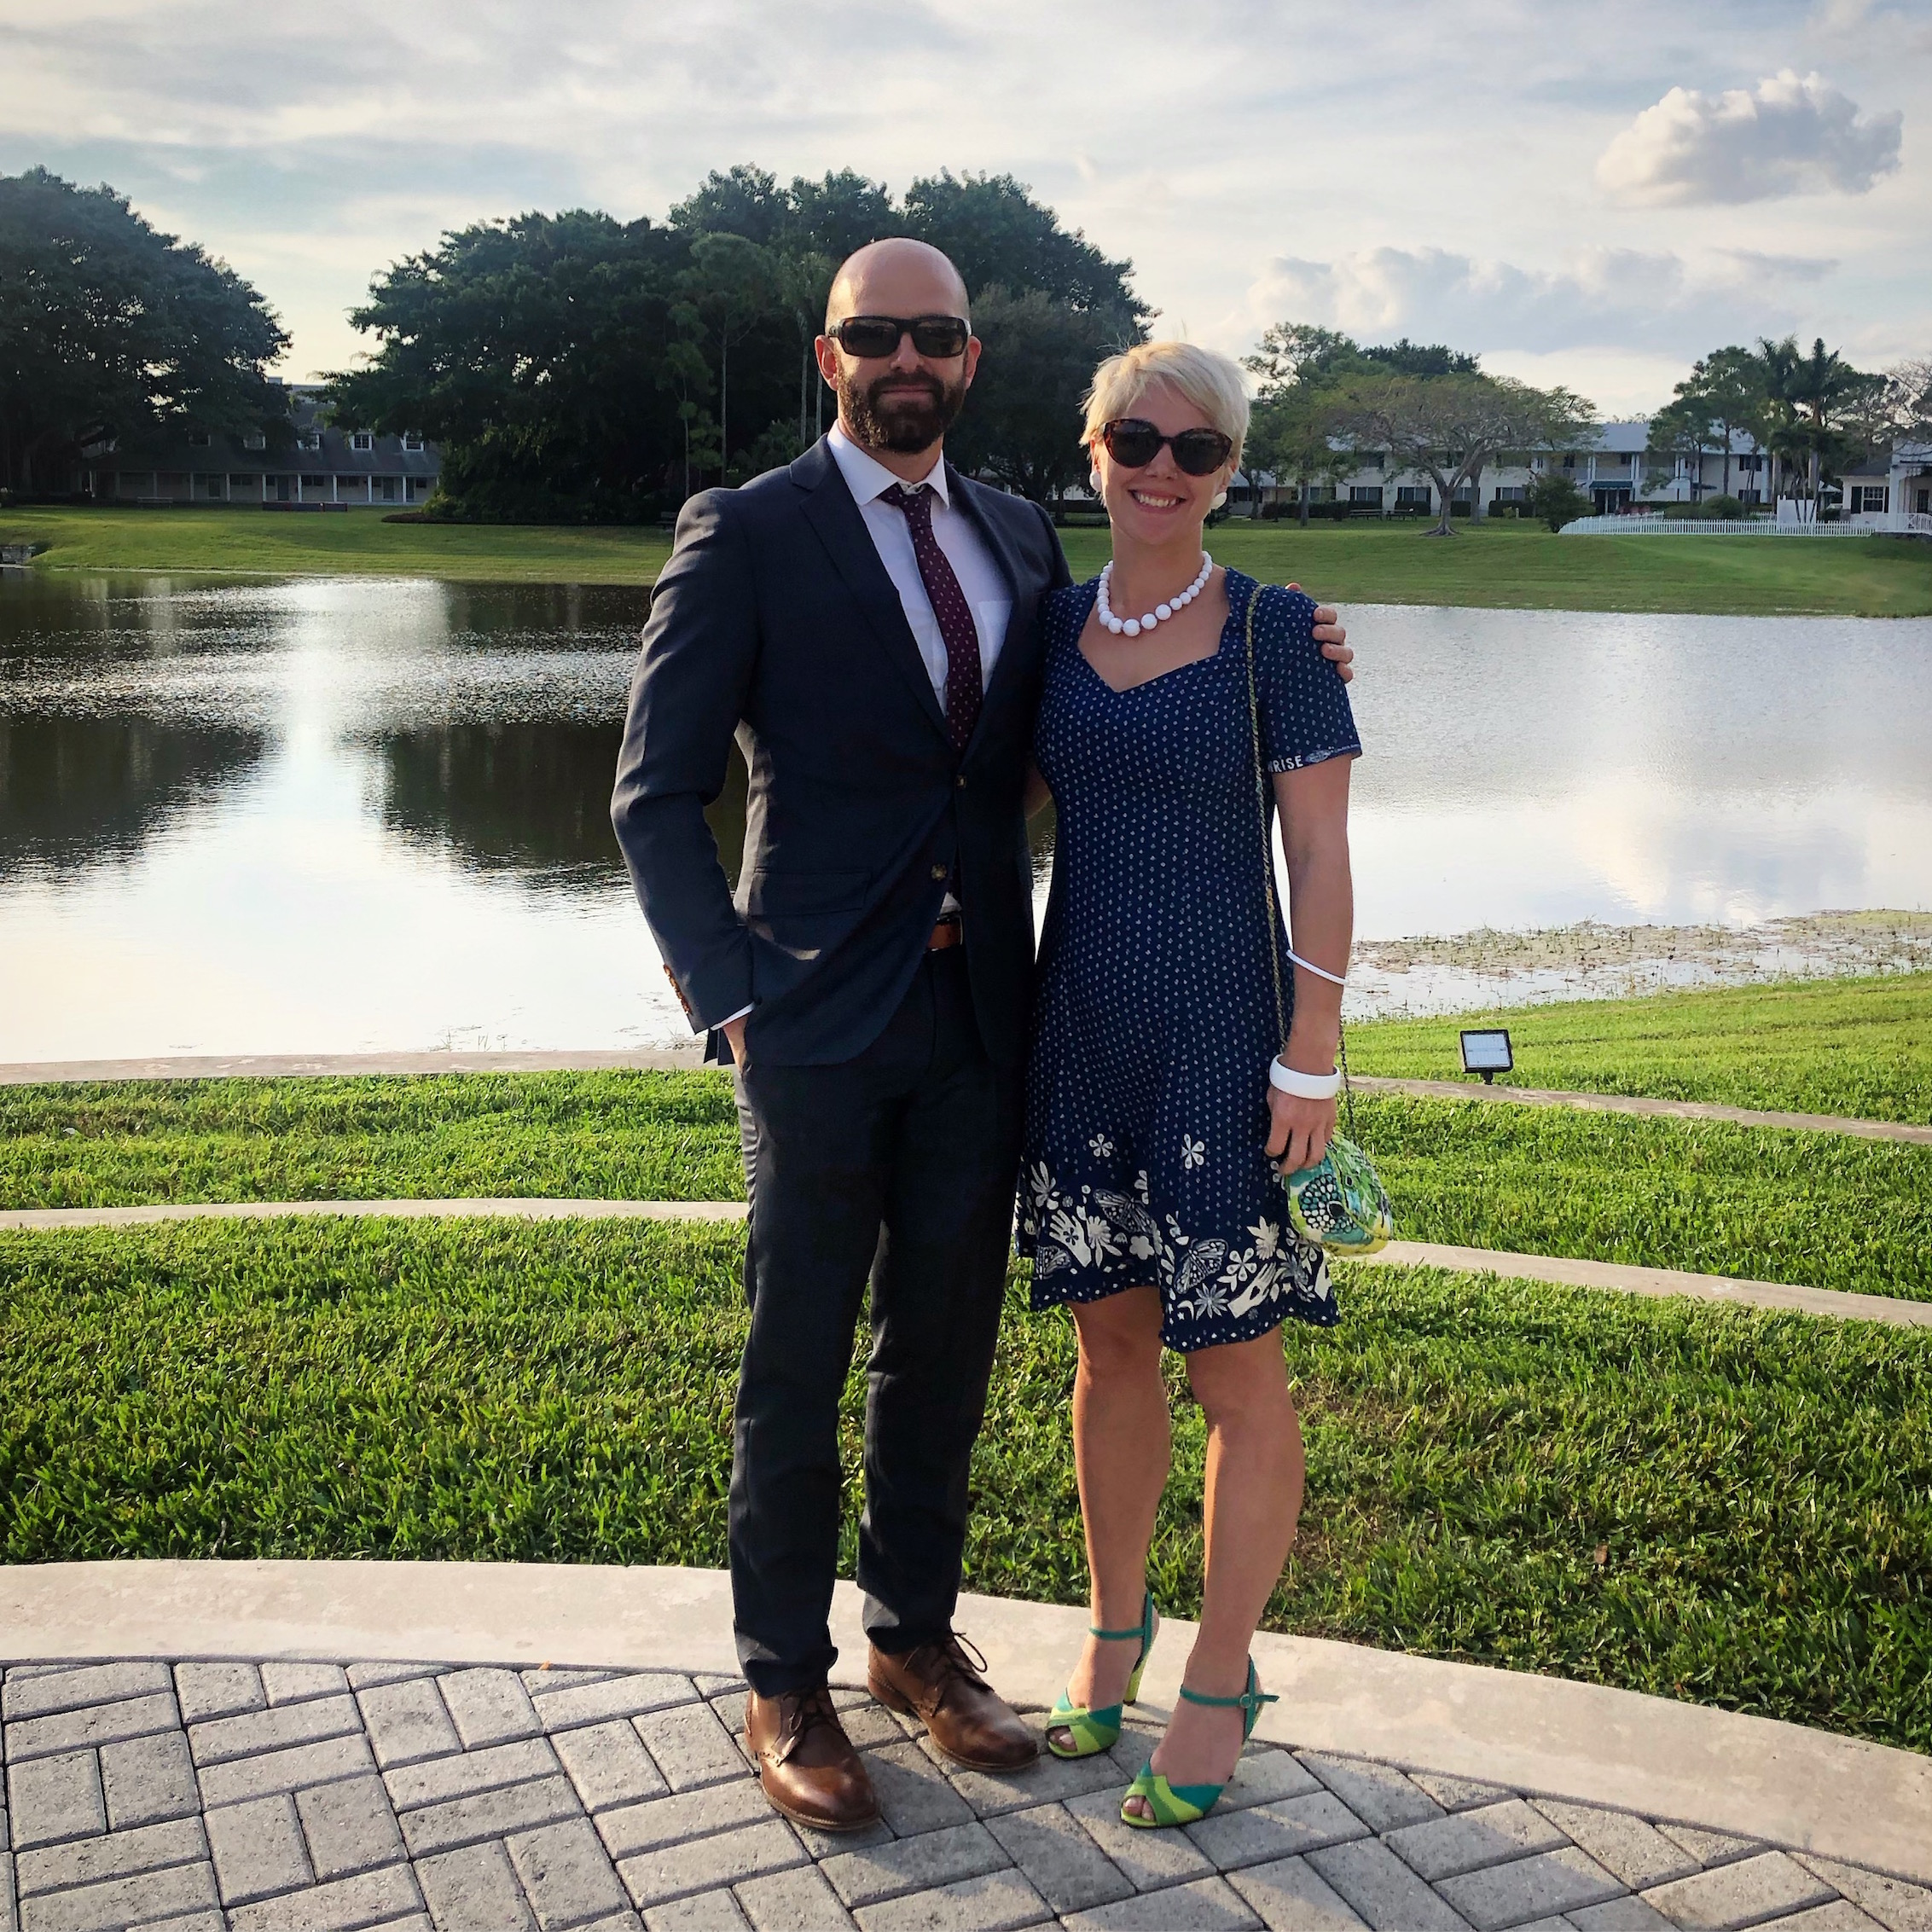
After all that work having paid off you would think think it couldn’t get much better right? Well, WRONG! As I mentioned, this was for a wedding we were going to, I tried the dress on with various pairs of heels I had but Joe and I both agreed none of them really did the dress justice. Well, Joe being the lovely human he is, said he was so impressed by my commitment to getting the dress just right that he would treat me to a pair of shoes. I was over the moon ( I LOVE SHOES!) but my desire to be more sustainable was a bit torn, luckily though, I managed to find the most amazing pair of Betty Page vintage style heels on Poshmark (a used fashion website kind of like ebay) that had barely been worn. When then arrived they were even more perfect than I thought they’d be!
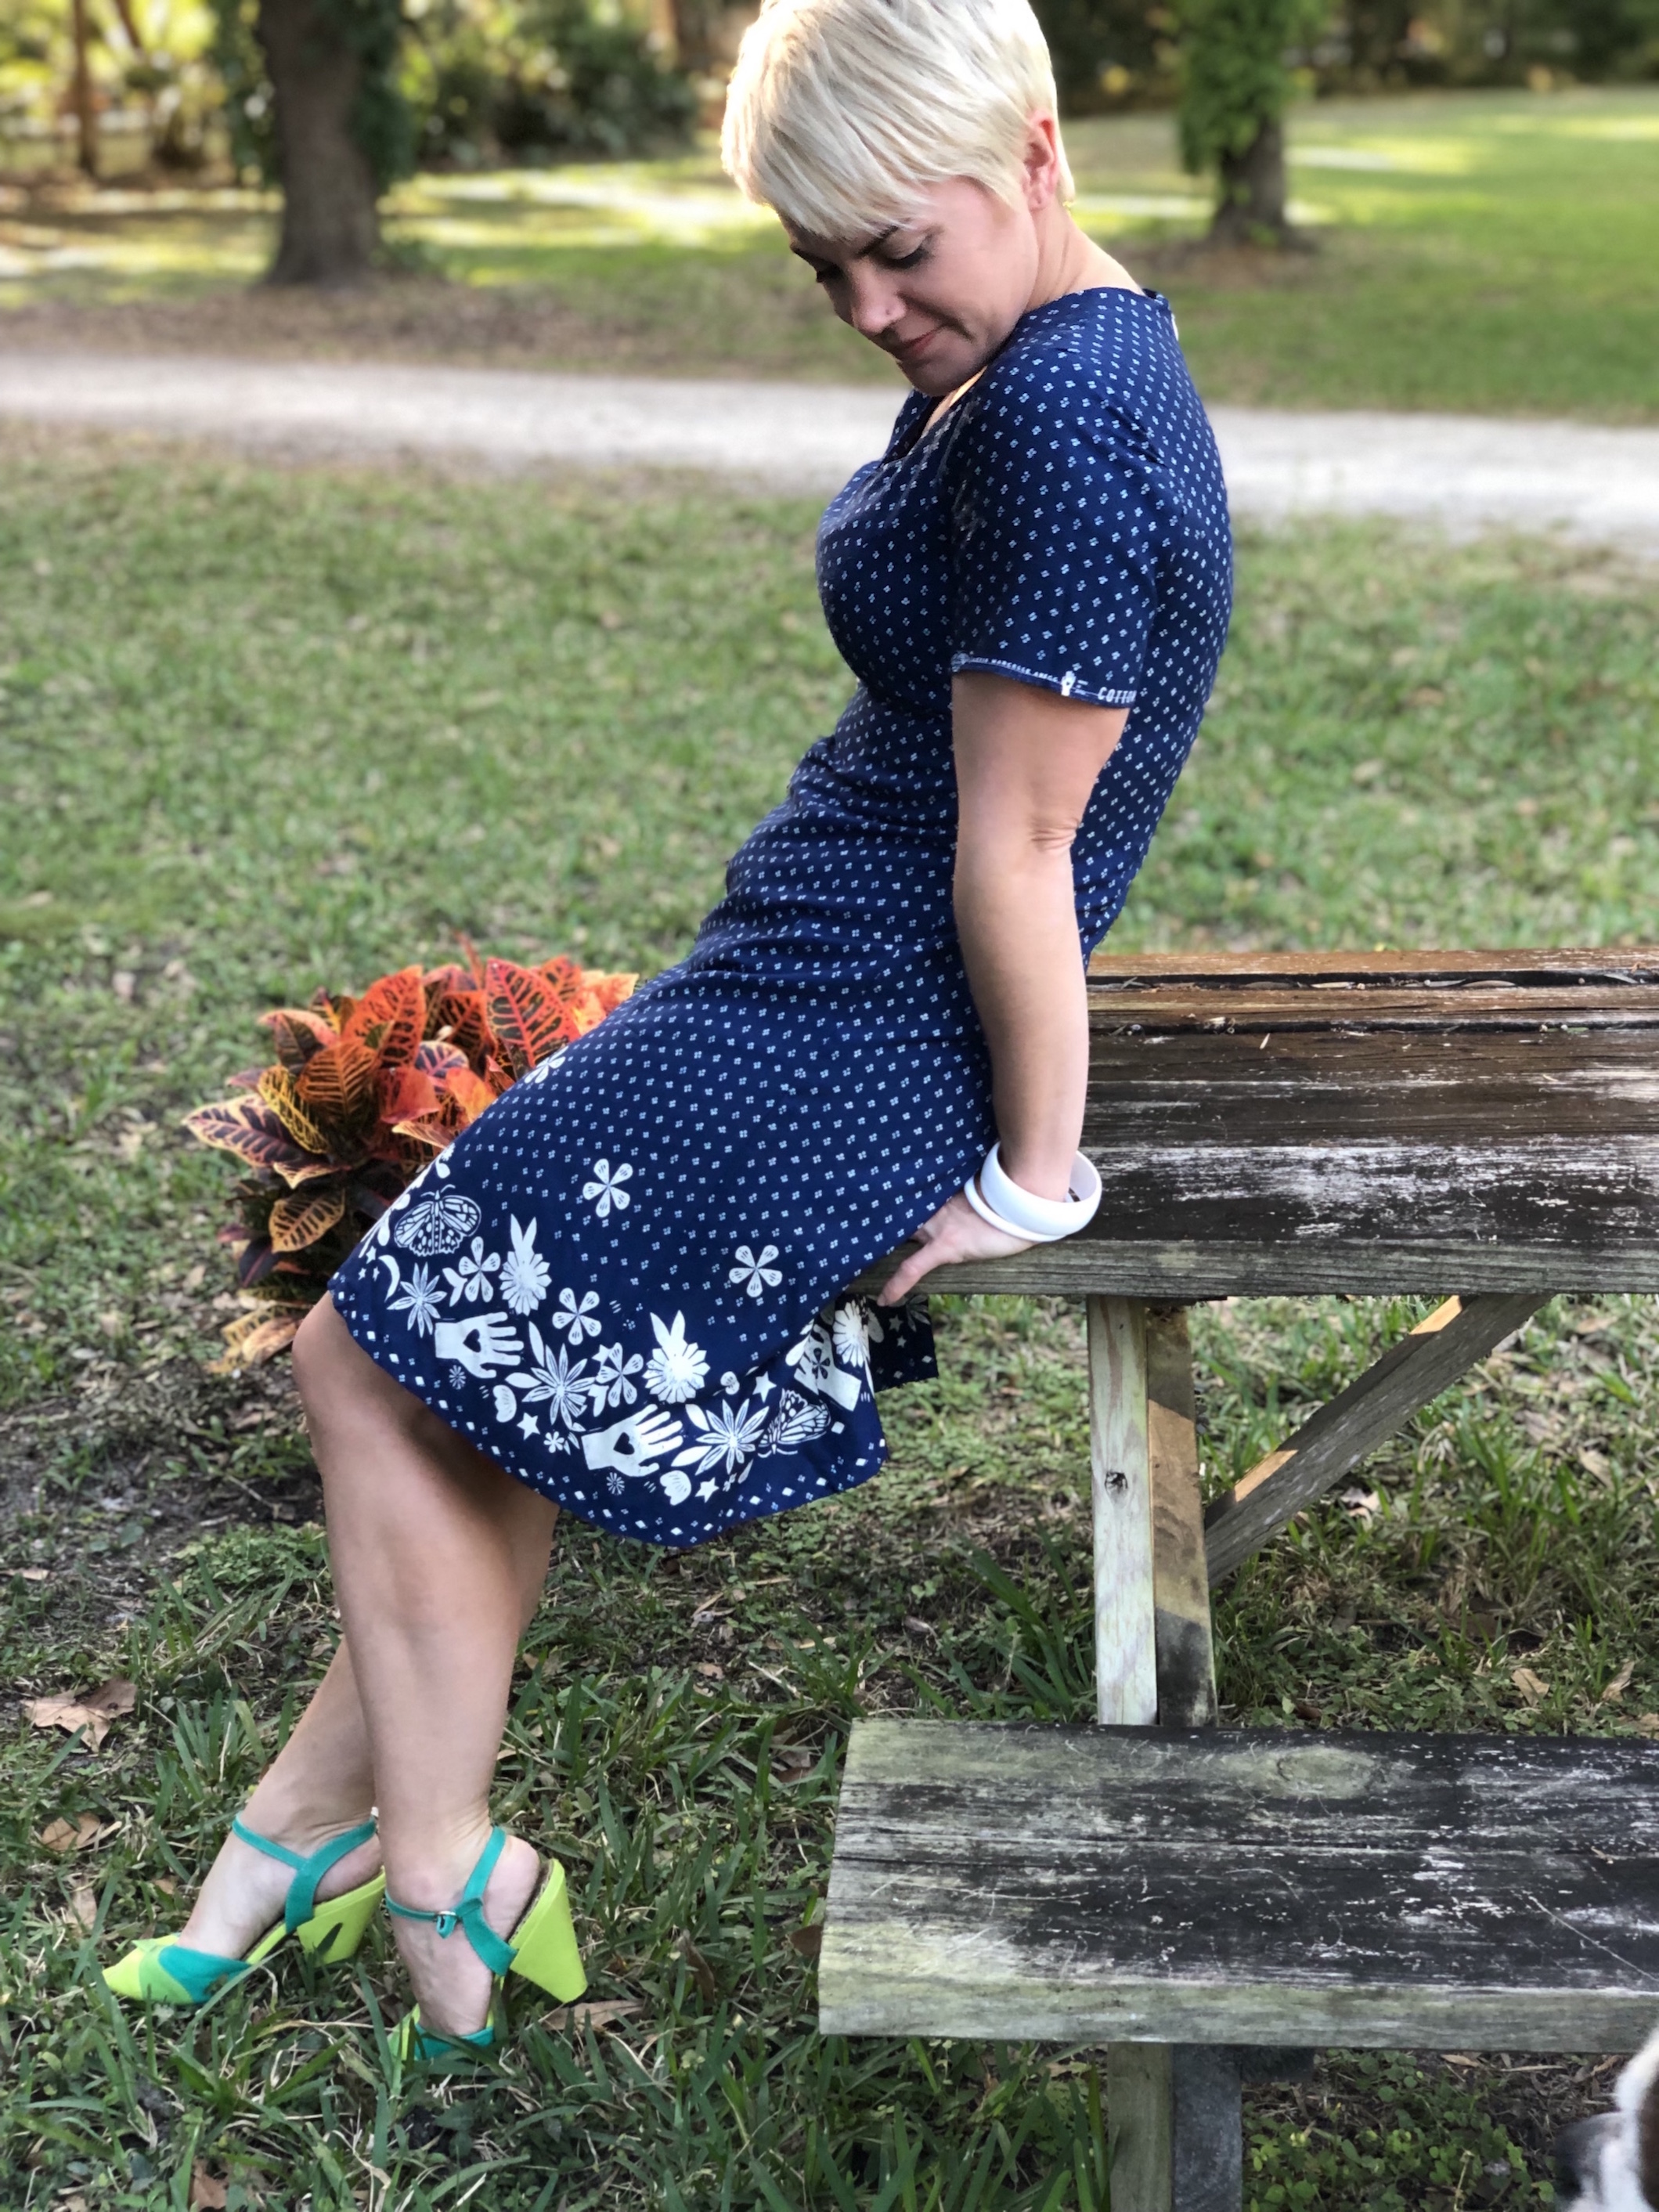
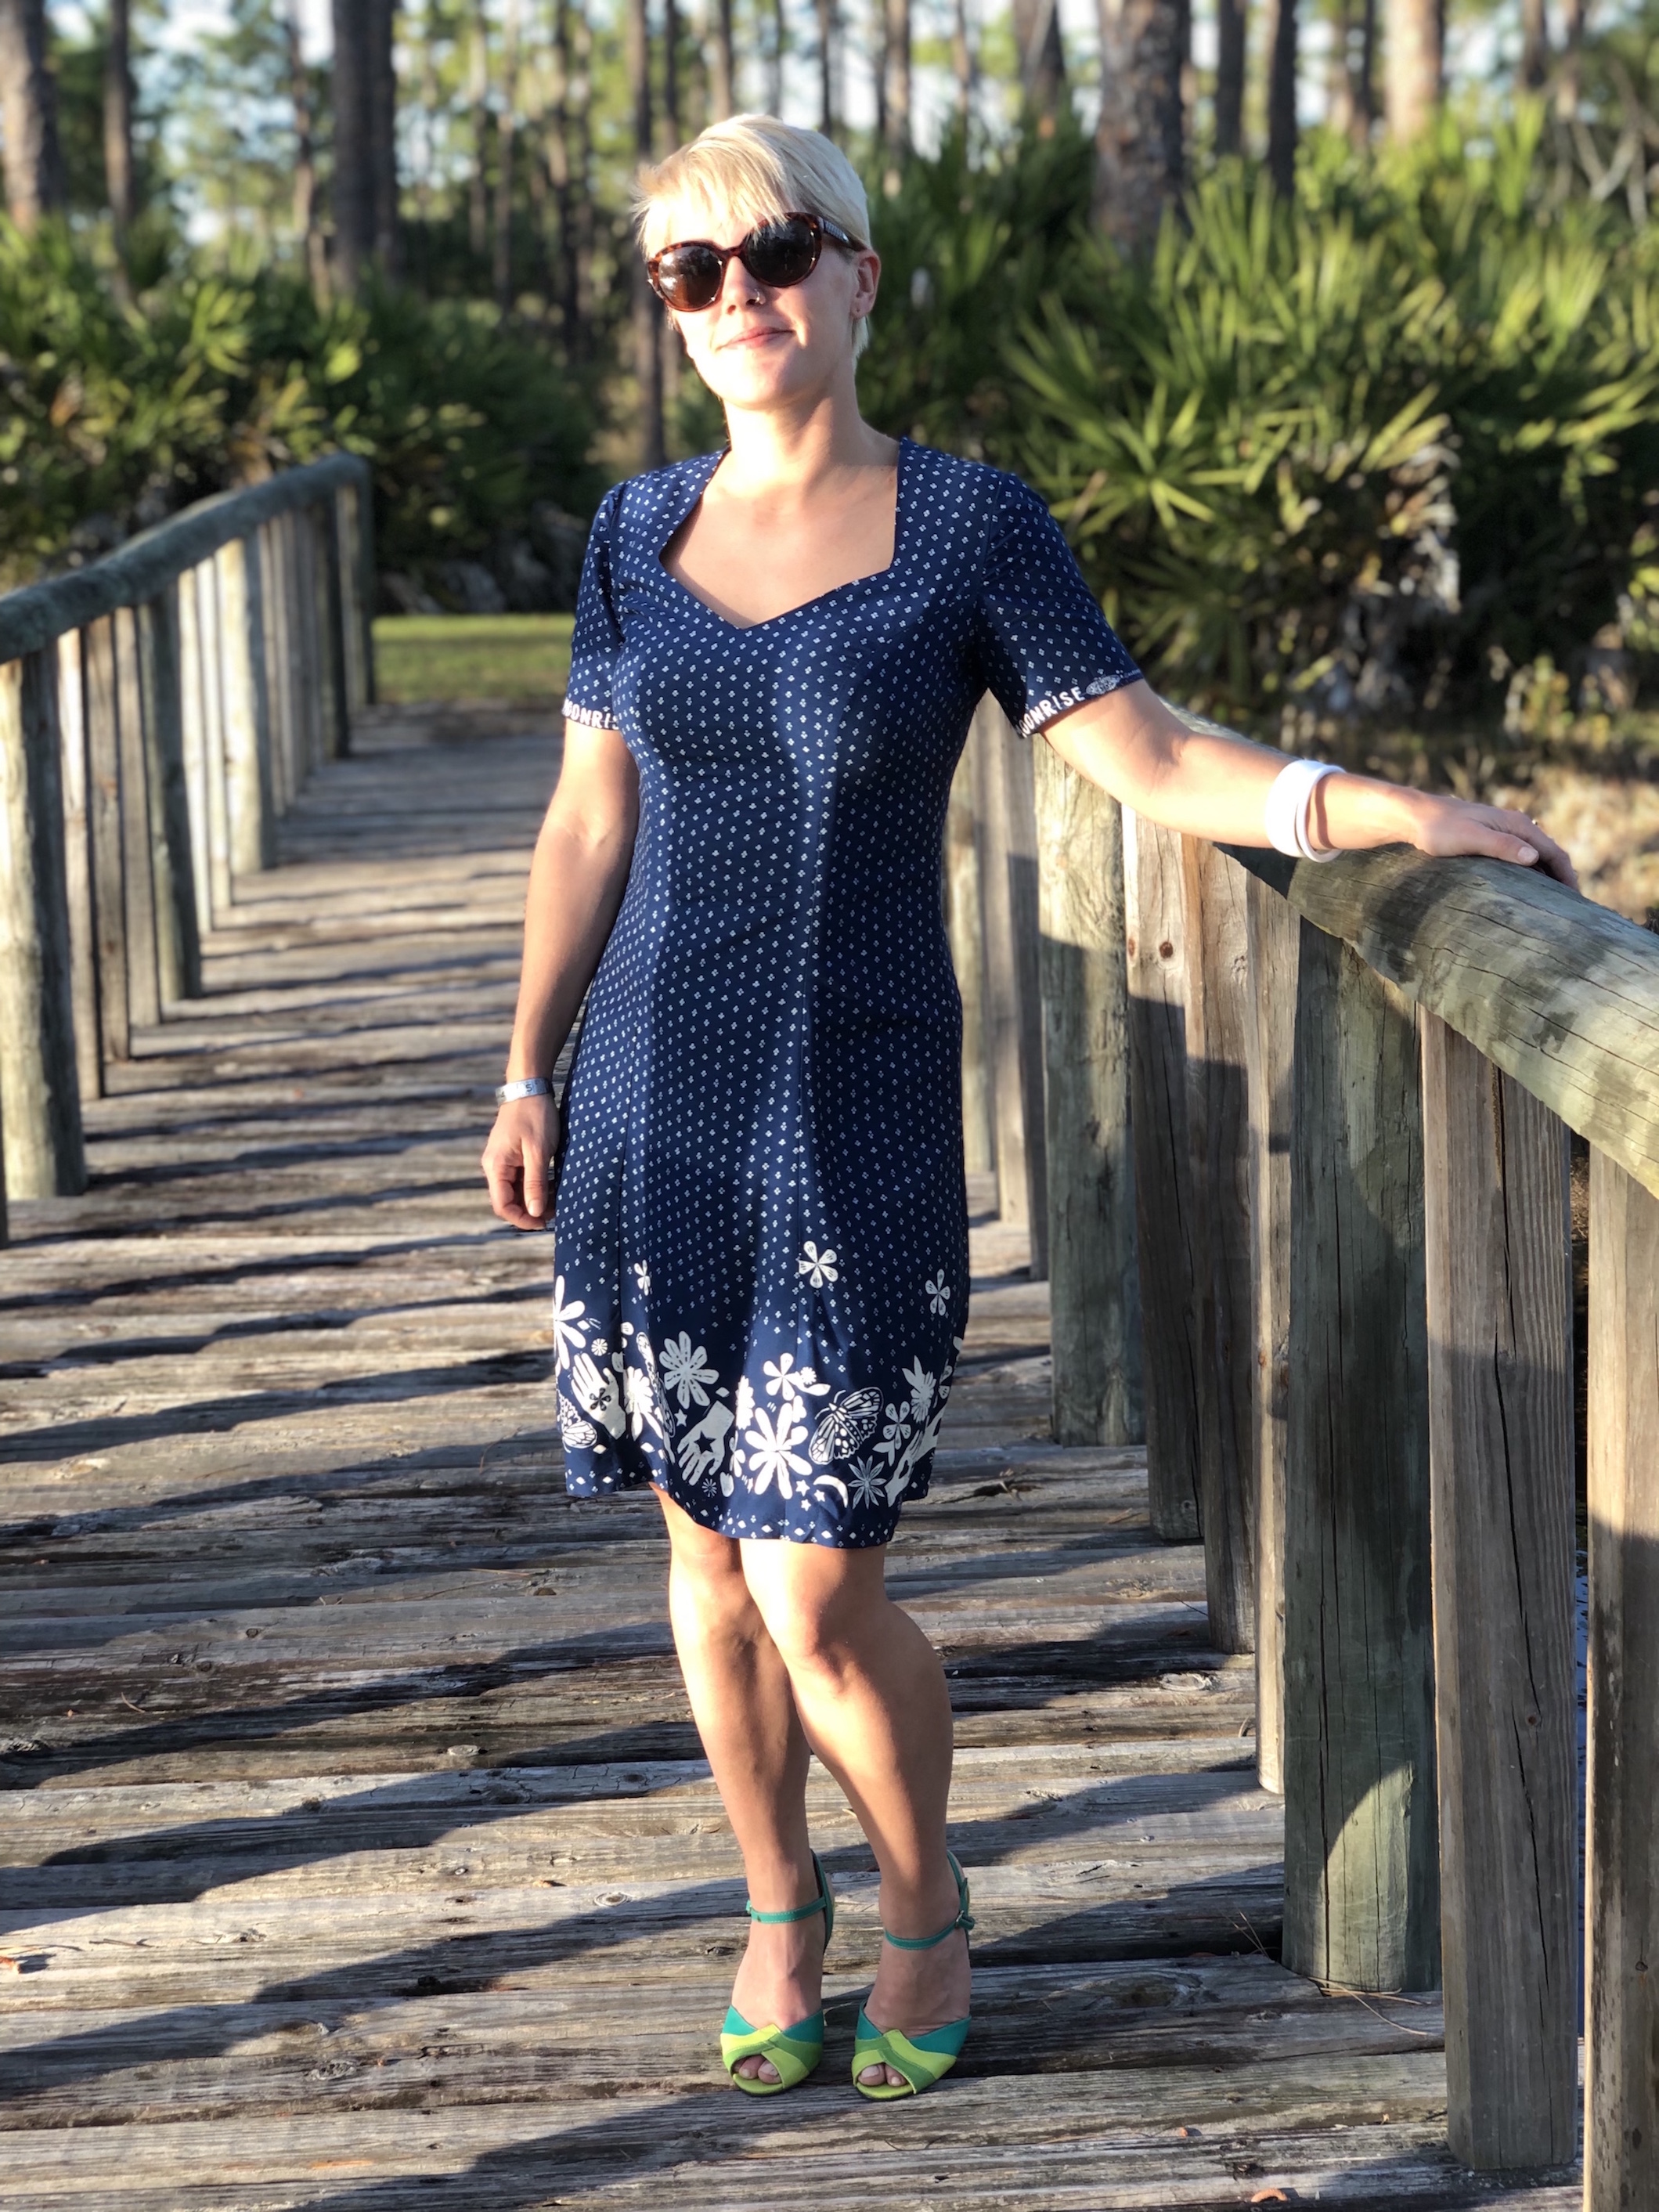
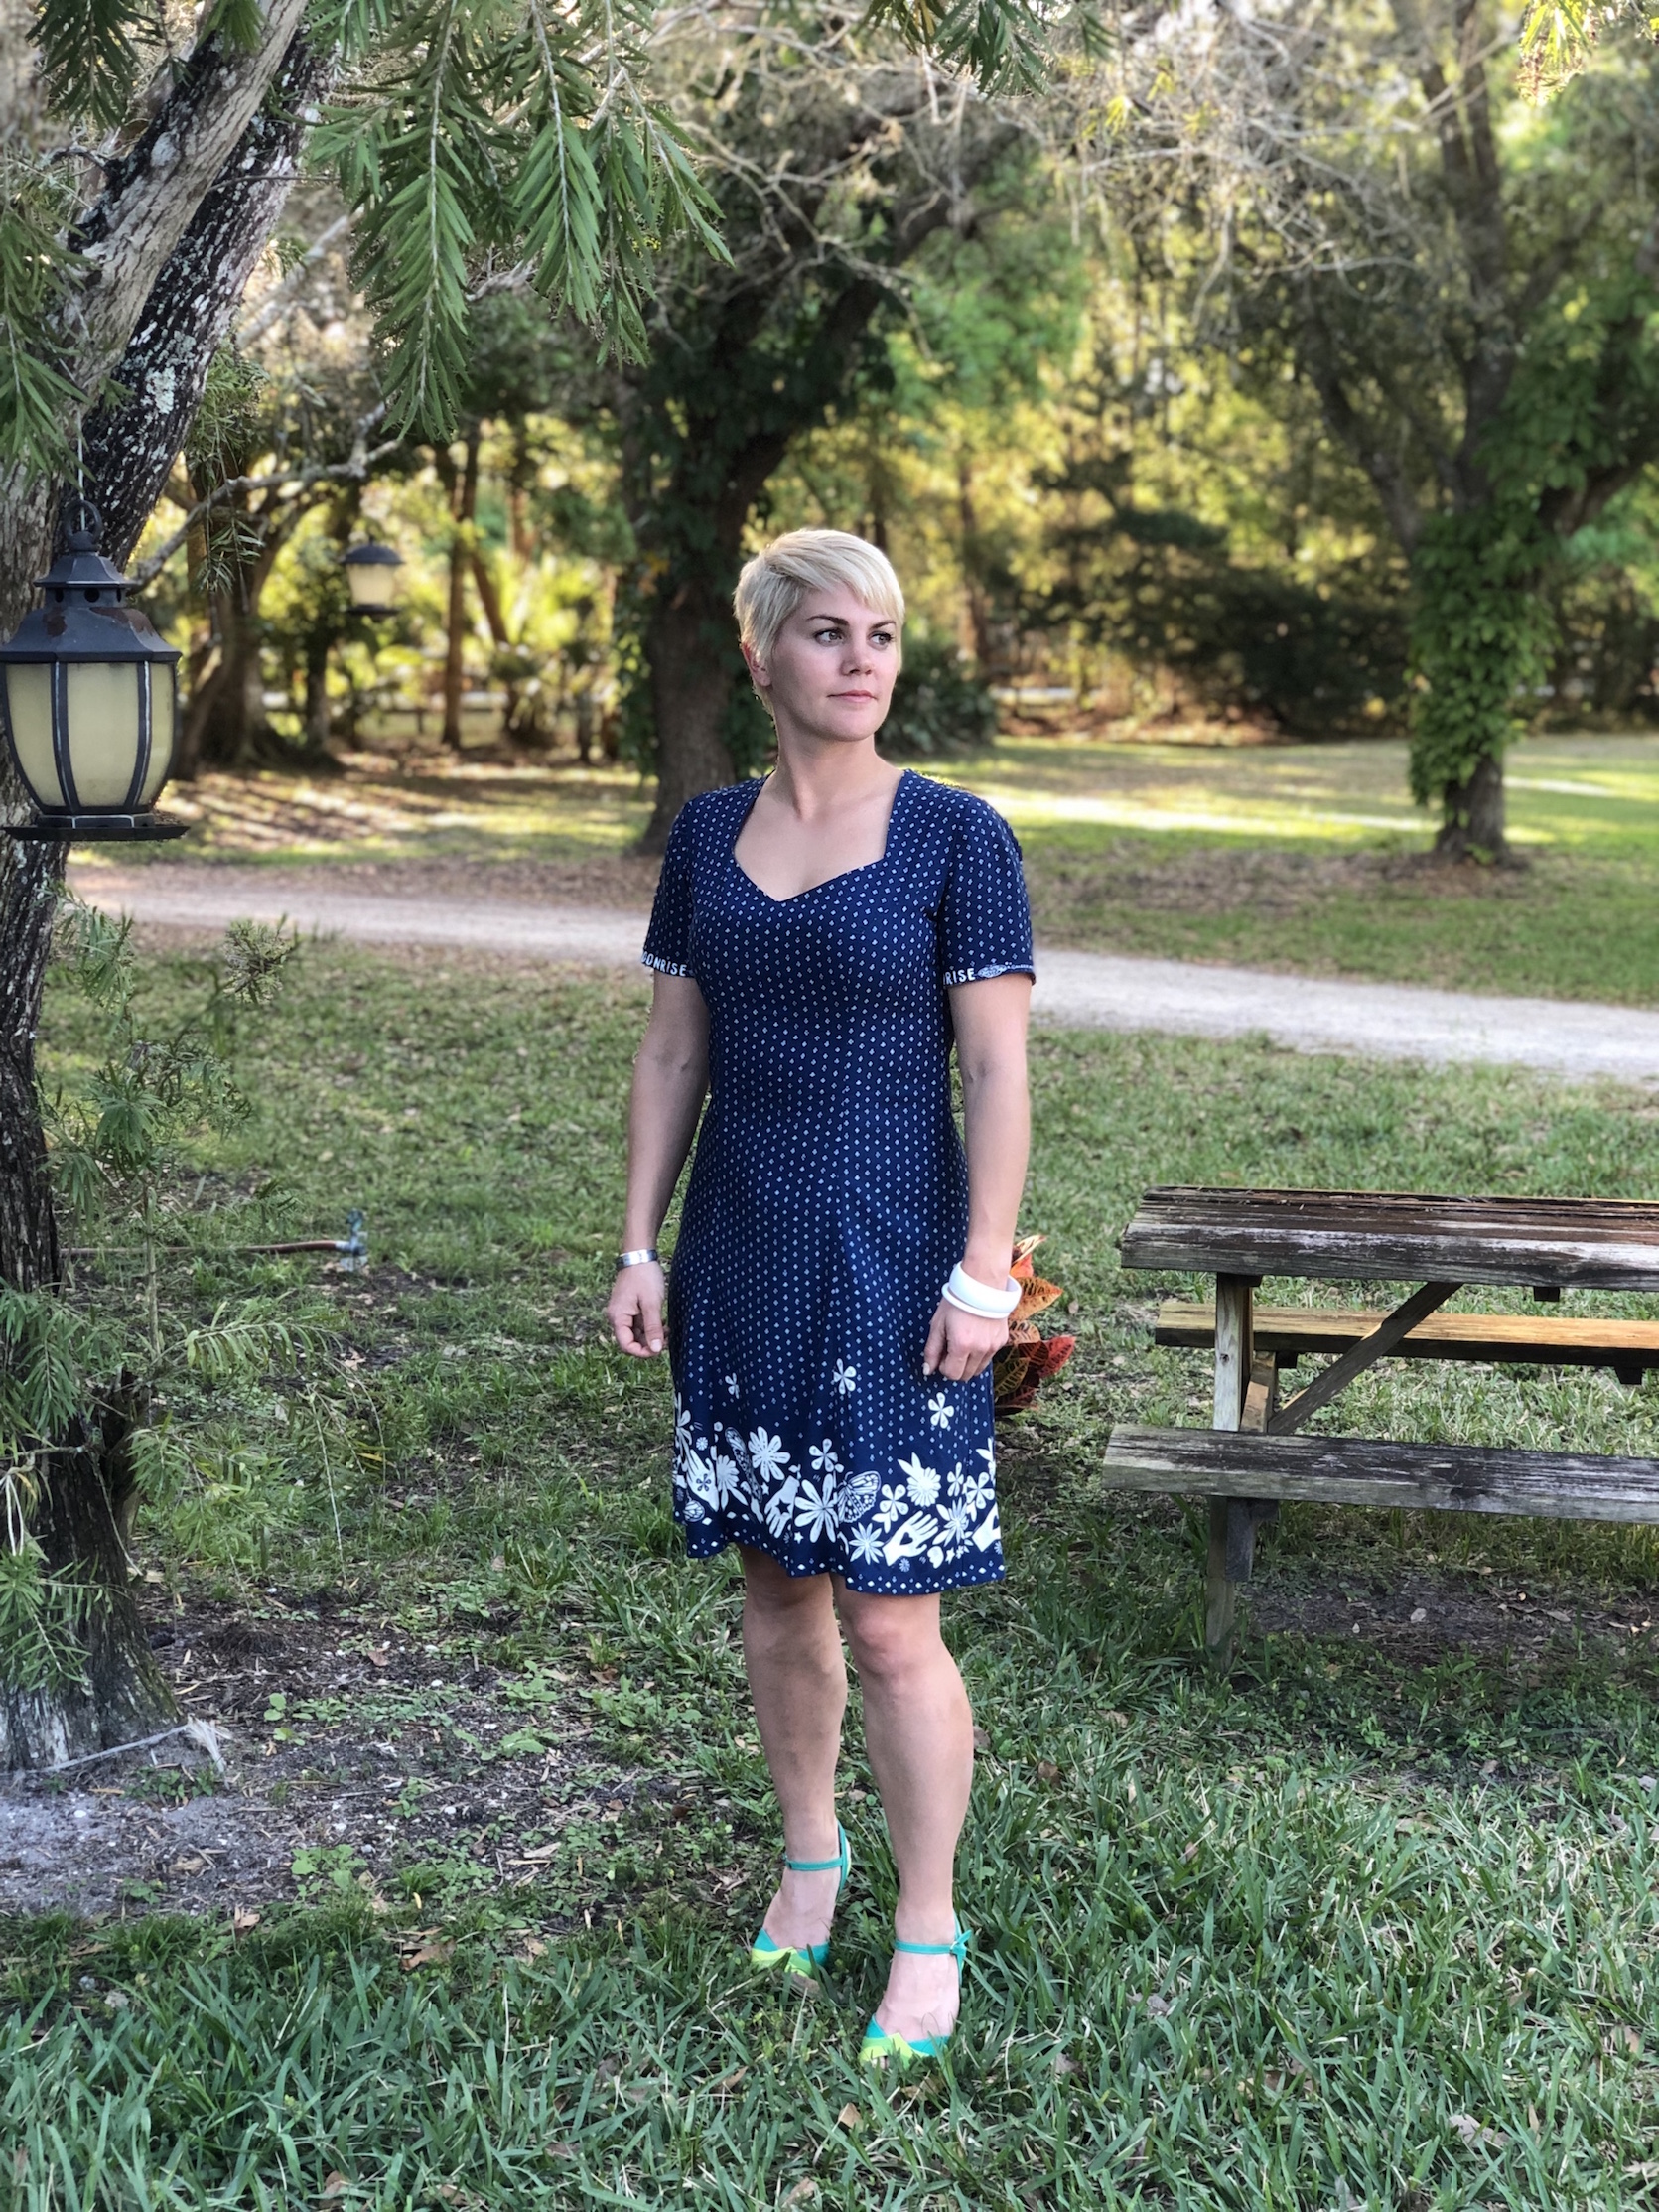
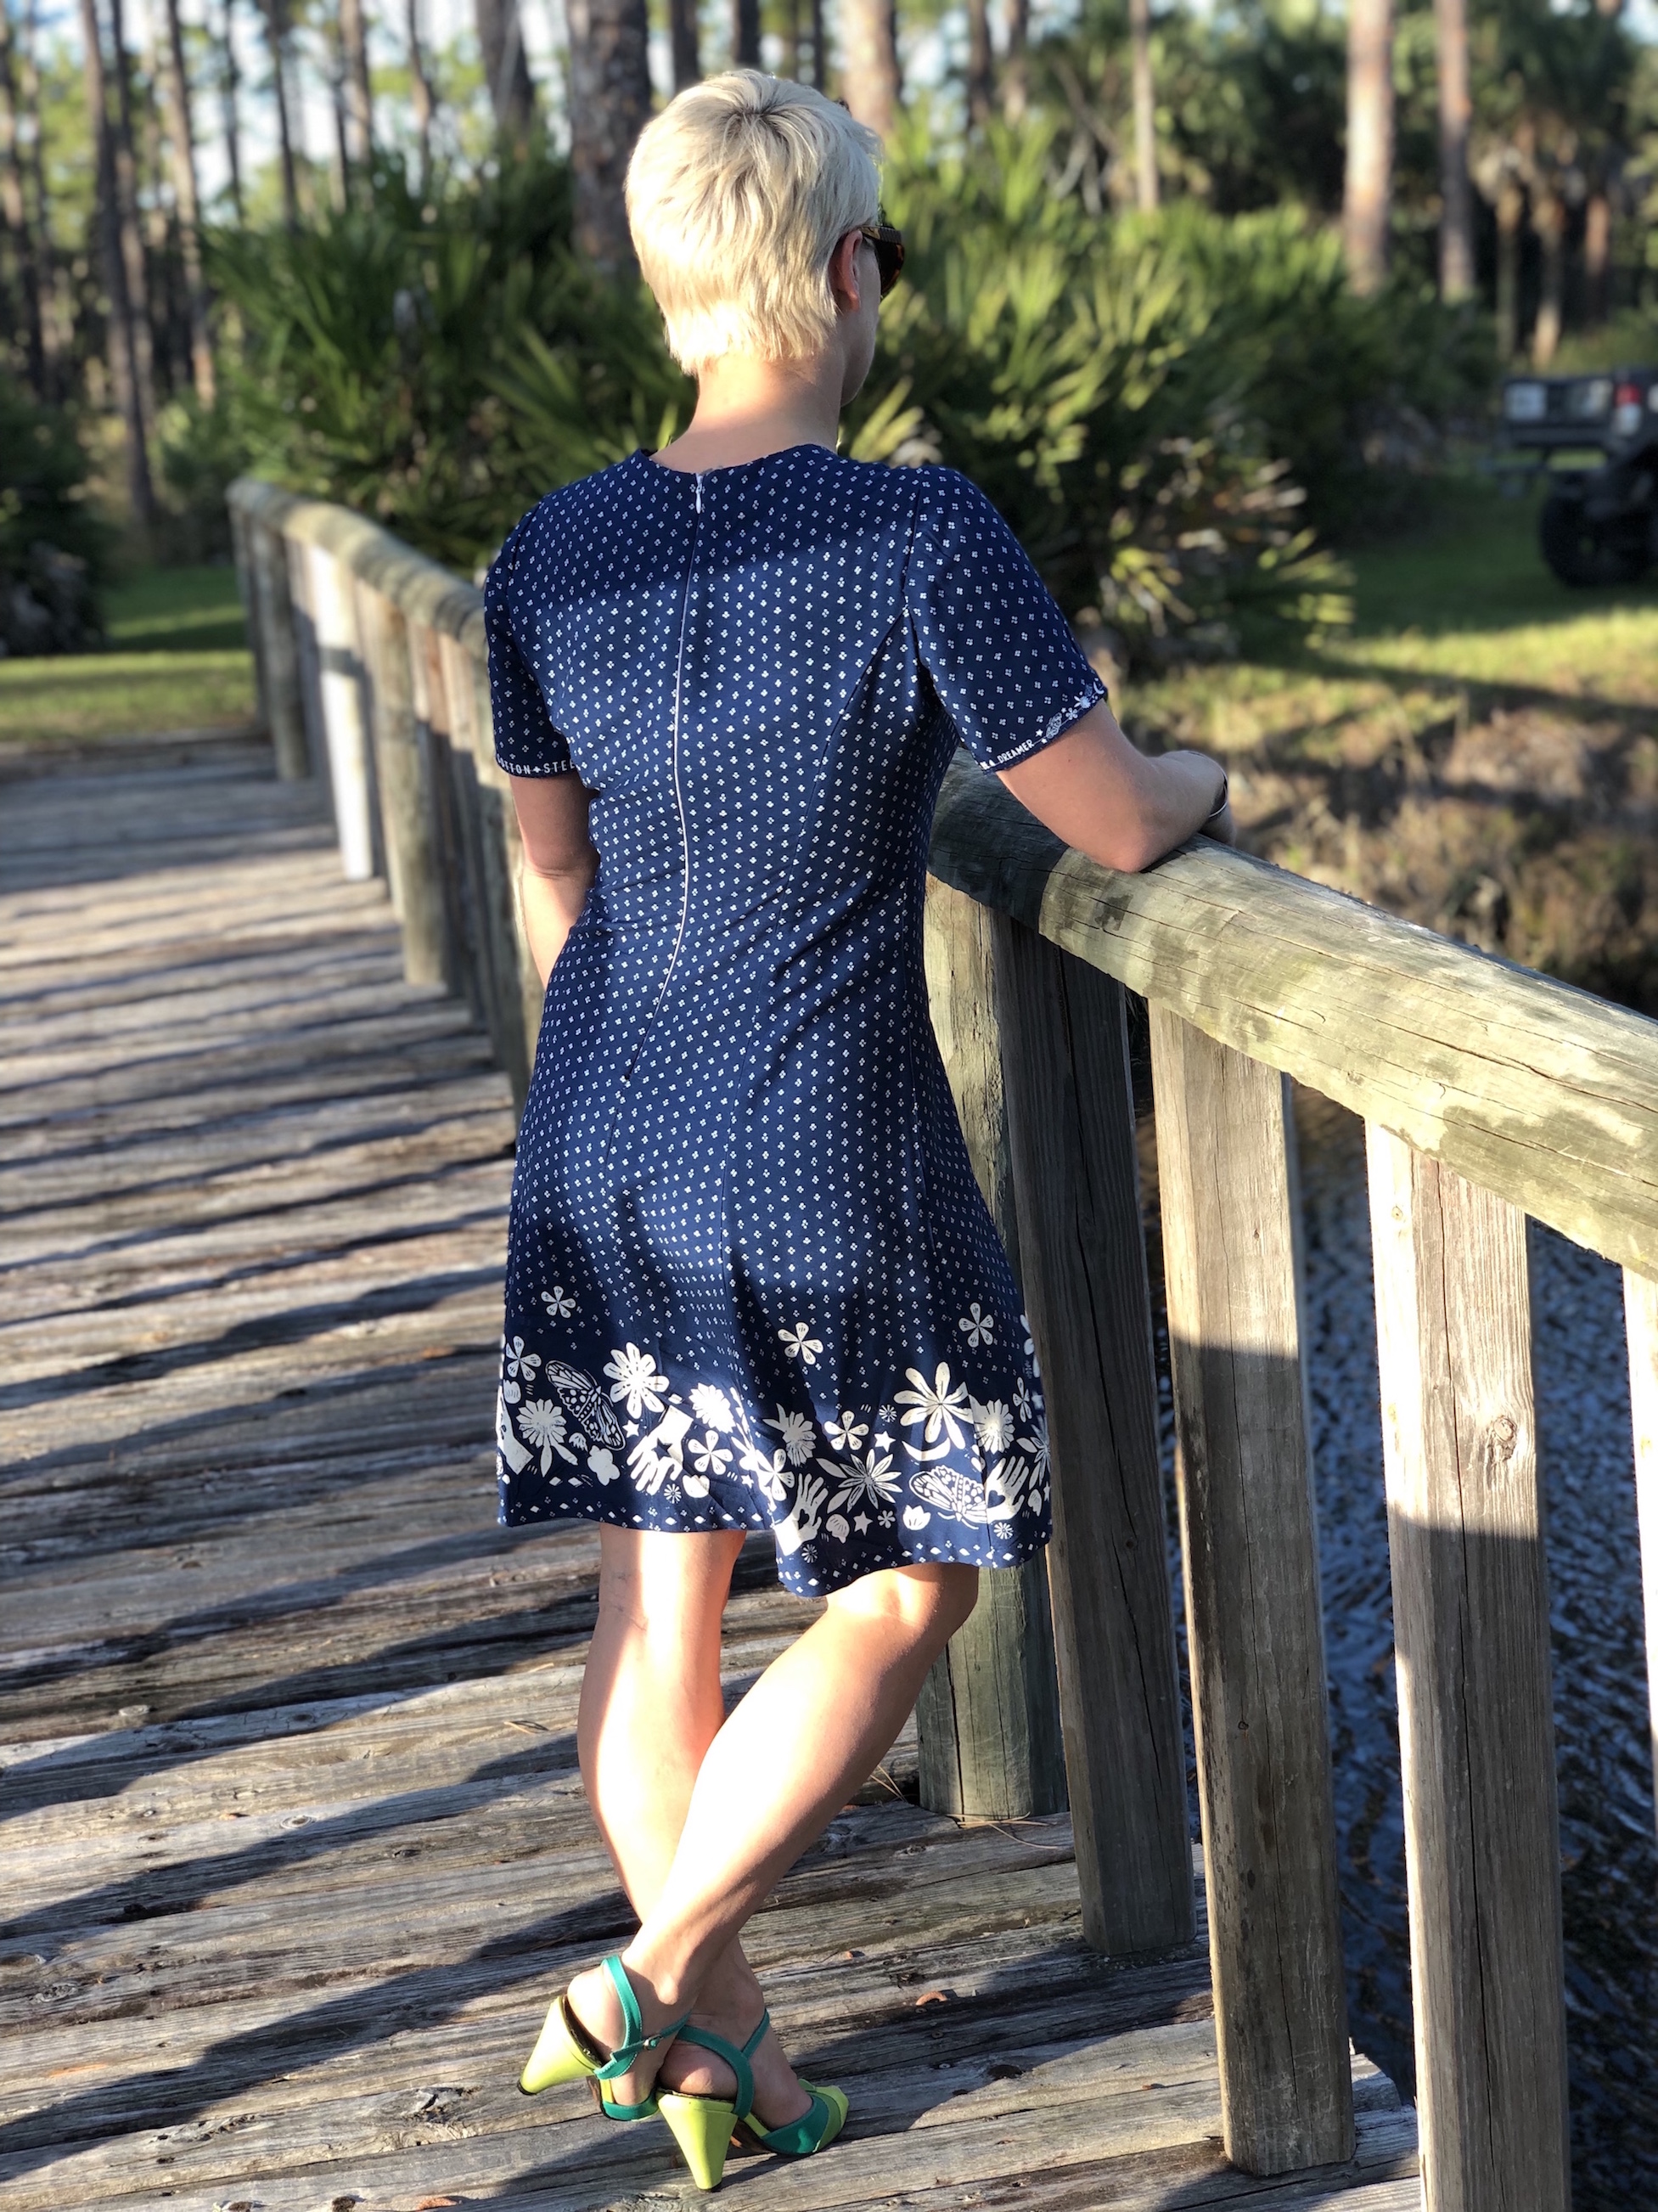
Last weekend I finally got to wear them, and the dress to said wedding. I teamed them with jewelry found at the local goodwill and a purse from a consignment store, oh and my fave accessory of them all – Joe 😉
We had such a great time that this was actually the only photo I got and I felt it didn’t do the dress justice. I wanted to give you guys a good look at that fit I fought so hard for.
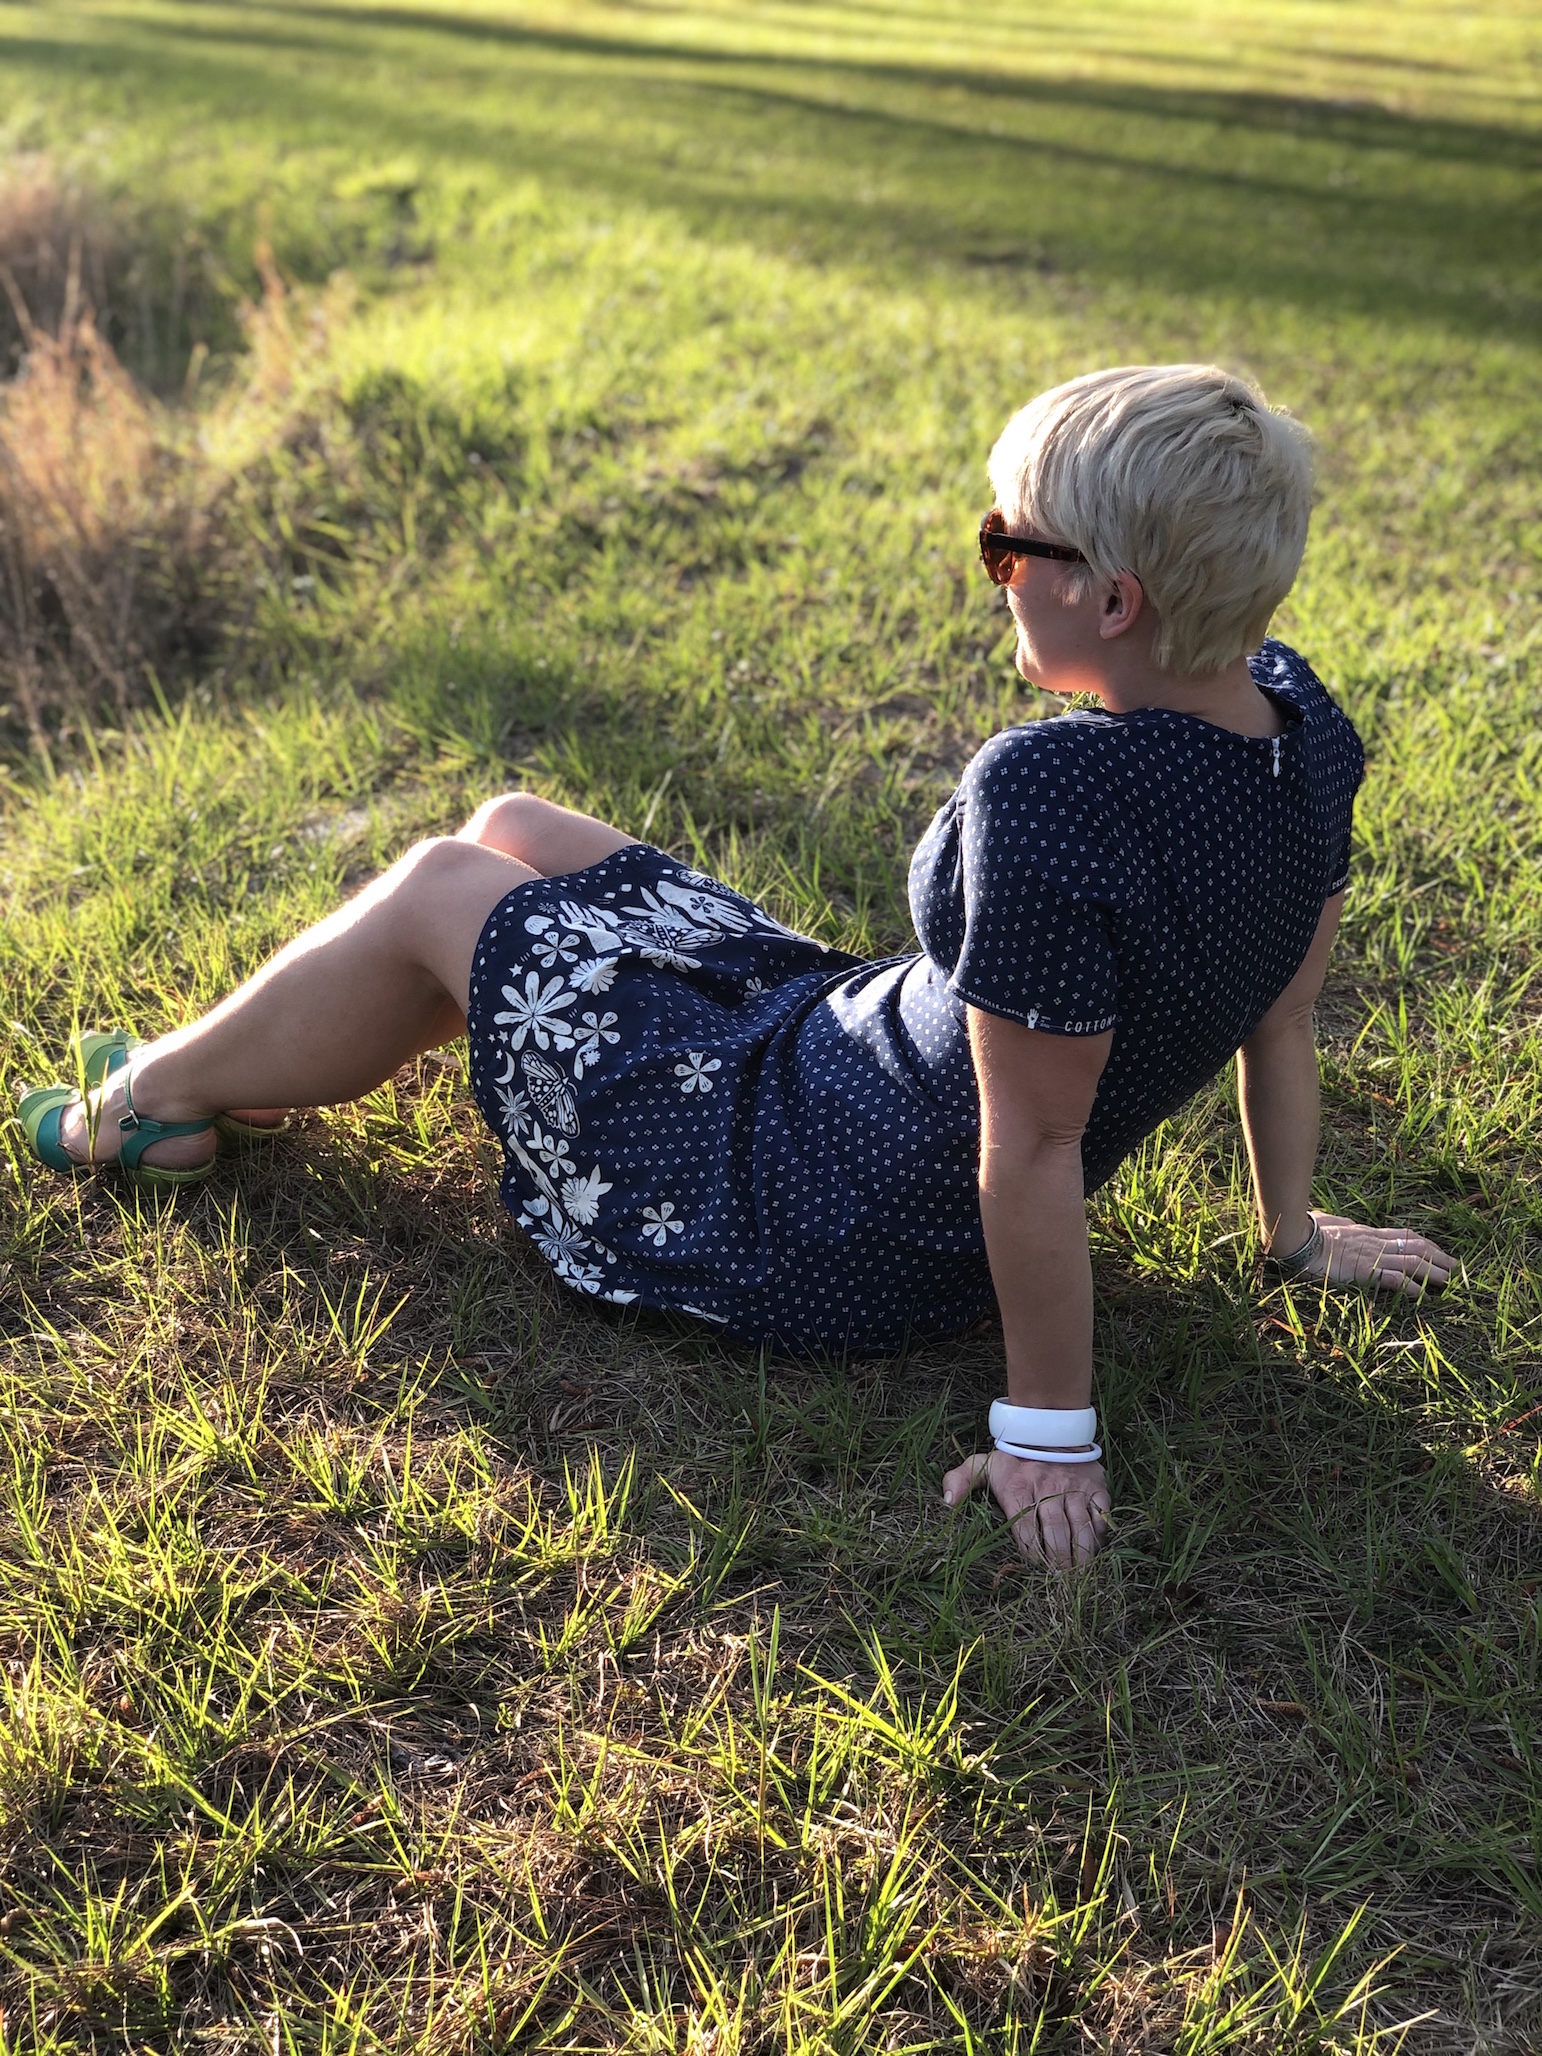
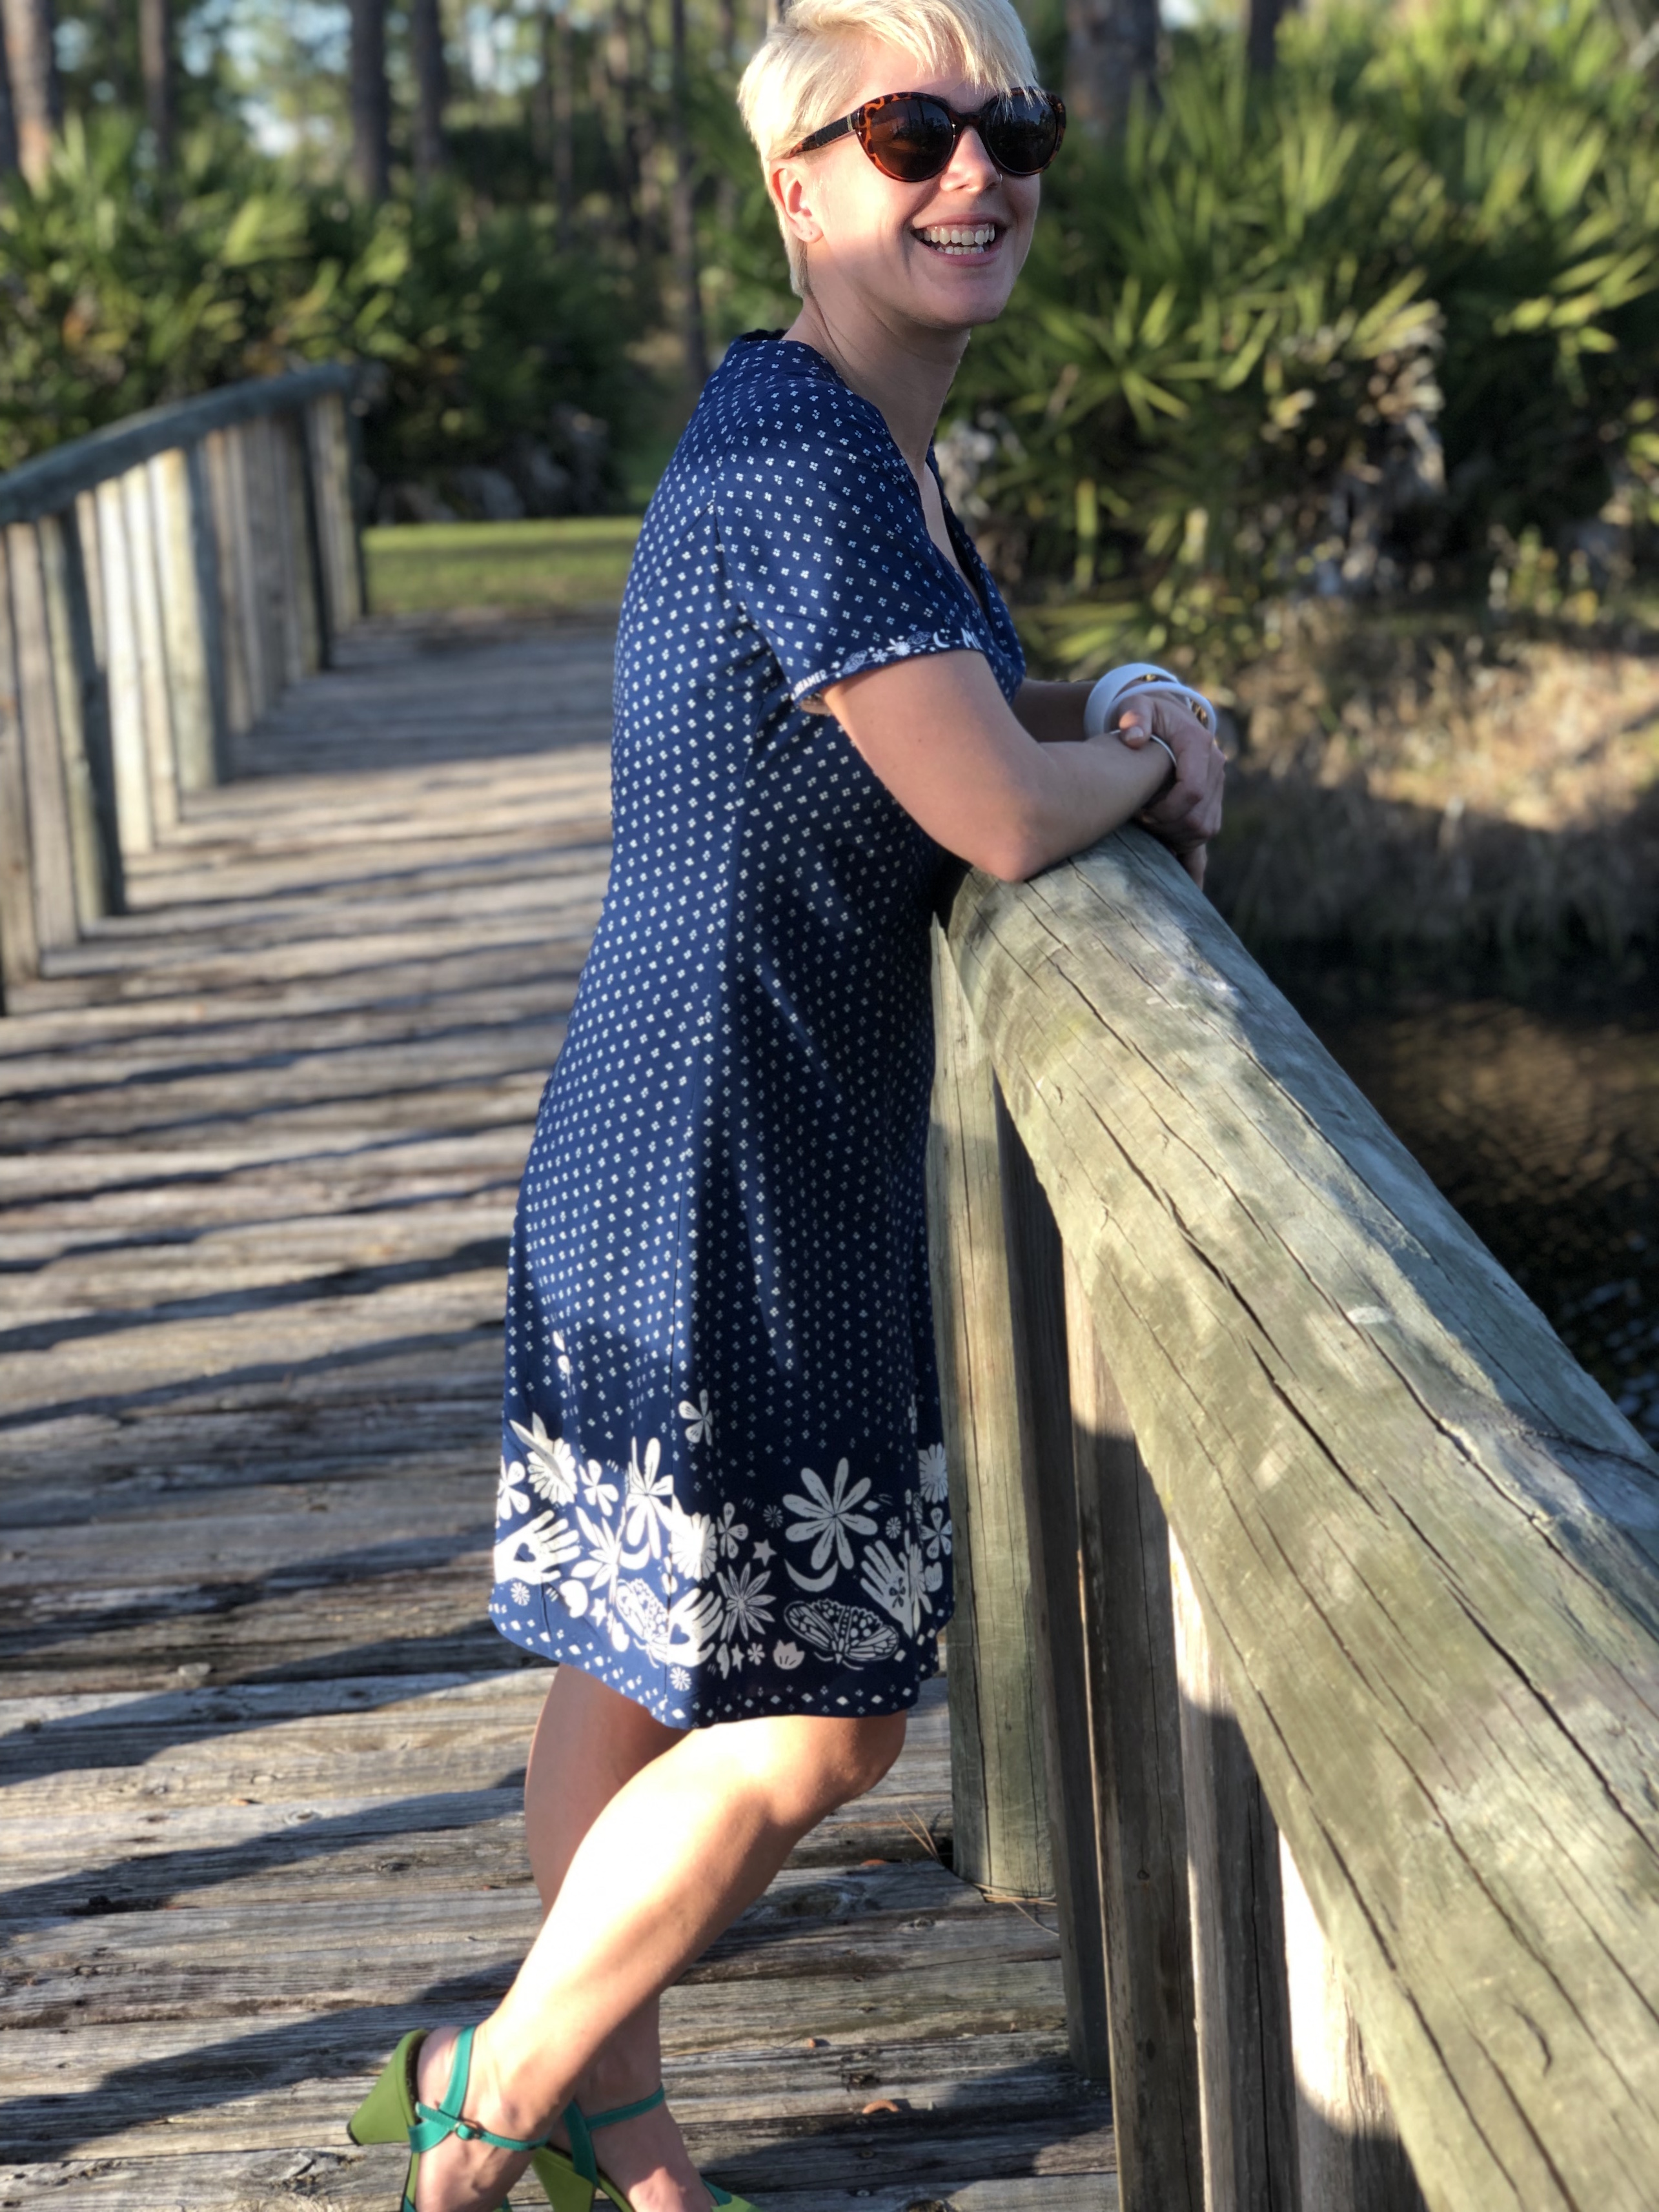
We’re staying with family in Florida right now to escape the rain up north and my mum offered to help me get some pics. I hope she realises she’s now my official photographer.

Prepare yourselves for a photo onslaught. I am SO happy and proud of this one folks. If people could invite me to a bunch of fancy events so I could wear it again that’d be great 😉
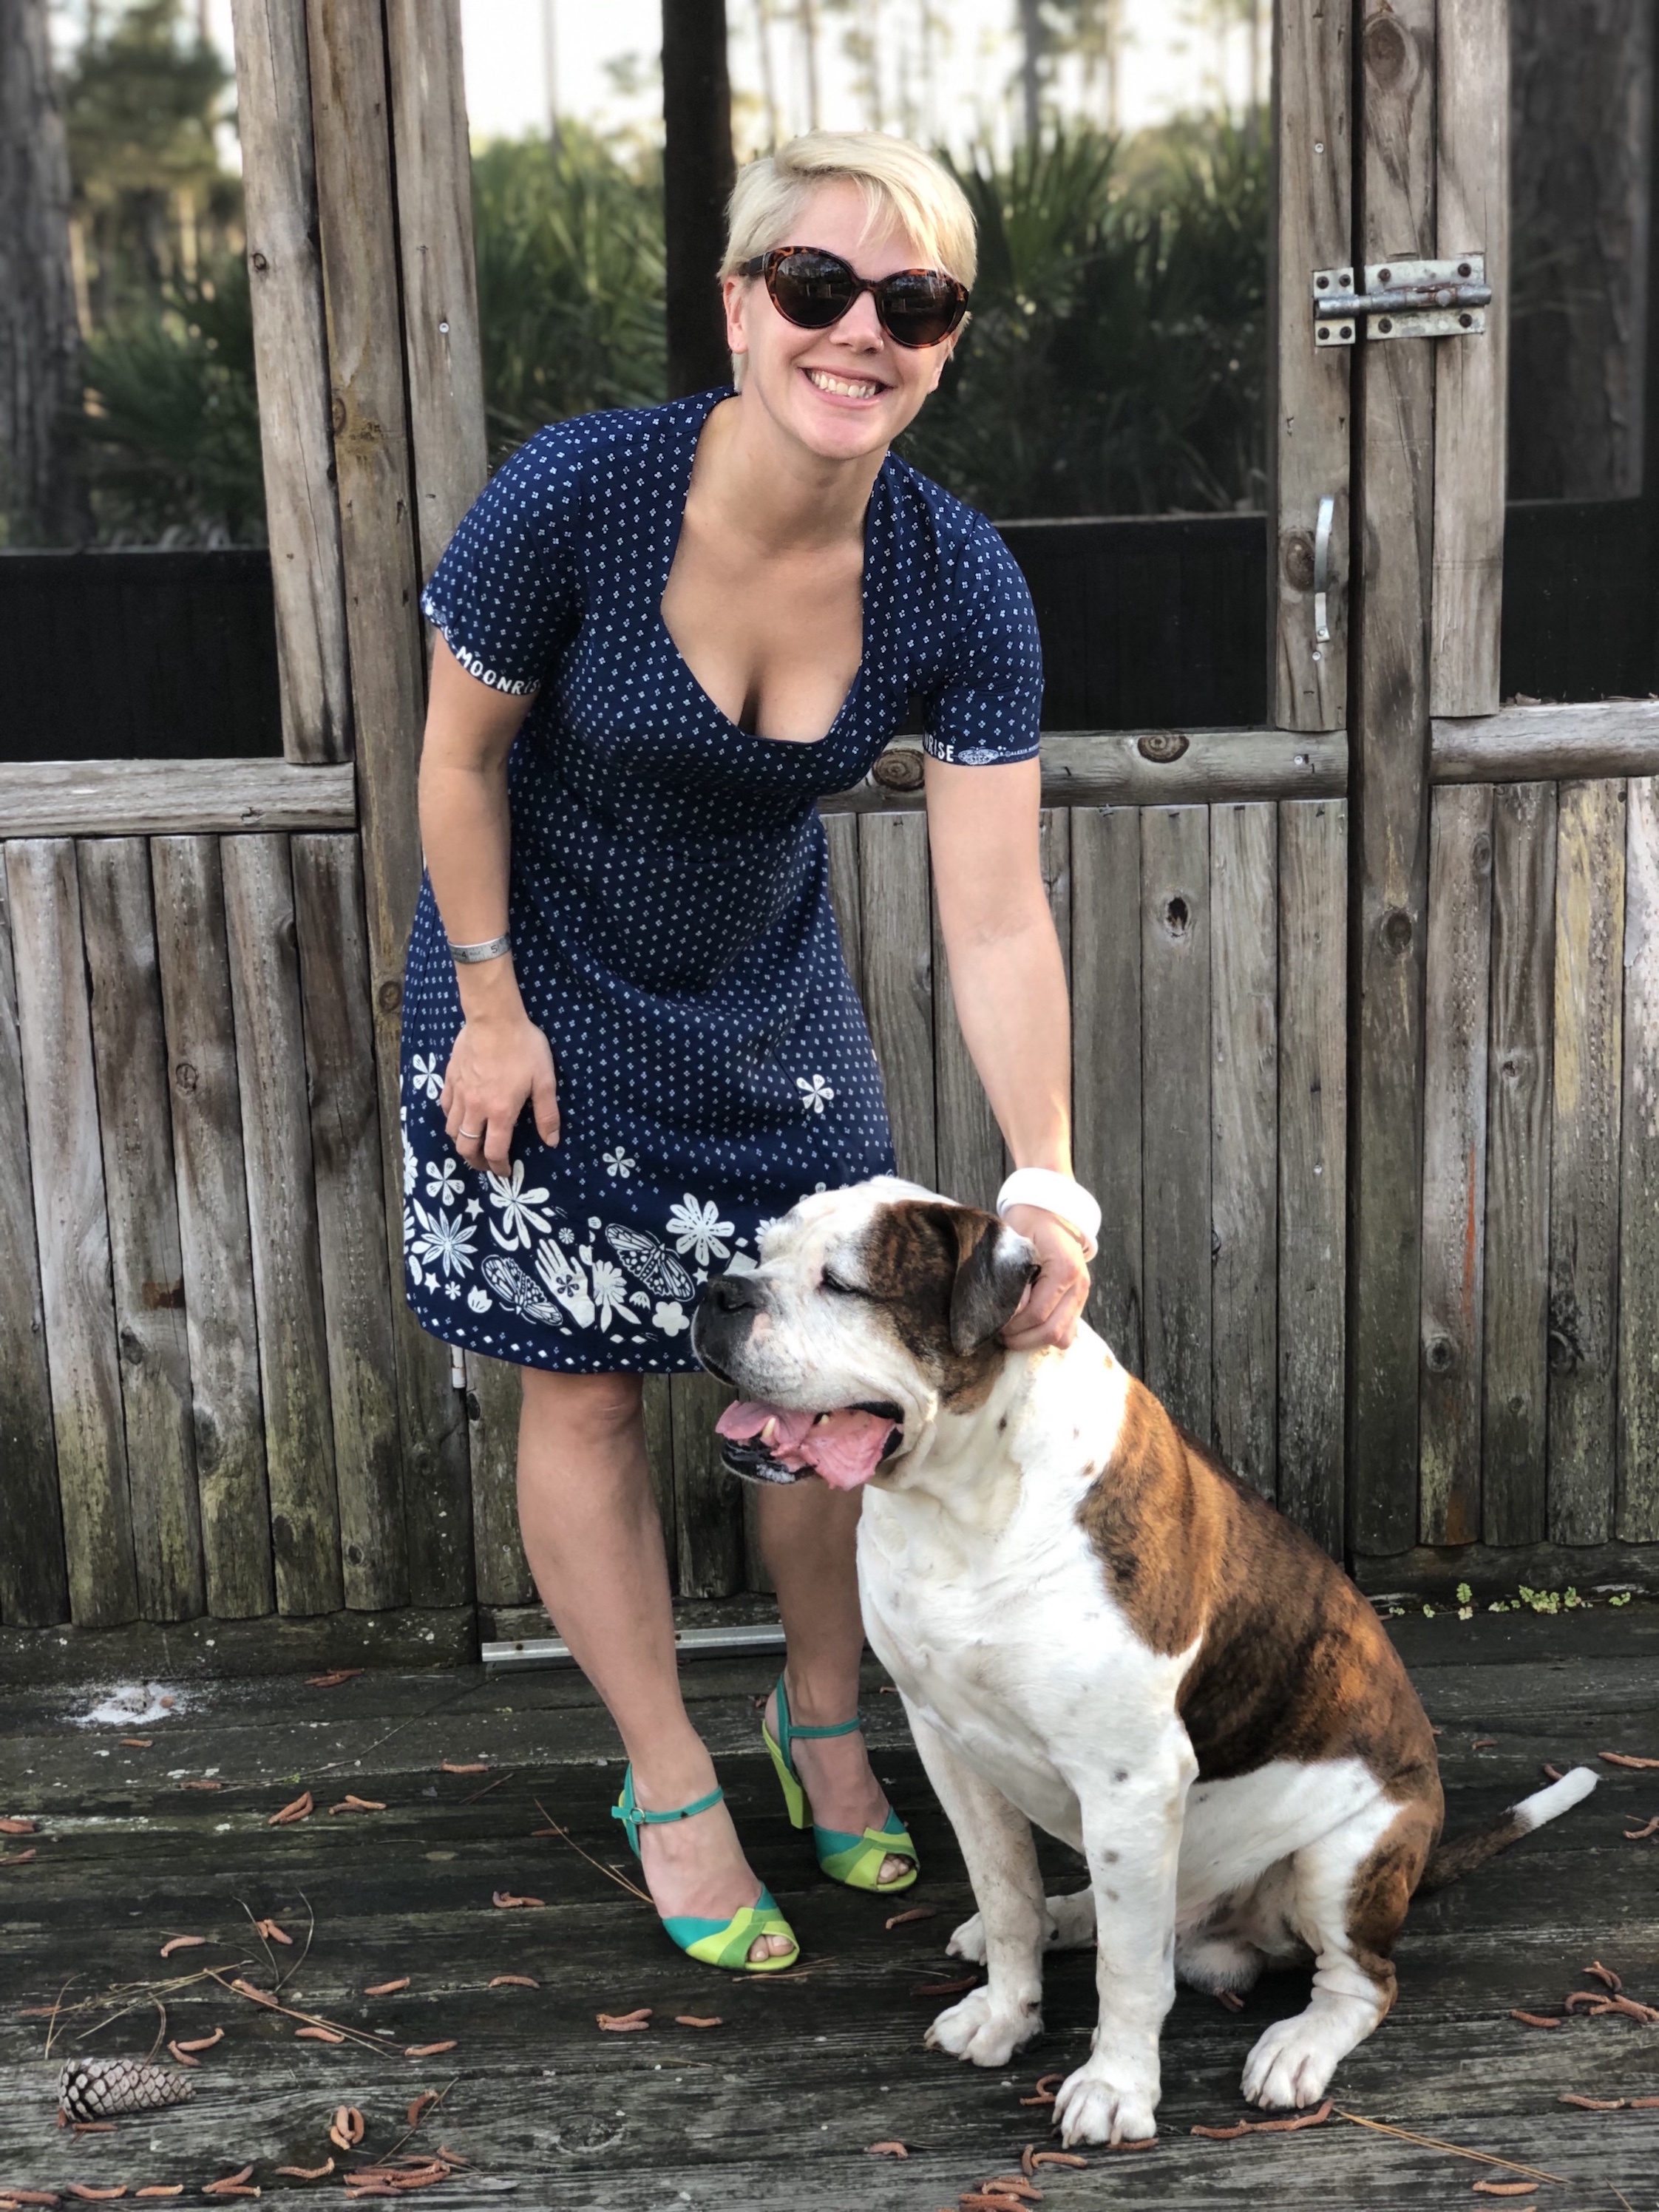
Of course, the boy had to get in on one too
Now, I’m off to smugly smile to myself about this one
![]()
xxx
Whew!!! You had me sweating reading this!! Thank you for sharing your fitting experience and suggesting pattern review! I don’t think I would have had the patience and gusto to get through! Love the dress , the fabric is Ahmazing , you look gorgeous and happy you ( or Joe ) treated yourself to some shoes.
Hi Joanna! Thanks for reading 🙂 haha yeah it was a giant rollercoaster ride that’s for sure! I think my stubborn nature shined through on this one as yeah, I think this one would’ve been expectable to quit, so glad I didn’t though. I LOVE Cotton and Steel – they’re rayon is just so soft! They have a cotton that uses the hand print part all over, totally tempted! The shoes were a lovely gift from Joe, apparently as a reward for seeing it through – lucky lady!
You and Joe look darling in your finery! You do have my former figure for sure. We could have been twins. I’ve lost a bit over the past year, not trying, so my curves have hit the highway, but I know the fitting challenges well. The dress is great!
Thanks so much for taking the time to read the post, and of course for all your invaluable help – I wouldn’t have finished it without you! It’s taken me some time to get comfortable with my figure honestly, but I’m getting there, and sewing is helping 🙂 So crazy/great to find someone who was built the same! 🙂
<3
🙂