Hello Hello,
If you’ve read any of my previous posts you’ll know I’ve long struggled with bodice fitting. Well, early on in January my sewjo returned with the FIRE and I used that drive to work on those issues, and with some help, I THINK it’s been resolved!
This going to be a bit of a long winded story so if you’re just here for the fit stuff, feel free to scroll through the beginning 🙂
I found at the end of last year I was getting overwhelmed by the sheer amount of ‘stuff’ I had. I decided rather than do the usual make 9, my plan for this year (and I really need to write a post about it) is to make a big dent in my stash, both fabric and pattern, before I’m allowing myself to buy anything new. With this in mind, I went through everything, pulled 16 pieces of fabric I want to use and then did my best to pair them with patterns I have, some of which have a couple of options so there’s some flexibility.
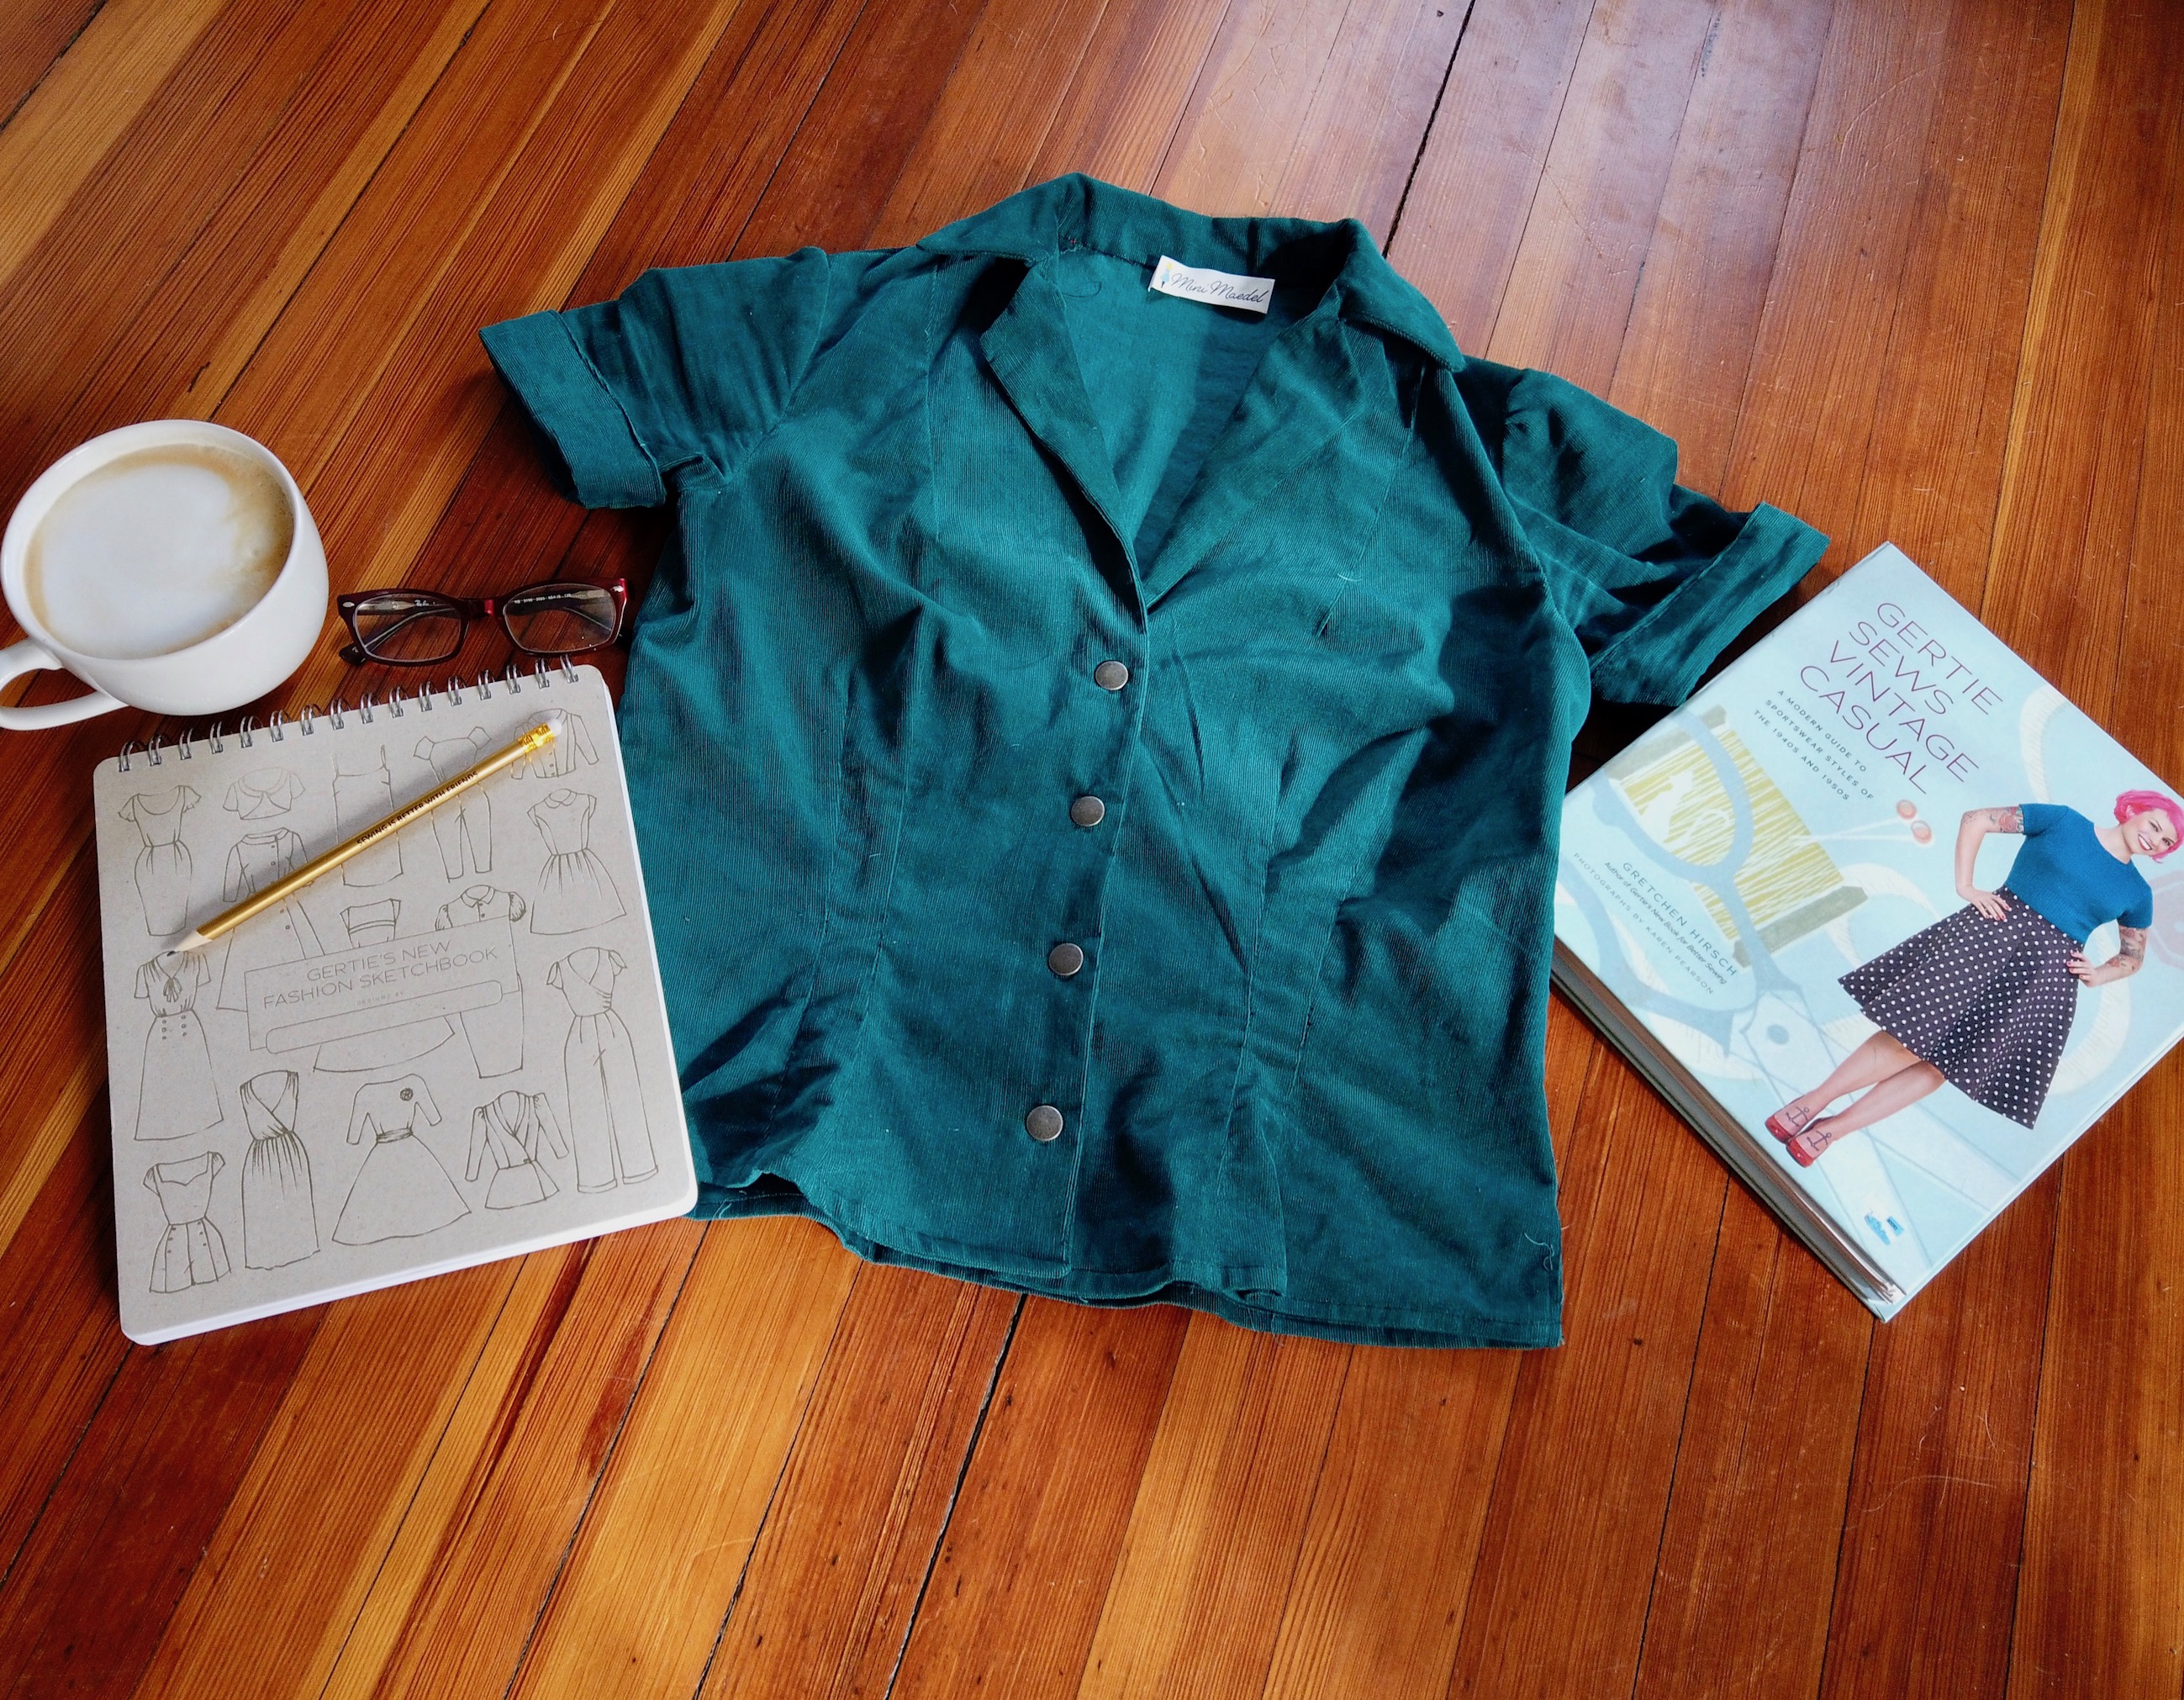
One of the fabrics I definitely want to use this year is the Liberty lawn I bought in London in 2018! I really don’t like the idea of it just sitting around for more than 2 years. Of course, I don’t want to waste it so I want to be certain I’ll like what I make. With that in mind I decided to muslin a few different patterns I have that might work. I know I want to make some kind of shirt so my first stop was the 1940’s blouse from the Gertie Sews Vintage Casual book.
Unusually for me I just decided to sew it up without making flat pattern adjustments. I think I was just super keen to sew to be honest. I cut a 4 at the shoulder and went out to a 6 in the bust, so under the armpit. I was amazed to find it actual fit pretty well, not perfect, but well enough that I ended up finishing what was intended as a muslin but now gets worn A LOT.
My fit issues are always between the shoulders and the bust; excess fabric which usually ends up pooling around my armpit. You’ll see from other posts I’ve tried narrow shoulder adjustments, full bust adjustments, folding out the length of the chest, even broad back adjustments. So many alterations and despite helping, nothing had worked perfectly.
Here’s some examples of what I’m talking about, including the new Gertie shirt:
The astronaut shirt probably fit best, that had a narrow and forward shoulder adjustment plus FBA, but as you see it still had a little of the excess (it’s worse in real life)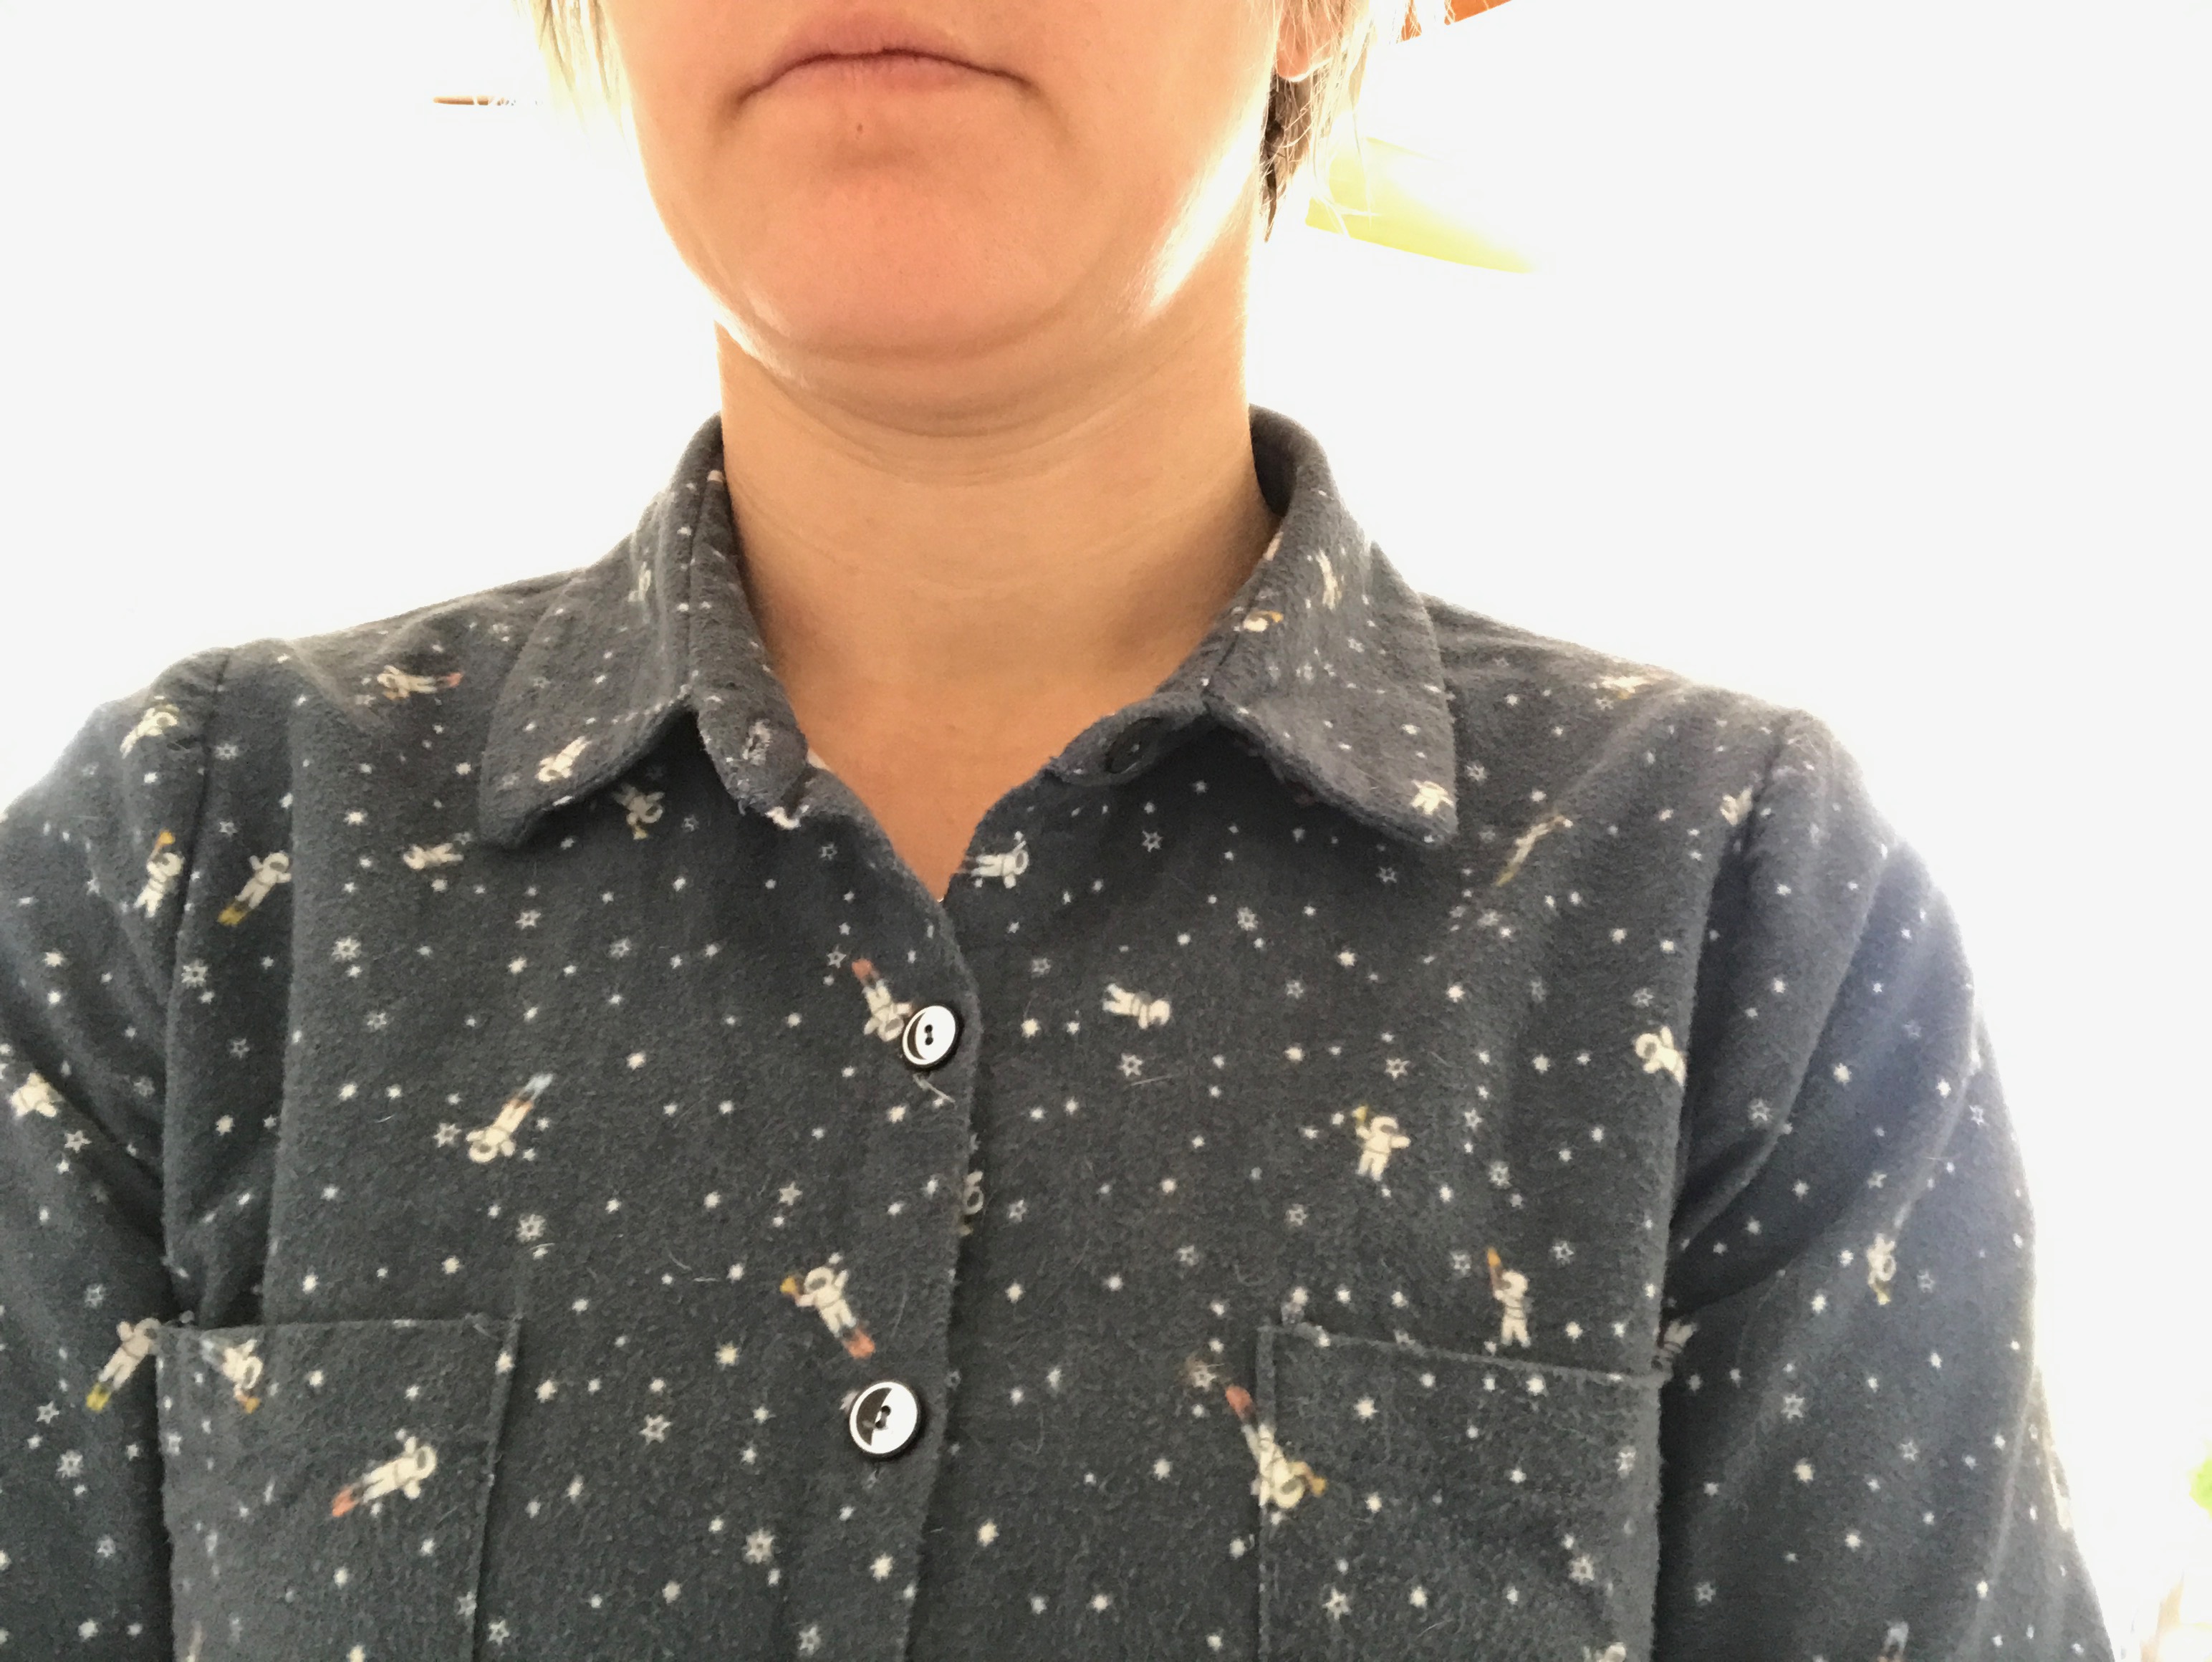
I was discussing this with my friend, the talented Mary over at @Thedailysew and she asked if I’d ever considered the armhole being the problem. It sounded unlikely to me but when she sent me the link to her blog post on it and I read the sentence “….too much fabric above the bust area. This usually occurs when the shoulders are narrow and the bust full” I realised she might actually be right!
In the blog post she walks you through two different methods of altering only the front arm hole, leaving the back alone. One method is taking the excess from the shoulder slope and the other, you simply dart it out about halfway down the armhole. I decided to try it on the Gertie pattern as that fit really well everywhere except the excess by the armpit, even my shoulder width.
First I tried the dart method as I was taking an inch and that was recommended for larger amounts. I was amazed when I put my muslin on and the excess had disappeared! Unfortunately it was now a little tight in some areas so I thought perhaps I’d taken too much and could probably also do with a FBA as I’d picked my size based on my high bust. For the next try I did the shoulder slope method as I was only taking 3/4″ now and a 2″ FBA. This one wasn’t tight at all but the excess wasn’t as greatly removed…interesting…back to the drawing board.
This next part should speak to a lot of you; wanting to sew allll the things and having a hard time focusing on one project….
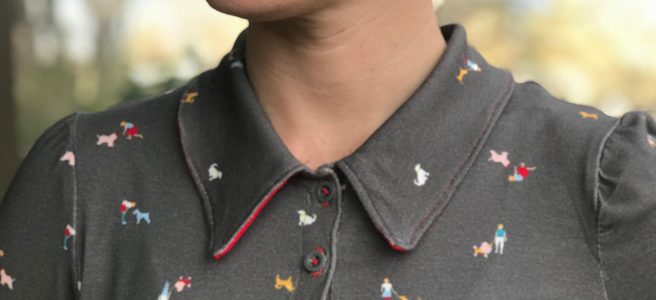
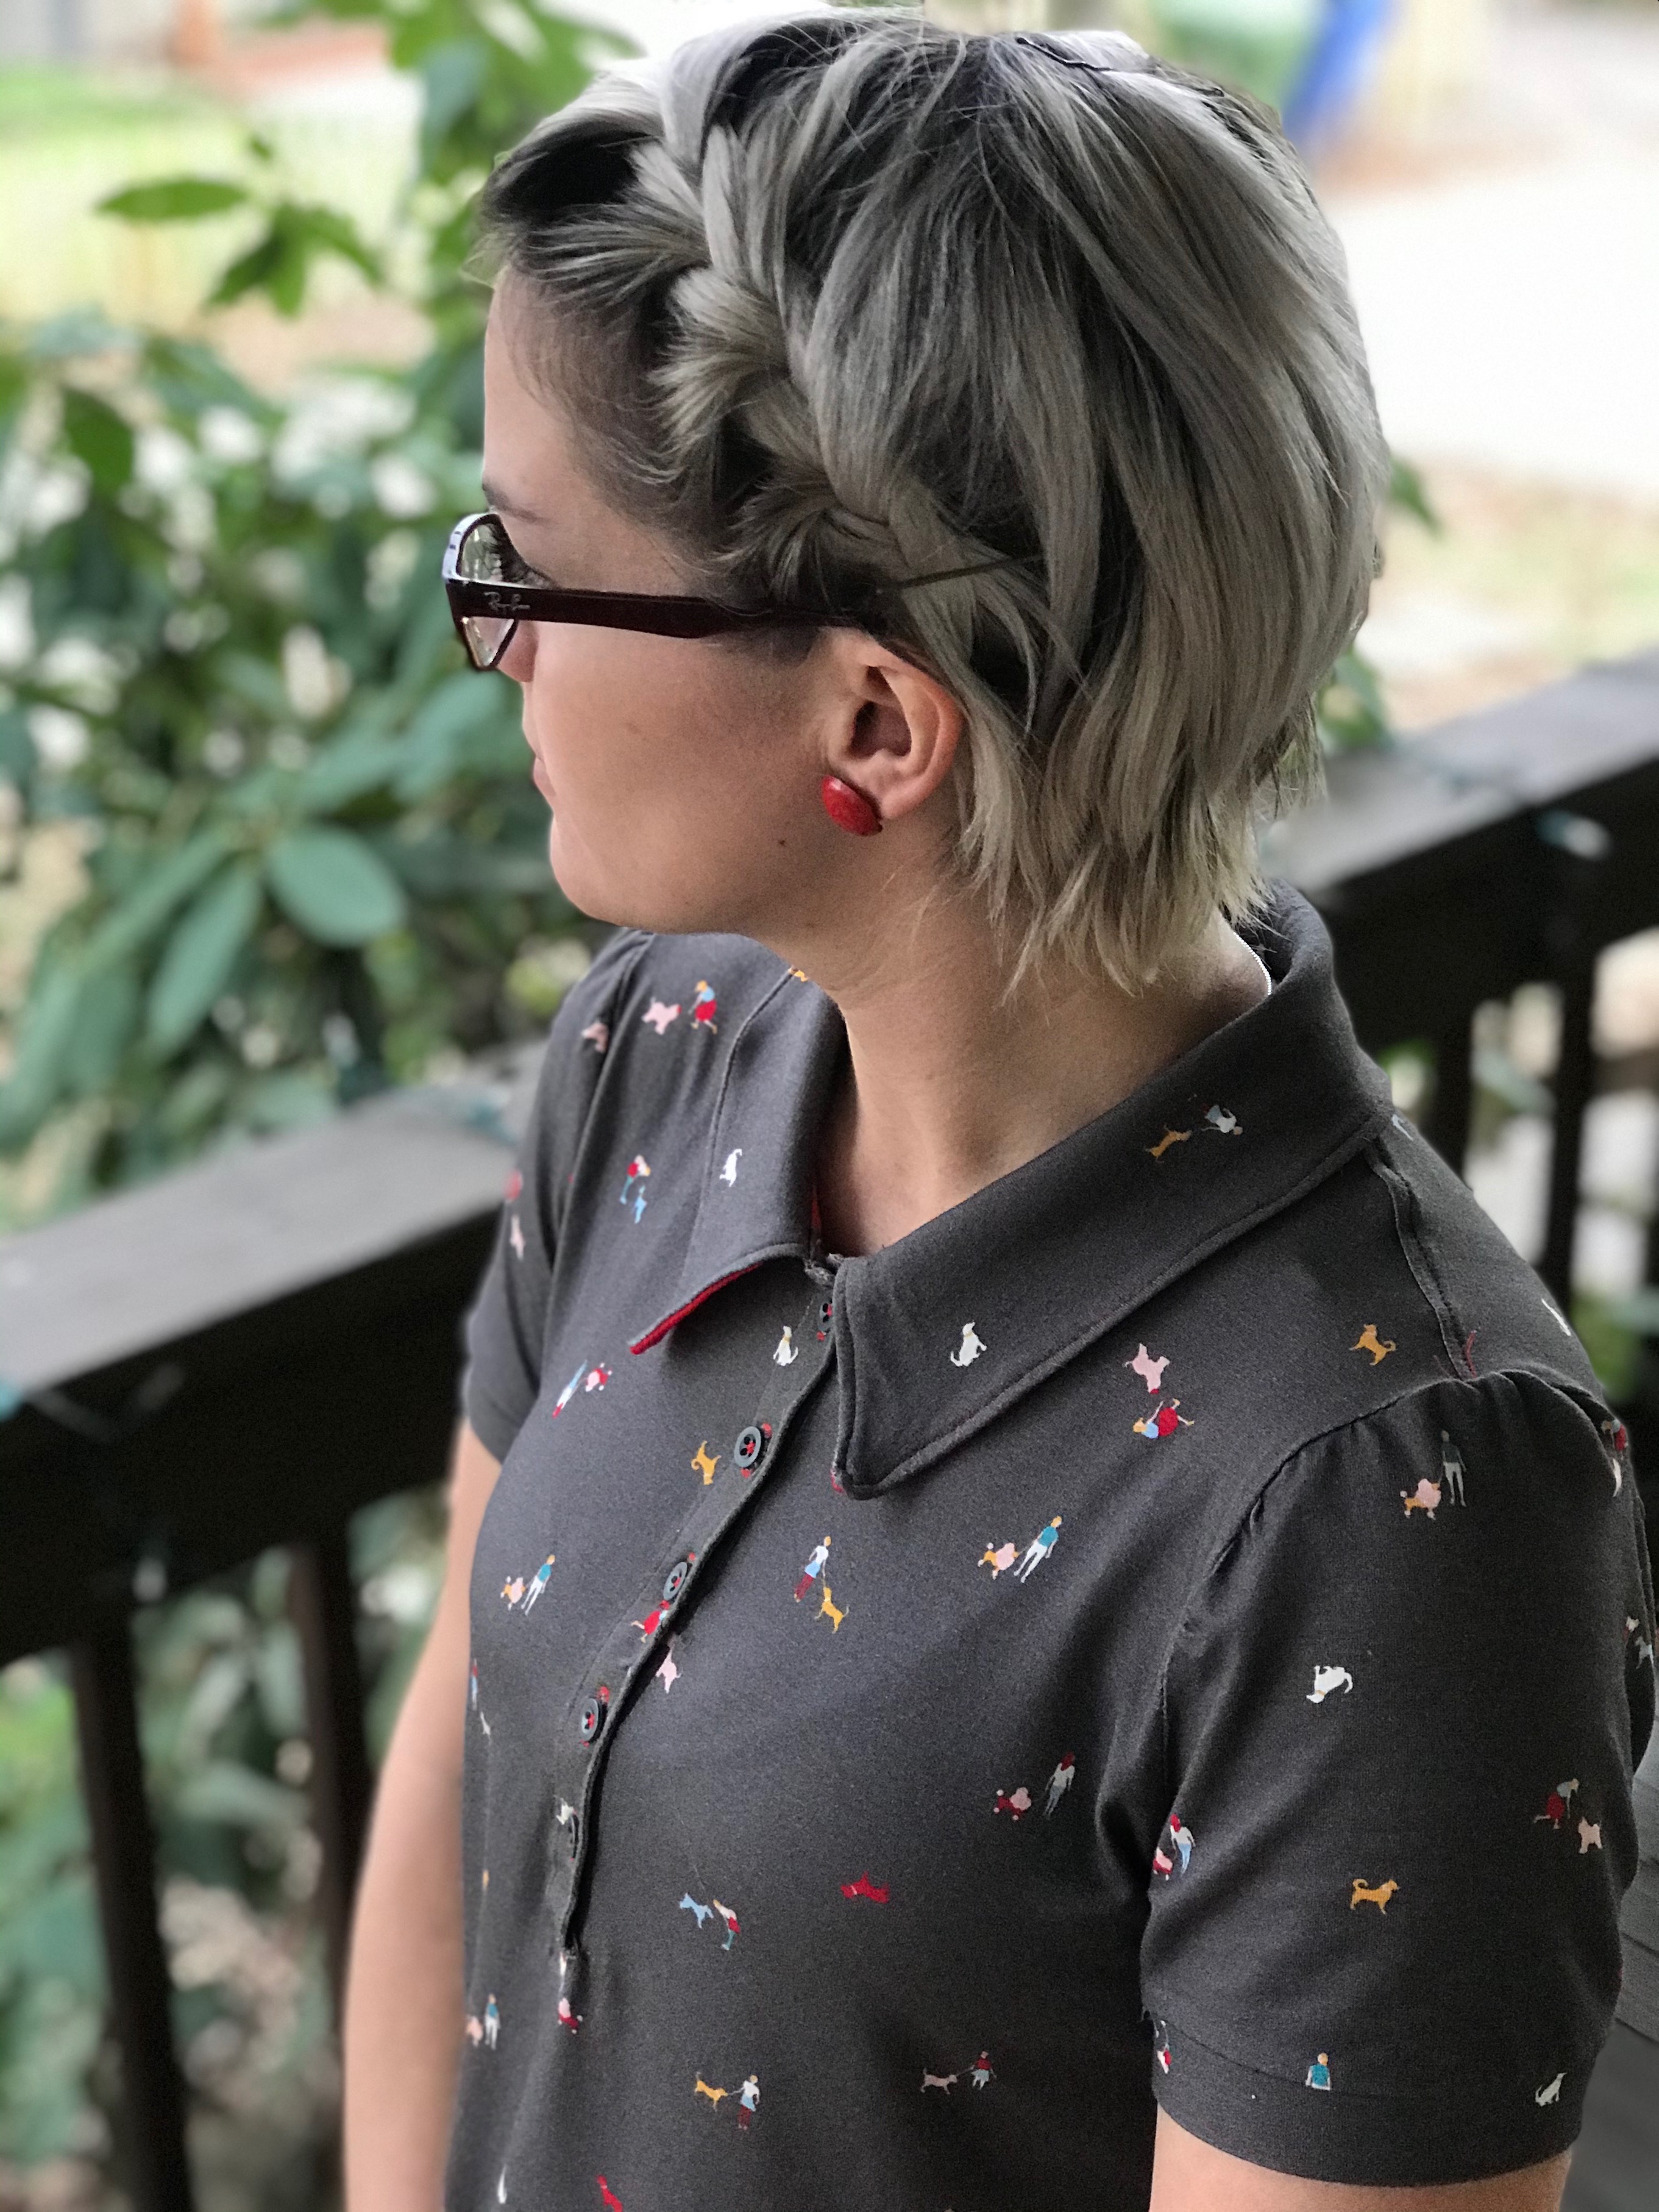
At the same time as this was going on I was really keen to use some fabric I’d bought from Textile Express Fabrics. One morning back in November I saw a post by The Rural Sewist of a long sleeved shirt she’d made using fabric with dog walkers printed on it. It was one of those “I have to have it moments” so I ordered it there and then! I’d been dying to sew it up ever since I’d got it but couldn’t settle on a pattern.
It’s a lovely grey colour when relaxed but when you stretch it, it goes white so I knew it couldn’t be my standard t-shirt pattern as I like those quite fitted. Suddenly I remembered I’d been kindly gifted a PDF pattern by Sinclair Patterns as they offer petite patterns. I’d picked the Brooke shirt pattern and I realised it could be perfect for this! I loved the fact it would be a comfy, wear it every day kind of garment but not just a boring t-shirt. Clothes should be fun people!

So with all this in mind I shifted my newly discovered alternation to this pattern instead…attention span problems much?
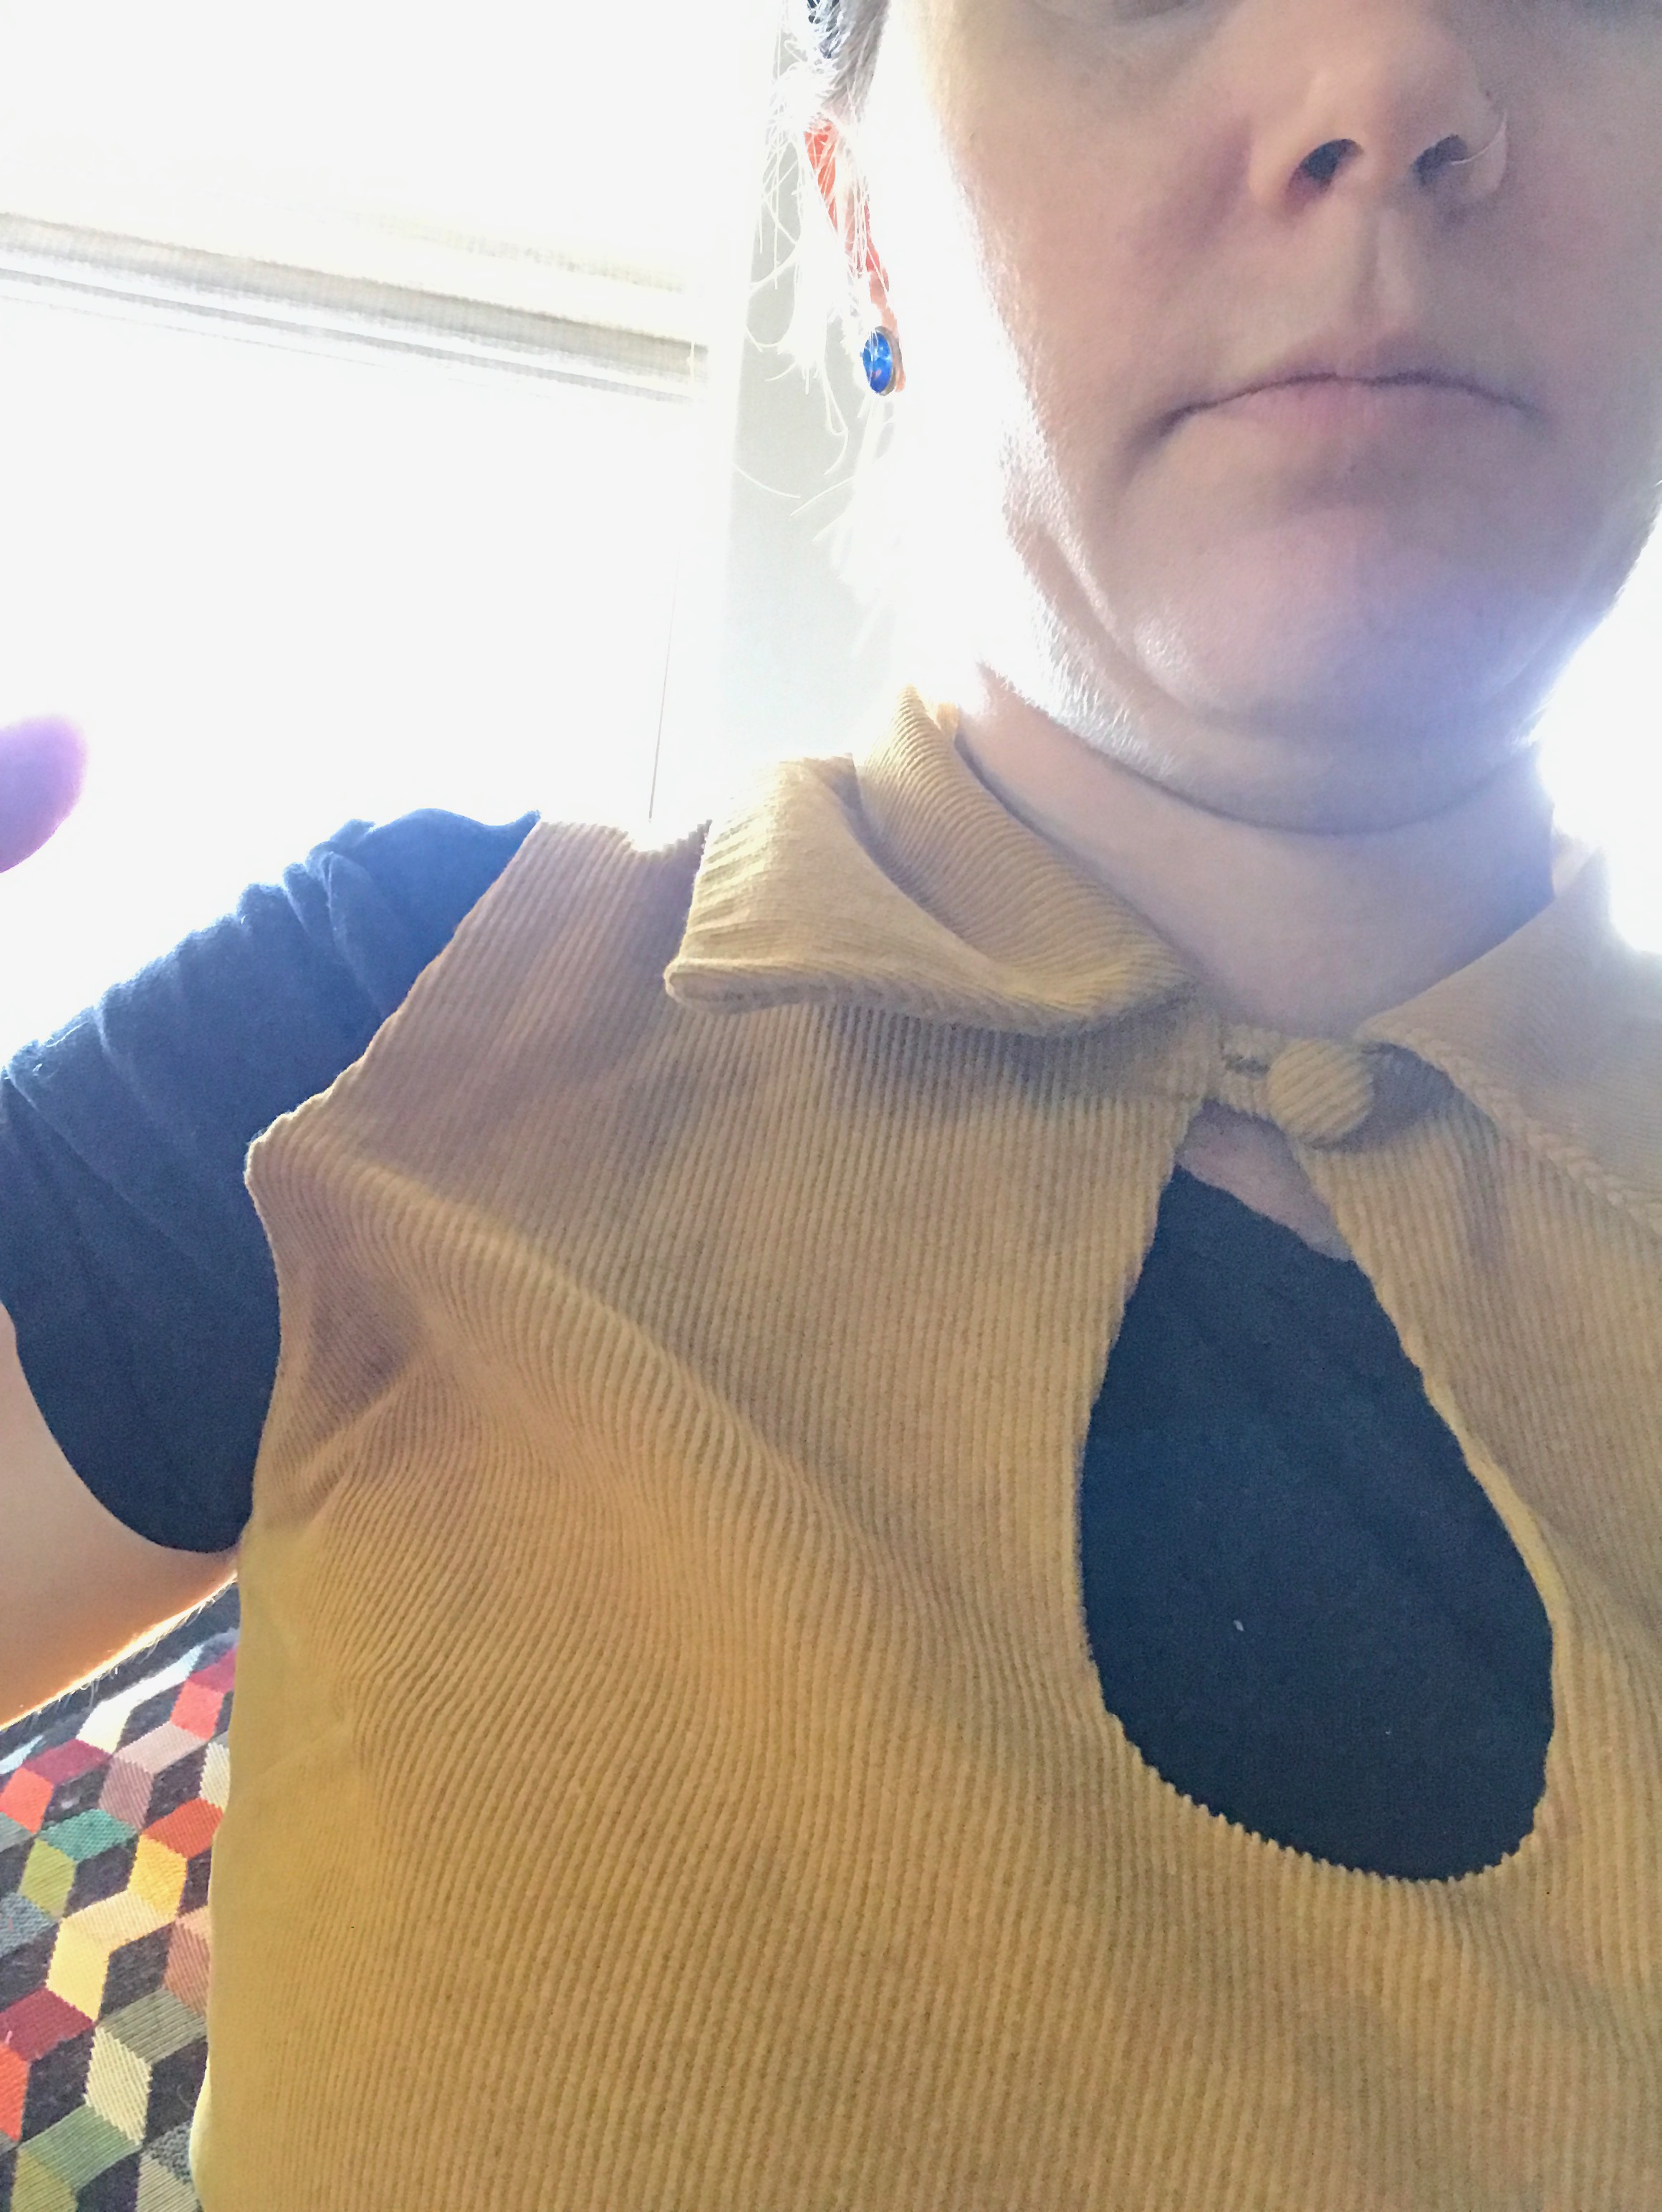
I cut up an old jersey maxi skirt that I never wore and sewed it up firstly not changing anything. I did the same as I had with the Gertie, 4 at the shoulders out to a 6 at the bust. Again, it fit surprisingly well (I think the petite sizing played a part here!) but, yup, you guessed it, it still had that excess armpit fabric.

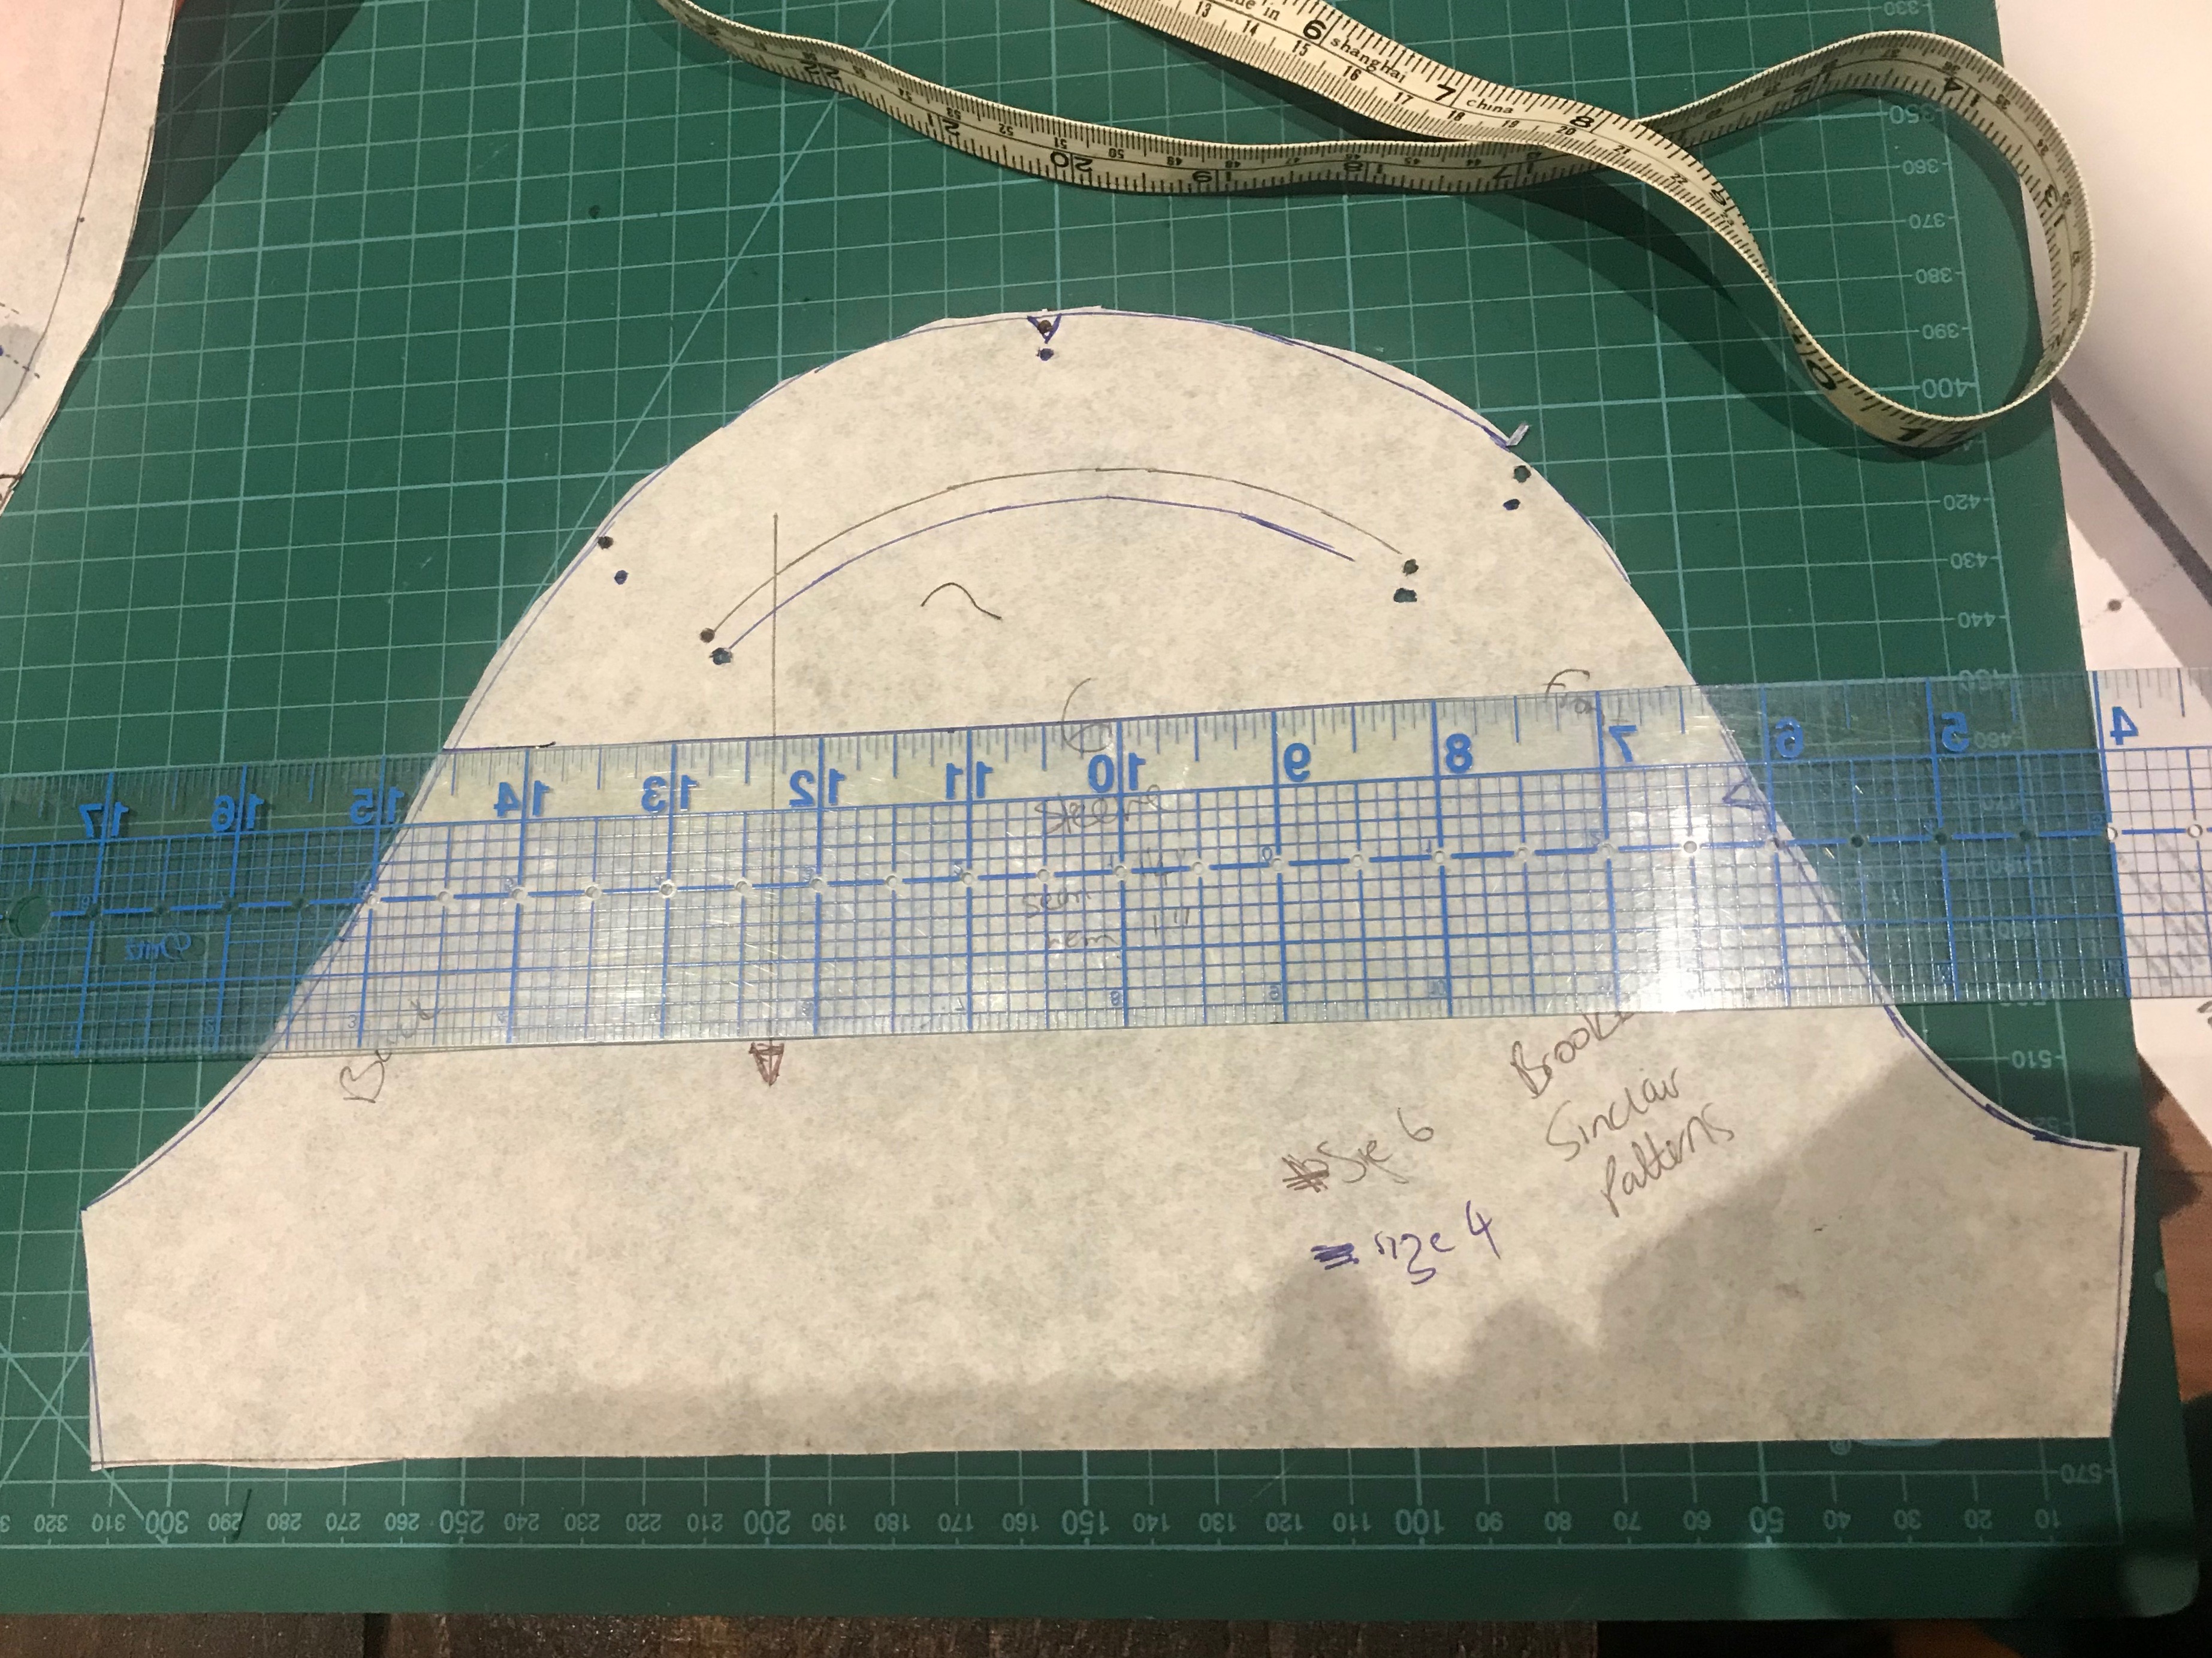
I took it apart, cut the front bodice down to a 2 in the shoulders out to a 6 in the bust and left the back as a 4 out into a 6. Yes, my back bodice was bigger than my front (narrow chest, broad back is a thing, honest!)
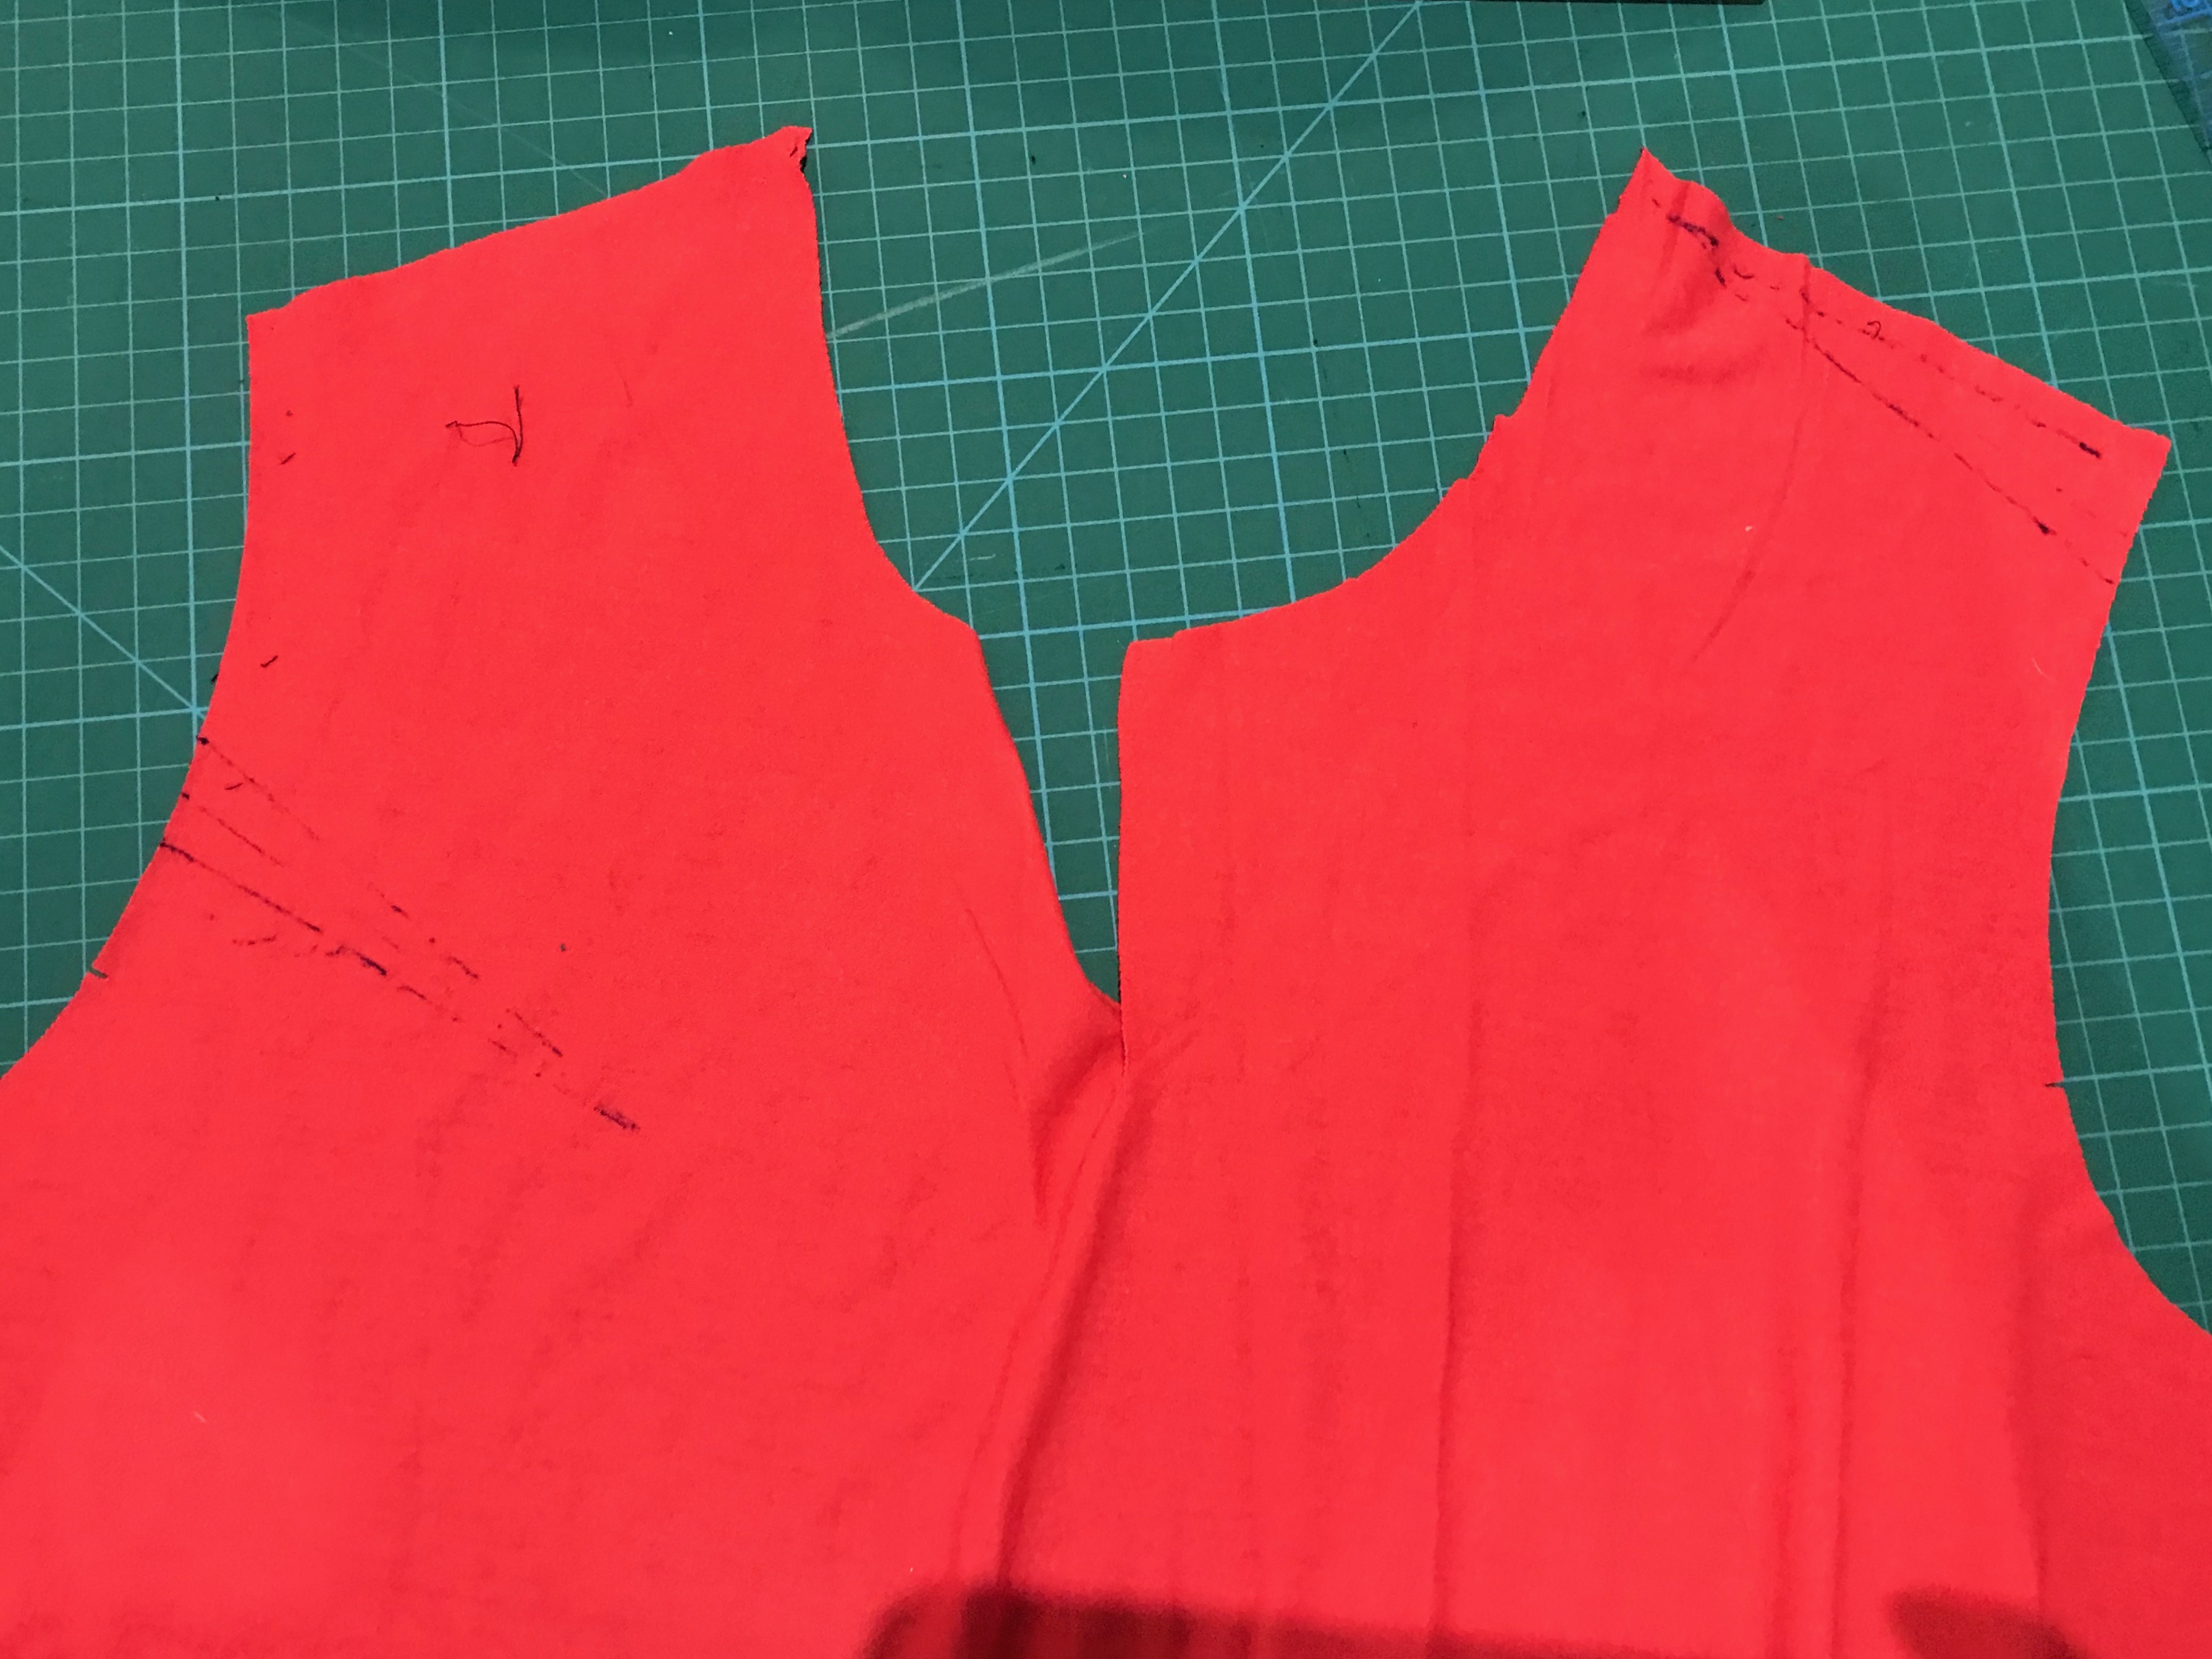
I then attempted a different arm hole adjustment on each side. So I did 3/4″ dart out of one side and a 3/4″ shoulder method for the other. IT WORKED!! both sides looked much better but I decided I preferred the darted side (photo below.) I didn’t do anything with the sleeves for the muslin so they’ve got way too much excess so I made sure to alter that for the final version. For this you you draw a line across the sleeve cap, cut it but leave a hinge on the back side and then overlap it in the front the same amount as you took out of the armhole – super simple.
If any of you are struggling with this too and would like to discuss it with me, please feel free to comment or come and find me on instagram.
As you look at the photo, the left side has the dart and the right the shoulder alteration.
 I was so excited to get stuck into the real thing, although a little nervous as I love the fabric so much.
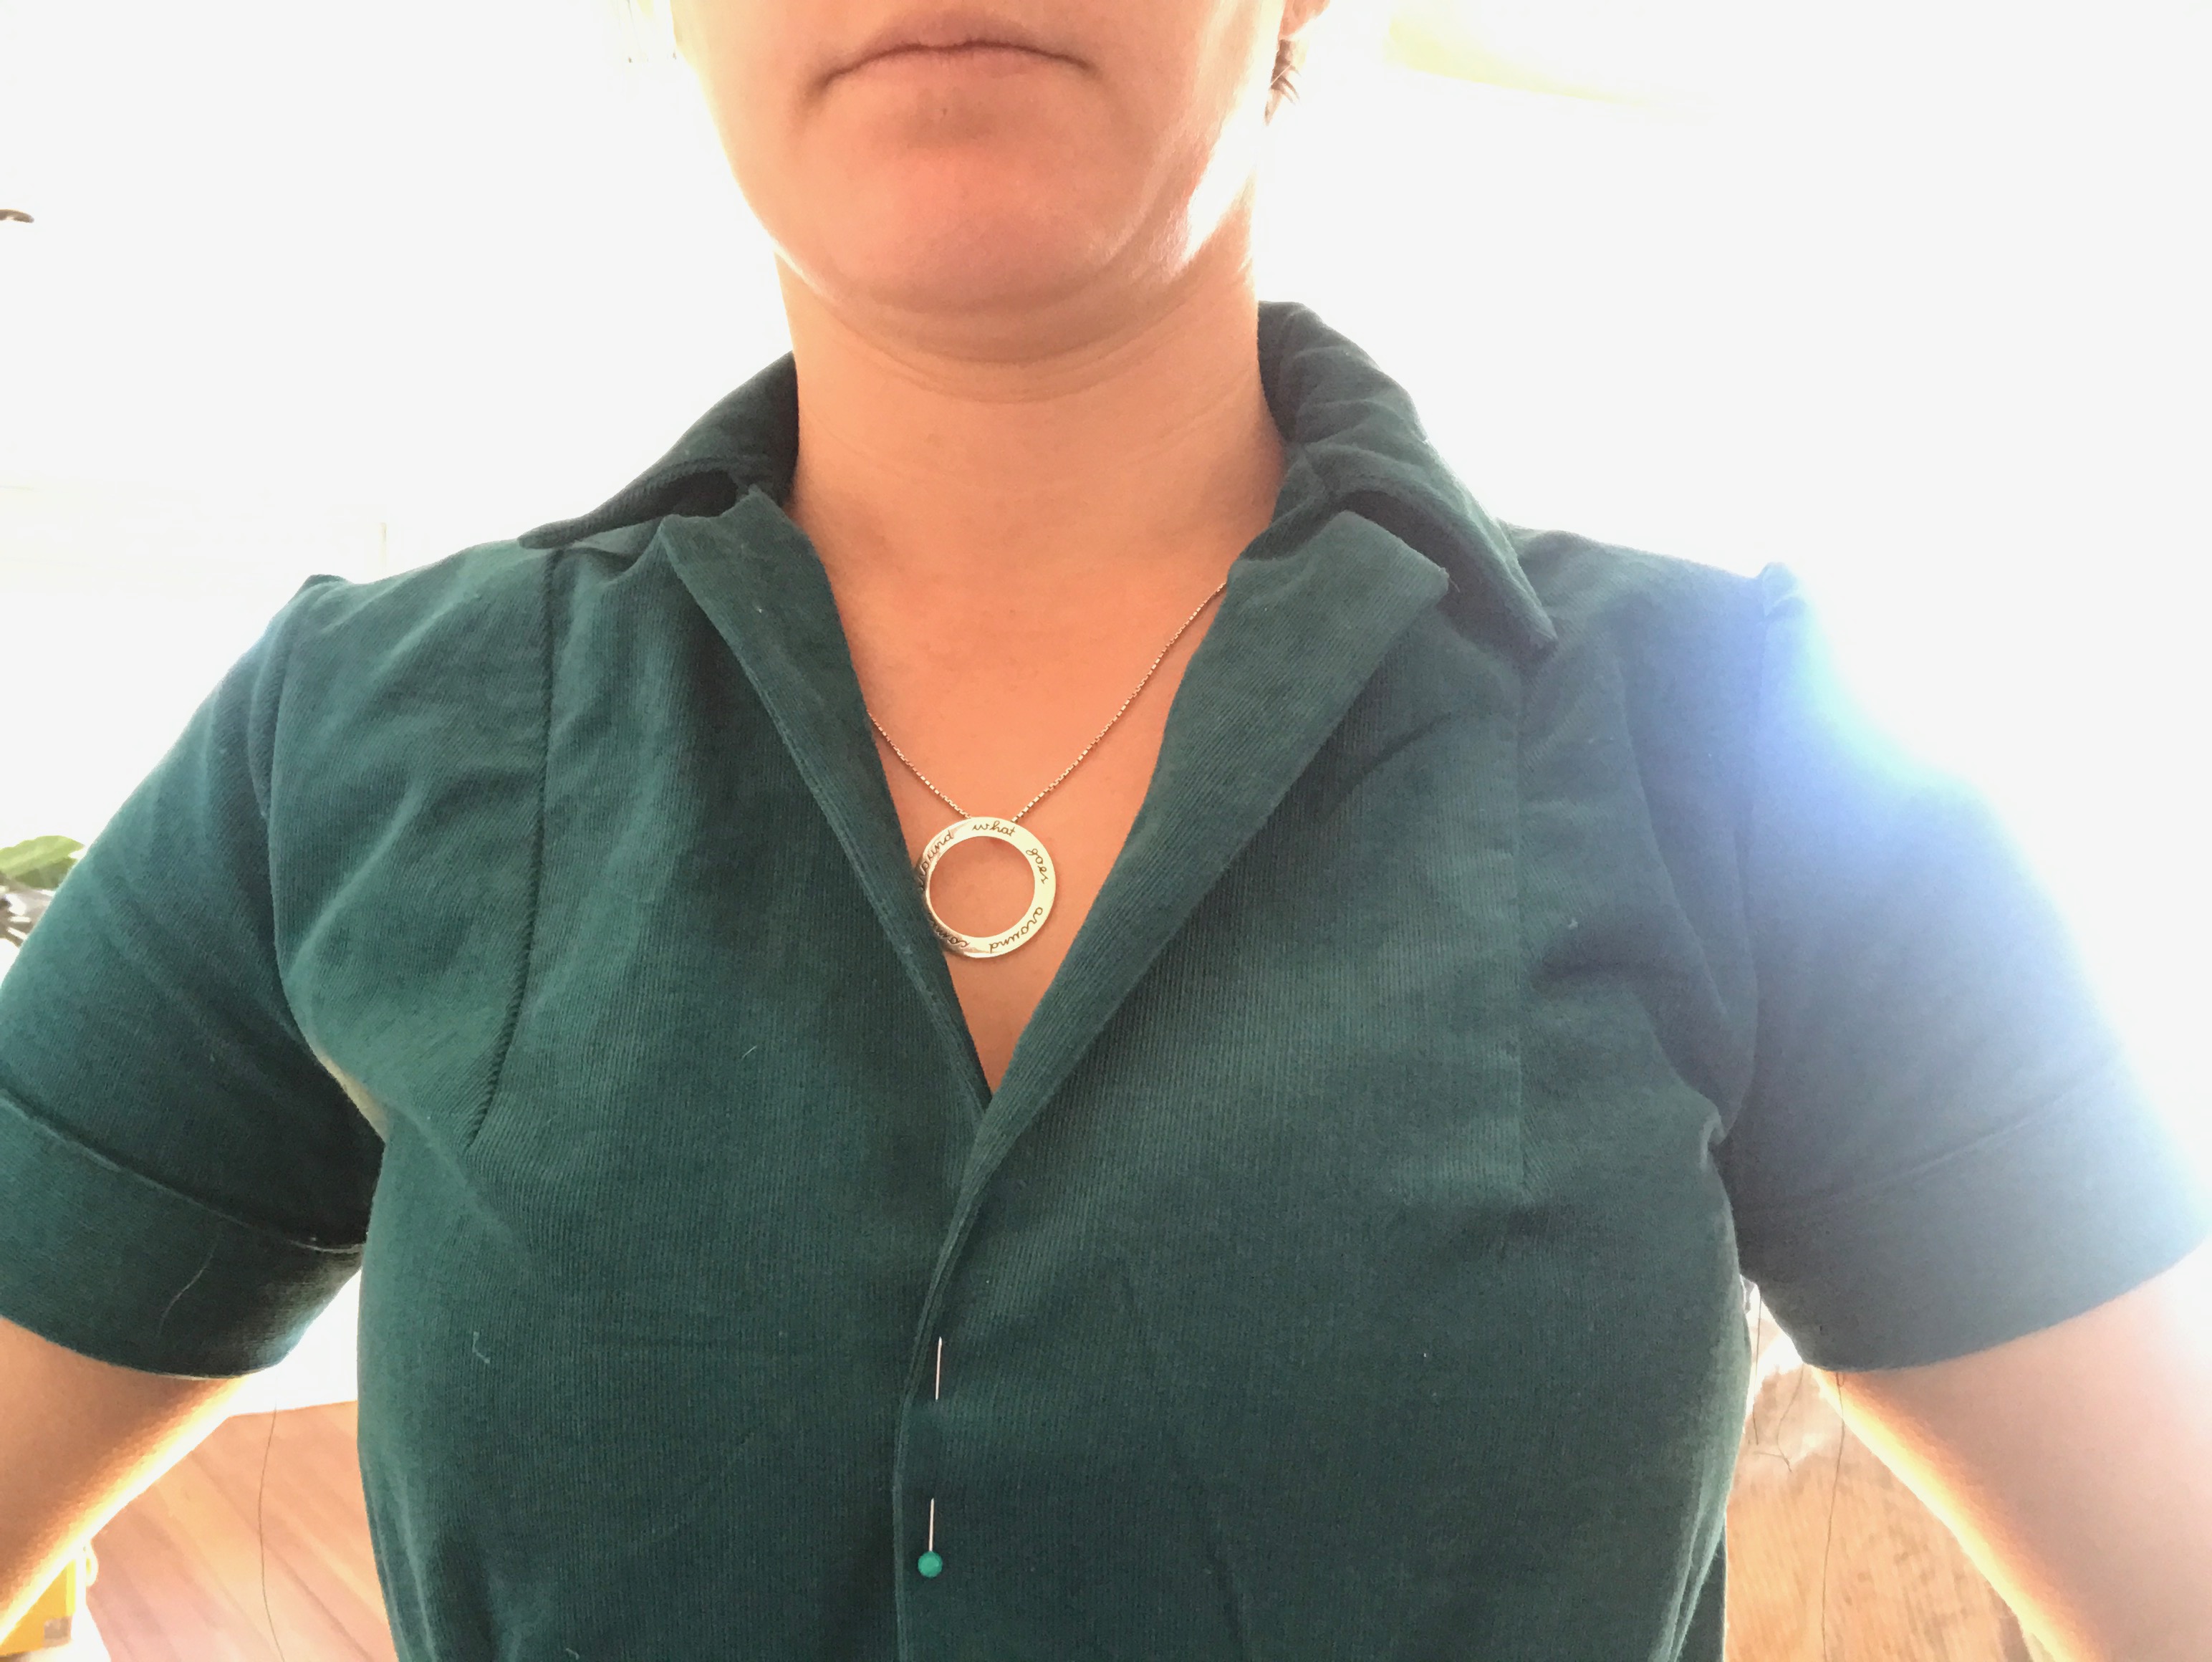
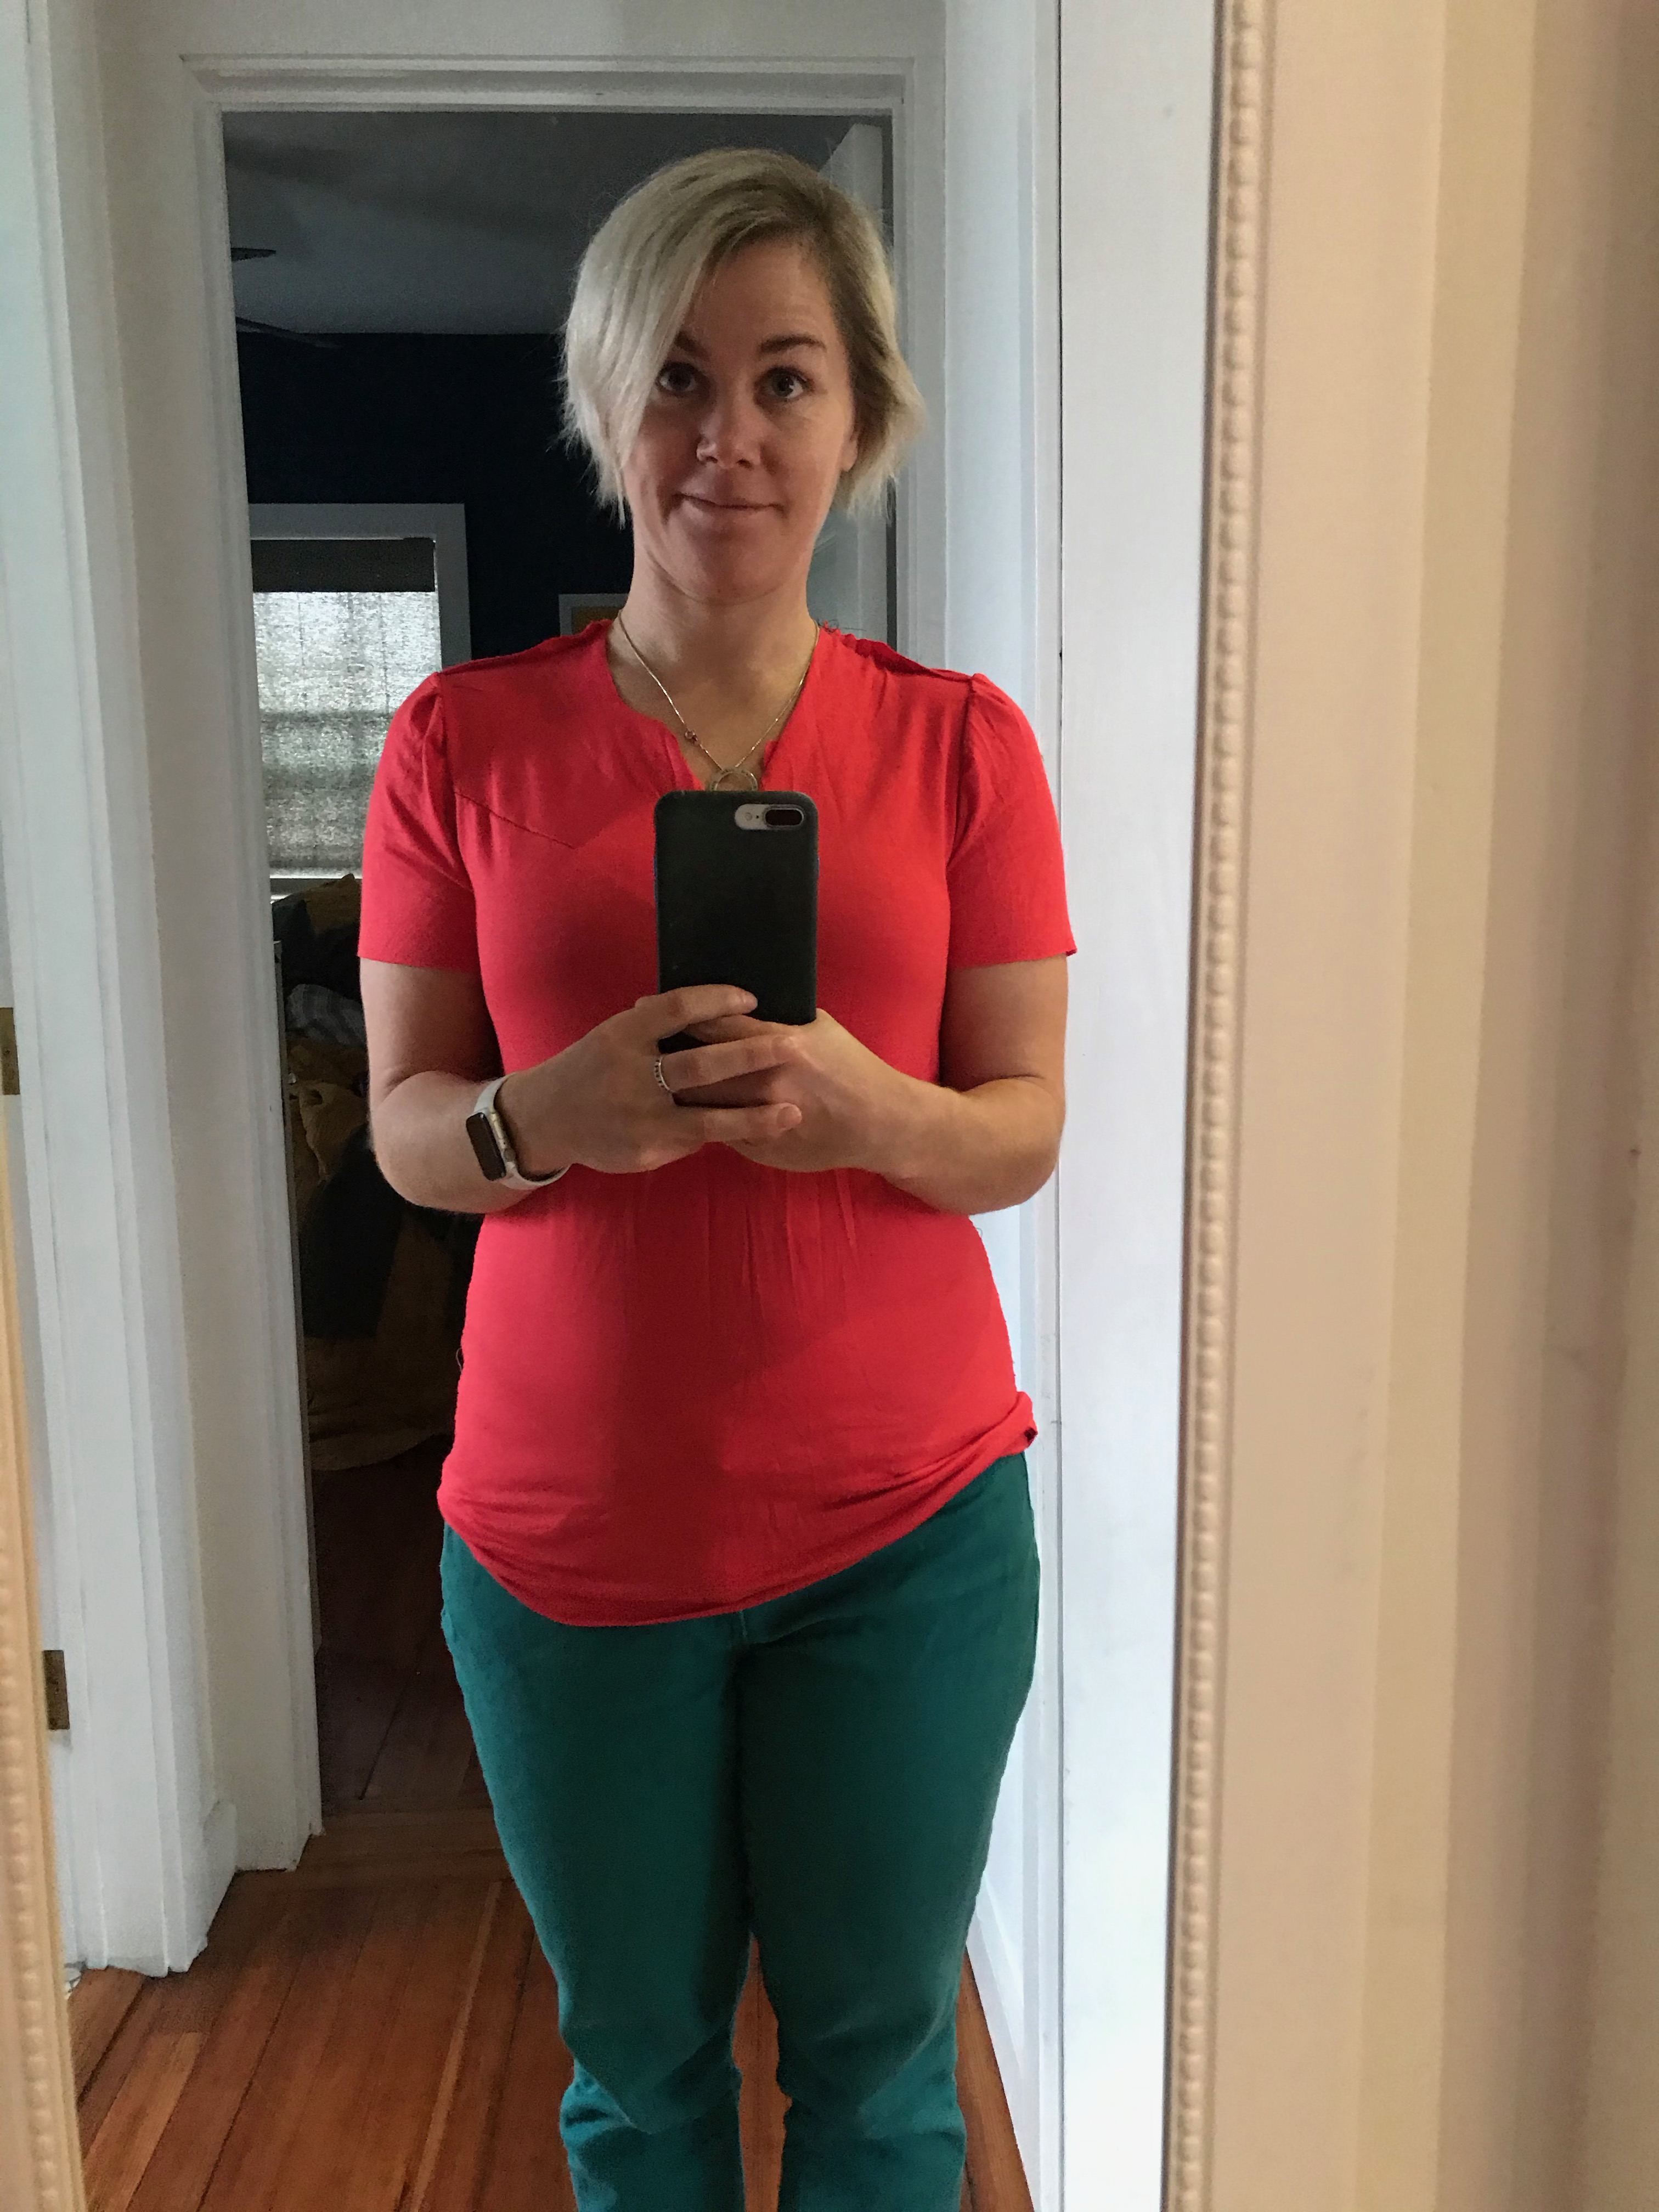
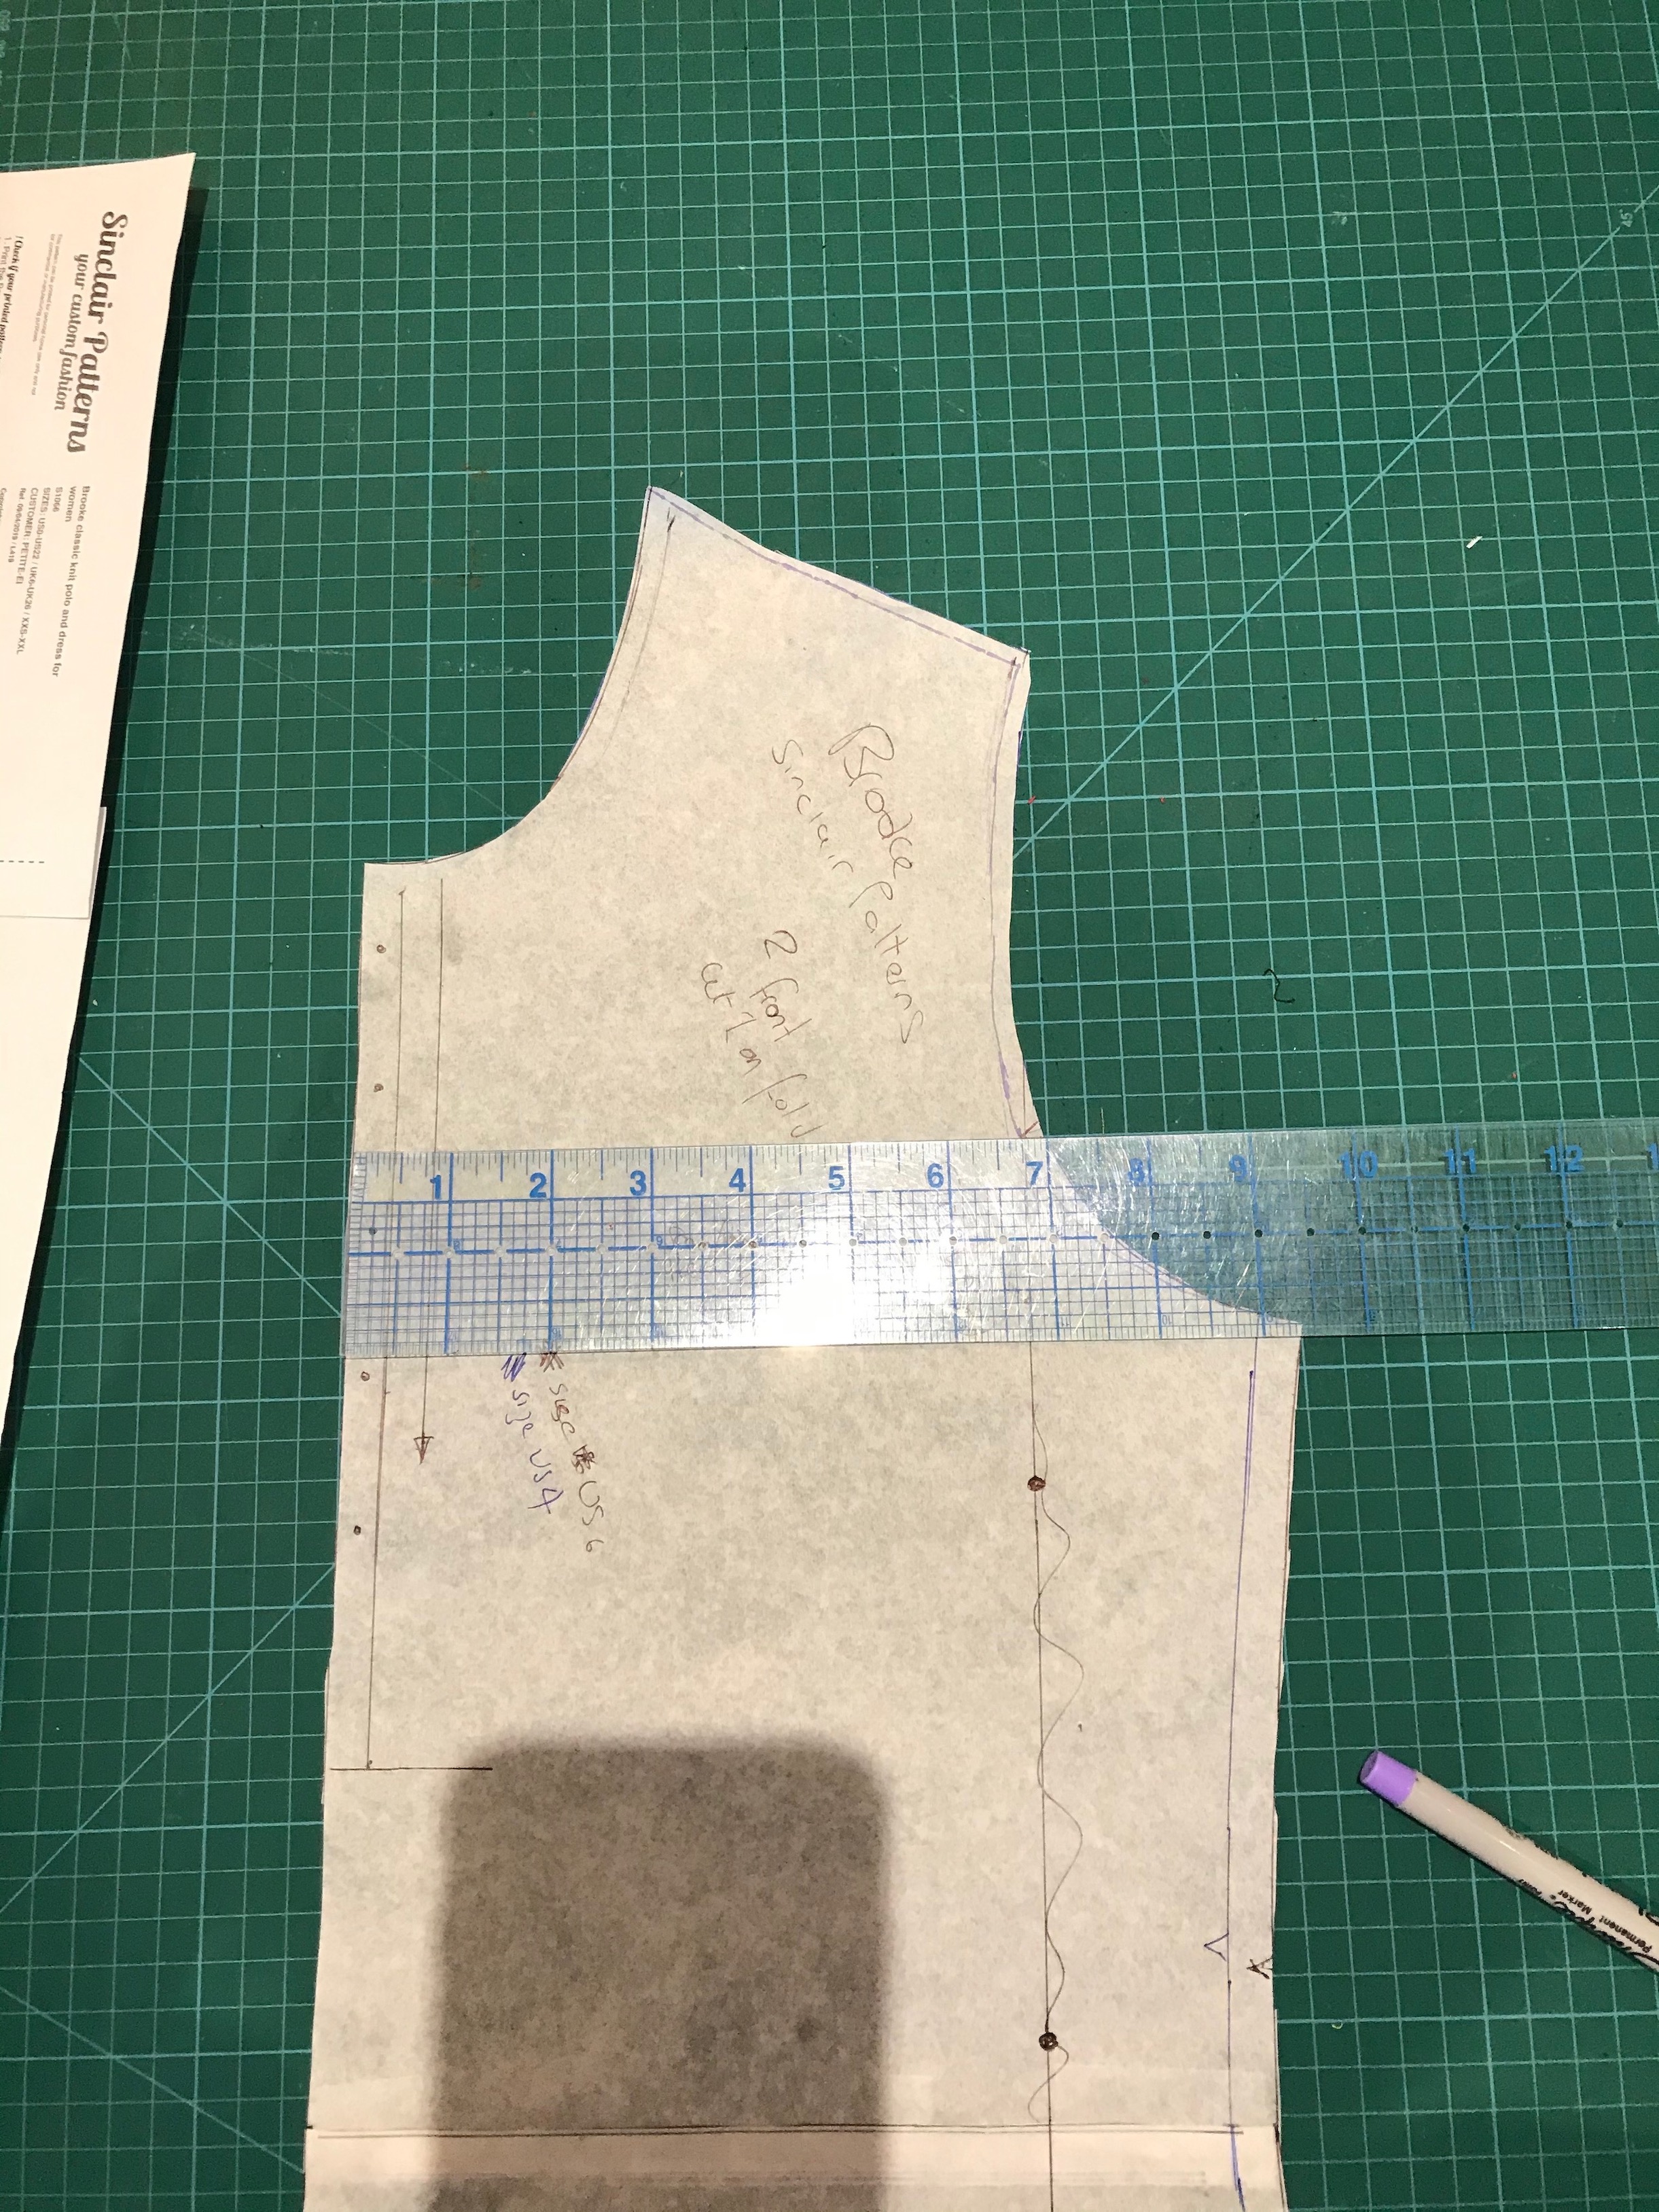
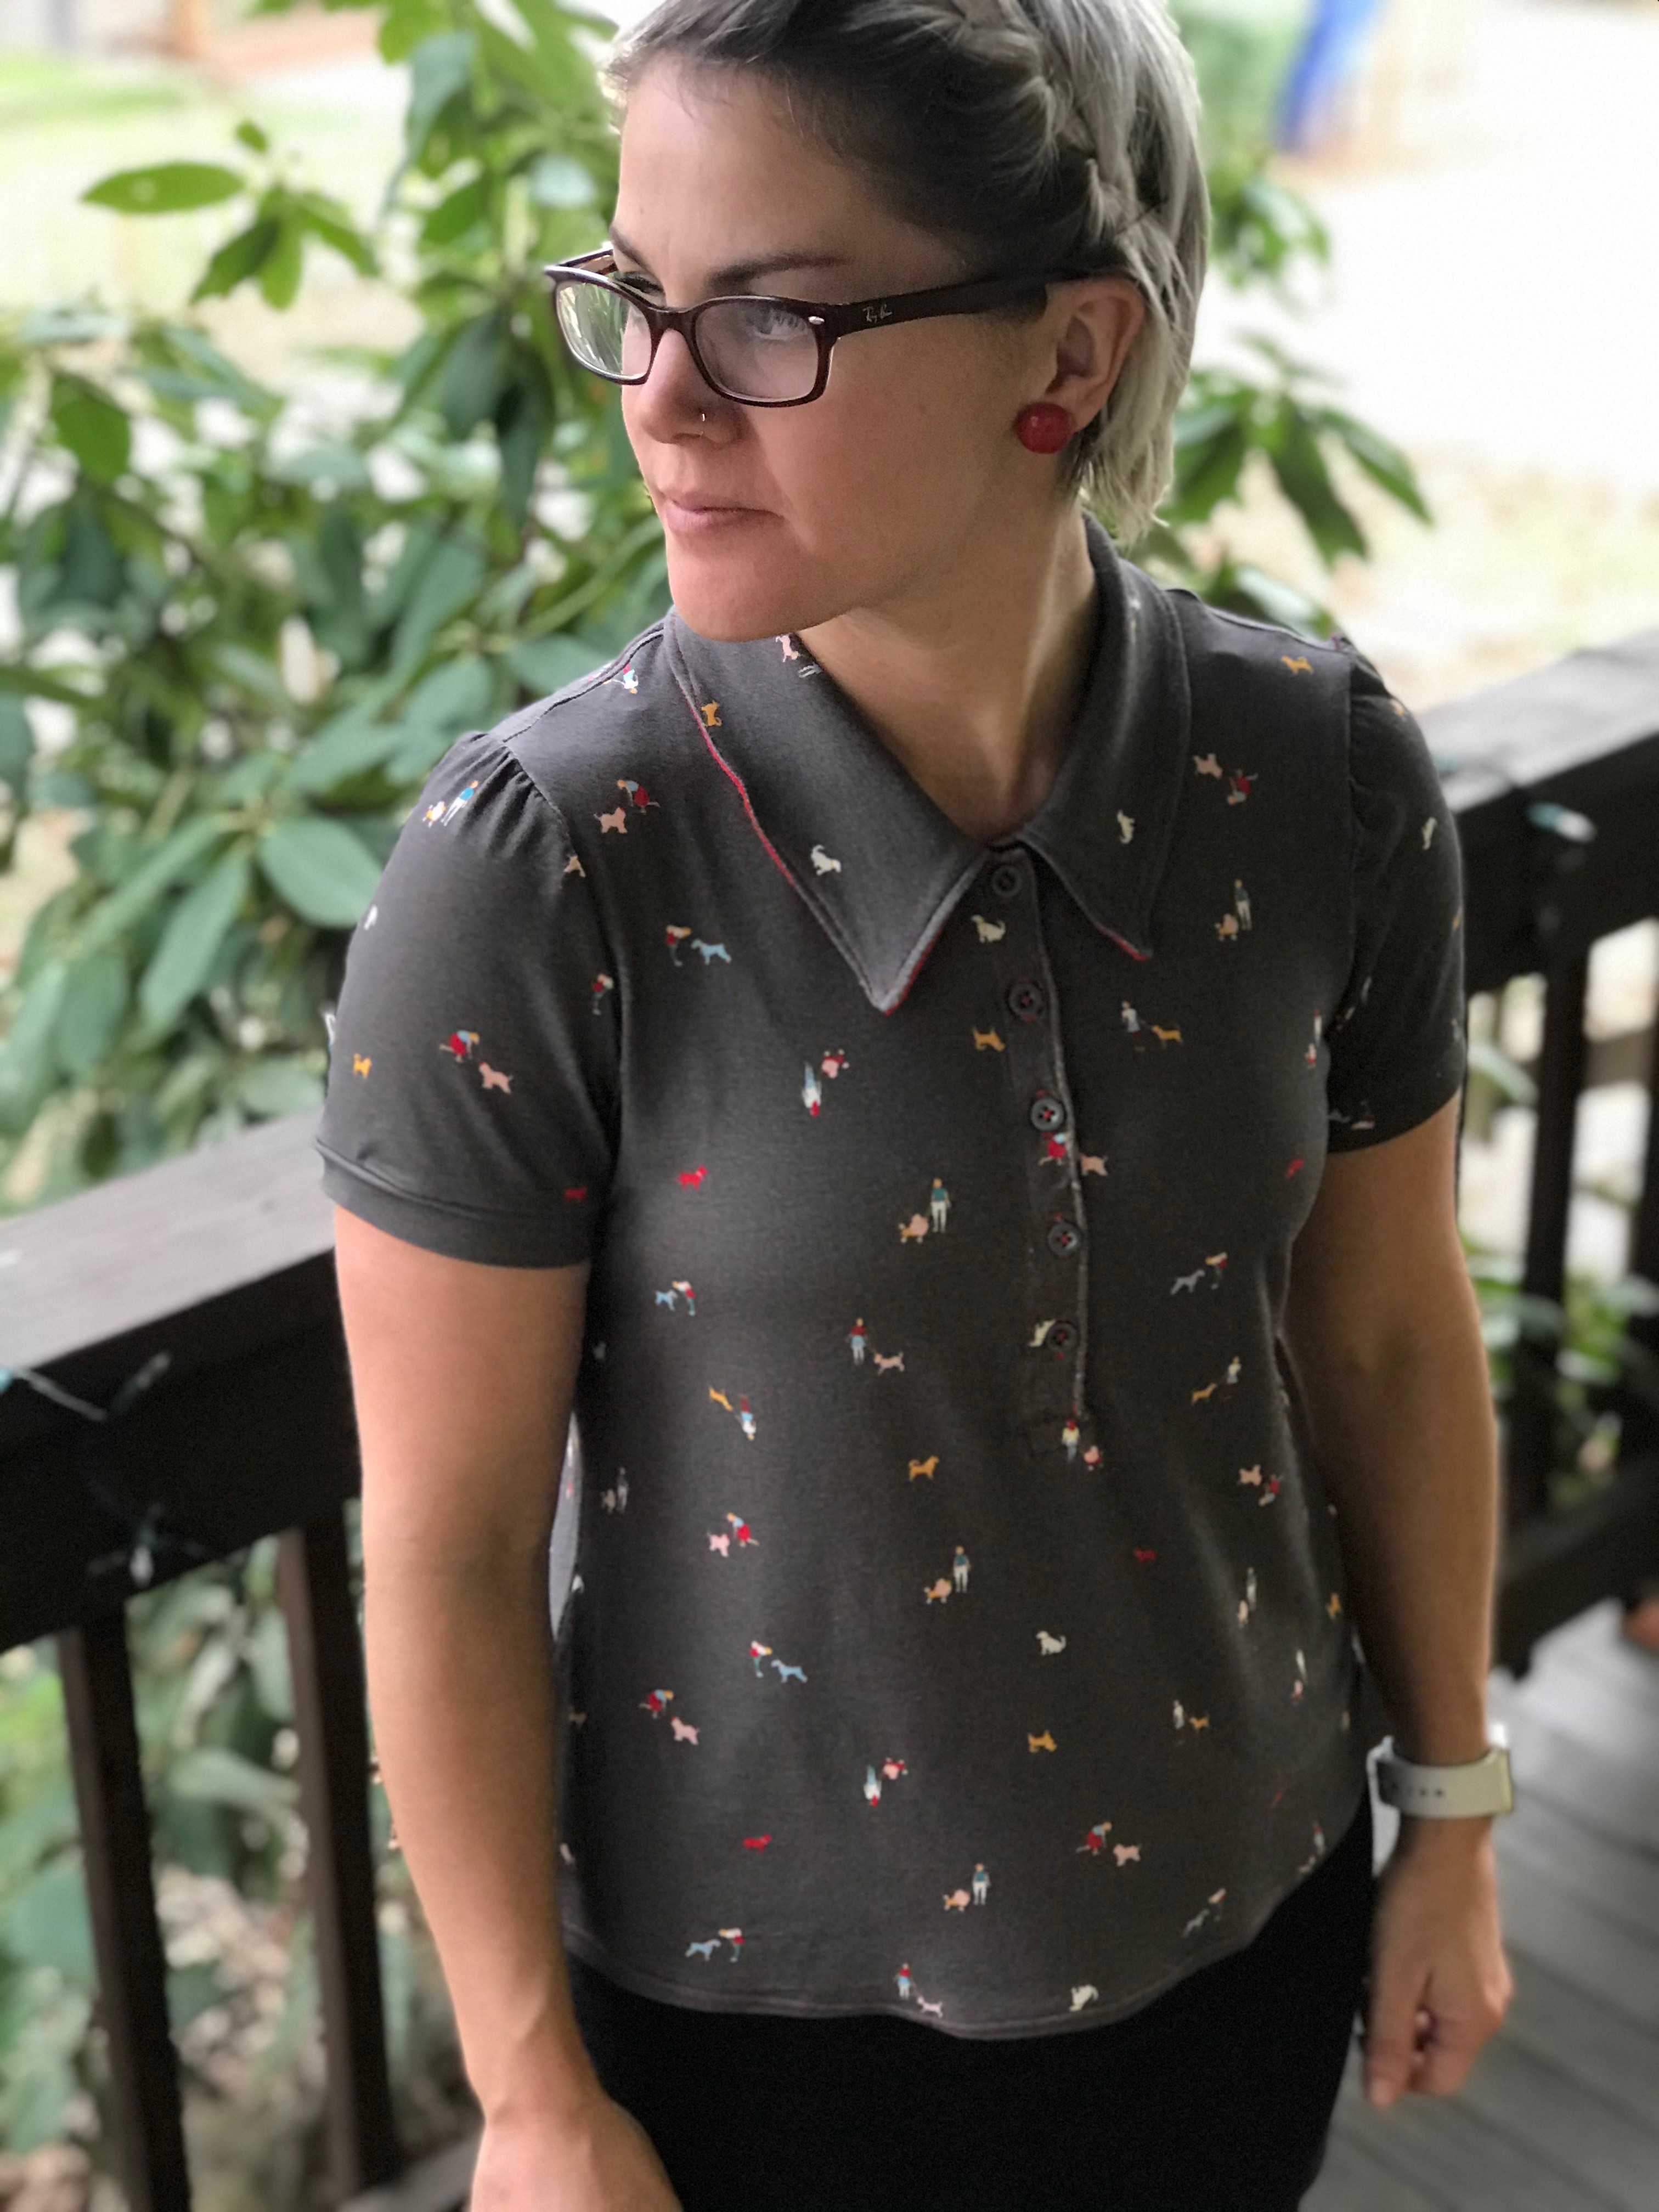
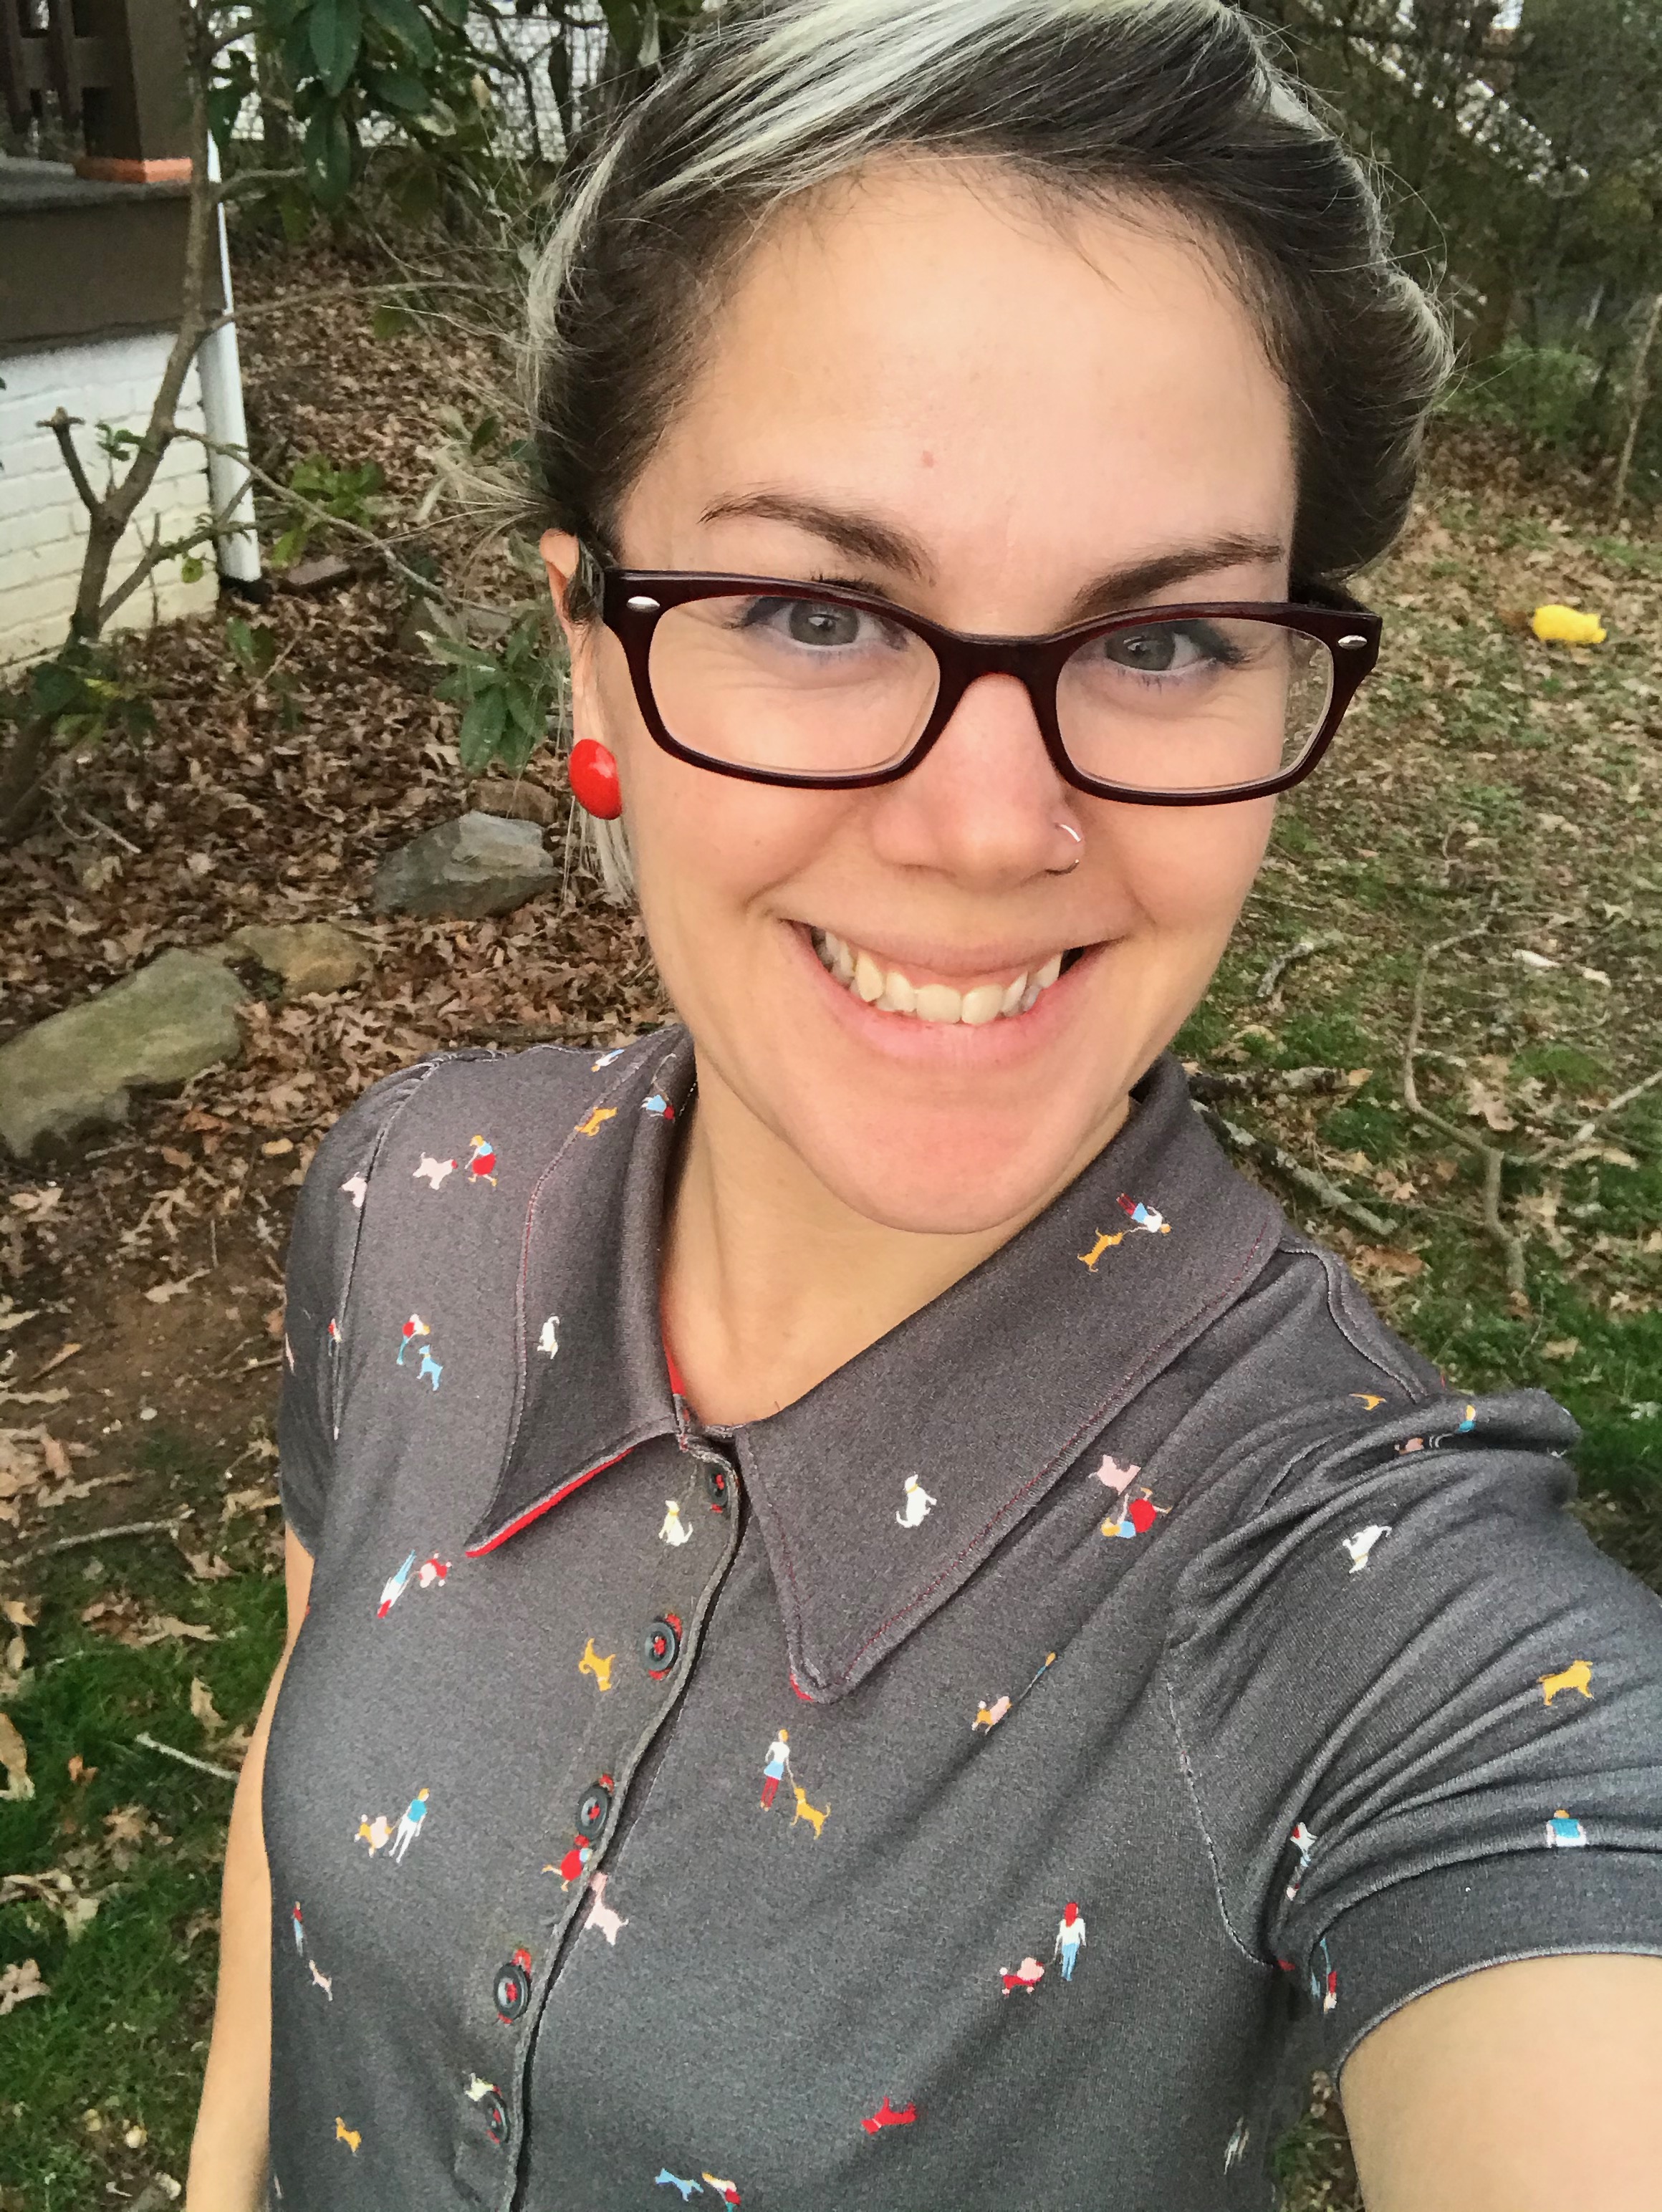
This was my first time being gifted a pattern and my first time using a Sinclair Pattern. The pattern is offered in petite, standard and tall, which is super rare and I’m very excited about. At the beginning it guides you through choosing which size from which size range to make. I still ended up having to shorten my pattern quite a lot despite using the petite version, but I think that’s because I wear high waisted jeans so want my shirts to be almost cropped. For my version I chose to do the classic collar with short sleeves. It also has a split hem rather than just a standard straight one which I thought was a nice touch. At first I was going to use a contrast fabric for the collar and the sleeve bands but ended up just using the main fabric and bright red top stitching. It honestly ended up being the perfect pattern for my fabric.
I found the instructions very easy to follow. I loved that it was a layered pattern so I could print the size I needed, plus the instructions used photographs rather than illustrations. They give instructions bother for overlockers/sergers and using a standard sewing machine, plus little tips on working with knits which would be super helpful for beginners. I’d definitely recommend giving their patterns a try and if I weren’t on a pattern buying ban right now I’d probably have gone and bought a few more, not having to alter the shoulders was such a treat!
Anyways, enough talking. Here’s the pics of the end product!
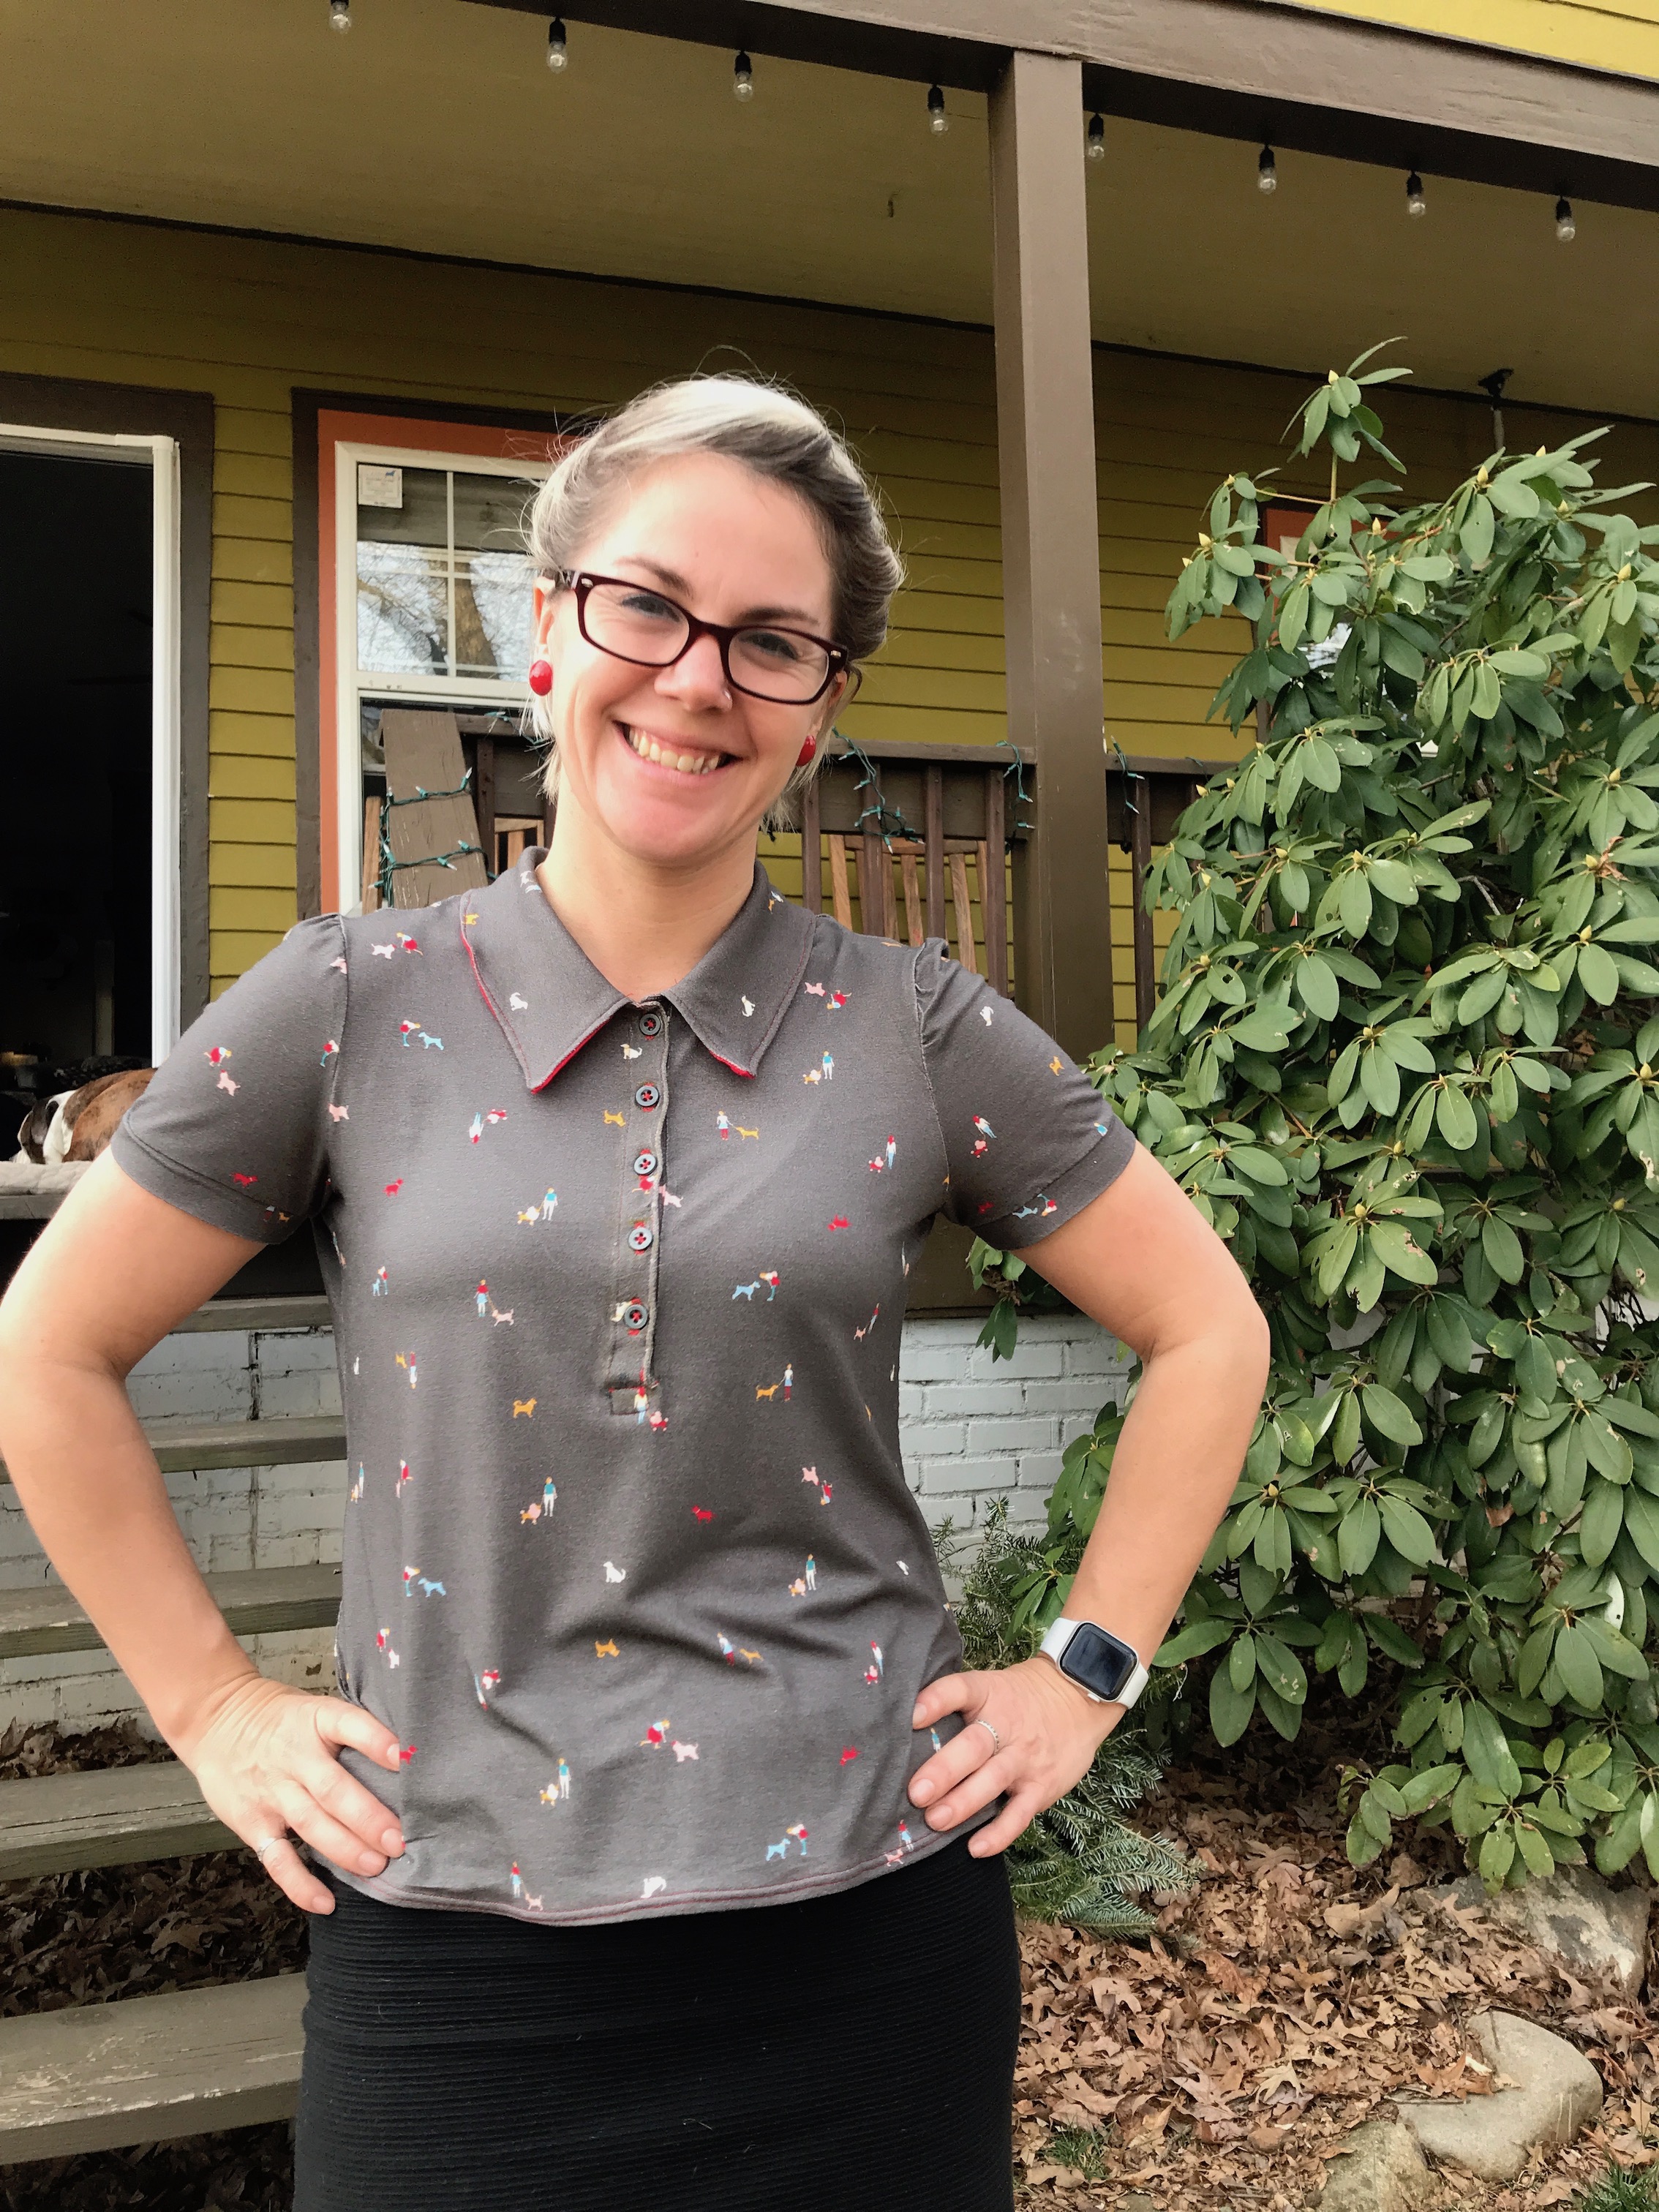
Look, no excess!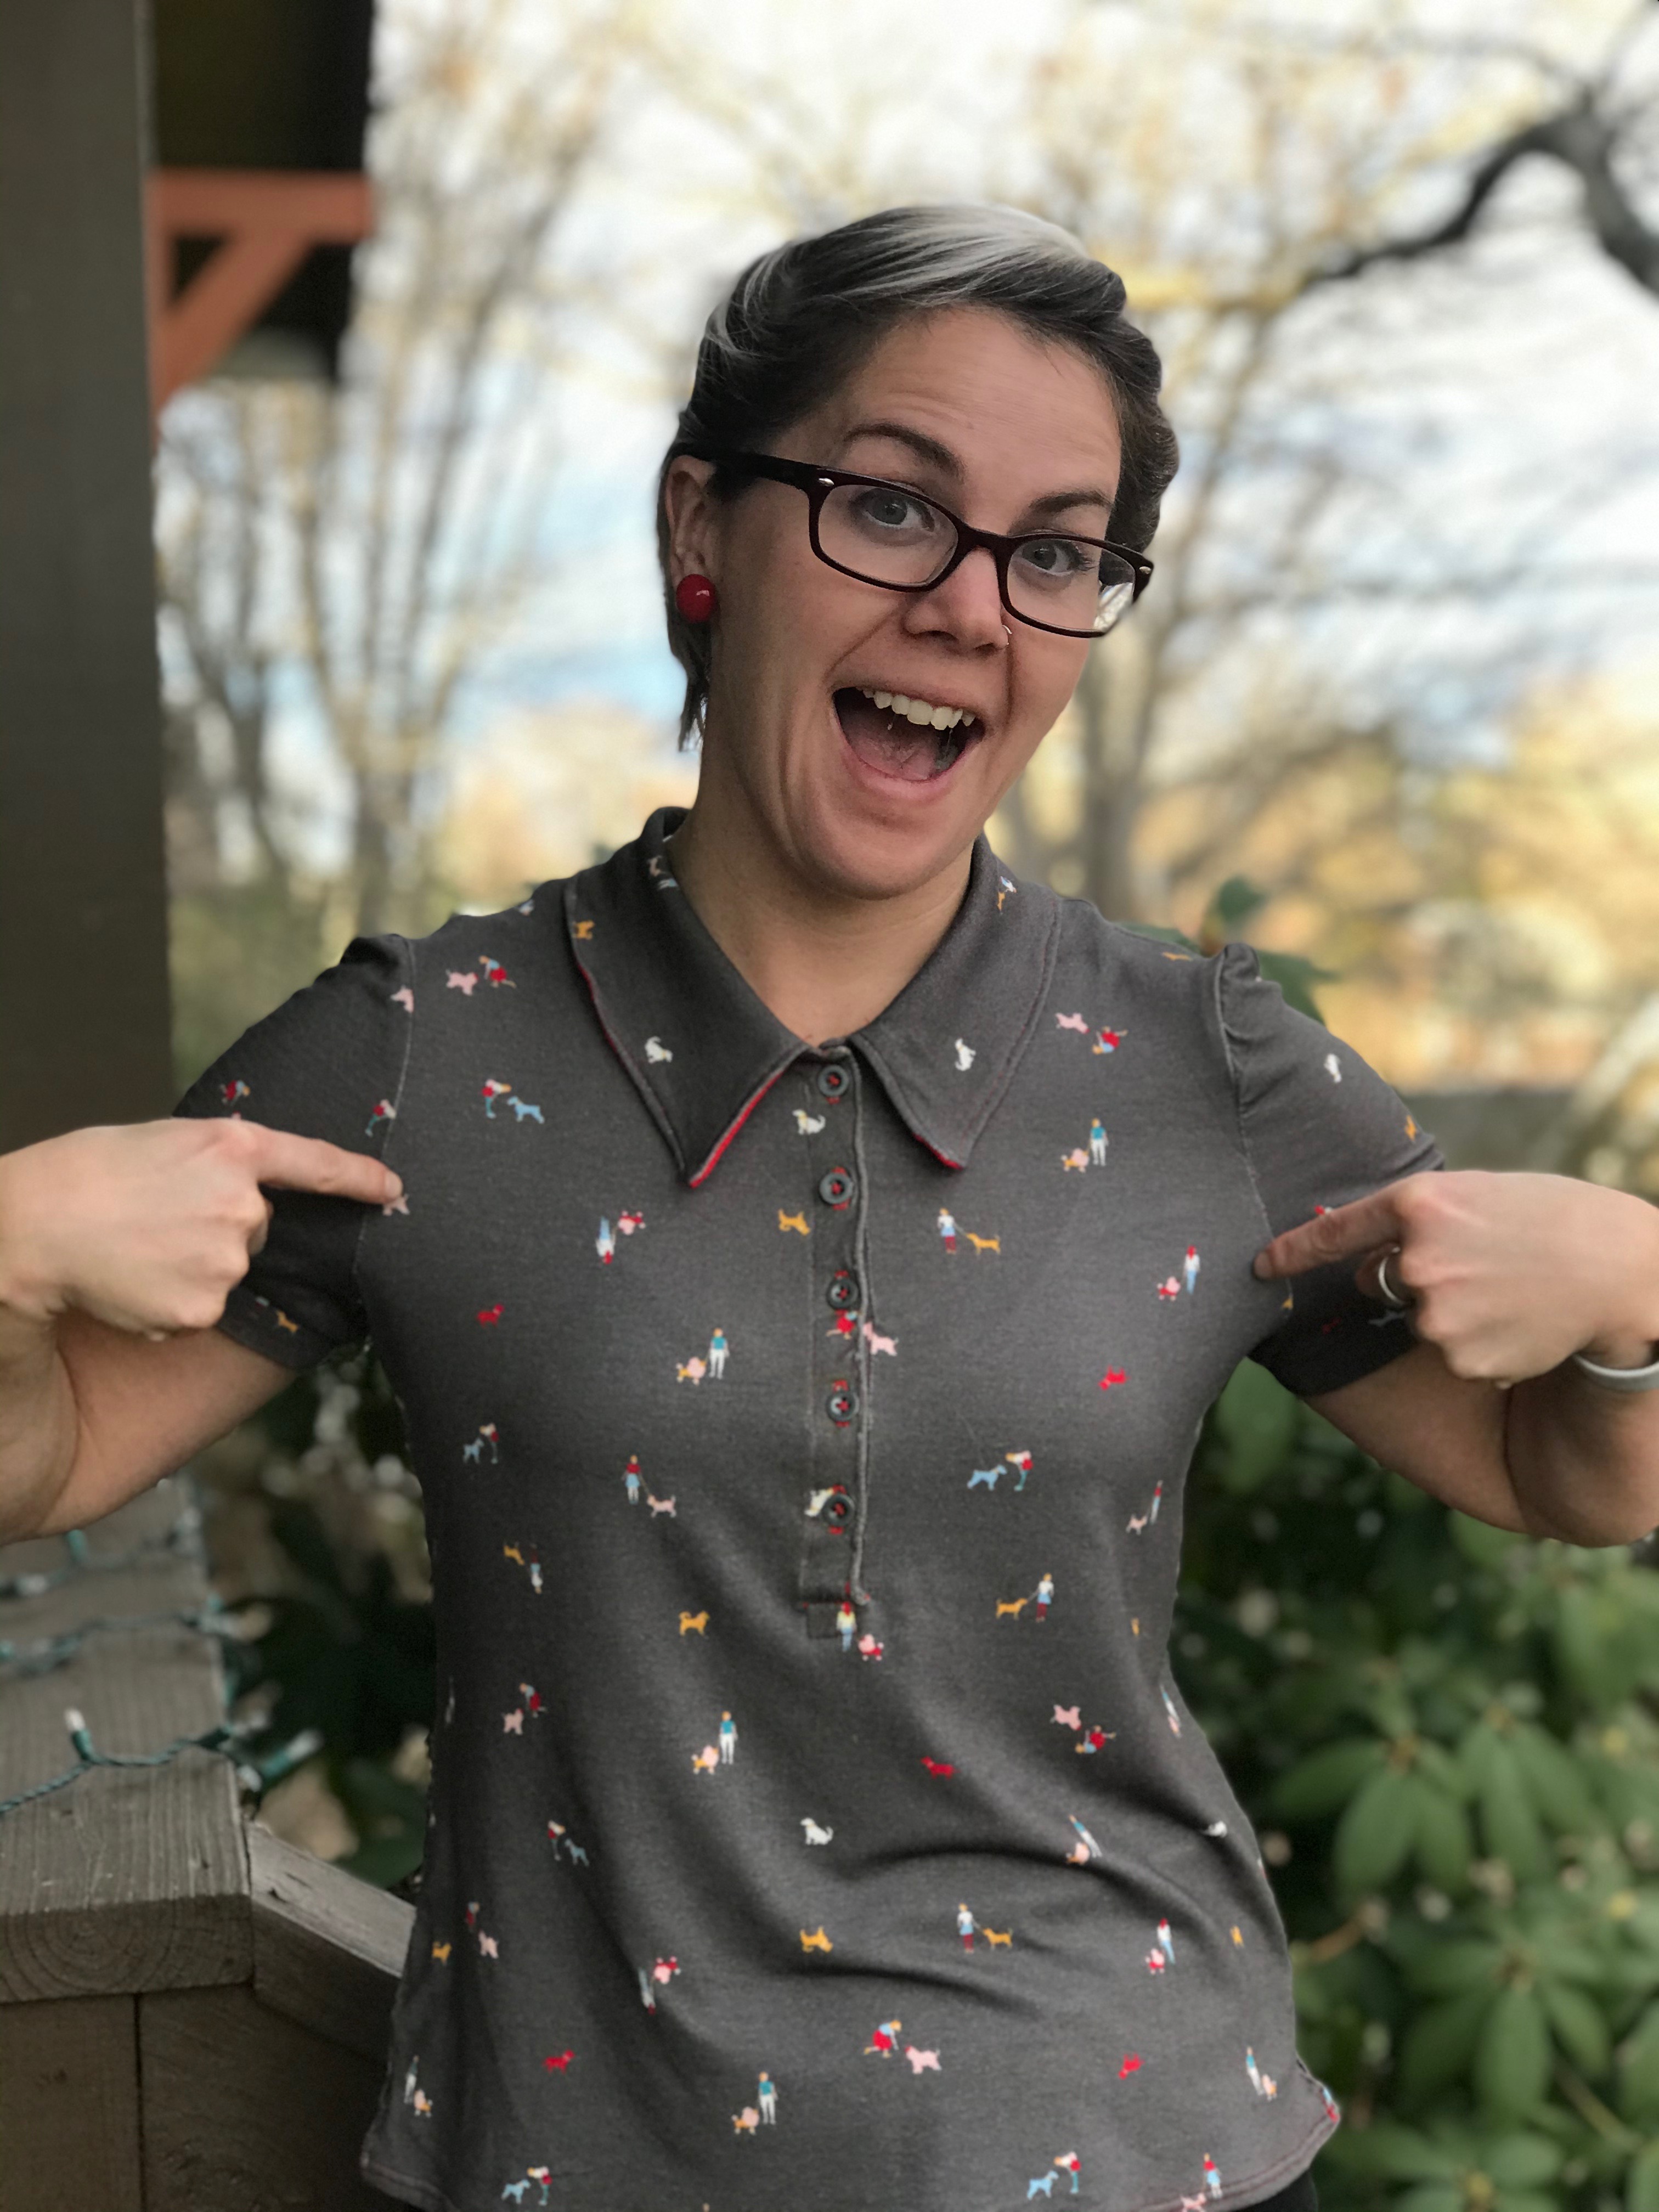
 The cute little split hem:
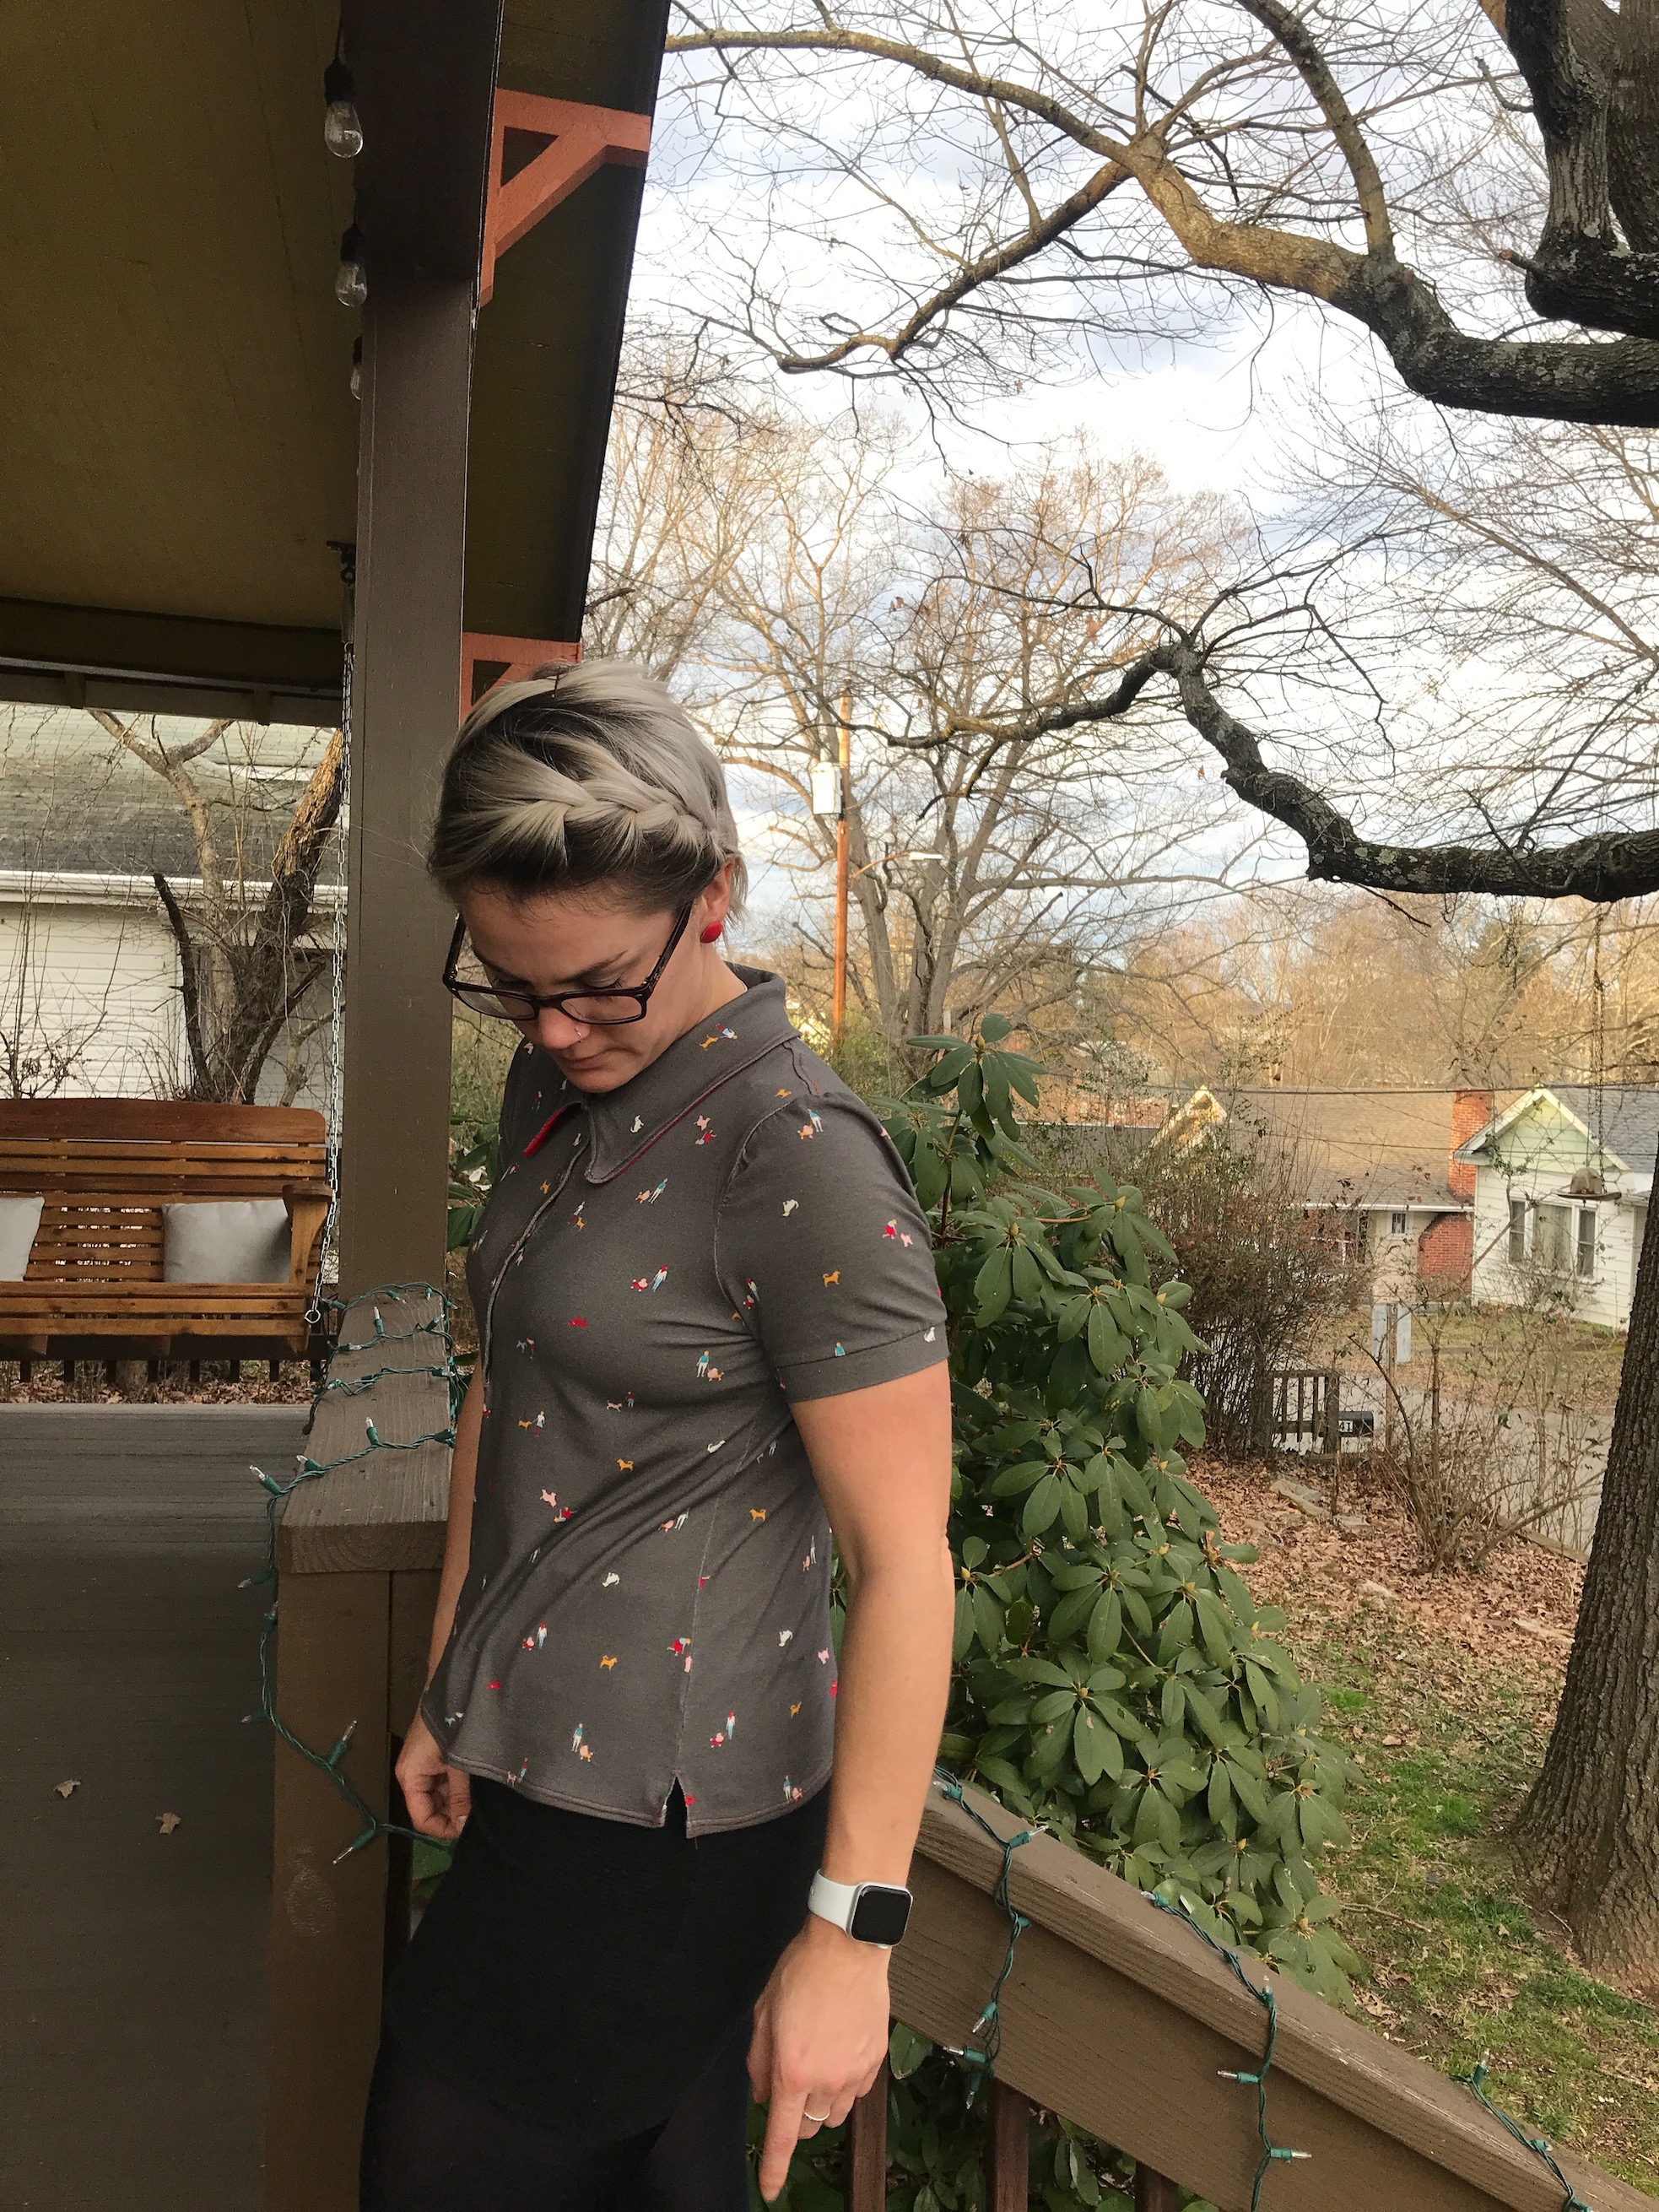 Bit of a closer look at that fabric!
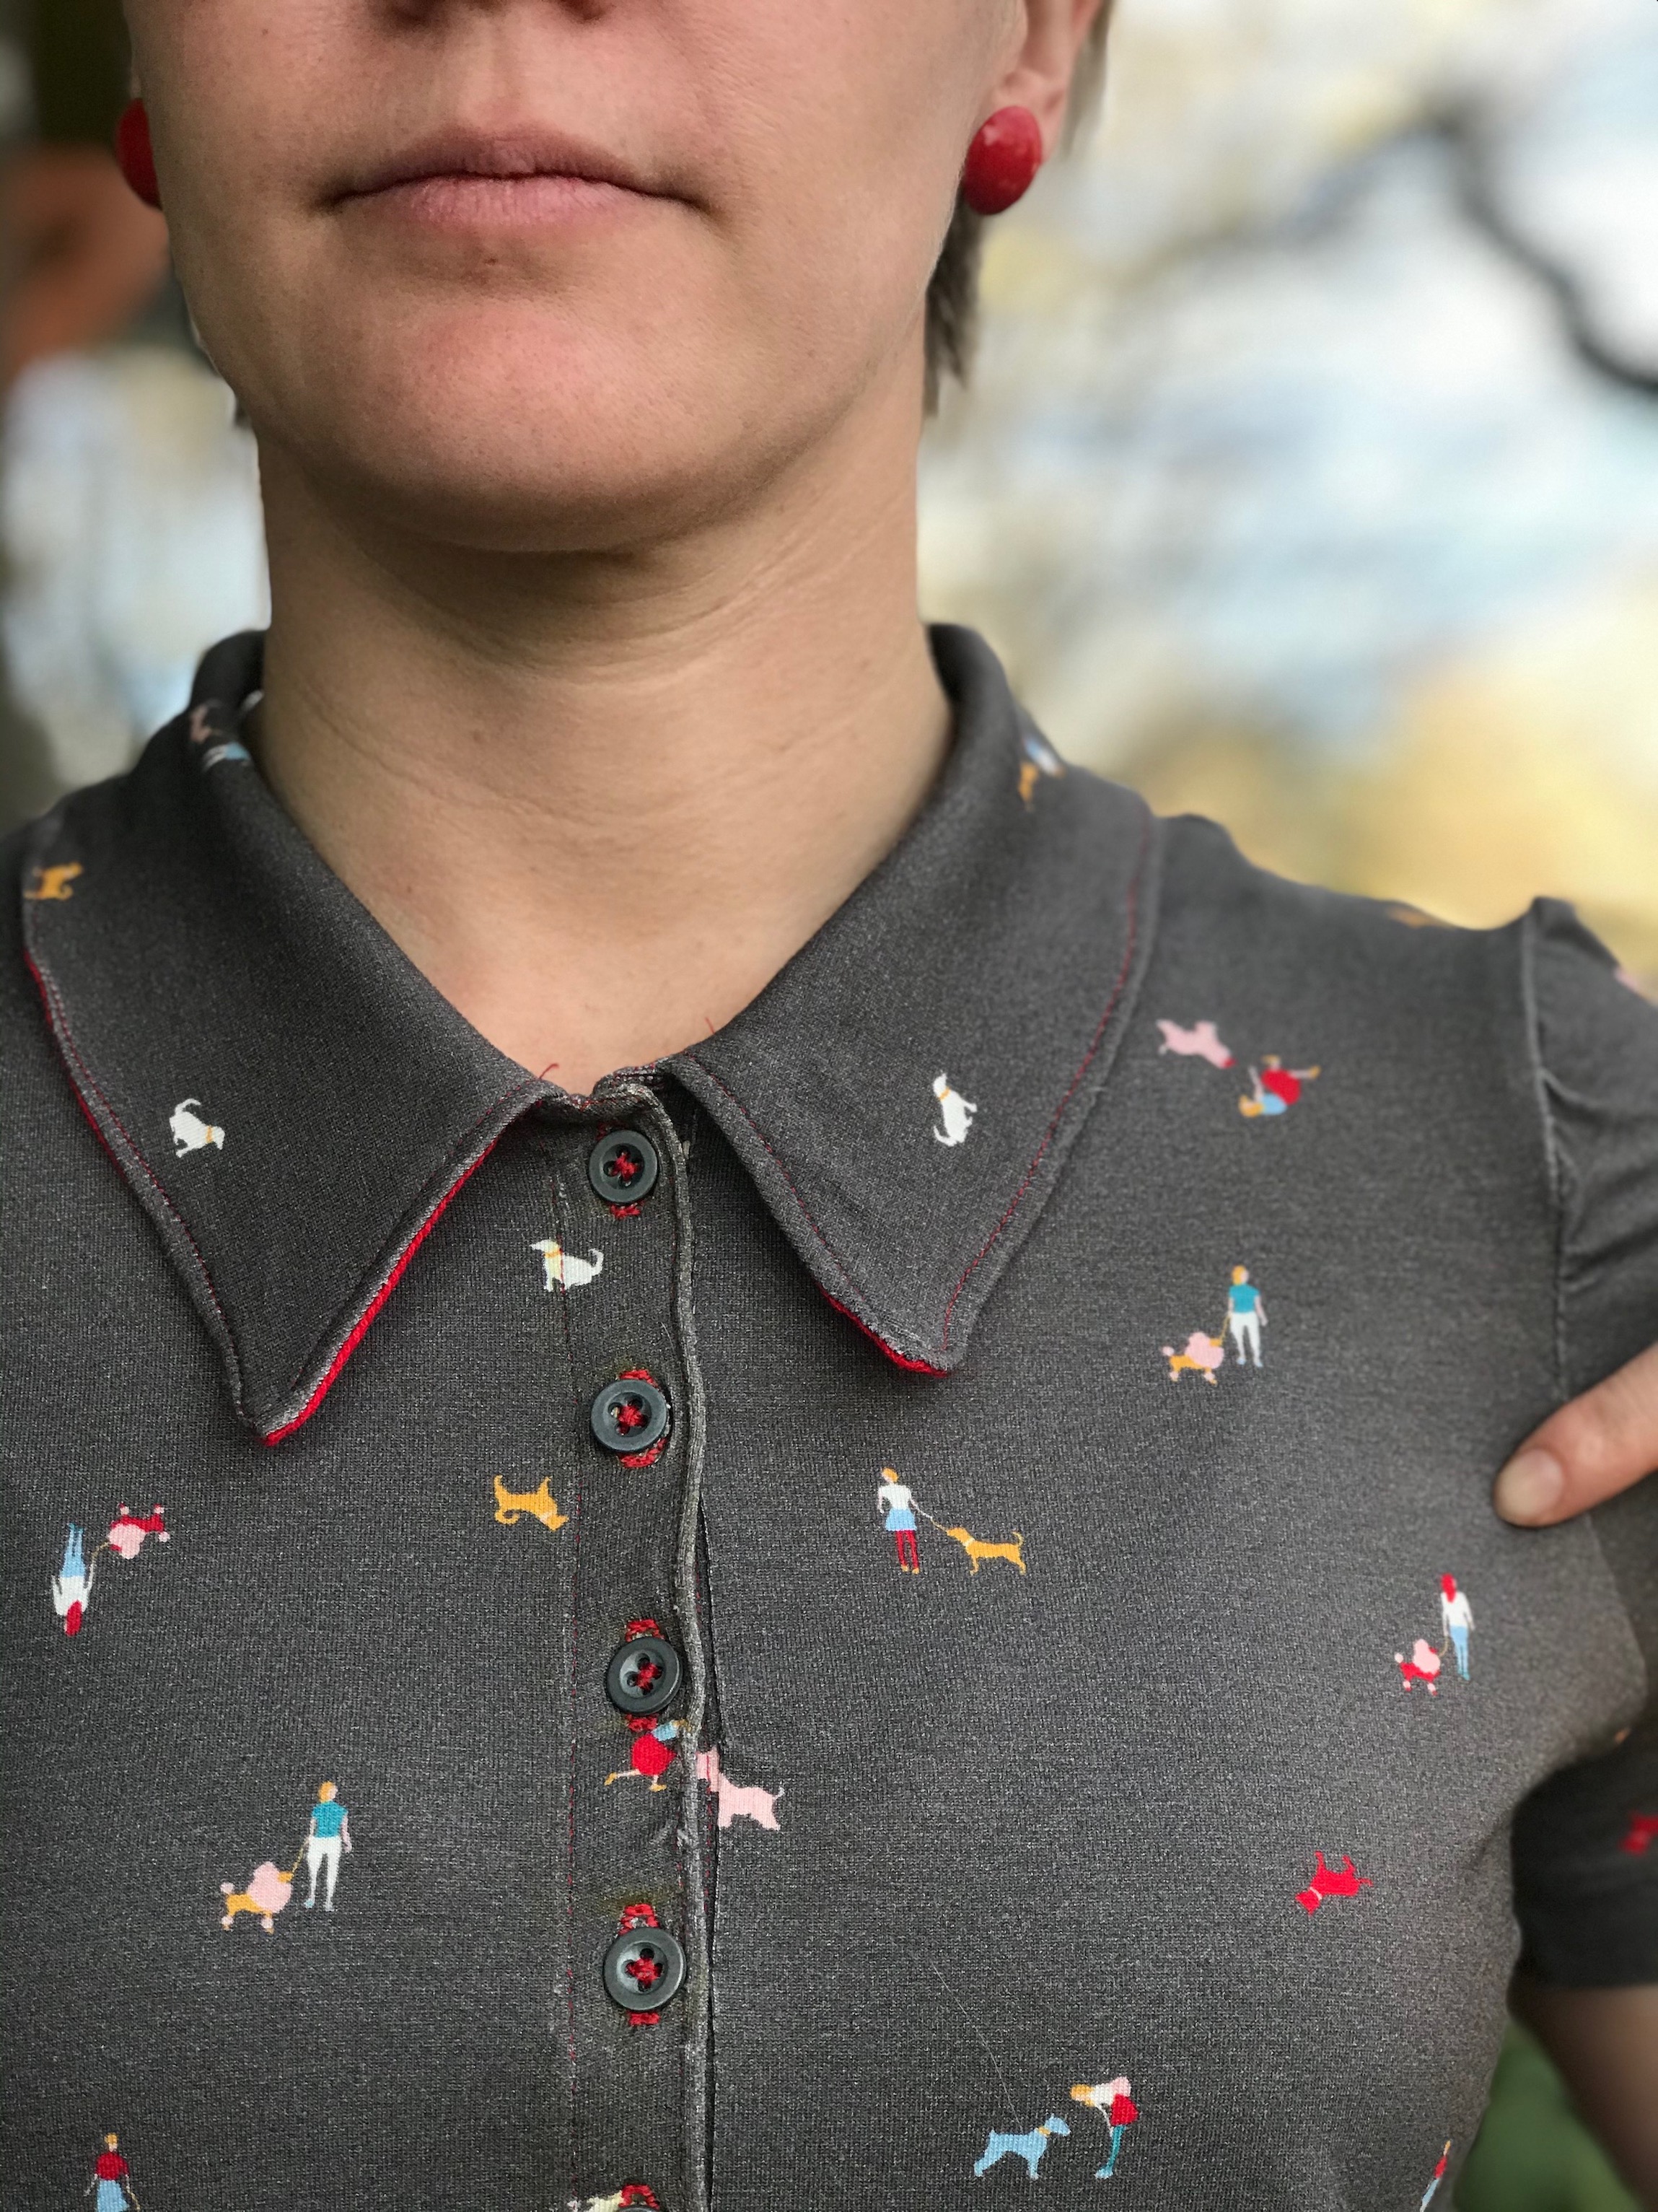
Contemplating all the things I can now alter the arm holes on…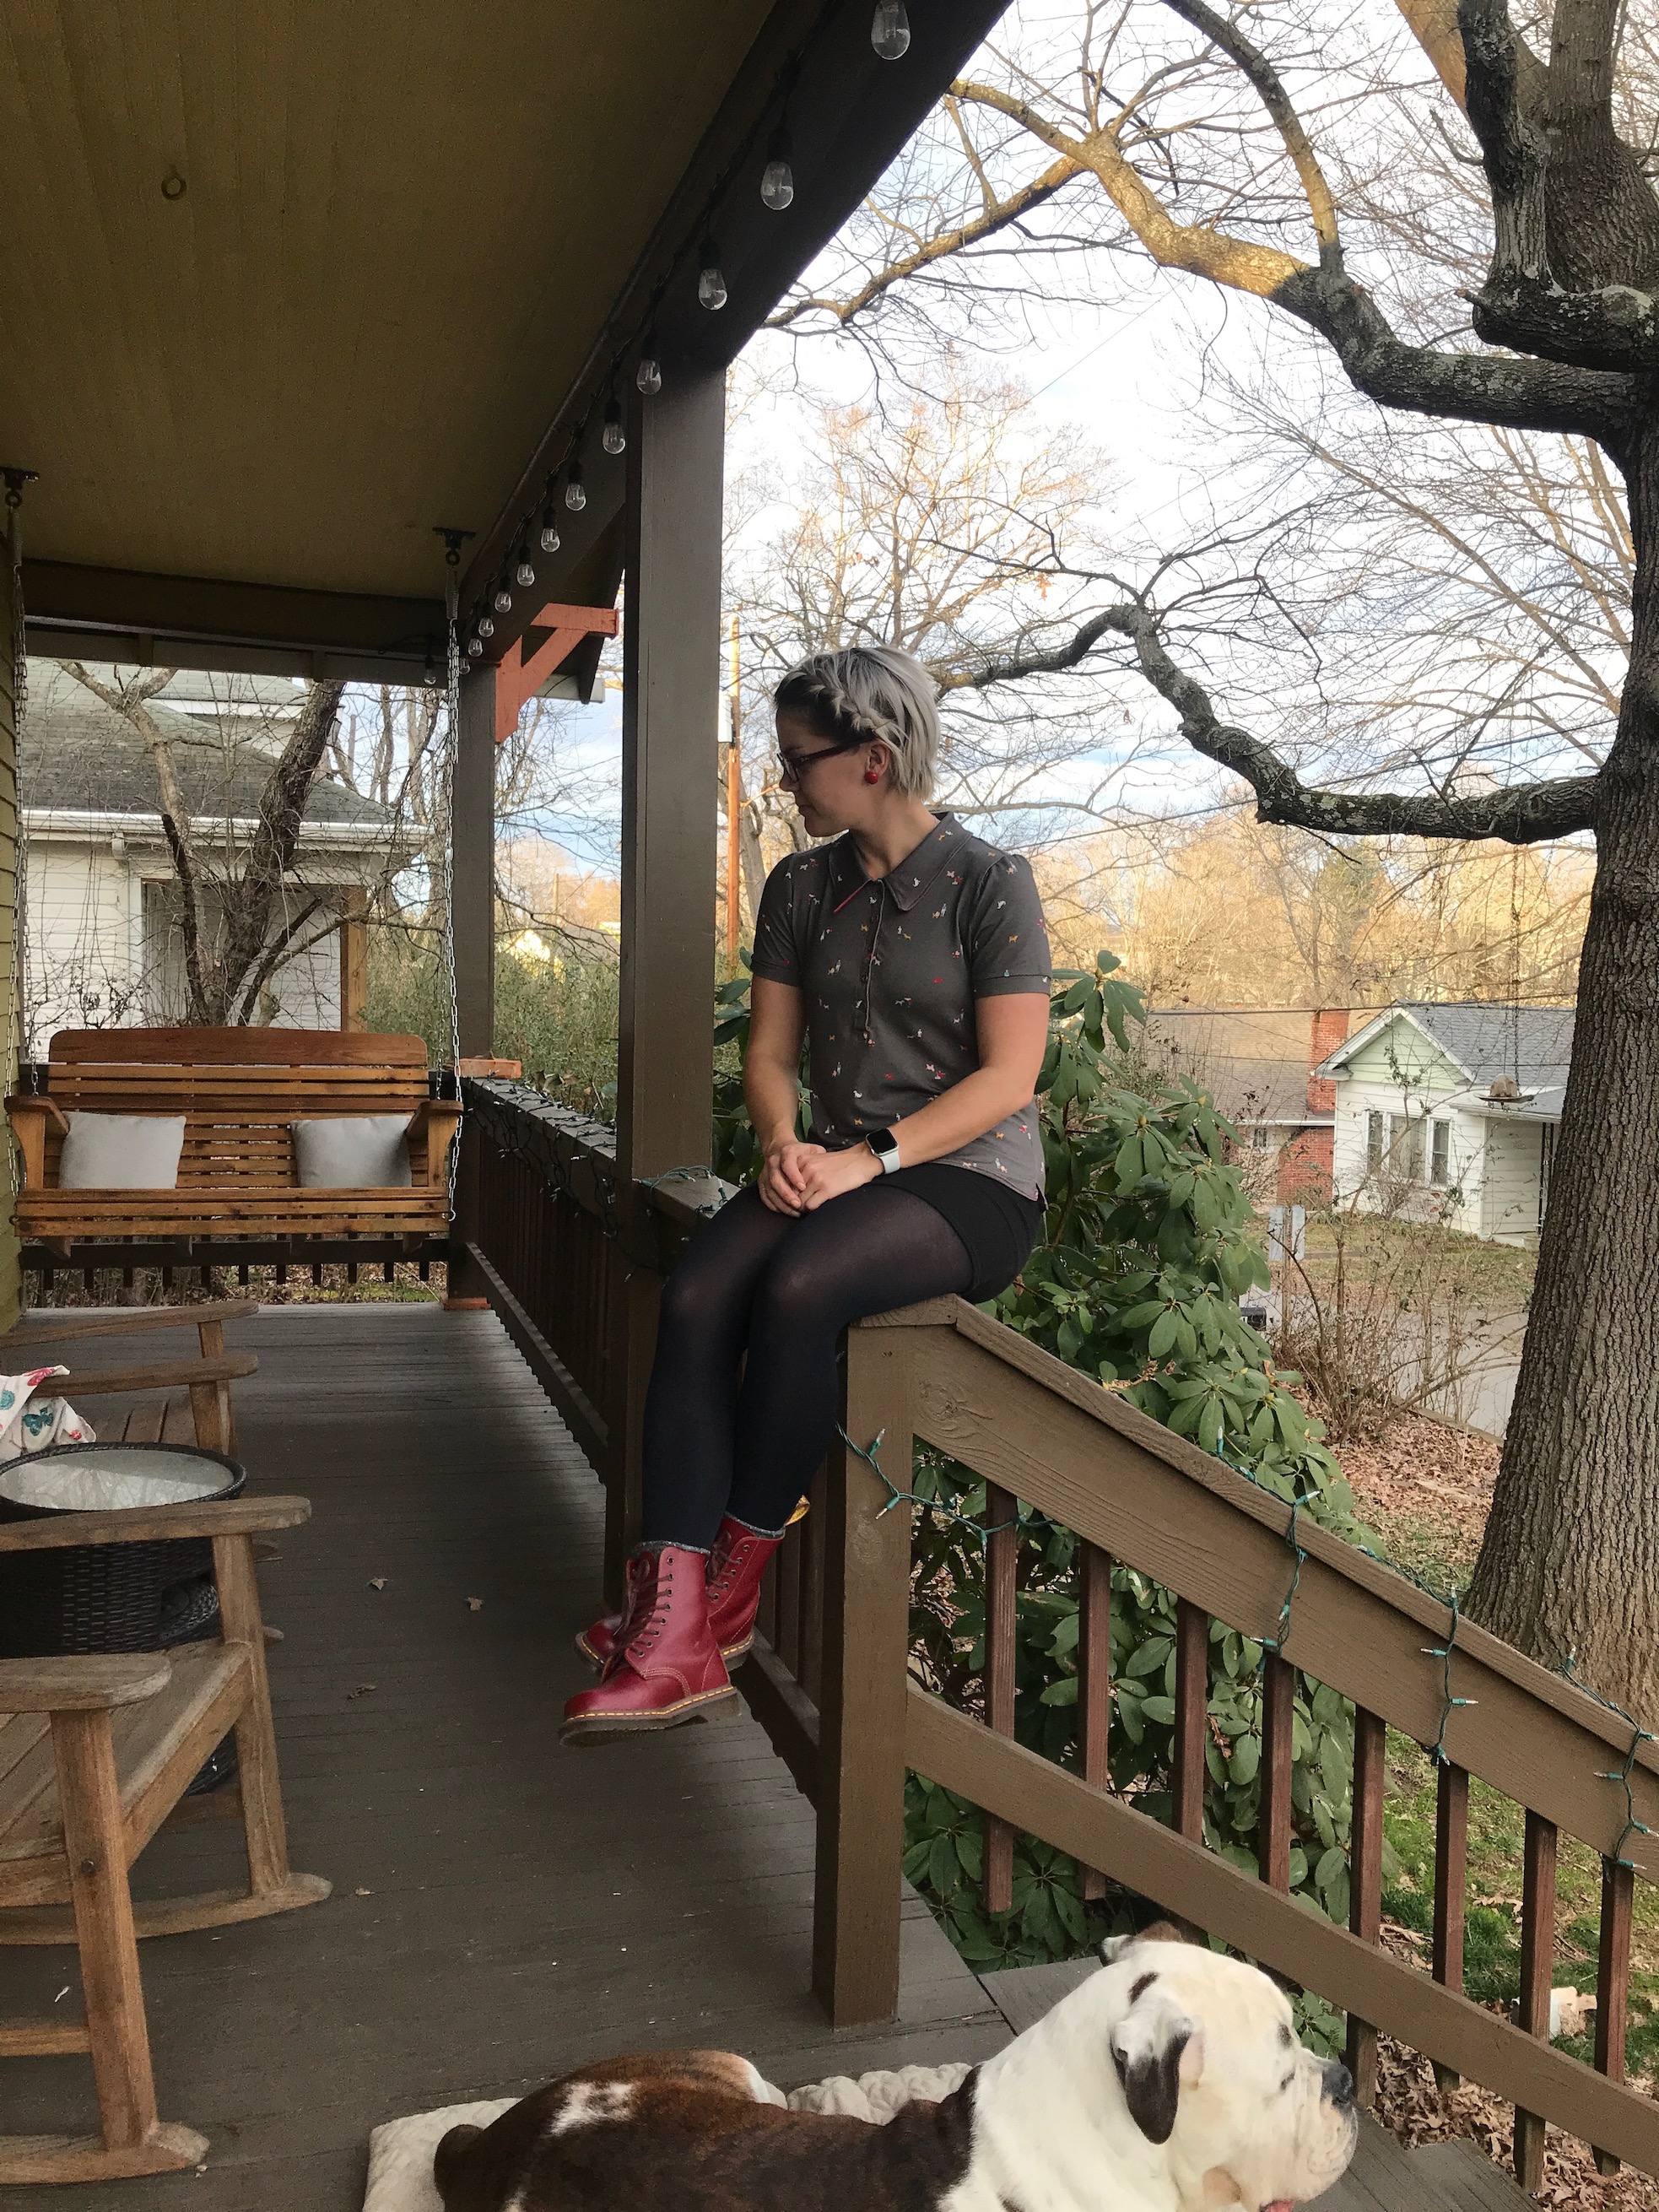
I know this is just a polo shirt and while I’ve made more complex things I can honestly say, with this project I feel like I’ve finally cracked my fit issues and this is the best fitting thing I’ve ever made!
I’m off to try and fit alllll the things now!
A happy happy Sam in a very cute t-shirt:
Over and out
![]()
xxx
One thought on “The One with The Solution”