
Hi lovely readers,
this week I’m writing about my first attempt at a Seamwork Magazine pattern, plus my first ever denim jacket! It was quite a ride, that’s for sure.
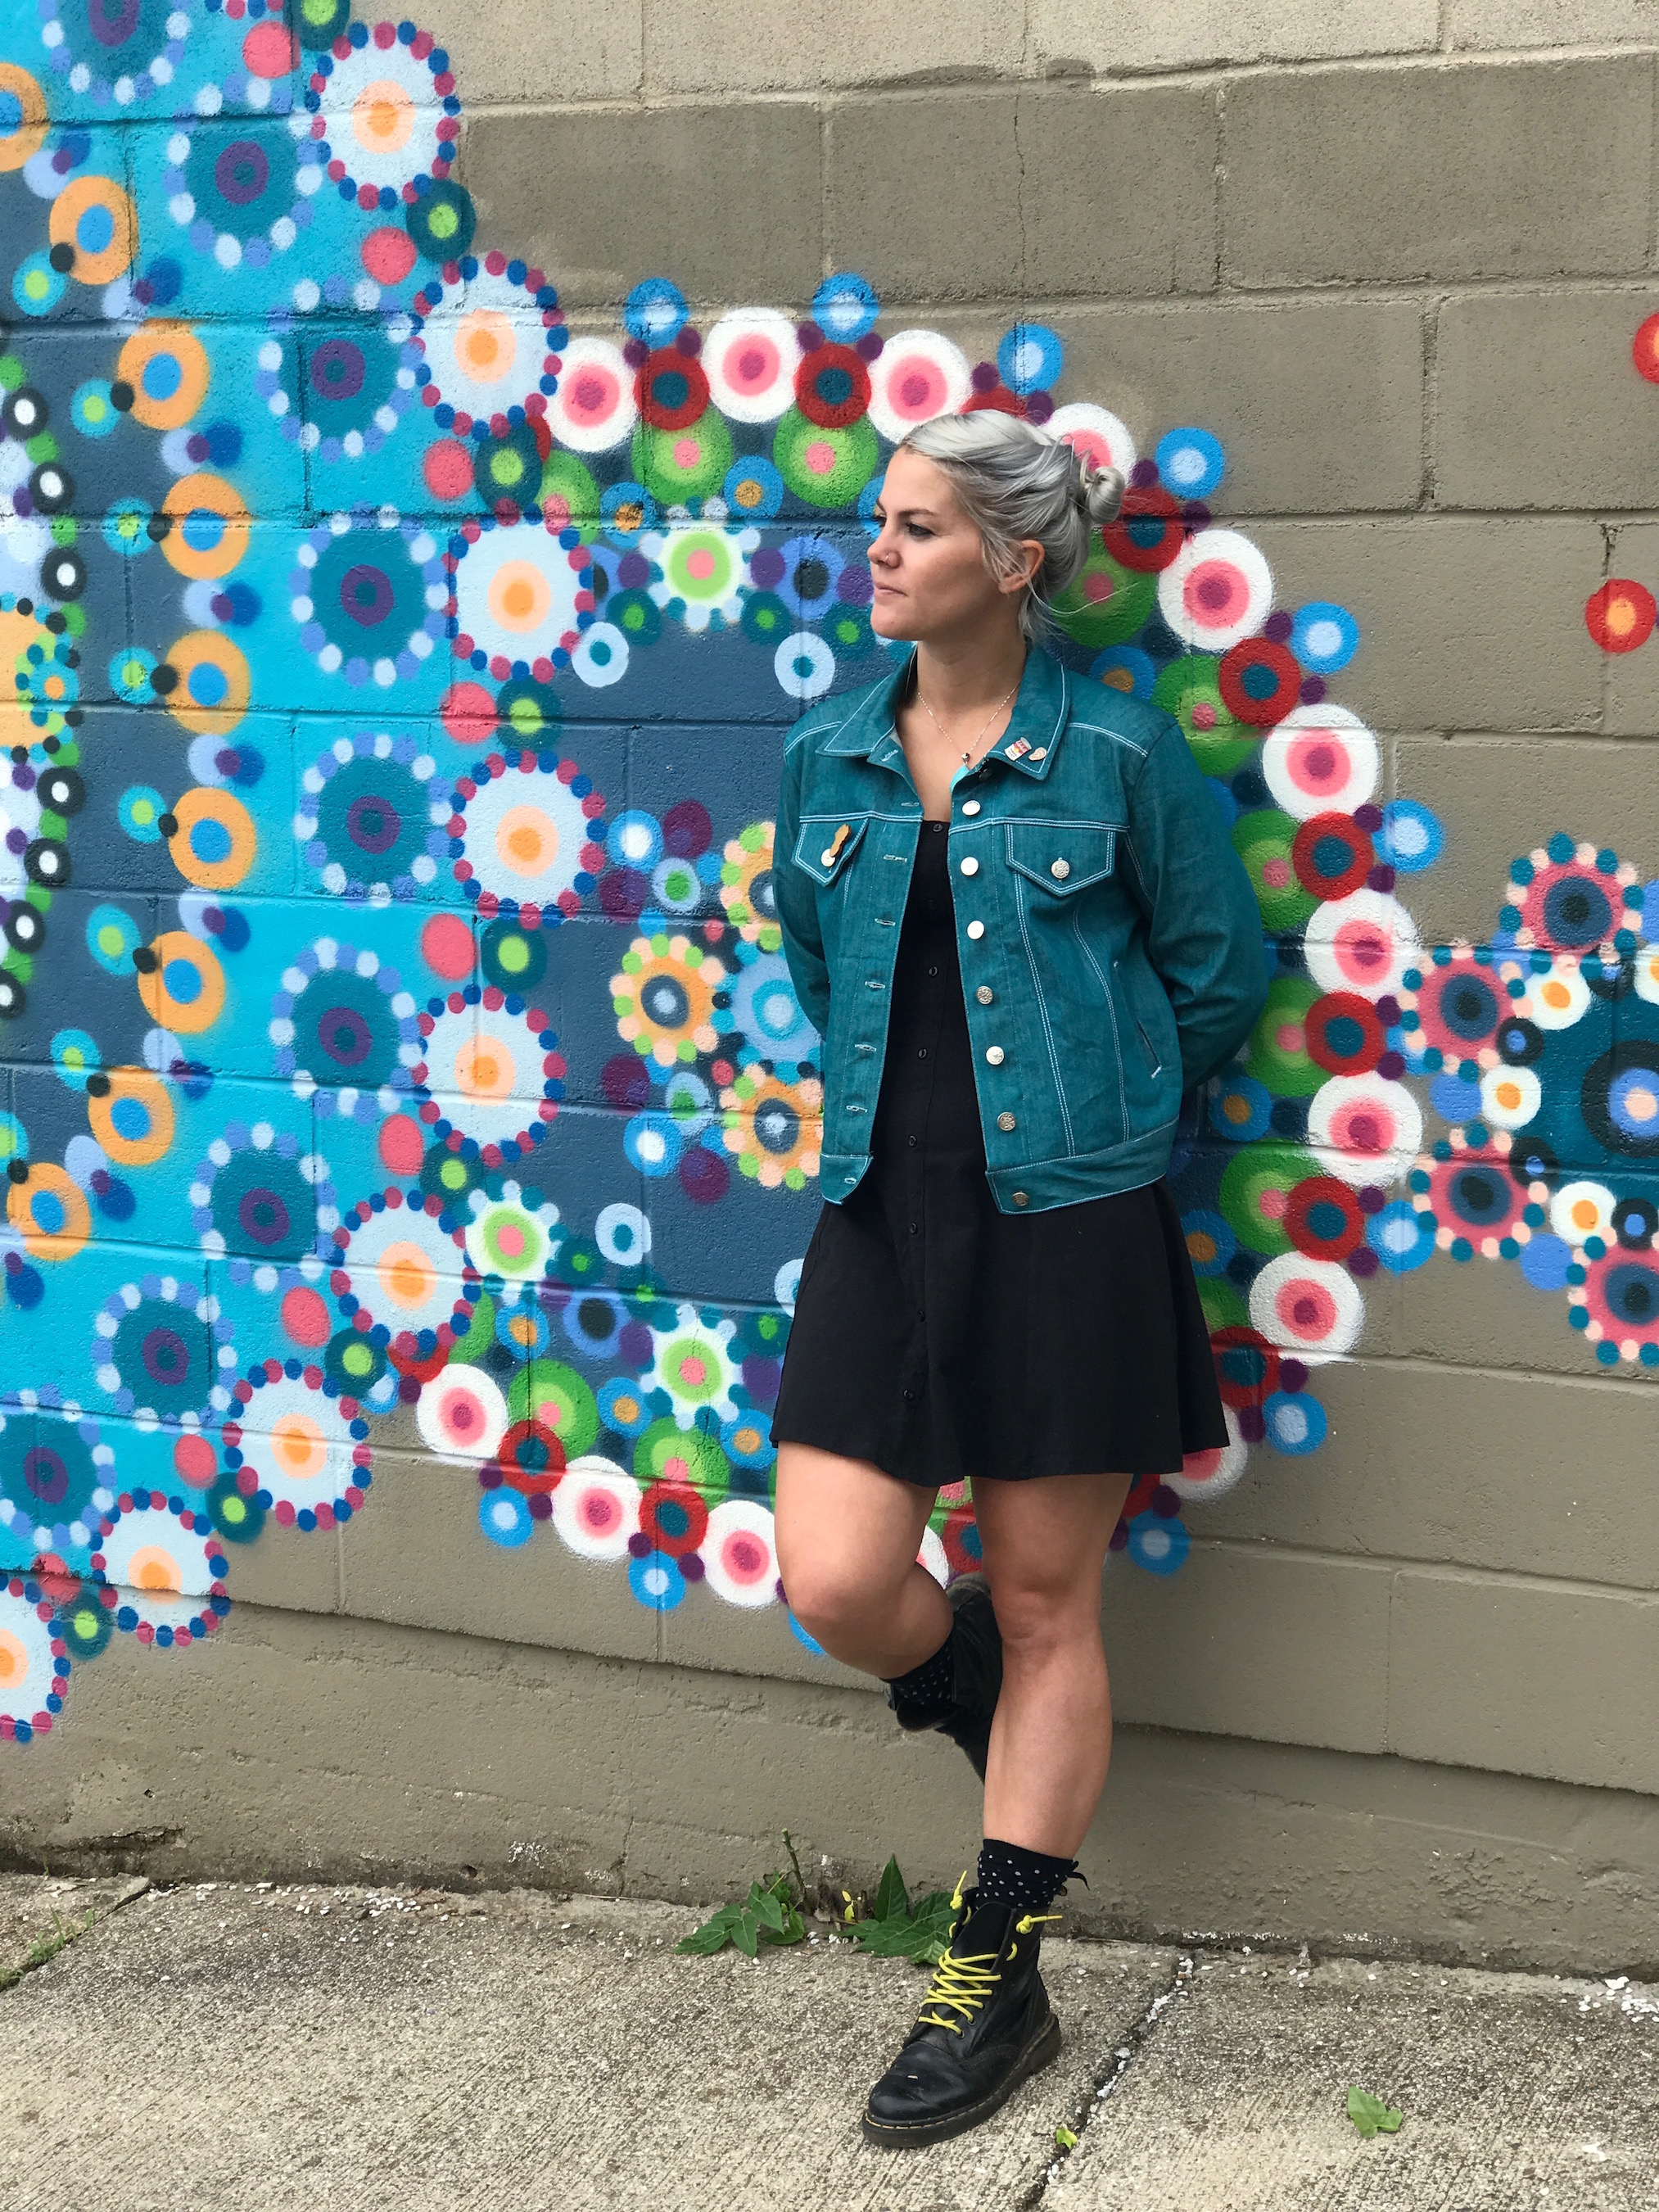
I’d started to want another jacket – I currently have a traditional blue Levi’s denim jacket, plus a brushed cord burgundy one. I died my hair blue and found I couldn’t really wear my blue denim jacket any more (wayyy too matchy matchy!) and I didn’t always want to wear the burgandy one, so I really did need another one (working hard to convince myself-ha). Seamwork Mag then went and came out with their Audrey pattern right around that time so it seemed like fate! Especially as I’d not signed up for a paid membership yet meaning I got the pattern for a dollar – Say whaaaat?!
The Fabric
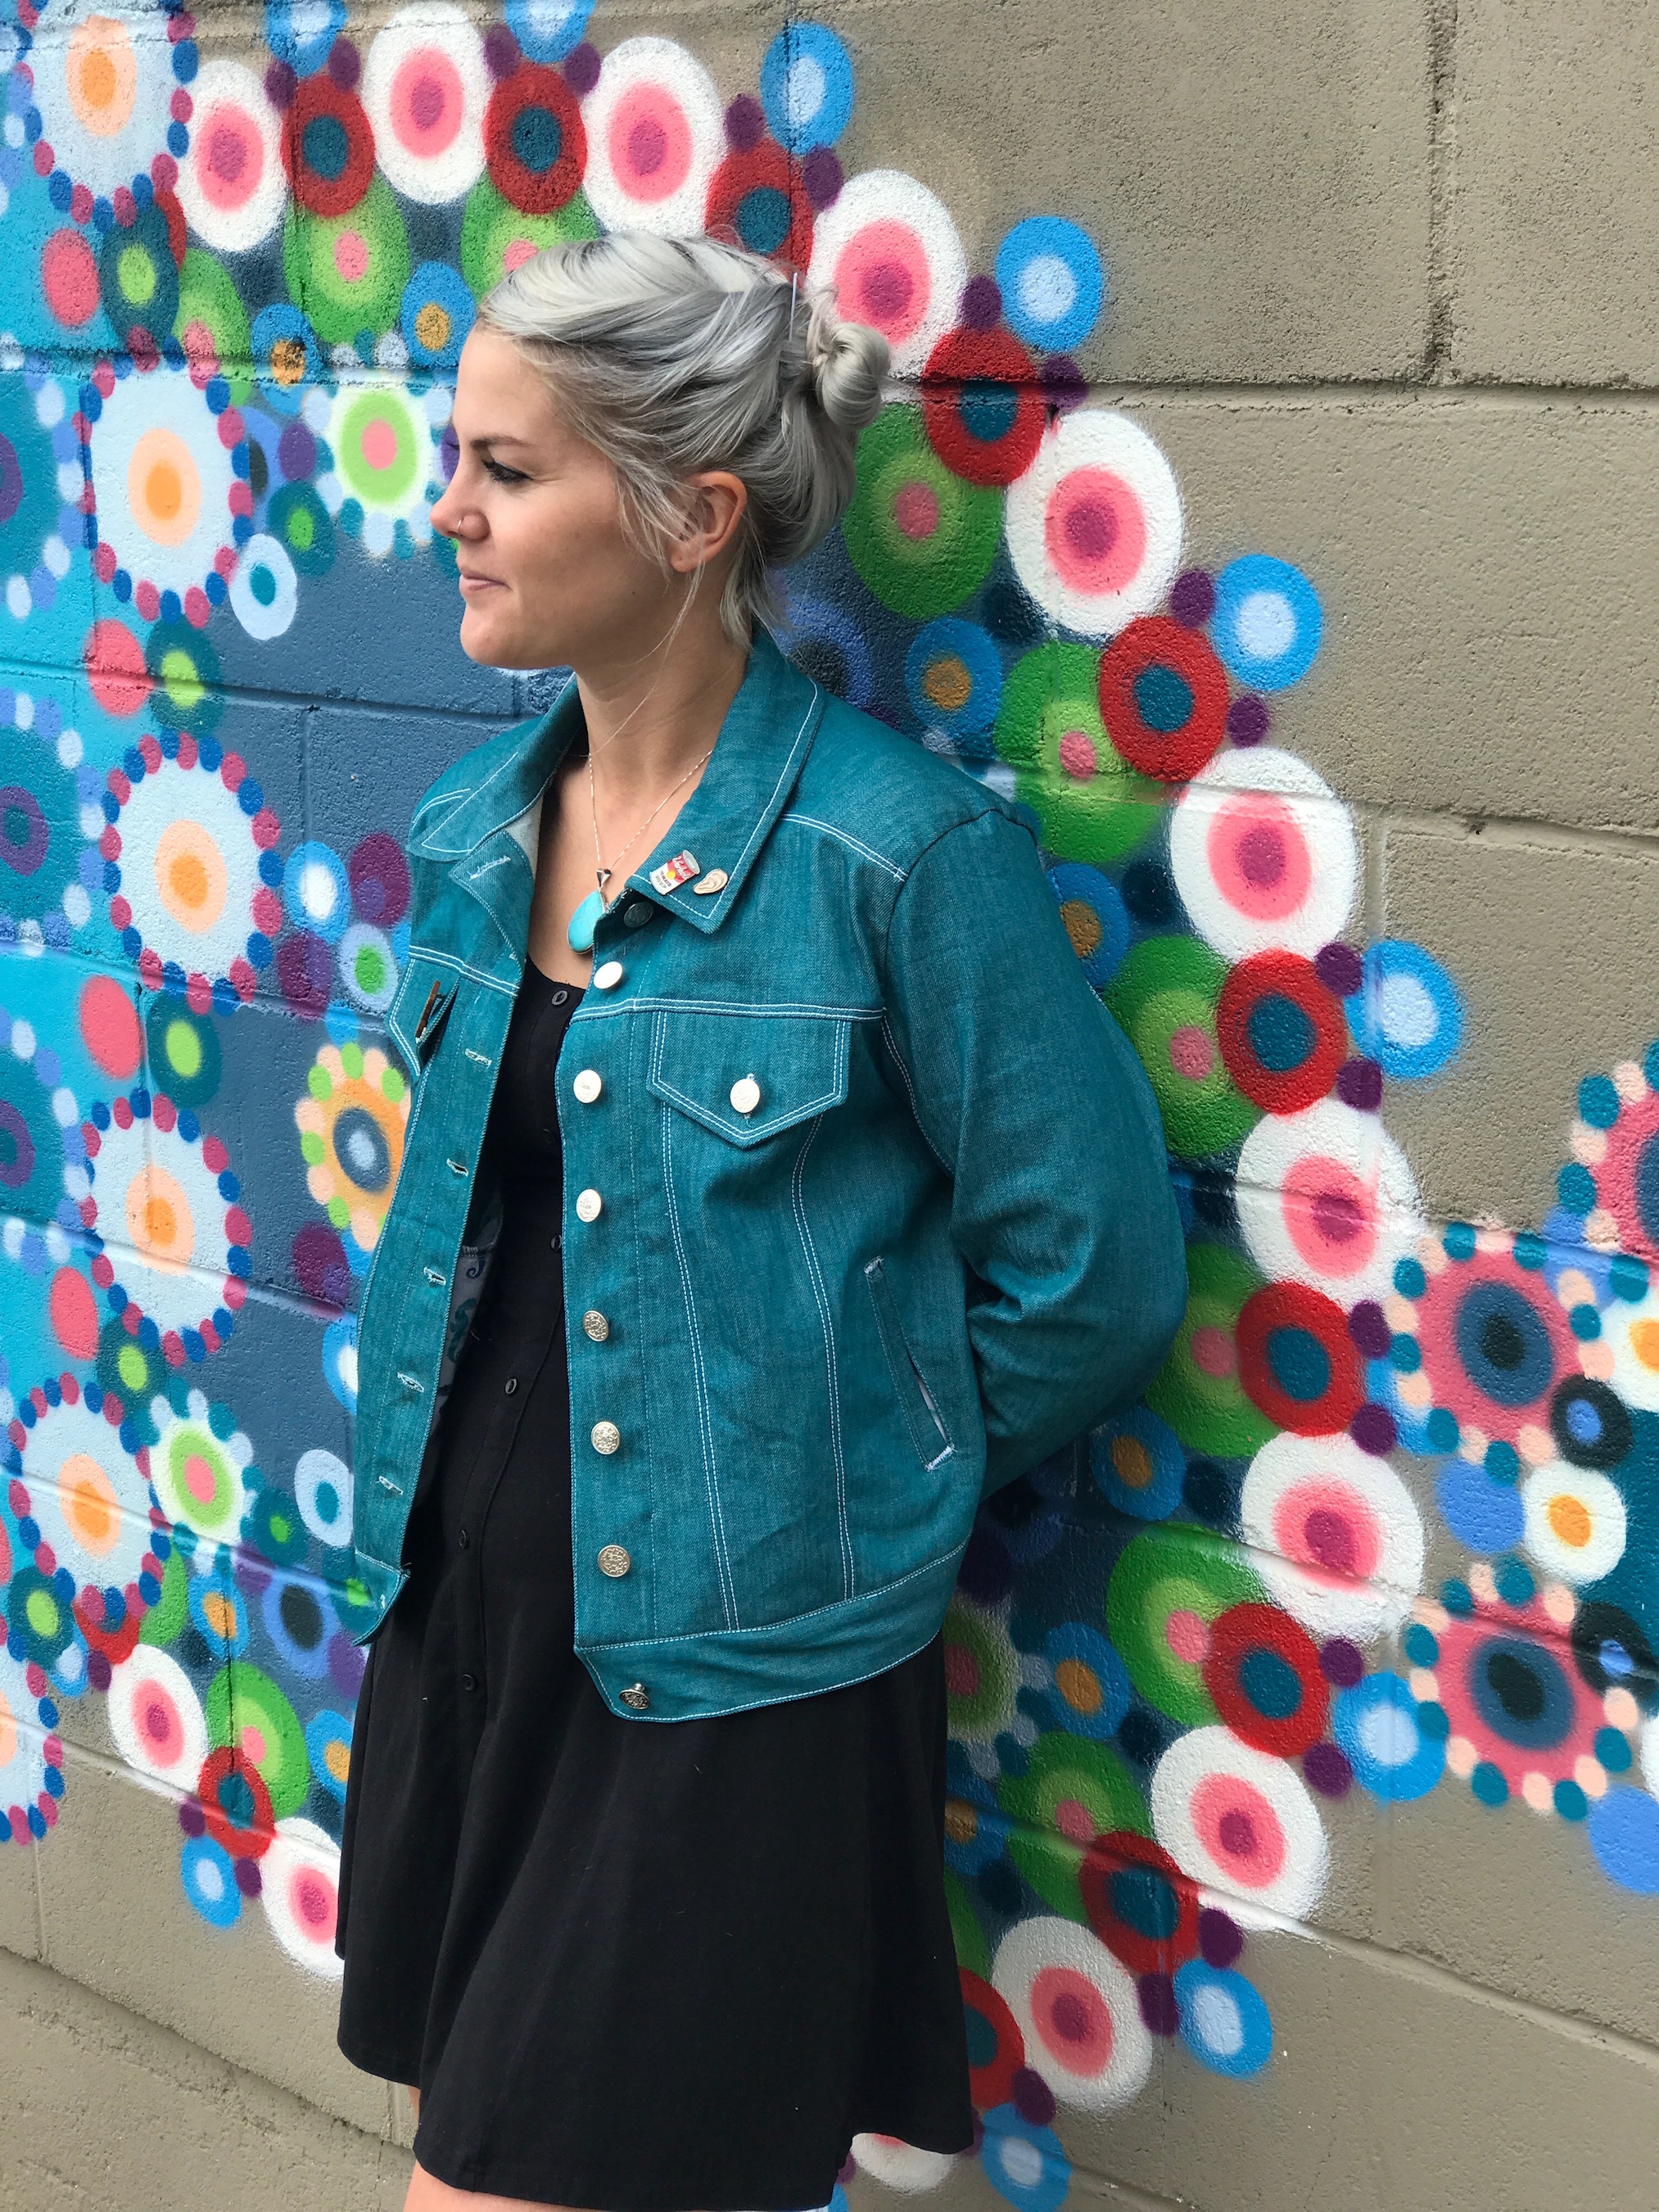
Originally I wanted to make a black one as it would be nice and neutral (and make my new hair pop1) but as we’re heading into summer it seemed a bit much. Plus I realised I should probably make a toile (Jenn I’m learning!). Plus I didn’t really want to spend any more money on fabric so I decided to go with some teal denim I’d spontaneously bought on a trip to Alexandria, Virginia just because I loved the colour so much.
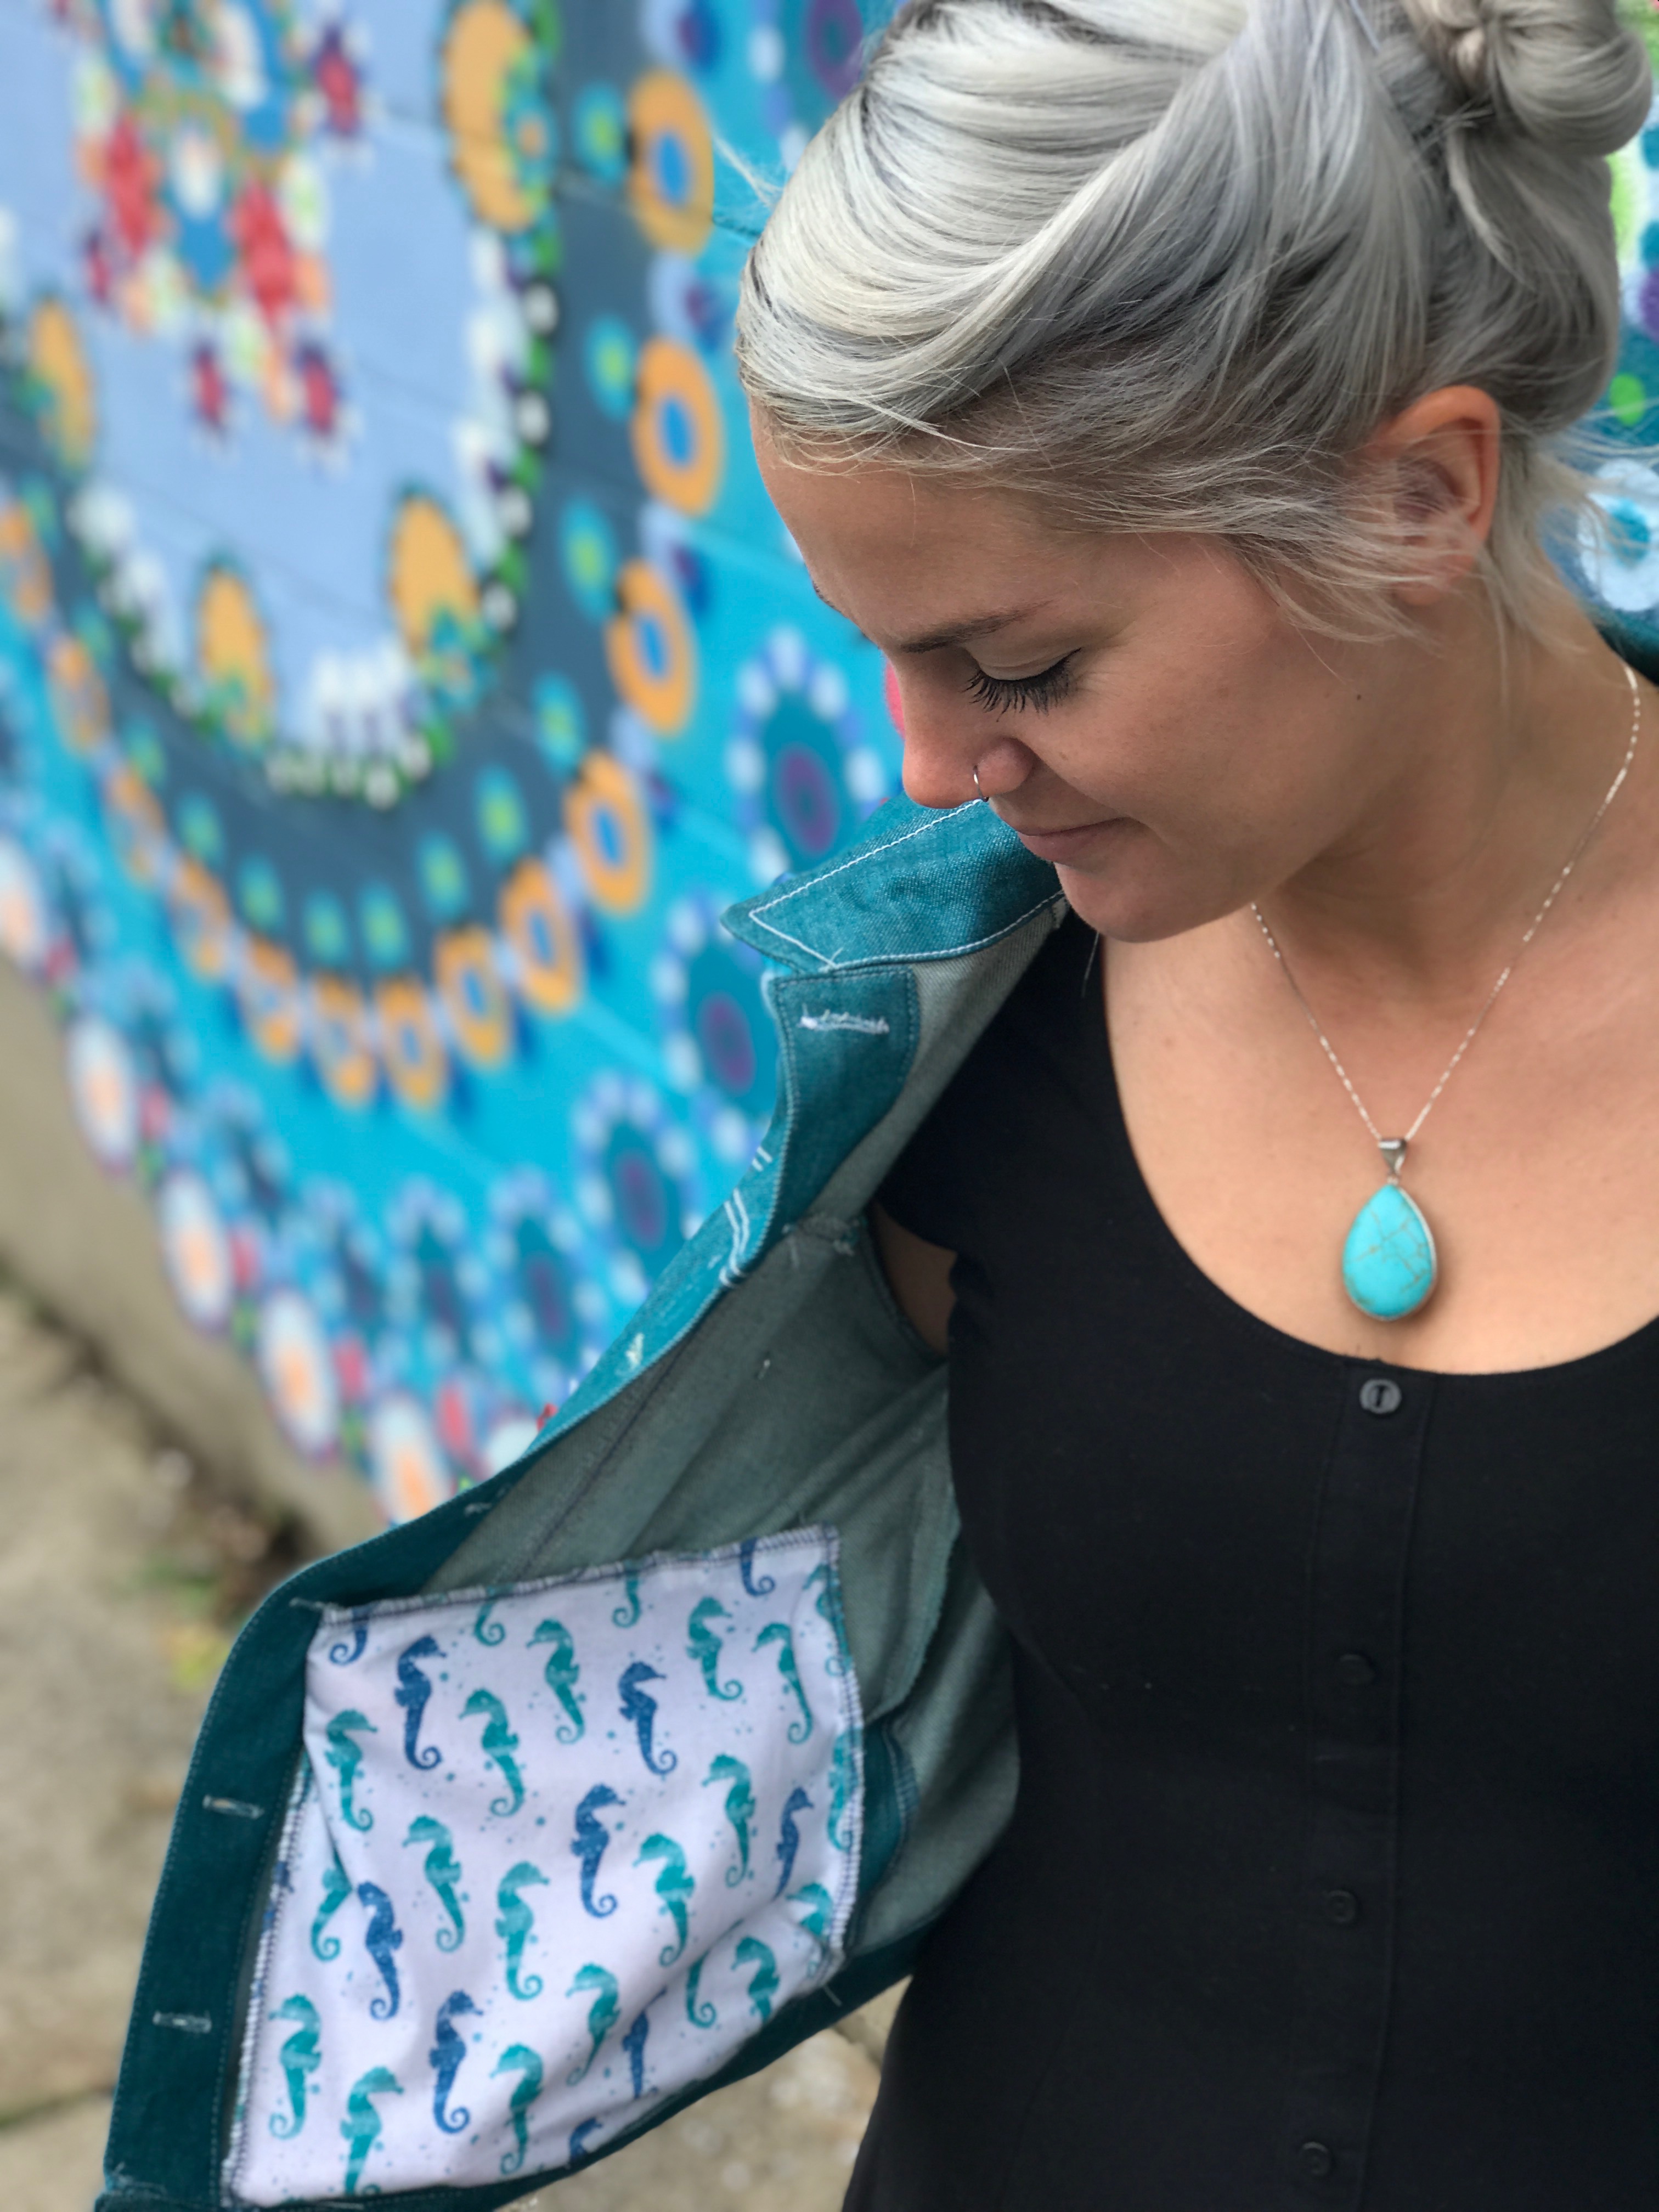
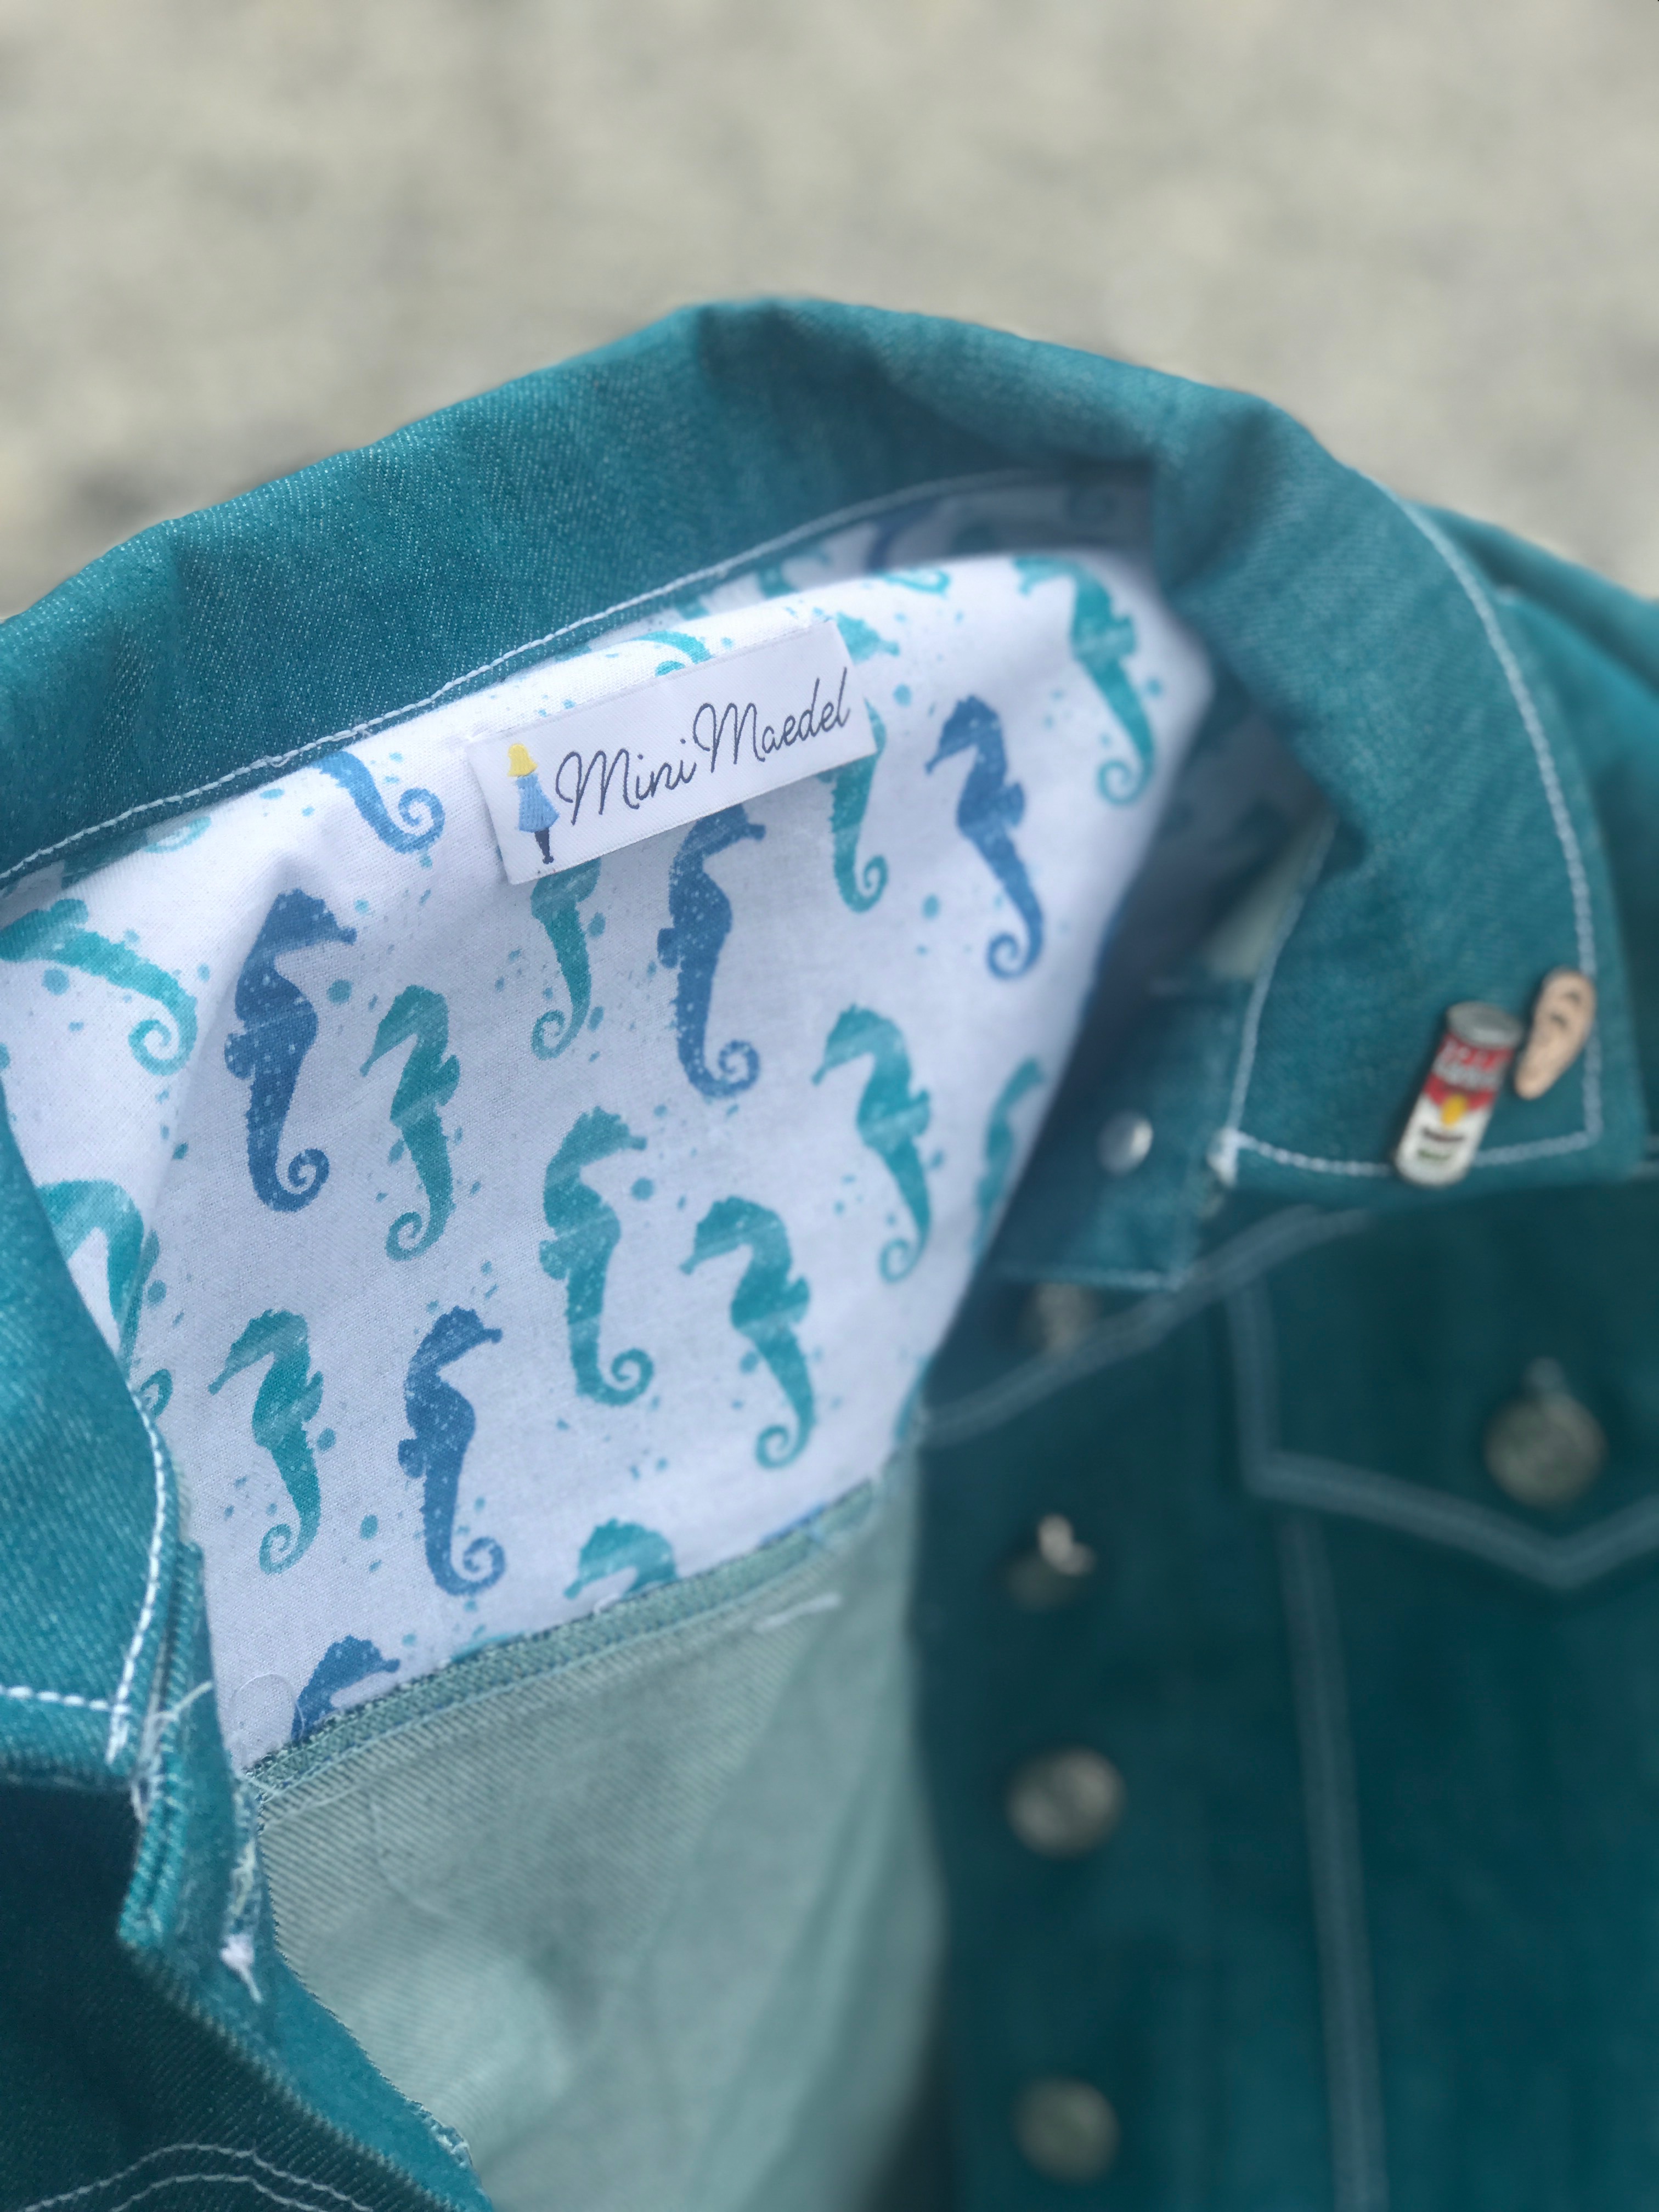
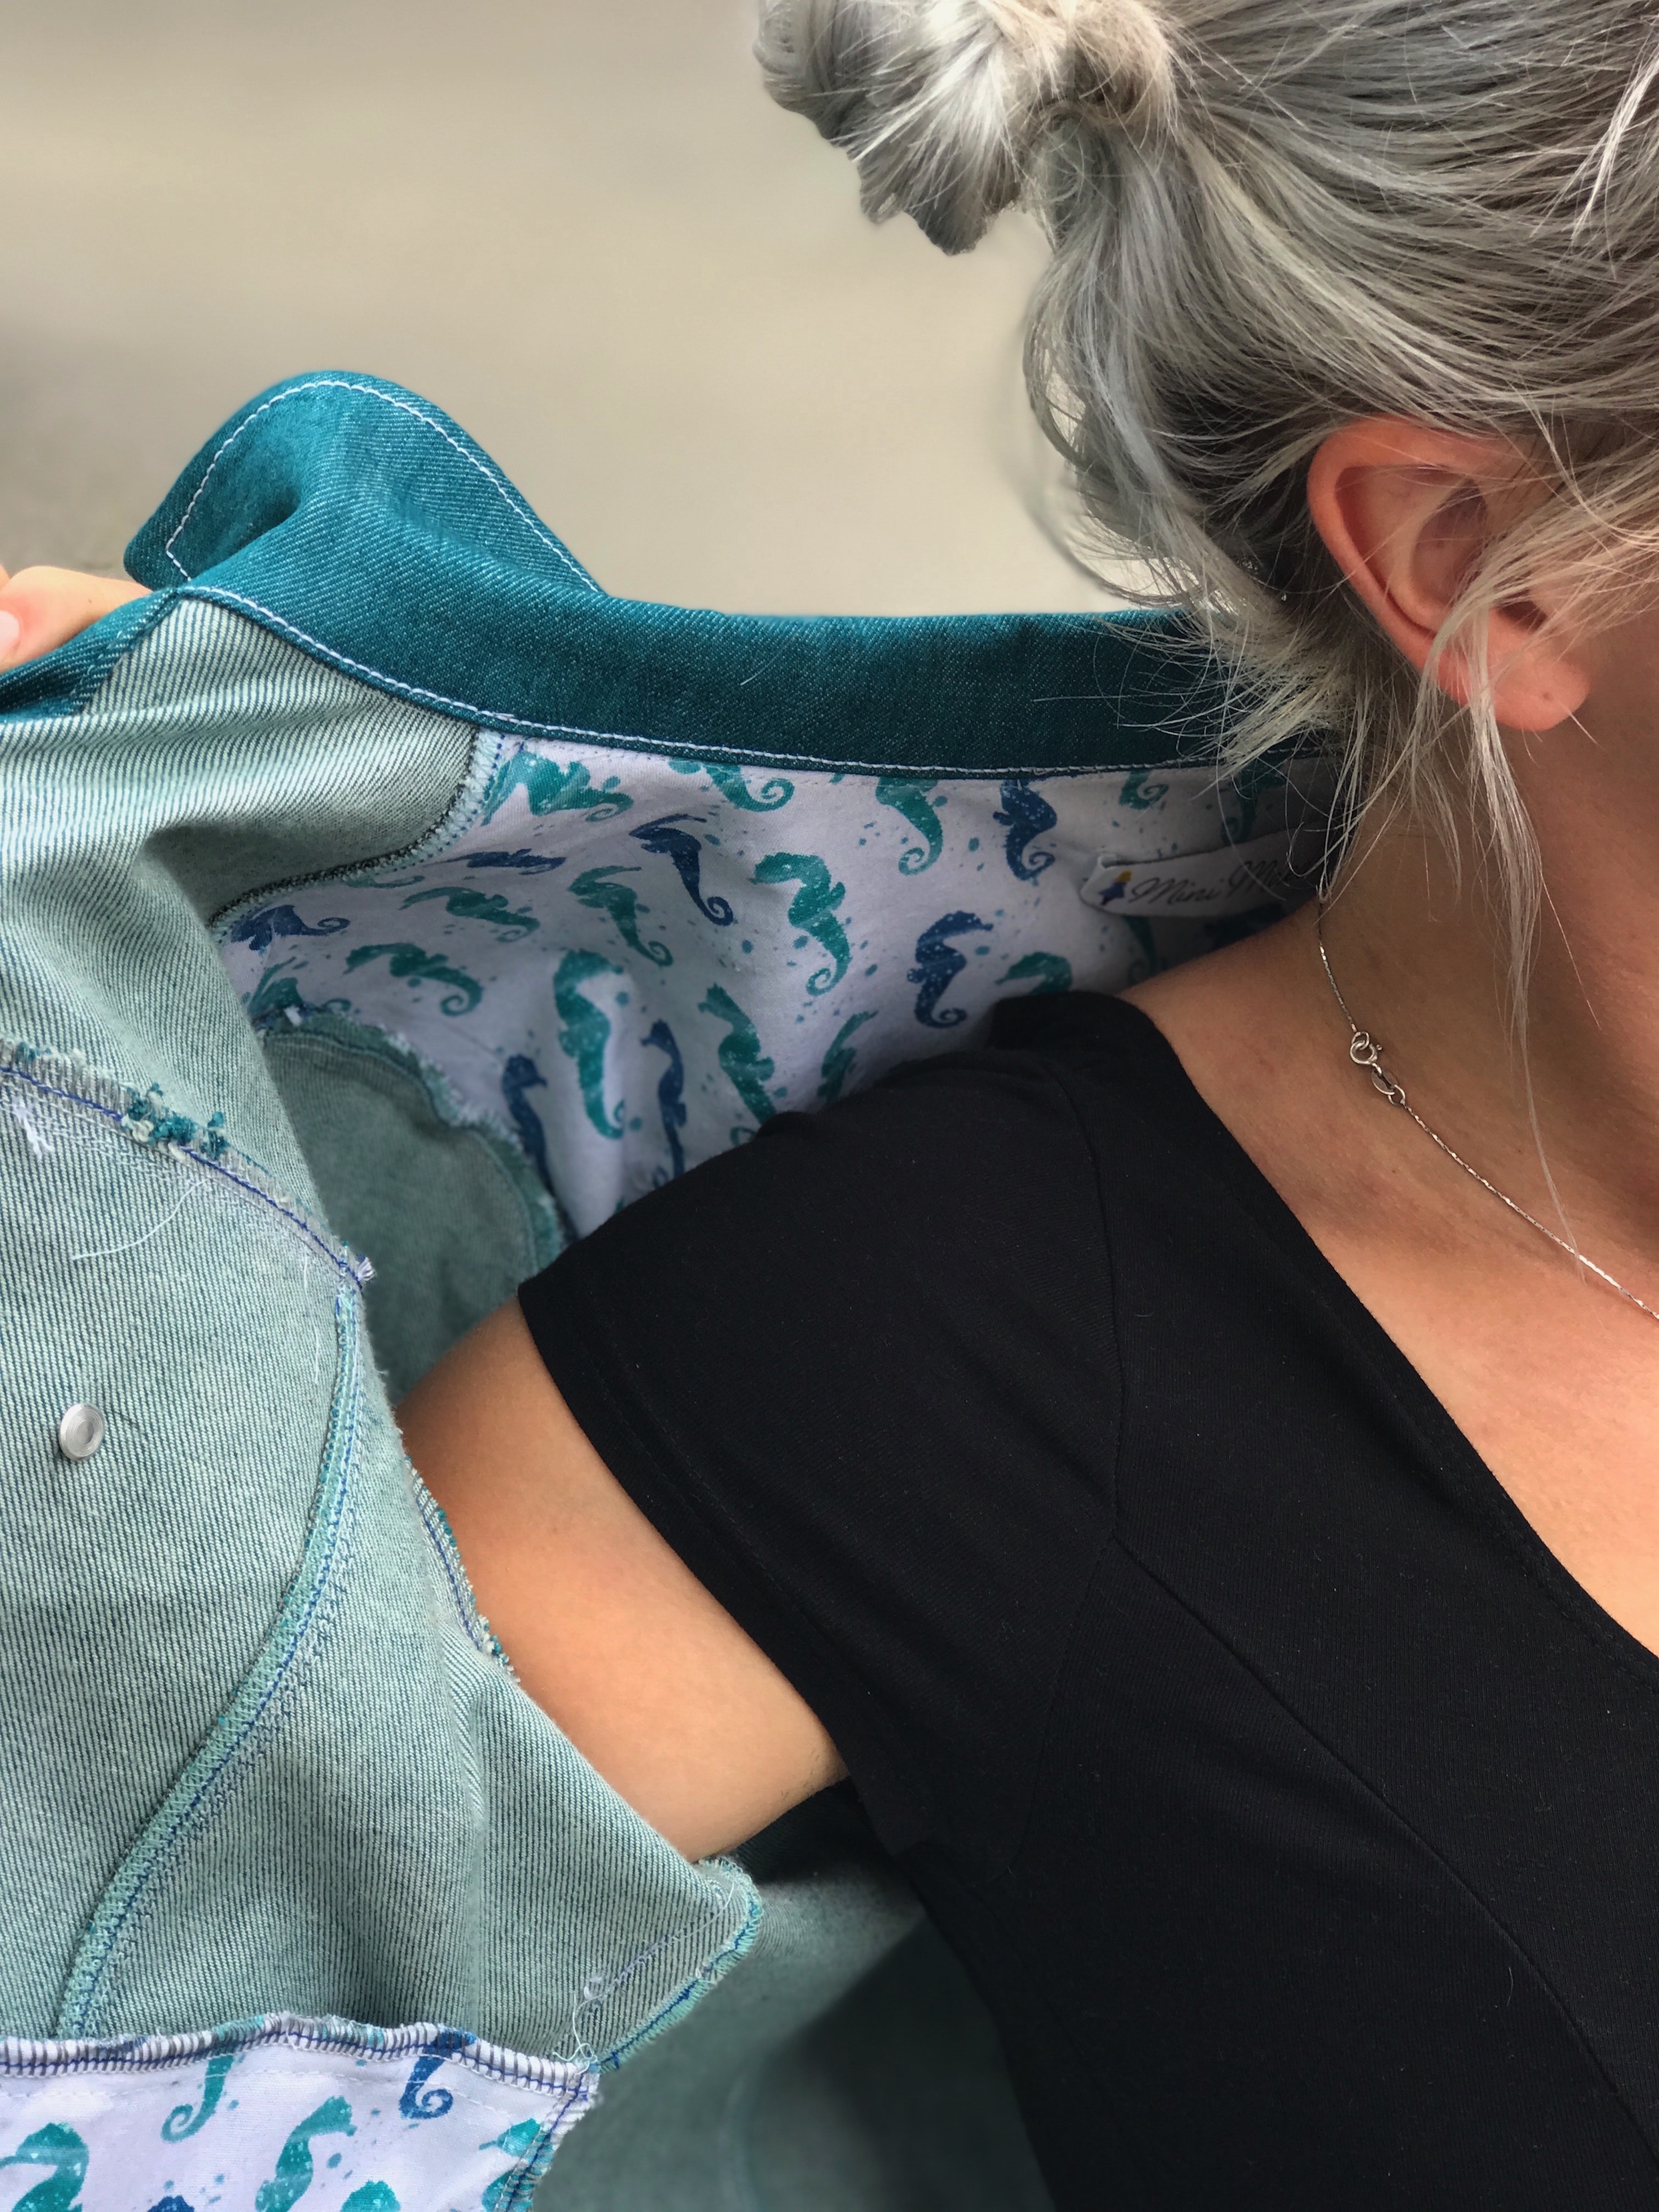
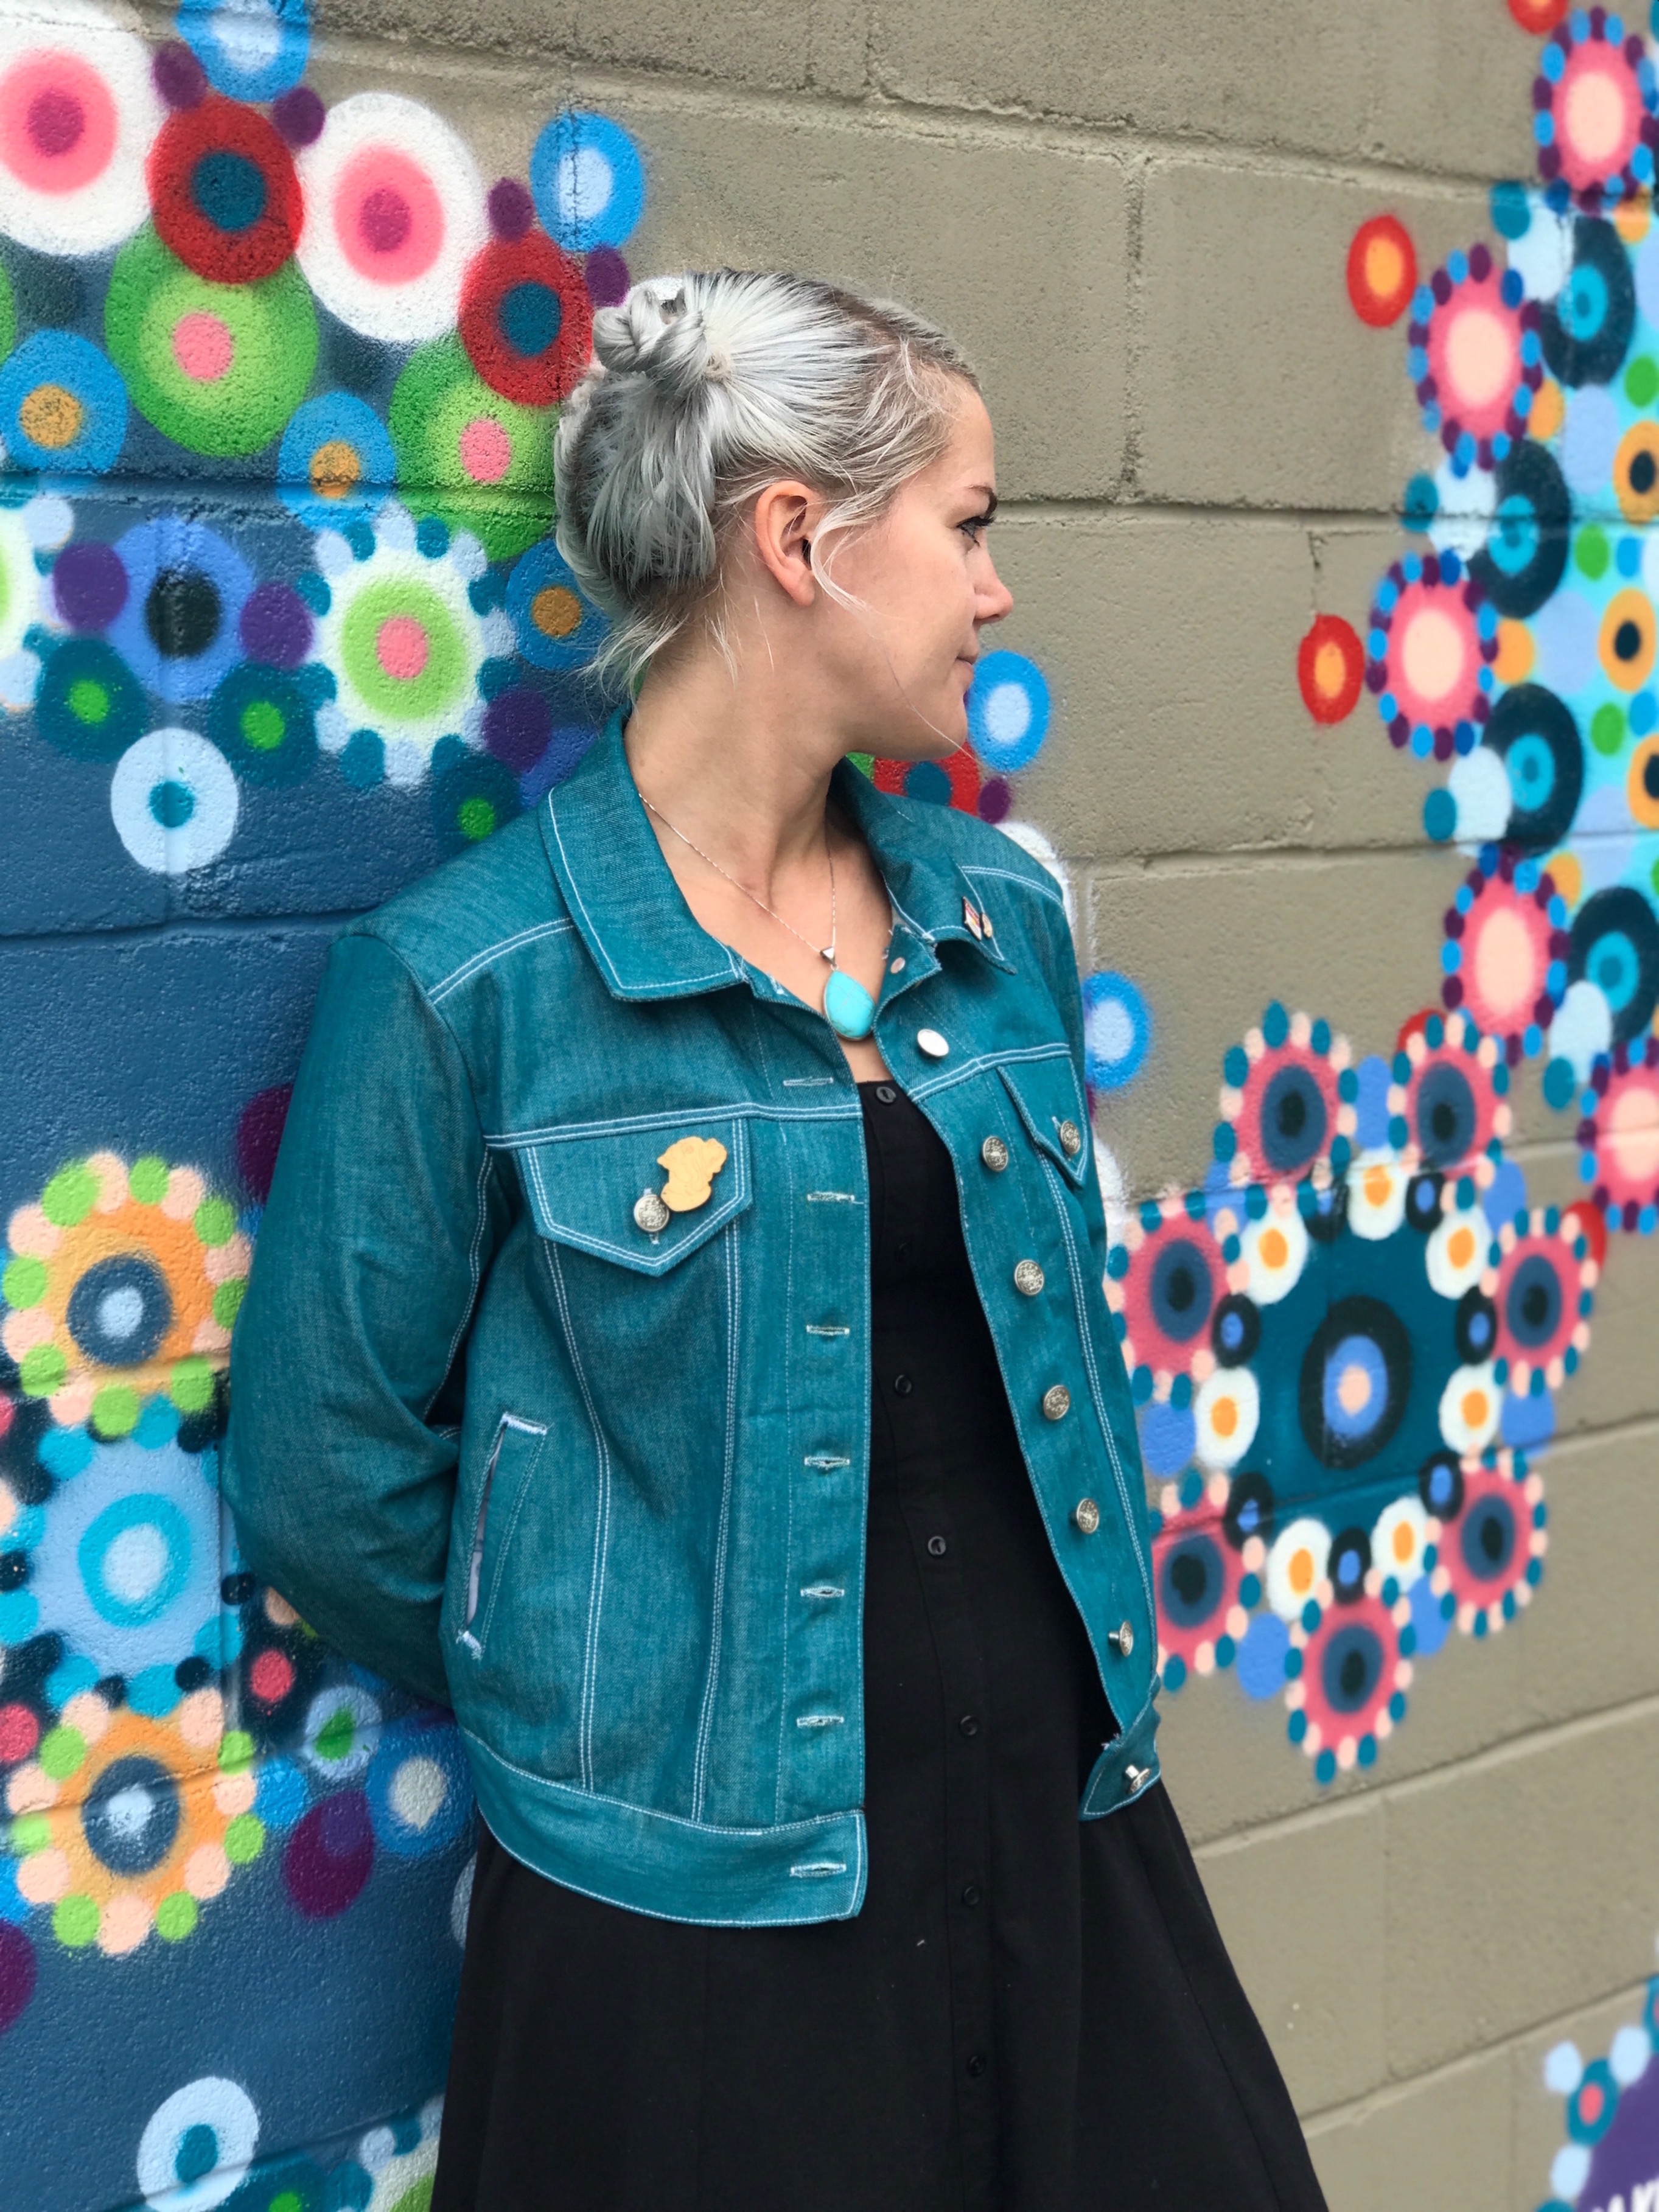
For my pocket fabric I couldn’t find anything in my stash that worked with the colour of the denim so Joe and I went to our local Joann’s and he picked some super cute seahorses, the teal was the perfect shade! He did a great job right?
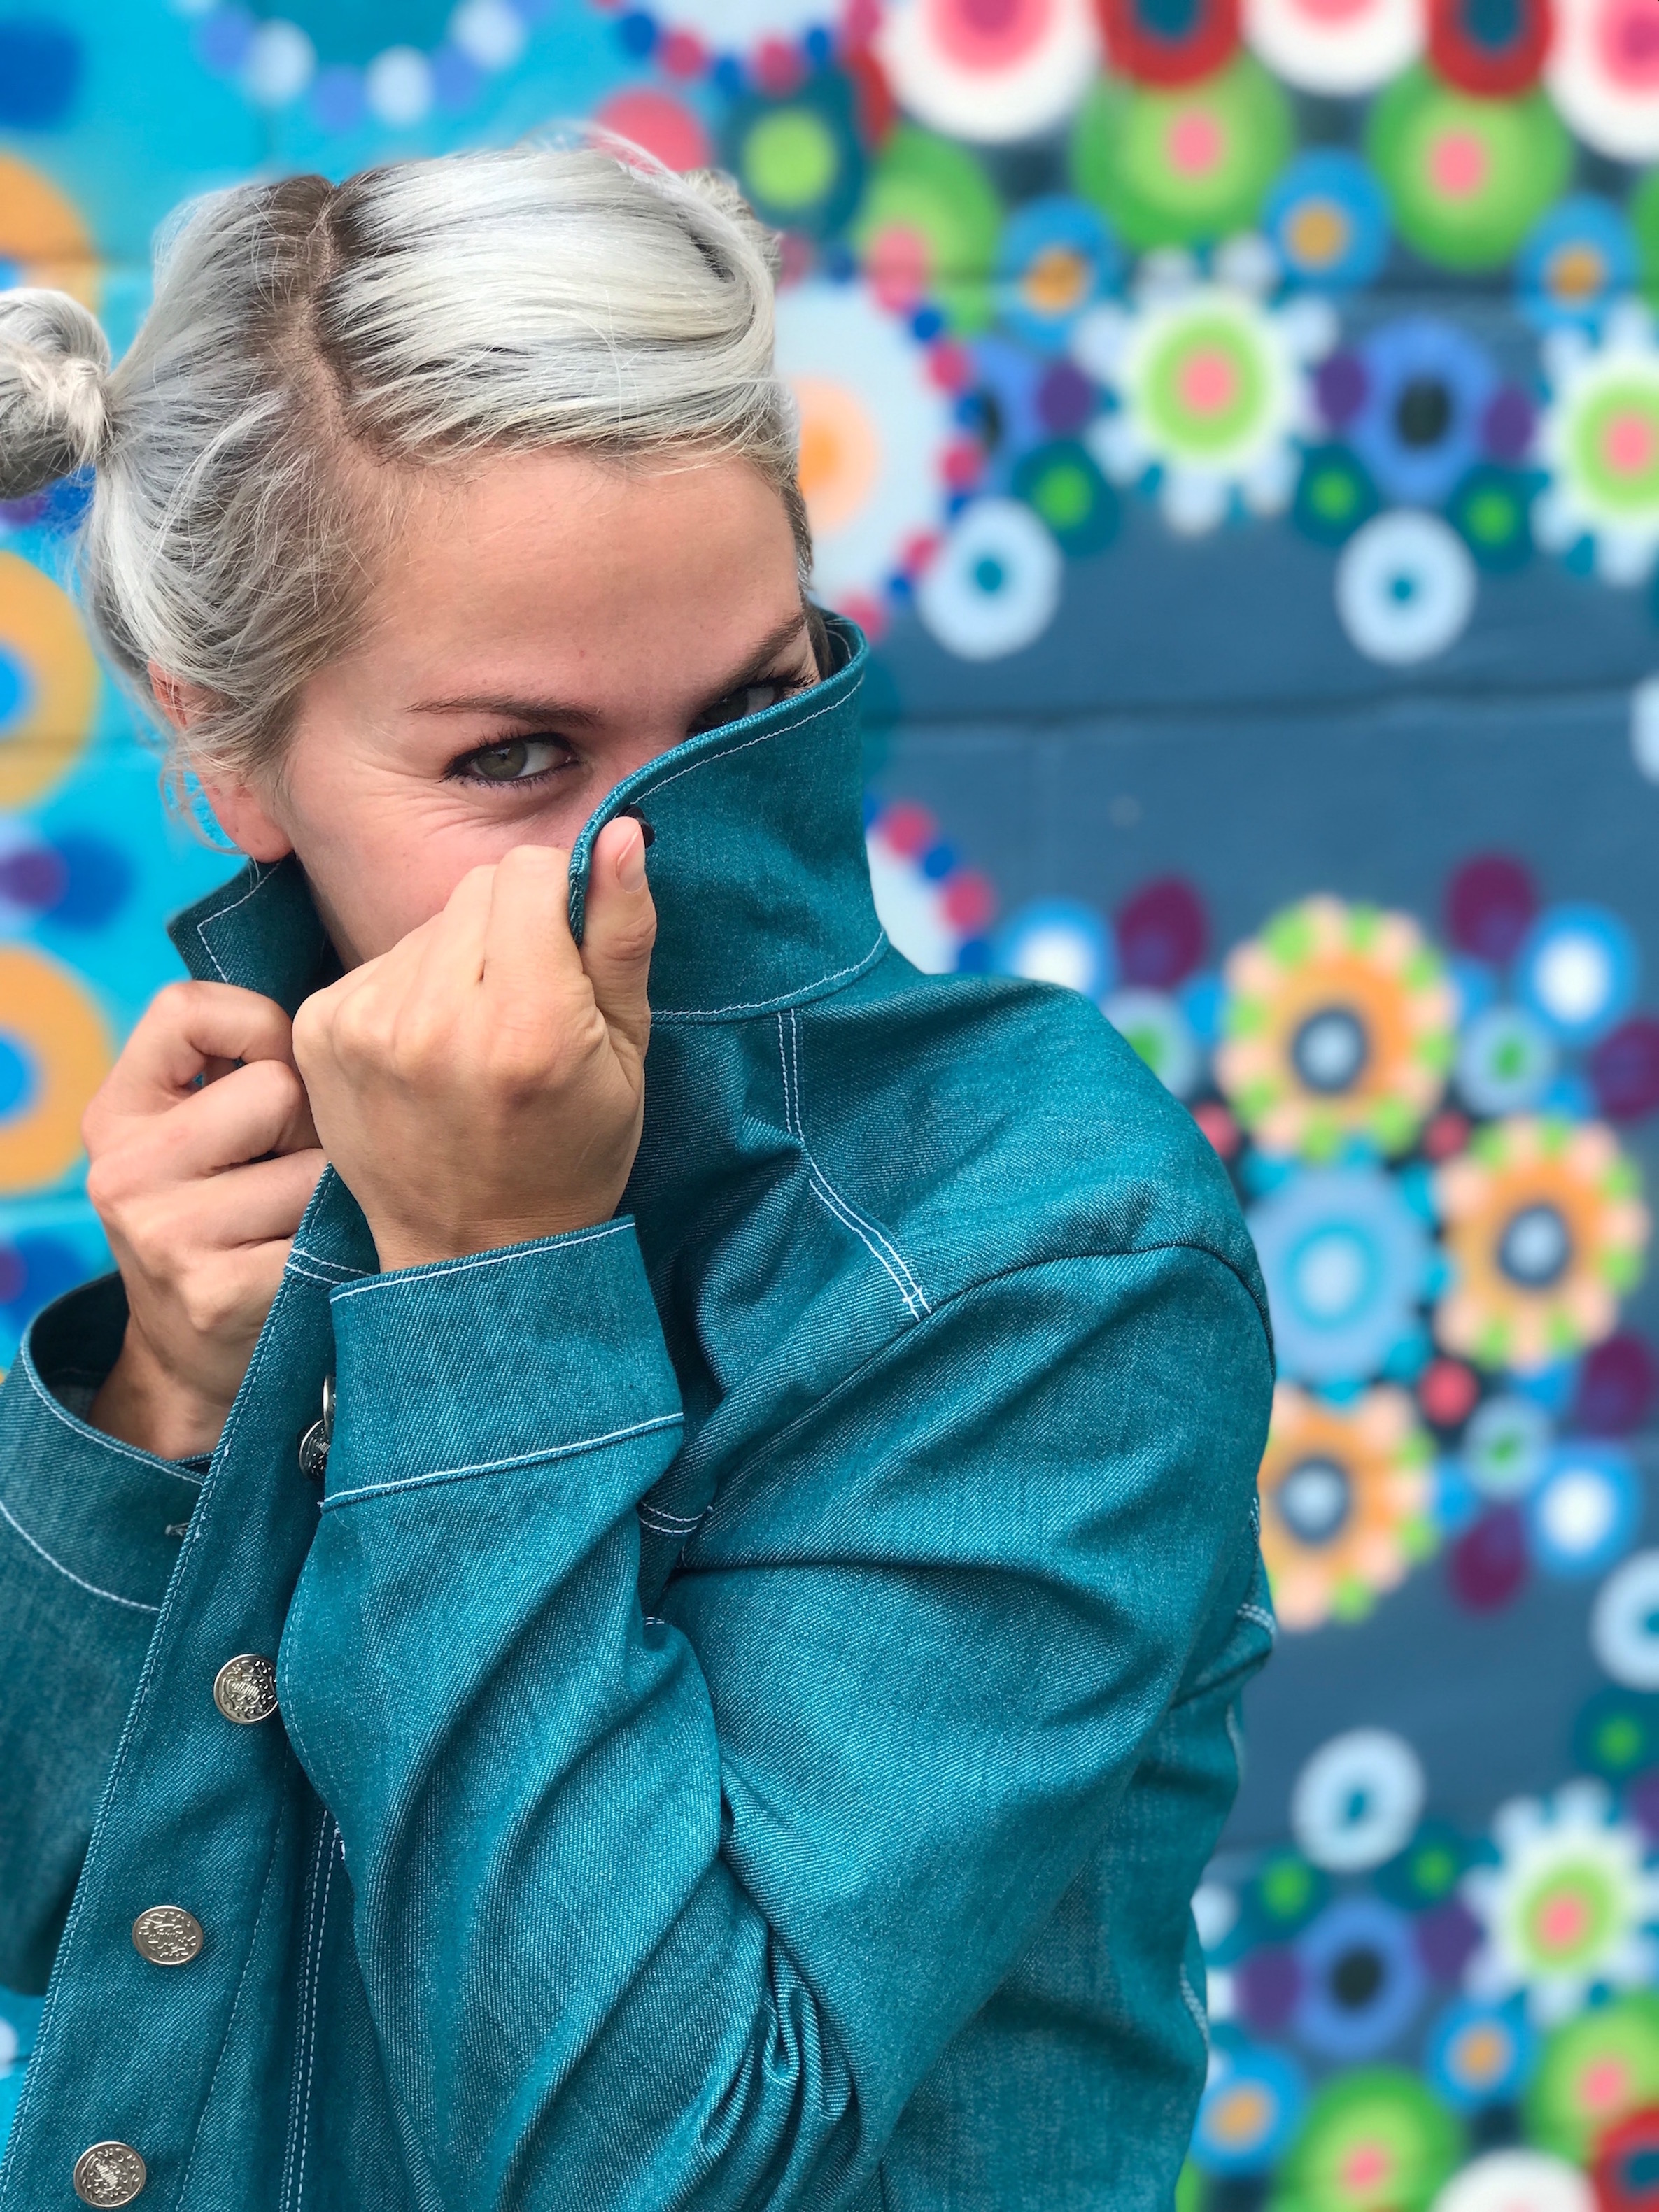
I followed some advice from Sewvee , who’d also made the Audrey and used the seahorse fabric for both the pocket lining and facing so you could see it rather than just being wasted inside the pockets, plus (again following her advice) I added in a yoke lining using that same fabric. I think that yoke lining really adds something!
 The Construction
I must admit, when I printed the PDF I was a little disconcerted with how many pages it was: 37! Luckily Seamwork allow you to only print your size line which I love and wish more PDF companies would start doing it.
Then it came to the cutting and I couldn’t believe how many individual pieces there were. It kind of all makes sense if you look at a RTW jacket though. A proper little jigsaw puzzle!
I made this jacket over about a period of a month, doing bits here and there, which is a change for me as I tend to want to finish it all straight away. I cut first, then then next session I pressed all the bits that needed cutting (Joe was sleeping so didn’t want to be loud!)
The next session I constructed both front panels, sleeves and the back panel. All went totally smooth and was a really nice sew.
The Hard Bits
Then it came to the welt pockets. I’ve never done welt pockets before and although I’m not the kind of person to shy away from a challenge but I must admit I did find the instructions slightly confusing and couldn’t really find any youtube tutorials that seemed to perfectly apply. Now I understand the concept of how they’re constructed I’ll be fine on the next ones but I’m glad I had my lovely friend Hannah there to puzzle over the instructions with me! With her help I made it through. They’re definitely not the neatest things I’ve ever sewn but they work so all is well.
Hannah has recently got back into sewing and we’ve been having crafting days at her house, so nice to have someone to sew with! We had a proper little factory set up in her dining room 🙂
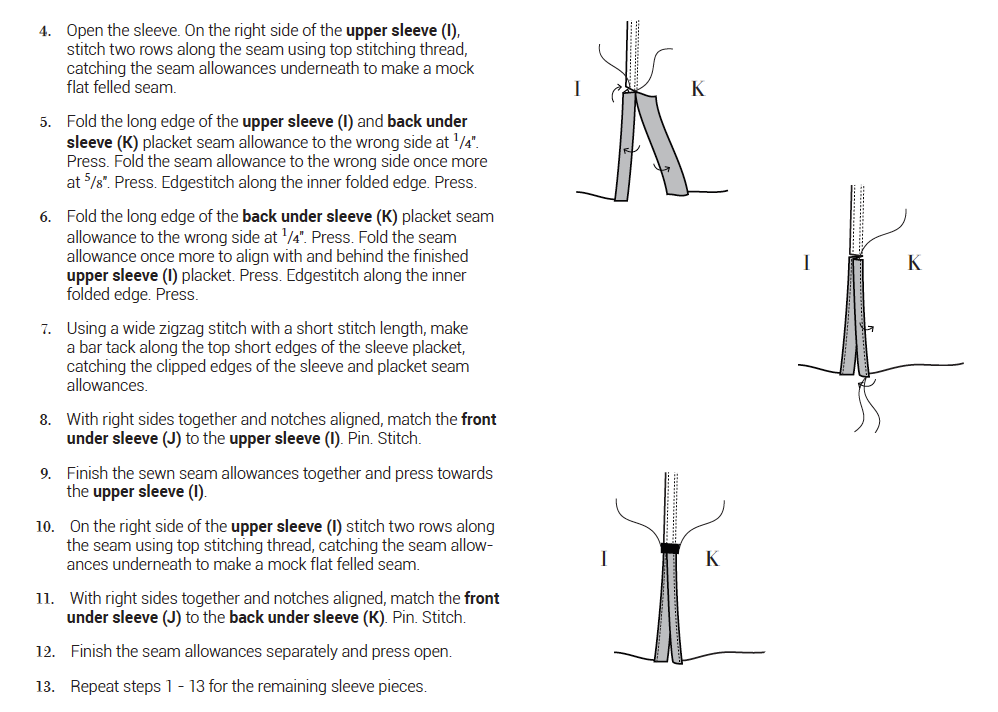
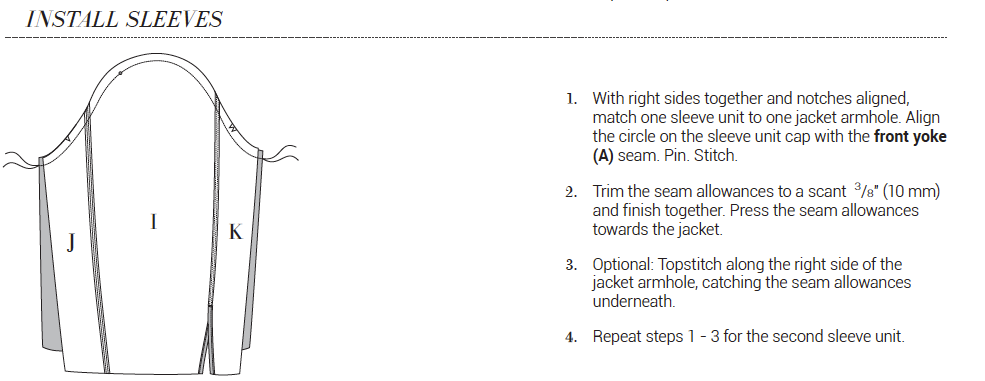
After the welt pockets came the sleeves and this is where I really struggled. I’m going to include some screen shots of the instructions and I’m not 100% convinced whether I was reading them incorrectly or if they are actually wrong themselves. From what I read it made it sound like you fully constructed the sleeves, i.e. you had a tube. Then after some other stages it came to add the sleeves to the jacket the image showed you a flat lay attachment method, which really was the only one that made sense as the side seams weren’t yet constructed.
Luckily I’d only sewn one sleeve into a tube as it seemed weird but unpicking it was a bit rubbish, especially as I’d already finished the seams with my overlocker – yuck!
What do you guys think? Can I just not read? I really would like someone to tell me if it was me or the instructions!?
Just so you know, the sleeves are made up of a central panel (I) then a panel either side of that, so (K) and (J).
My Favourite Bits
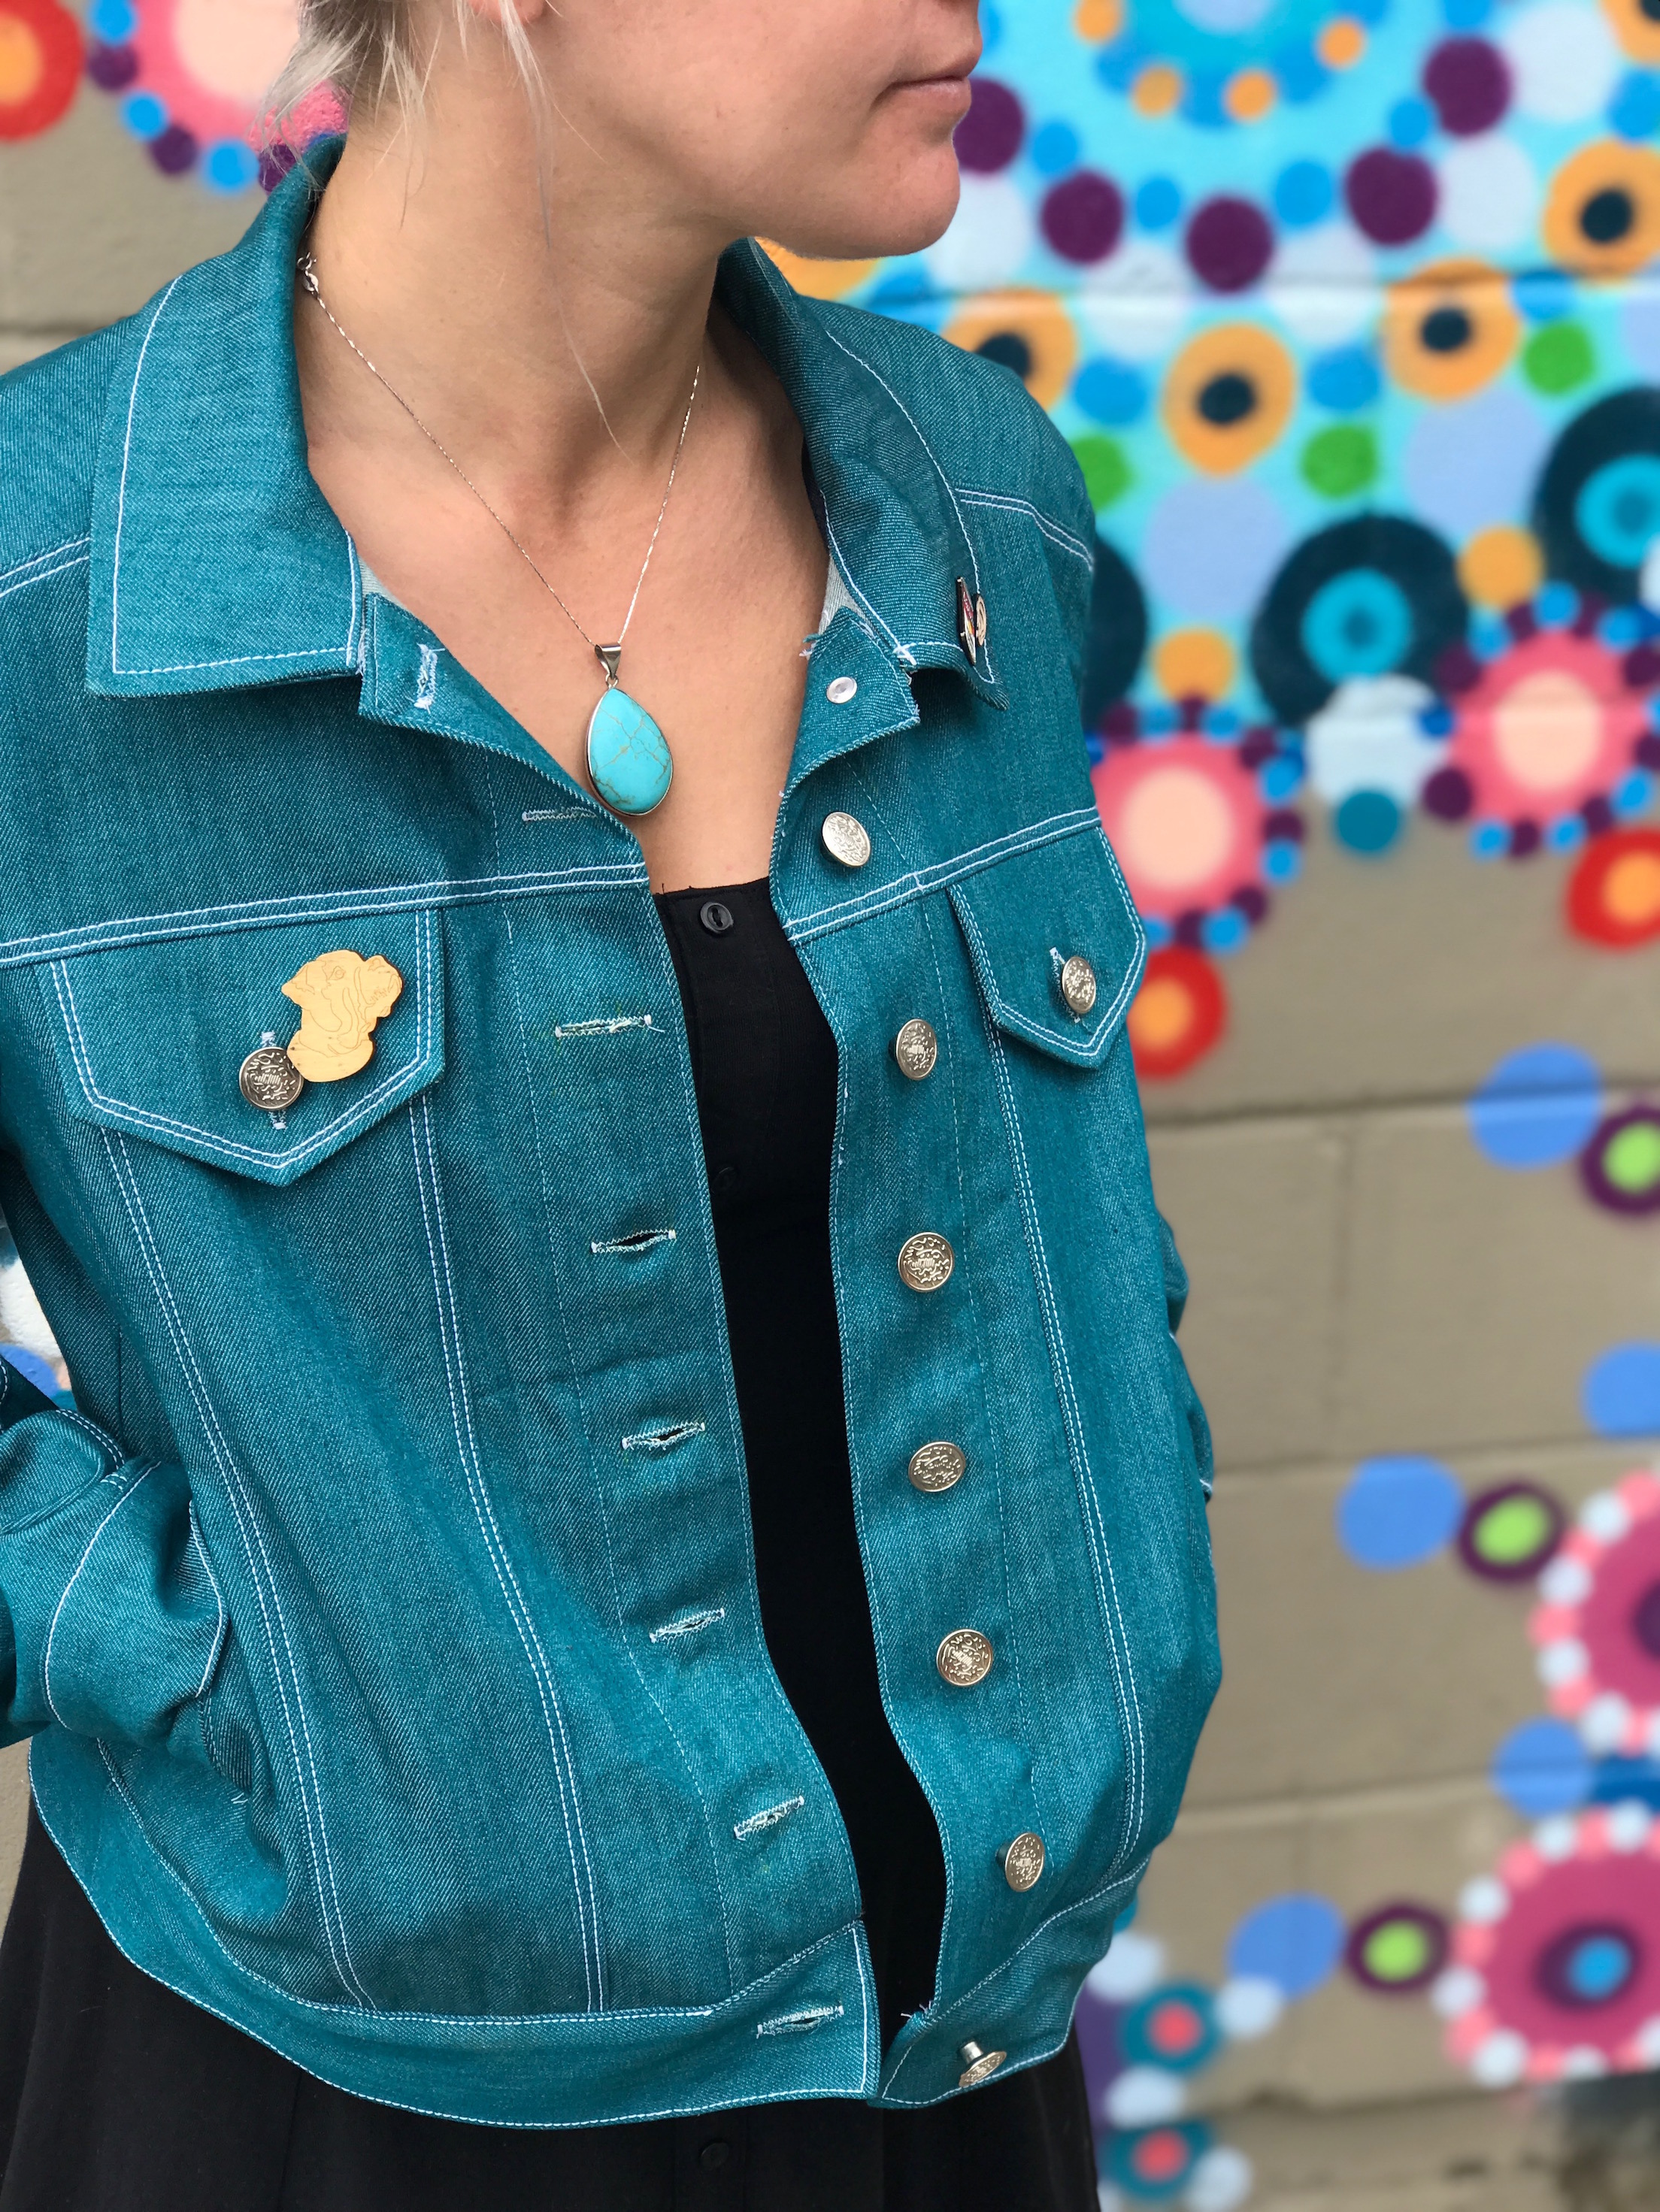
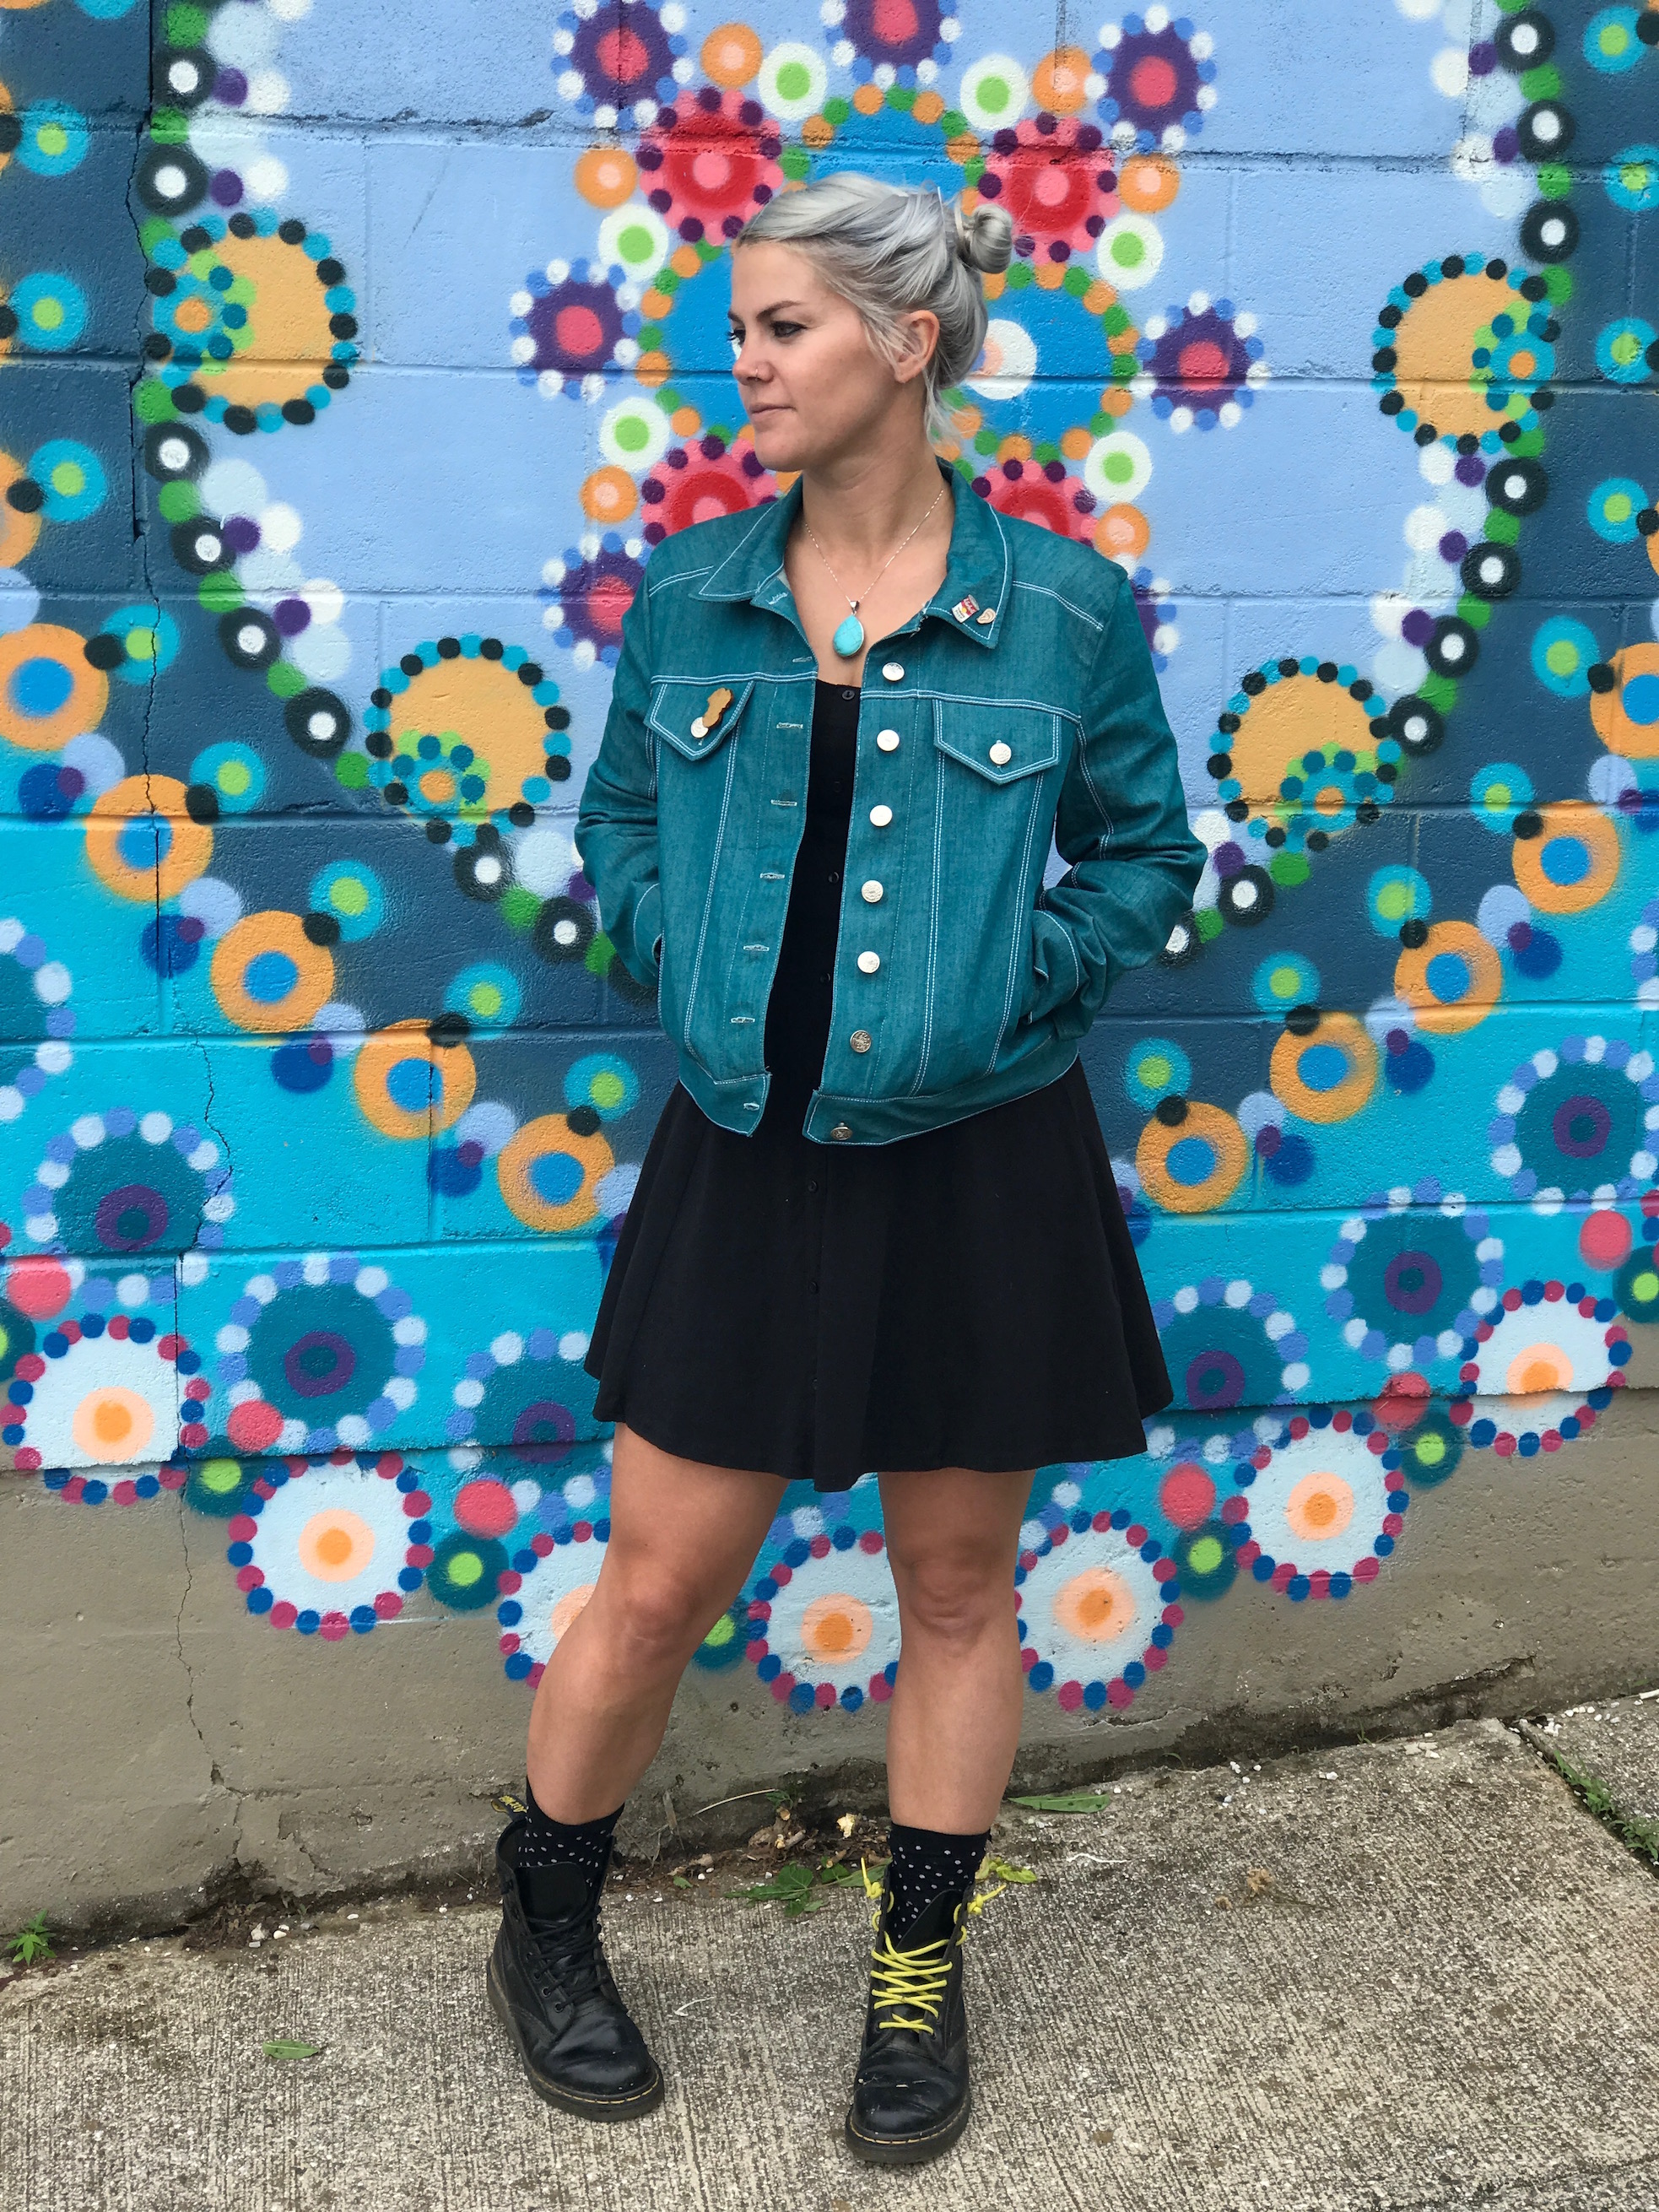
I will say I really loved the way the collar, cuffs and waistband were attached to the jacket. I’ve never done it that way and I found it really easy and logical. You basically create the pieces in a way that they are a pocket for the seam allowances and the just sew it closed so it is all neatly hidden away! Brilliant!
Oh and I actually really enjoyed doing all the top stitching. I decided to go with white to really make the colour pop and I think it worked well. I bought an edge stitch foot specifically for this project and I am SO glad I did. If you’ve been on the fence about it I really can’t recommend it enough.
Overall the pattern wasn’t too bad, other than the things I mentioned it went smoothly. It’s just time consuming as there are so many pieces. It is definitely a project to take your time over.
The Conclusion
I am really pleased with the result but as this technically is a toile, but a very wearable one, there are things I made note of that I will change when I get around to that black one, they include:
- narrow shoulder/high chest adjustment – I’m technically considered petit at 5ft 2″ and I have a lot of issues with extra fabric between my chest and shoulders that I’m in the process of figuring out.
- don’t trim the pocket bags so they get caught in the seams, my catch in places but not completely, perfectionist in my is annoyed!
- ensure a neater finish of the button placket.
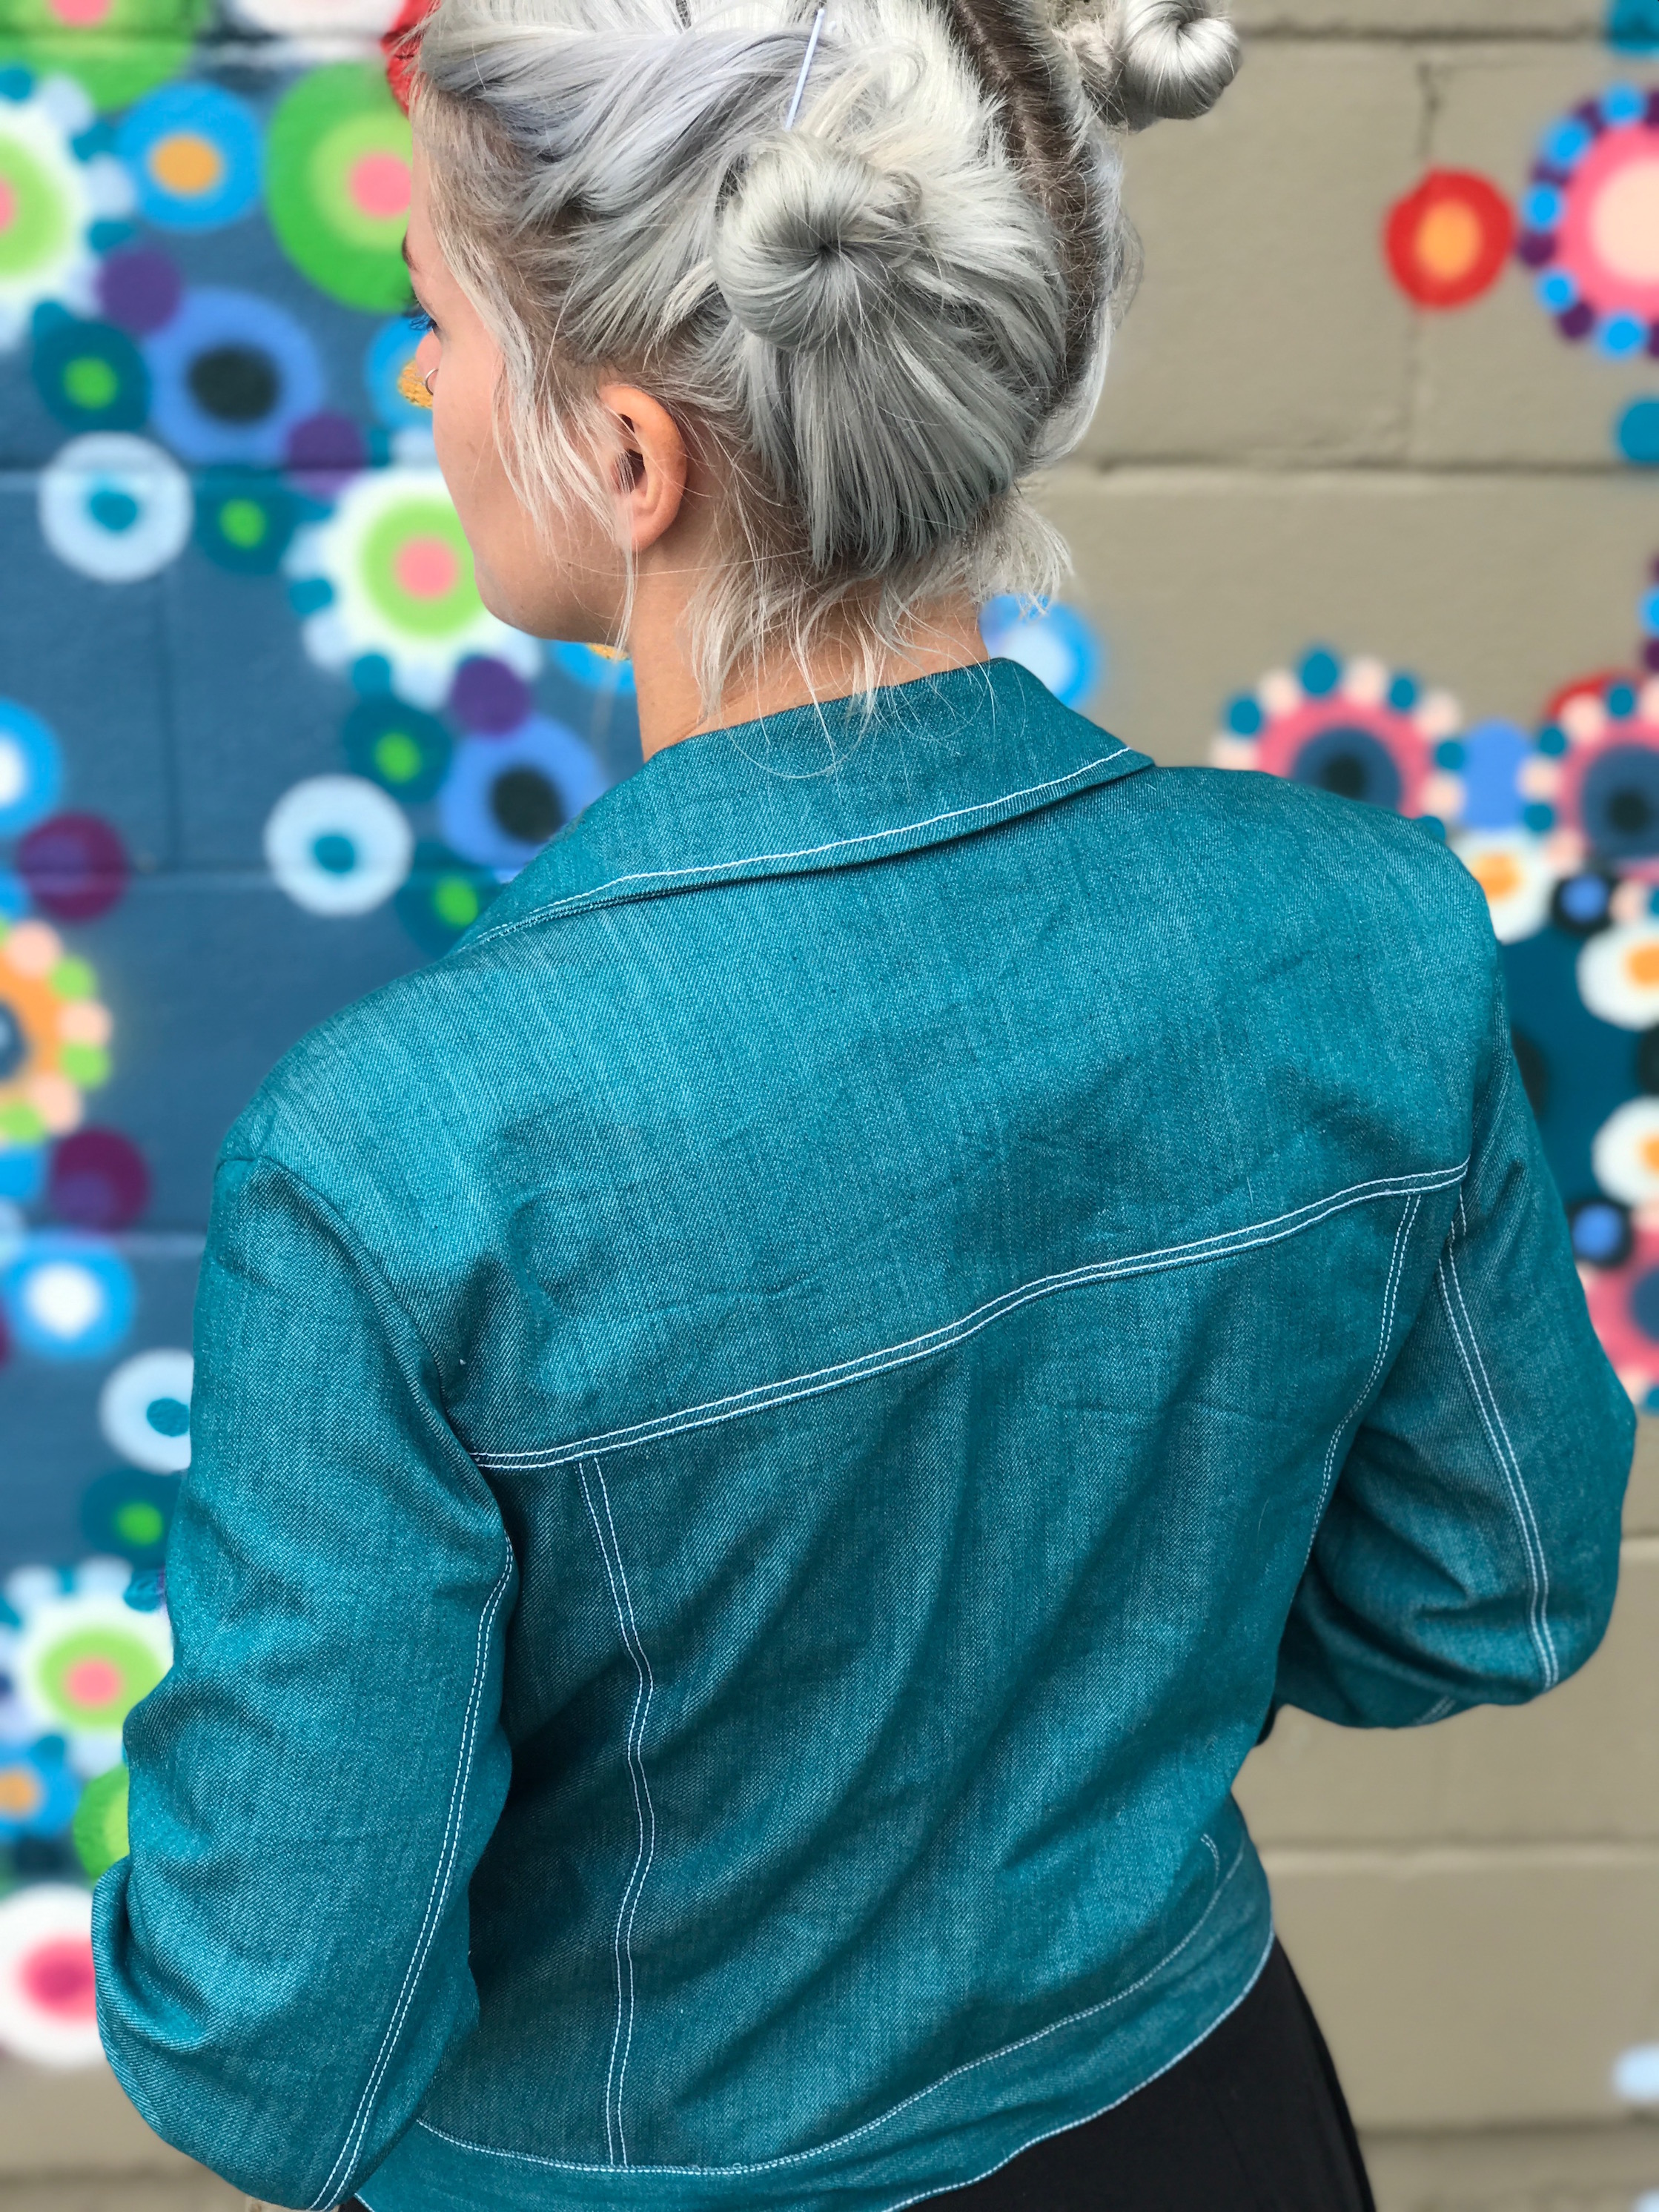
I finished the jacket last weekend but it has been super hot and humid here lately so it wasn’t until last night I finally got to wear it. It really was comfortable and think it is fast going to become a well worn me-made!
Luckily my hair has faded out to grey so there isn’t waaay too many colours going on 🙂
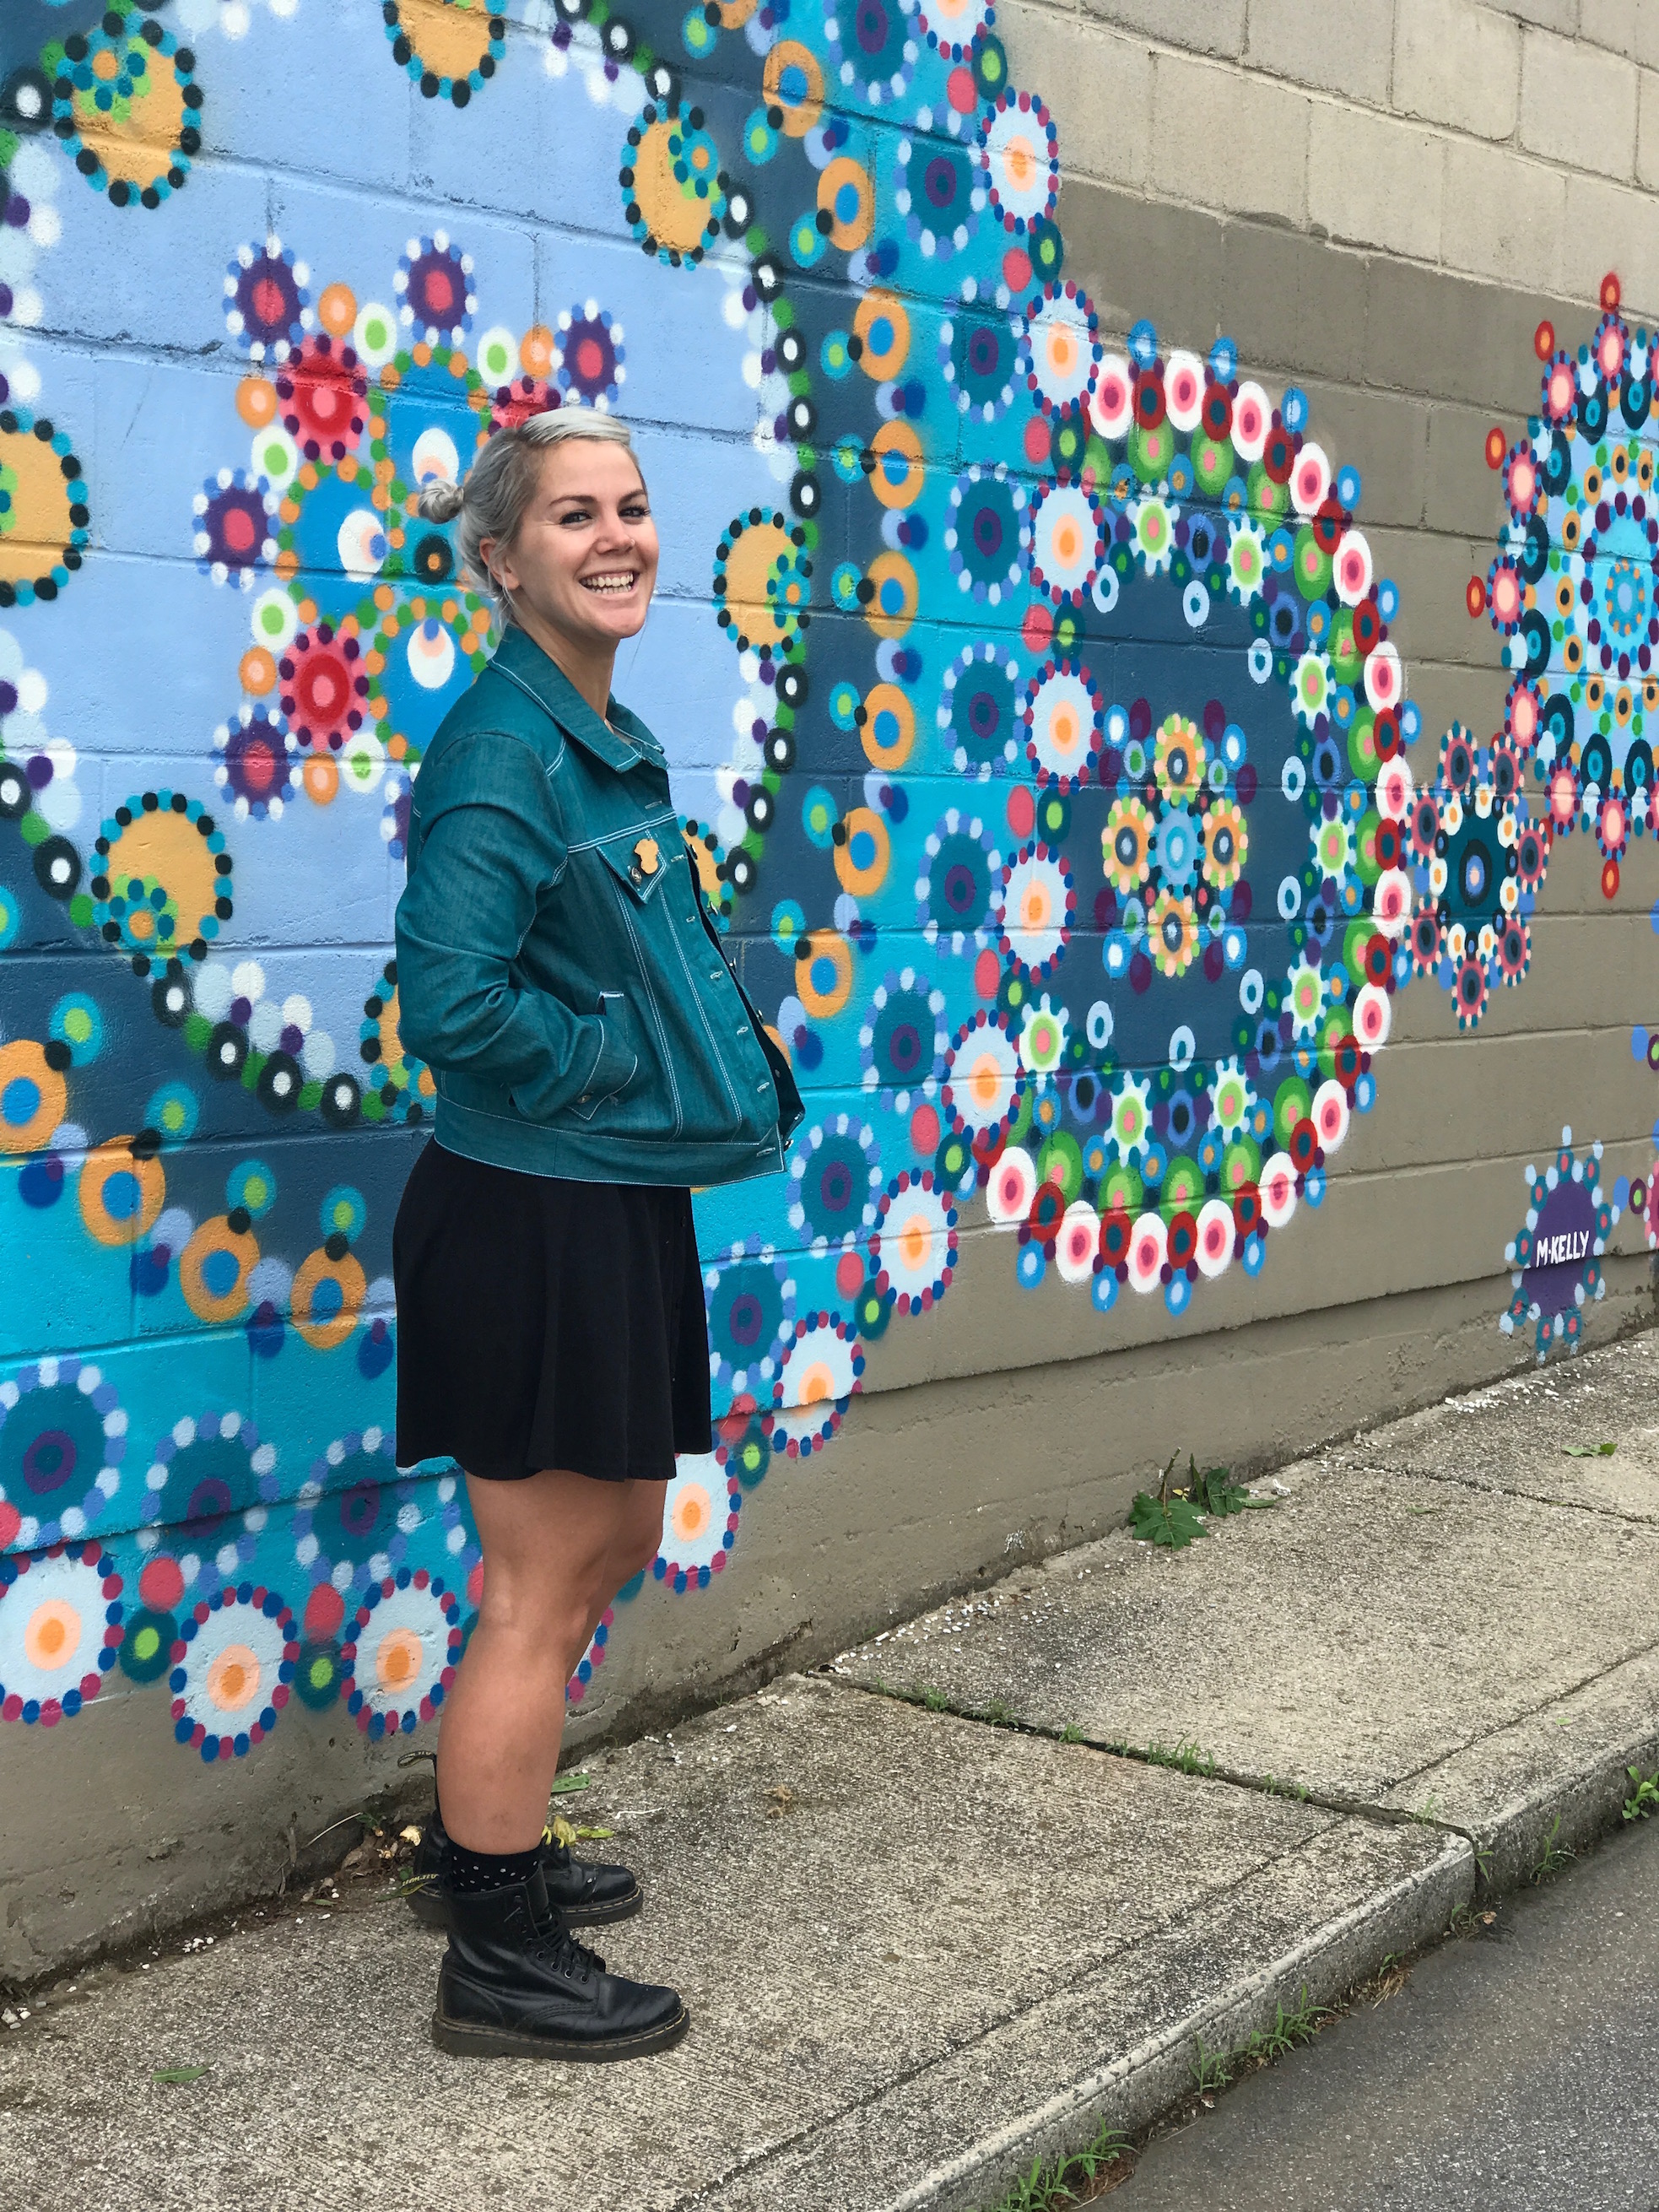
As always I had the lovely and talented Laura take my picture, she’s moving to Texas in a few weeks (why, Laura, WHY?!) and boy did she pull out all the stops for our last photo sesh!
I can safely say these are my favourite pictures yet! THANK YOU LAURA YOU GENIUS!
Until the next time!
![]()
xxx
Big fan. Looks great, love the water horsie interior & it clearly fits really well.
Thanks Mate 🙂